How to Install Paperless-ngx on a Synology NAS with Docker
Learn how to install Paperless-NGX on your Synology NAS — a powerful open-source document management system — using Docker and Portainer. Step-by-step guide.
Table of Contents
- Why Choose Paperless-NGX on Your Synology NAS?
- Glossary: Key Terms and Technologies
- Installation of Paperless-ngx on your Synology NAS using Docker
- Prerequisites for Paperless-NGX Installation
- Preparing Your Synology NAS for Installation
- Installing Paperless-ngx with Docker Compose
- Archiving with Paperless-ngx on your Synology NAS
- Keeping Paperless-NGX Updated
- Backing up Paperless
- Document Exporter
- Conclusion
Paperless-NGX is a powerful, open-source document management system (DMS) designed to help you digitize, organize, and easily search through your important documents. By installing it on a Synology NAS using Docker, you can create a reliable, self-hosted solution protected by the robust features of Docker containers.
This step-by-step guide explains every part of the installation process, including essential prerequisites, creating user accounts, setting up folders, configuring Docker Compose (often managed via Synology Container Manager or Portainer), and more. By the end, you’ll be ready to take advantage of Paperless-NGX’s efficient OCR capabilities, document upload automation, intuitive web interface, and backup options — all on your Synology NAS.
Why Choose Paperless-NGX on Your Synology NAS?
Paperless-NGX is the successor to Paperless-ng, itself a fork of the original Paperless project. It helps to declutter your home or office by providing a centralized repository for digitized documents. Key features include:
- OCR (Optical Character Recognition) for searching scanned documents
- A polished web-based interface accessible from any modern browser
- Optional integration with Tika and Gotenberg to process emails and Office documents
- Compatibility with common containerization platforms like Docker
Running Paperless-NGX with Docker on a Synology NAS is an excellent way to manage your documents effectively. Docker isolates Paperless-NGX from the rest of your system for improved security and smoother maintenance.
Glossary: Key Terms and Technologies
| Term | Description |
|---|---|
| ARM CPU | Processor architecture used by some Synology NAS devices. |
| Caddy | An alternative reverse proxy server. |
| Cloud Sync | A Synology service for synchronizing data with cloud storage providers. |
| Docker | A containerization platform for installing and running Paperless-NGX. |
| Gotenberg | A tool for converting documents to PDF. |
| IMAP | Email retrieval protocol, used to optionally fetch and archive email attachments. |
| Nginx Proxy Manager | A reverse proxy solution that can allow access to Paperless-NGX from beyond your network. |
| OCR (Optical Character Recognition) | A technology to identify and extract text from scanned or image-based documents. |
| Paperless-ng | An earlier version of Paperless-NGX. |
| Paperless-NGX | The open-source document management system you will install. |
| Portainer | A user-friendly UI for managing Docker containers. |
| PostgreSQL | Database system for storing Paperless-NGX data (recommended for multiple users). |
| Redis | An in-memory data store used by Paperless-NGX as a task/message broker. |
| SMTP | The standard protocol for sending emails. |
| SQLite | An alternative embedded database option for Paperless-NGX. |
| Synology NAS | A Network Attached Storage device that can host applications, including Docker containers. |
Installation of Paperless-ngx on your Synology NAS using Docker
This guide focuses on installing Paperless-NGX on Synology NAS using Docker. If you’re interested in a Linux server setup, check out my previous guide or my Youtube video. Since Paperless-NGX is now the official successor to Paperless-ng, I’ve moved NAS-specific instructions to this post for clarity and convenience.
Prerequisites for Paperless-NGX Installation
Before getting started, make sure you have the following:
-
A Synology NAS. I use the Synology DS220+(Amazon Affiliate-Link) with additional 8 GB RAM(Amazon Affiliate-Link). While not strictly necessary, having at least 1 GB RAM is recommended. For heavier workloads, plan on 2 GB or more.
-
Docker installed (via the Synology Package Center).
-
Portainer installed for easier management of Docker containers.
-
(Optional) Additionally, you may consider setting up a Nginx Proxy Manager either in the network or installed on the Synology NAS itself in combination with a DNS-Server if you want a customized domain name or remote access.
-
(Optional) An email inbox for fetching attachments automatically via IMAP. Of course, you can also use your own mail server for this purpose. Attachments are loaded, and the email can be automatically moved or deleted.
-
(Optional) A network scanner. I use a Xerox 6515DNI (Amazon Affiliate-Link), which can either send a scan to the email mentioned above address or directly store the file in the NAS (if it doesn’t currently have trouble finding it). This saves the step of manual uploading. If you only want a scanner and not a printer, I recommend the Brother ADS-1700W (Amazon Affiliate-Link).
-
(Optional) A backup strategy, e.g., external storage or cloud services via Synology Cloud Sync. Services such as Google Drive, Microsoft OneDrive, or other WebDAV storage options can be utilized for backup purposes. Of course, something simple like an external hard drive can also be used for backup. Remember, however, that RAID is not a backup.
-
(Optional) An Android smartphone. Useful apps include Paperless and Paperless Share, which make it easier to handle Paperless with an Android smartphone.
Please note that the instructions in this guide specifically apply to Synology NAS, but the document management system Paperless-NGX can also run on NAS from other manufacturers such as QNAP or ASUSTOR, especially if Portainer or Docker support is available and the NAS has an x64 CPU. However, the preparation, such as creating shared folders, may differ slightly.
Resource Usage
After I started the containers, I can see the following memory usage in the Container Manager:
| Service | RAM |
|---|---|
| Gotenberg | 42 MB |
| Paperless | 904 MB |
| Postgres | 90 MB |
| Postgres-Backup | 20 MB |
| Redis | 20 MB |
| Tika | 234 MB |
Preparing Your Synology NAS for Installation
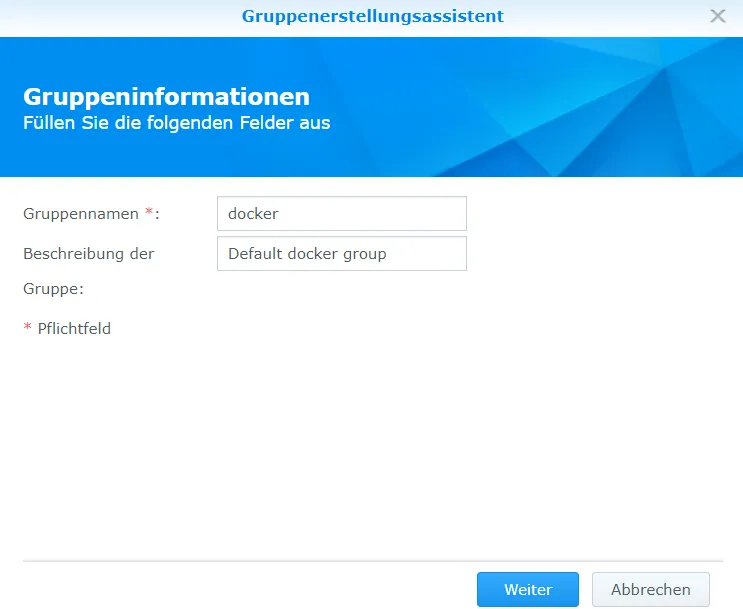
Creating New User and Group for Docker
For security, it’s best practice not to run Paperless-NGX under your NAS administrator account.
In Synology DSM, create a new user group named “docker.”
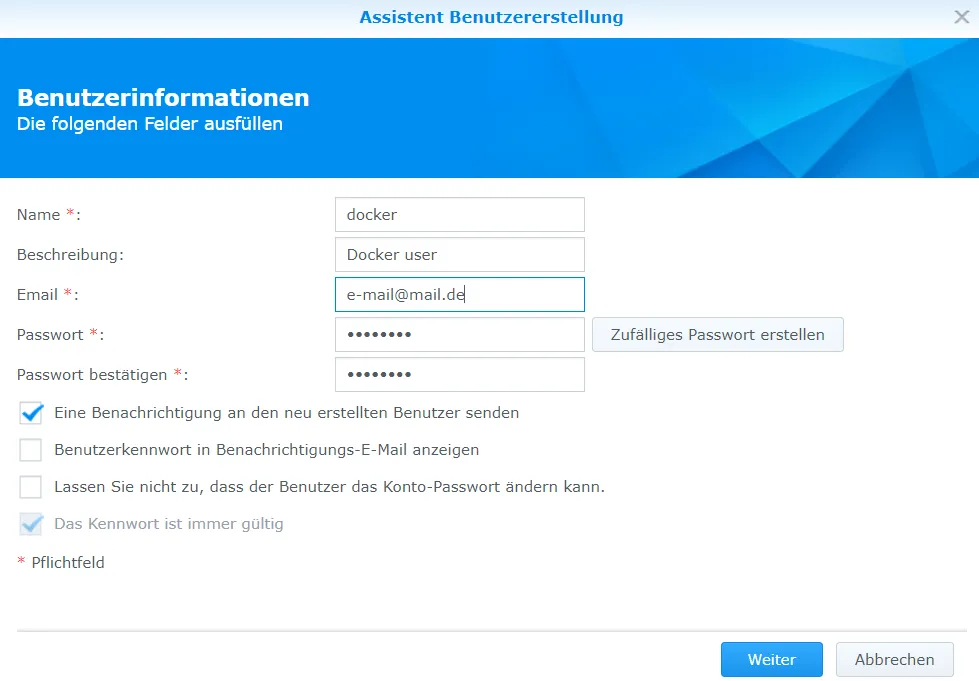
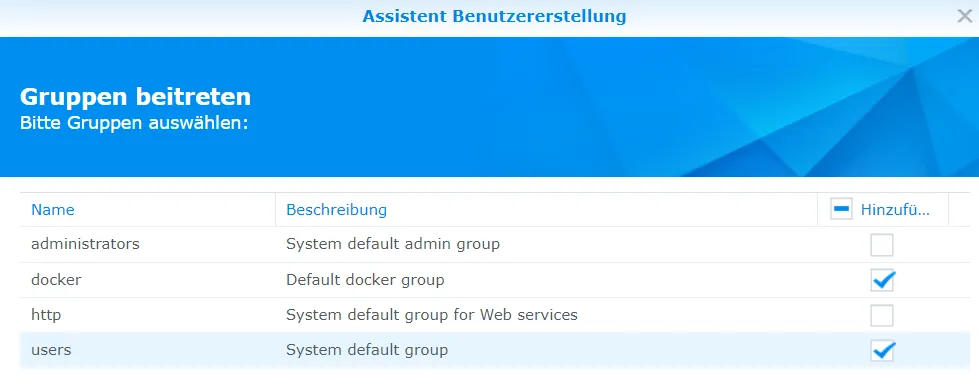
Create a new user, for example “paperless,” and add it to the “docker” group.
Next, find the user and group IDs (UID and GID) for this new “paperless” user
Temporarily enable SSH in the DSM Control Panel.
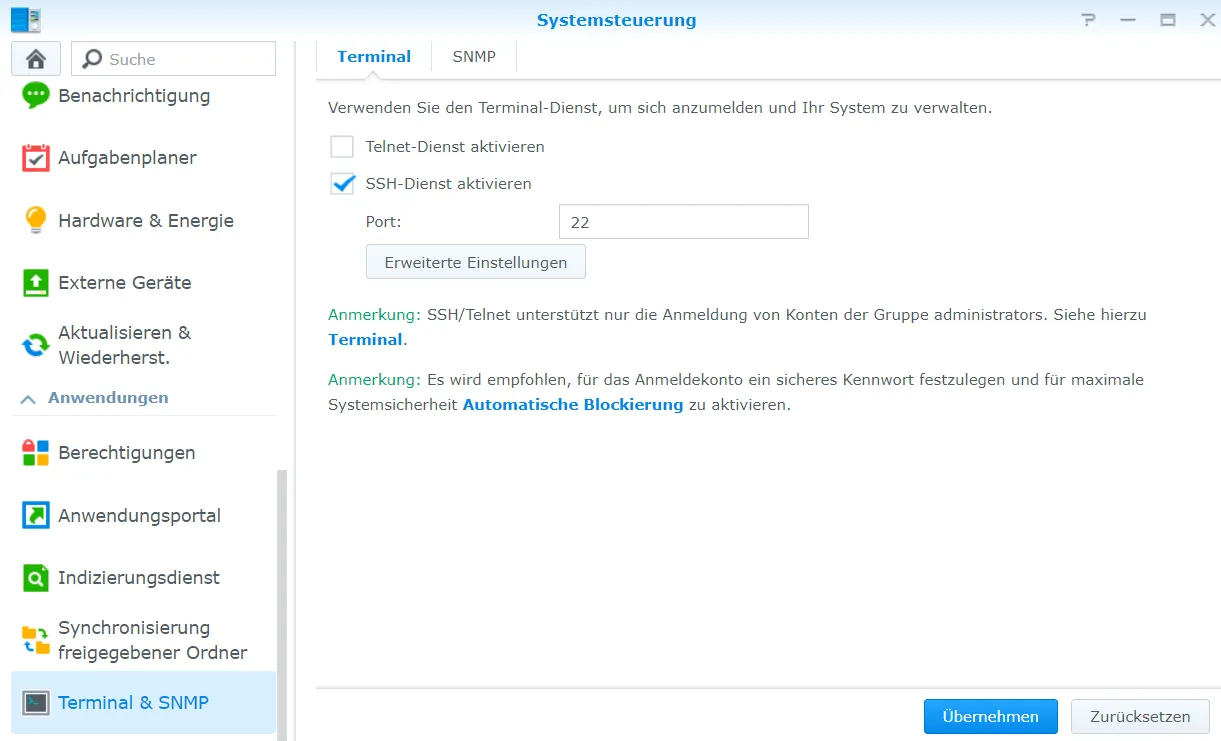
Open a terminal, and connect:
ssh adminusername@{nas-ip-address}Run:
id paperless
# or
id docker
# or
id username
Note the UID and GID values, for example:
uid=1010(docker) gid=100(users) groups=100(users),65555(docker)In this case, note down 1010 as UserID and 65555 as GroupID.
exitDisable SSH when finished for security.
![]()
Setting Up New Folders
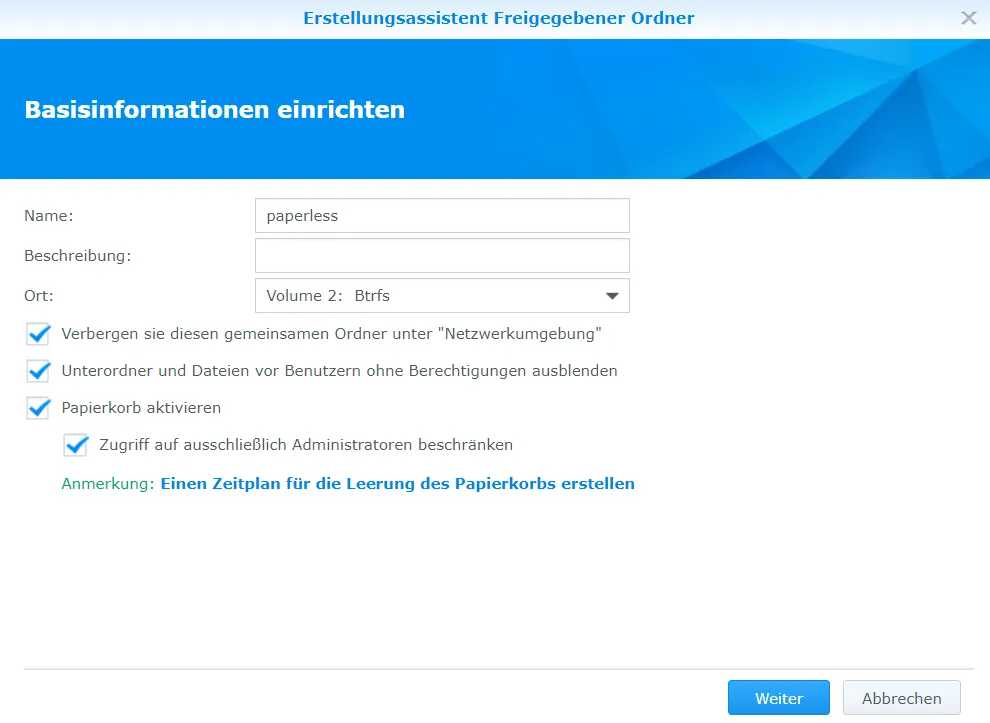
Create a new shared folder for Paperless-NGX (e.g., “paperless”). Turn OFF data checksum for better performance (Synology recommends against enabling checksums for databases or services with frequent writes).
To ensure the quality of services, we recommend not enabling data checksum if the shared folder is used for the following services:
- Hosting databases or virtual machines
- Storing video recordings from Surveillance Station
- Running services that require small or random write operations
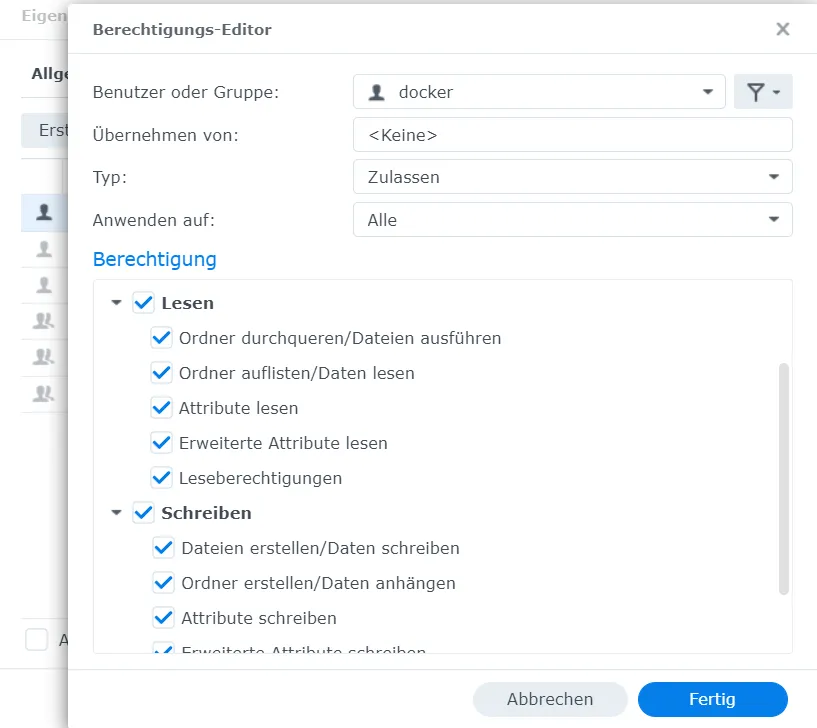
Set permissions so that both the “docker” group and the new “paperless” user have full read/write access.


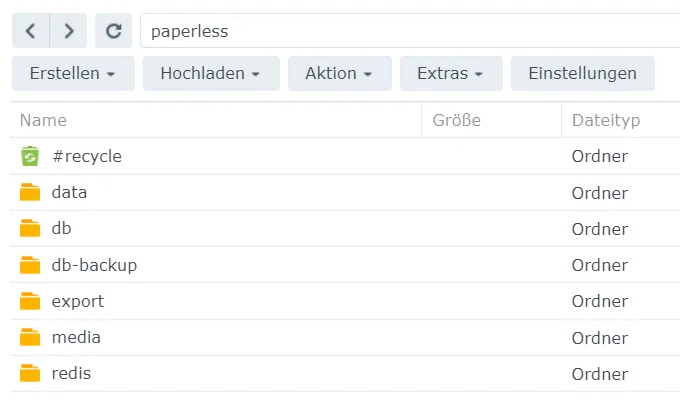
Within the “paperless” folder, create six subfolders: data, db, db-backup, export, media, and redis.
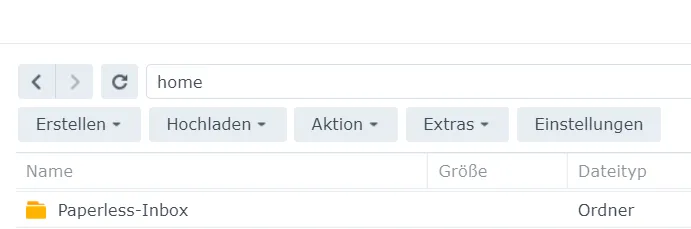
Create an “Inbox” folder in your user’s home directory for automatic document consumption: /volume1/homes/username/Paperless-Inbox
Alternatively, you can consider creating a user account on the DiskStation for the network scanner and creating the Inbox folder in that user’s home directory. This way, the scanner does not need access to the main account, yet it is still possible to scan to this folder. Or you can create an additional shared folder if manual file placement is desired.
Give appropriate permissions to your new Paperless user, the network scanner (if used), or any other accounts needing write access.
With this, I have prepared everything necessary.
Patrick has pointed out to me that the Inbox folder does not behave correctly as long as Synology Drive is in use.
Currently, the Synology Drive server cannot detect file changes in a folder attached to a Docker container. Synology Drive Server, Client, and ShareSync cannot synchronize files with Docker-attached folders. The limitation is mentioned here and here. There is currently no way to make it work properly. Unfortunately, no binary program could also be triggered for this case. Instead, files must be deleted directly from the host system rather than from the container.
Firewall Configuration
If you use a restrictive firewall on your NAS, ensure container-to-container communication is allowed. Double-check IP addresses assigned by Docker for your containers and update firewall settings accordingly, or allow the entire internal IP range.
Installing Paperless-ngx with Docker Compose
Paperless supports PostgreSQL and SQLite for data storage, but using PostgreSQL is recommended due to its capabilities in handling multiple simultaneous operations. The installation involves setting up Paperless-ngx with a PostgreSQL database along with a Redis broker. Redis is responsible for bringing tasks from the web server to the task scheduler.
I have been using Paperless-ngx with Redis 7.0 and PostgreSQL 16 for the past few weeks (instead of the origin 6.0 and 13). It ran stable and without any problems. Therefore, this time, I am using these newer versions. Additionally, I am starting a container that automatically creates a database dump for backup every week. Furthermore, Tika/Gotenberg, to process not only PDFs but also office documents (such as “.docx”, “.doc”, “.odt”, “.ppt”, “.pptx”, “.odp”, “.xls”, “.xlsx”, and “.ods”).
Since version 1.11.0 of Paperless, not only are attachments of emails processed but also the text of the email itself can be archived with Gotenberg.
Create a New Stack in Portainer (Docker-Compose)
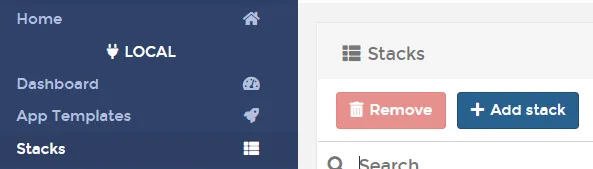
Open Portainer.
Select “Stacks” from the menu.
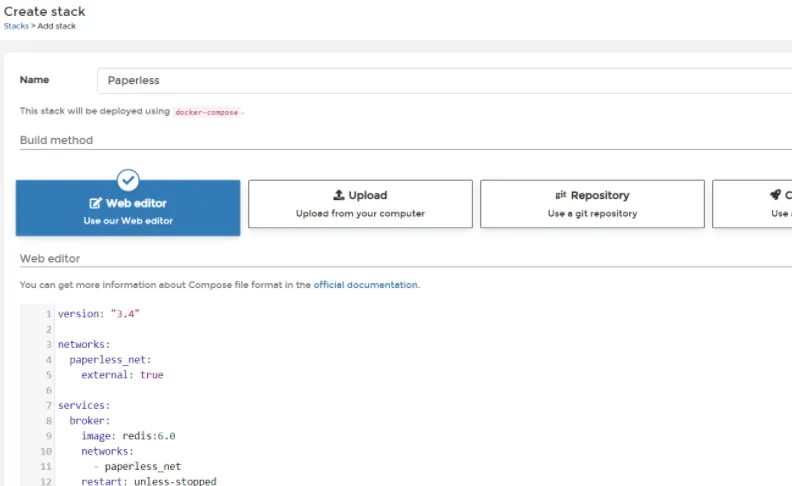
Click “Add Stack.”
In “Web editor,” paste the Docker Compose file shown below.
If “Add Stack” is missing, ensure you’re in the local environment and running the portainer/portainer-ce image instead of portainer/portainer.
Below is an example Compose file. Adjust folder paths, passwords, user/group IDs, and any optional variables to suit your needs.
networks:
    internal:
        external: false

services:
    broker:
        container_name: paperless-redis
        image: valkey/valkey:9
        networks:
            - internal
        volumes:
            # Change to your correct path(s)
            - /volume1/paperless/redis:/data
            # - /volume2/paperless/redis:/data
        restart: unless-stopped
        user: "1010:65555" # Your Paperless user/group IDs
        sysctls:
            - net.core.somaxconn=511
        cap_add:
            - SYS_RESOURCE
        deploy:
            resources:
                limits:
                    memory: 256M
        healthcheck:
            test: ["CMD", "redis-cli", "ping"]
            interval: 30s
            timeout: 5s
            retries: 3

    db:
        container_name: paperless-db
        image: postgres:18
        # Do not simply upgrade or downgrade, as the database will not load anymore.
        networks:
            - internal
        restart: unless-stopped
        volumes:
            # Enter the correct path here
            - /volume1/paperless/db:/var/lib/postgresql
        #  - /volume2/paperless/db:/var/lib/postgresql
        environment:
            POSTGRES_DB: paperless
            POSTGRES_USER: paperless
            POSTGRES_PASSWORD: xzdN19DTd3CxWOuXP6eSyfhB19HRAx # Replace with your password
        deploy:
            resources:
                limits:
                    memory: 512M
        healthcheck:
            test: ["CMD", "pg_isready", "-U", "paperless"]
            interval: 30s
            timeout: 5s
            retries: 3
        logging:
            driver: "json-file"
            options:
                max-size: "10m"
                max-file: "5"

    webserver:
        container_name: paperless
        image: ghcr.io/paperless-ngx/paperless-ngx:2.20
        networks:
            # If the Proxy Manager is on the Synology, then the network from it should also be entered here, instead of opening a port.
            - internal
        restart: unless-stopped
        depends_on:
            - db
            - broker
        ports:
            # Delete this part if the Proxy Manager is on the Synology.
            # Otherwise, select a port here that is free.
            - 8010:8000
            # - 8011:8000
            # - 8012:8000
        healthcheck:
            test: ["CMD", "curl", "-f", "http://localhost:8000"]
            interval: 30s
            timeout: 10s
            retries: 5
        volumes:
            # Enter the correct paths here
            - /volume1/paperless/data:/usr/src/paperless/data
            - /volume1/paperless/media:/usr/src/paperless/media
            - /volume1/paperless/export:/usr/src/paperless/export
            - /volume1/homes/username/Paperless-Inbox:/usr/src/paperless/consume
        environment:
            PAPERLESS_REDIS: redis://broker:6379
            PAPERLESS_DBHOST: db
            PAPERLESS_DBPASS: xzdN19DTd3CxWOuXP6eSyfhB19HRAx # This is the password from above
            USERMAP_UID: 1010 # UserID for the docker user
            USERMAP_GID: 65555 # GroupID for the docker user
            PAPERLESS_OCR_LANGUAGE: deu+eng
            # Enter a random key here if you want to make Paperless accessible from outside.
            PAPERLESS_SECRET_KEY: C3Q2dLkVPqZWDKTXgkHwWhJ6jk8XqAbeDmDZjCxvb3c2jXl6pTGQXqJFqEkS9umFmXrk4WmzT8rlwjqWan6A2G54Q5IgraBv96CS
            # Enter your own domain behind localhost here if you are using a proxy host, otherwise delete this environment variable.
            PAPERLESS_ALLOWED_HOSTS: "localhost,paperless.domain.de"
            PAPERLESS_TIME_ZONE: Europe/Berlin
            # Adjust here if you want a different folder structure
            PAPERLESS_FILENAME_FORMAT: "{created_year}/{correspondent}/{title}"
            # Omit the next three lines if you do not want to use Tika/Gotenberg.
            PAPERLESS_TIKA_ENABLED: 1
            PAPERLESS_TIKA_GOTENBERG_ENDPOINT: http://gotenberg:3000/ #or http://gotenberg:3000/forms/libreoffice/convert#
            PAPERLESS_TIKA_ENDPOINT: http://tika:9998
            PAPERLESS_URL: "https://paperless.domain.de" # Remove or adjust if not using a proxy
        deploy:
            resources:
                limits:
                    memory: 2048M
        logging:
            driver: "json-file"
            options:
                max-size: "10m"
                max-file: "5"

    db-backup:
        container_name: paperless-db-backup
        # Possibly adjust the image to match the one above
        image: postgres:18
        volumes:
            # Enter the correct path here
            - /volume1/paperless/db-backup:/dump
            - /etc/localtime:/etc/localtime:ro
        environment:
            PGHOST: db
            PGDATABASE: paperless
            PGUSER: paperless
            PGPASSWORD: xzdN19DTd3CxWOuXP6eSyfhB19HRAx # This is the password from above
            BACKUP_NUM_KEEP: 10
            BACKUP_FREQUENCY: 7d # Every 7 days, can be adjusted
        entrypoint: |
            bash -c 'bash -s <<EOF
            trap "break;exit" SIGHUP SIGINT SIGTERM
            sleep 2m
            while /bin/true; do
              pg_dump -Fc > /dump/dump_\`date +%d-%m-%Y"_"%H_%M_%S\`.psql
              (ls -t /dump/dump*.psql|head -n $$BACKUP_NUM_KEEP;ls /dump/dump*.psql)|sort|uniq -u|xargs rm -- {}
              sleep $$BACKUP_FREQUENCY
            done
            EOF'
        networks:
            - internal
        deploy:
            resources:
                limits:
                    memory: 256M

    # Omit this part if you do not want conversion of Office documents, emails.
    gotenberg:
        container_name: paperless-gotenberg
        image: gotenberg/gotenberg:8
        restart: unless-stopped
        environment:
            CHROMIUM_DISABLE_ROUTES: 1
        command:
            - "gotenberg"
            - "--chromium-disable-javascript=true"
            - "--chromium-allow-list=file:///tmp/.*"
        networks:
            - internal
        deploy:
            resources:
                limits:
                    memory: 512M
        healthcheck:
            test: ["CMD", "curl", "-f", "http://localhost:3000/health"]
            interval: 30s
            timeout: 5s
            retries: 3

    tika:
        container_name: paperless-tika
        image: apache/tika:3.2.3.0
        restart: unless-stopped
        networks:
            - internal
        deploy:
            resources:
                limits:
                    memory: 512M
In the comments, I have indicated the parts that need adjustment. The paths to the directories should be changed. In particular, the path to the Paperless-Inbox will be different.
You can modify the images. I do not recommend to use latest as the image tag. Instead, use a specific version. This way, you can be sure that the image will not change unexpectedly. You can look here for the newest Paperless image tags. If you use 2.7 as the image tag, you will get the latest version of Paperless-ngx 2.7 (2.7.0 or 2.7.1).
The database password needs to be changed in three places.
PAPERLESS_ALLOWED_HOSTS should be removed if you do not want to access Paperless via a proxy host. Otherwise, it ensures that only the Synology NAS has access and devices accessing Paperless through the registered domain. The PAPERLESS_SECRET_KEY also needs to be changed. You can comment or delete the line if you do not plan to operate Paperless publicly. The key can be random.
The User ID (UID) and Group ID (GID) should be changed (otherwise, access rights to the folders are not guaranteed).
For PAPERLESS_FILENAME_FORMAT, you have the following variables available:
- { asn }: The archival serial number of the document
- { correspondent }
- { document_type }
- { tag_list }: All tags separated by a comma
- { title }: Name of the document
- { created }
- { created_year }
- { created_month }: Month (1–12)
- { created_day }: Day (1–31)
- { added }: Time when the document was added to Paperless
- { added_year }
- { added_month }
- { added_day }
The files will be stored in the media folder according to the chosen schema. With the format chosen in the example above, my 2020 tax assessment would be stored in the directory “/media/documents/originals/2021/tax-office” (or similar). However, if I used {created}_{title}instead, it would not be stored in a subfolder, but the name of the file would have the prefix with the creation date (e.g., 20211217_nameofthefile.pdf). It is crucial to avoid touching this structure manually! If you want to change it afterwards, you must run the document_renamer command in the Paperless container.
You can omit the part with Tika and Gotenberg if you have limited system resources. Then PDF documents, PNG images, JPEG, TIFF and GIF images can still be processed.
Further configuration options can be found in the documentation.
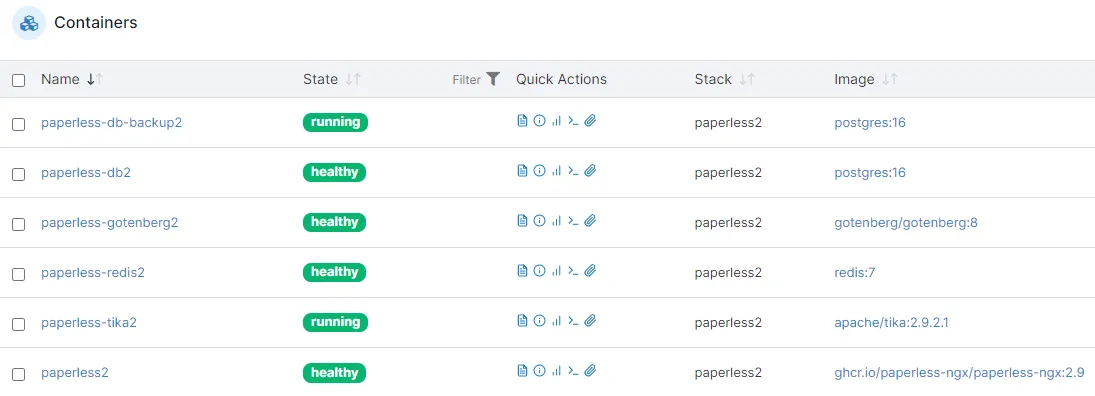
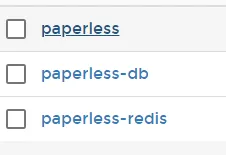
Click “Deploy the stack” and wait while the images are downloaded. In Portainer, confirm all containers show either “healthy” or “running.”
The deployment may take some time if all images need to be downloaded. After waiting a bit, all containers should be started.
Generator
Docker Compose Generator
Nginx Proxy
In the meantime, you can set up a proxy host for Paperless. Here, I enter my Synology NAS address and the chosen port number. Additionally, I can limit access to local by using an access list.
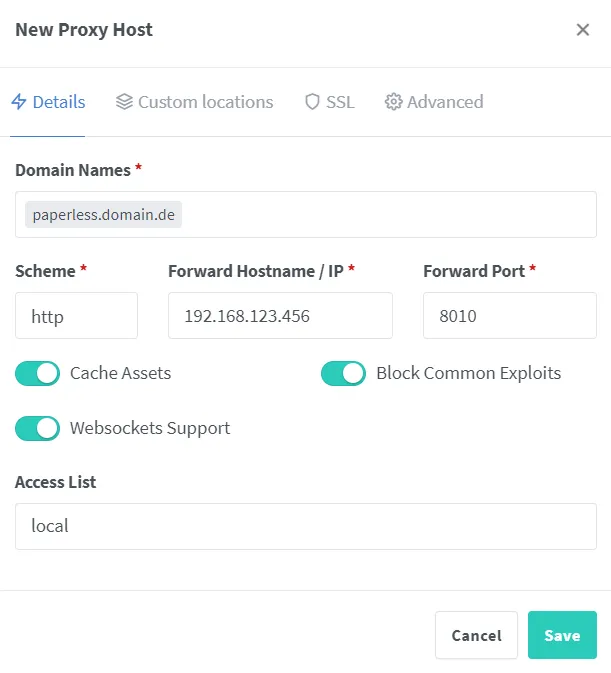
If the Nginx Proxy Manager is on the NAS and the web server is in the same Docker network, you can enter the containername of the web server here as well as port 8000.
After obtaining an SSL certificate for the proxy host, I added a few additional settings in “Custom Nginx Configuration”.
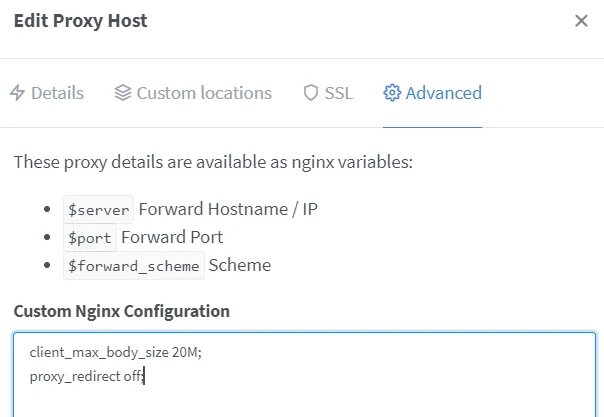
client_max_body_size 20M;
proxy_redirect off;
This ensures that larger files (20 MB) can also be loaded via Paperless’ web interface.
Caddy Proxy
Alternatively, when using an external device, you have many options instead of Nginx Proxy Manager. For example, you can use Caddy as a reverse proxy. Here is an example of a Caddyfile:
{
    acme_ca https://acme-v02.api.letsencrypt.org/directory
    email   mail@domain.com
}

paperless.example.com {
    @blocked not remote_ip private_ranges
    respond @blocked 403
    reverse_proxy 192.168.1.123:8010
}
Create a Paperless Admin User
Finally, we need a user account in Paperless. In Portainer, select the “paperless” container (your Paperless-NGX service).
Click “Console.”

Run python3 manage.py createsuperuser as a command.
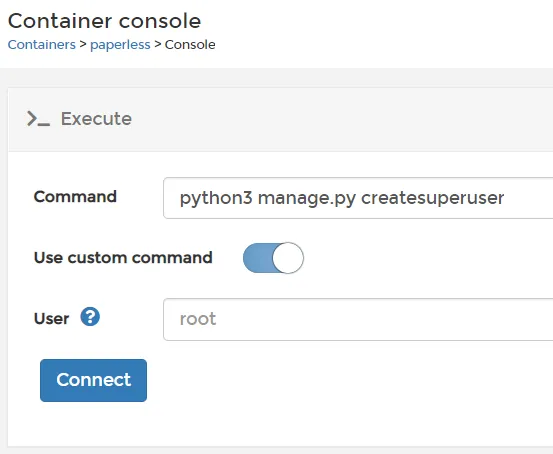
Provide a username, email address, and password when prompted.
You can now log in to Paperless-NGX via your NAS IP and the mapped port (e.g., http://192.168.1.123:8010) or via your chosen domain name if using a proxy.
Archiving with Paperless-ngx on your Synology NAS
Streamline Filing with Paperless
Seamlessly archive your documents by simply dragging and dropping files into Paperless’ web interface. Alternatively, use the designated Paperless Inbox folder, or send emails directly if your admin settings are configured.
If Tika and Gotenberg are set up, it should also be possible to upload a *.docx document, among others. If there are errors, it could be, for example, because the Synology DiskStation has an ARM CPU. In this case, different images are needed.
Enhance Document Retrieval with Metadata
Effortlessly locate documents later by editing their metadata post-upload.
-
Title: The title of the document
-
Archive Serial Number: Particularly important for documents also filed in hard copy. You can write a number on them before scanning them and then place them in a folder. This makes it possible to find the physical receipt later with Paperless.
-
Correspondent: Identify the creator or recipient; broader categories work well too. This means that if I receive an invoice from Netcup (Affiliate Link) , Netcup is the correspondent. Sometimes I have thought about grouping a few correspondents together. For example, the tax office, trade office, etc., could be grouped under “State Authority”.
-
Document Type: Here, I would enter the document type, such as invoice, report, manual, contract, miscellaneous, etc. I put documents into Miscellaneous until I think a type occurs more frequently, and it would make sense to separate them. The insurance policy would then be found under contract. Correspondence with the insurance, I would put it under Miscellaneous or Notification as long as it does not change the agreement.
-
Tags: Here, you can enter several filters for the document. For example, the document’s recipient, what subject the paper has and possibly also which year it concerns. Probably important are also such tags as “Tax”, if it affects taxes or “Work”, if the documents have to do with work (so both employment contracts as well as payroll or a simple letter). Everything that has to do with my business gets the tag Business. Sometimes, I also have year numbers as a tag when, for example, I receive a document in 2022 that refers to 2021; then it gets the label 2021.
With this, I am pretty satisfied so far. In the end, everyone has to decide for themselves. Fortunately, OCR also helps you find the information you are looking for.
PDF Viewer
Paperless-NGX includes an optional built-in PDF viewer. Enable it in the Paperless-NGX settings for convenient browser-based file previews.
Keeping Paperless-NGX Updated
Finally, it’s important to keep your Paperless instance or other containers updated by regularly checking for the latest versions and performing necessary updates. The latest version of Paperless can be found here.
The currently installed version can be seen at the bottom left in the Paperless-ngx UI. Before updating, I recommend creating a backup. The other containers can also be updated.
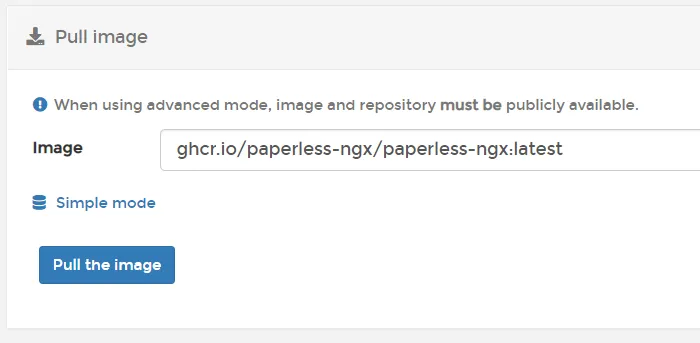
Simply re-pull the image “ghcr.io/paperless-ngx/paperless-ngx:latest” or “ghcr.io/paperless-ngx/paperless-ngx:2.14” in Portainer’s Image Menu.
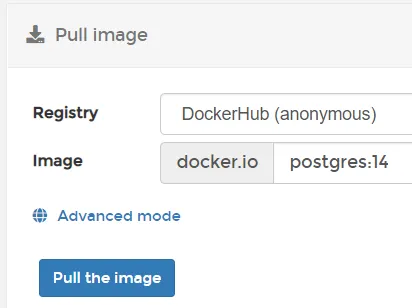
Postgres:16, Redis:7, and Gotenberg/Gotenberg:8 can also be updated. Postgres:16 means that the latest image of Postgres with a 16 at the beginning should be used. This can be 16.0 but also 16.1.2 (if it exists). Don’t update the major version of Postgres (e.g. Postgres:17) without migration.
If a new image exists, the original gets the tag <none>.
Now, all you have to do is restart the stack once by selecting Stack, pressing “Stop this stack”, and then “Start this stack”.
Update: Nowadays, it’s even faster if you navigate in Portainer to the Stack Editor of Paperless and press the button “Update the stack”. Then you can select the option “Re-pull image and redeploy”.
Backing up Paperless
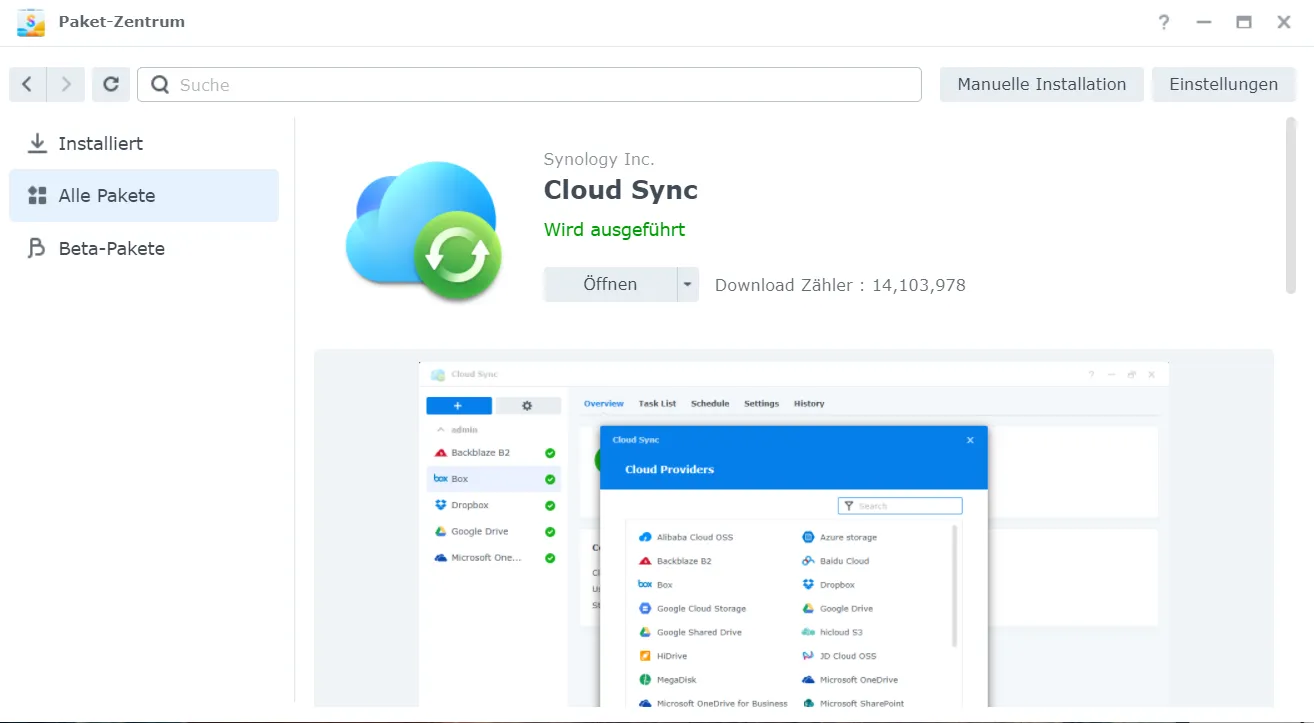
For a backup, the folders db-backup (database), media (archived PDF documents), and data (settings) need to be secured. This can be done manually. But you could also use Cloud Sync from the Package Center.
Here, you can create three tasks.
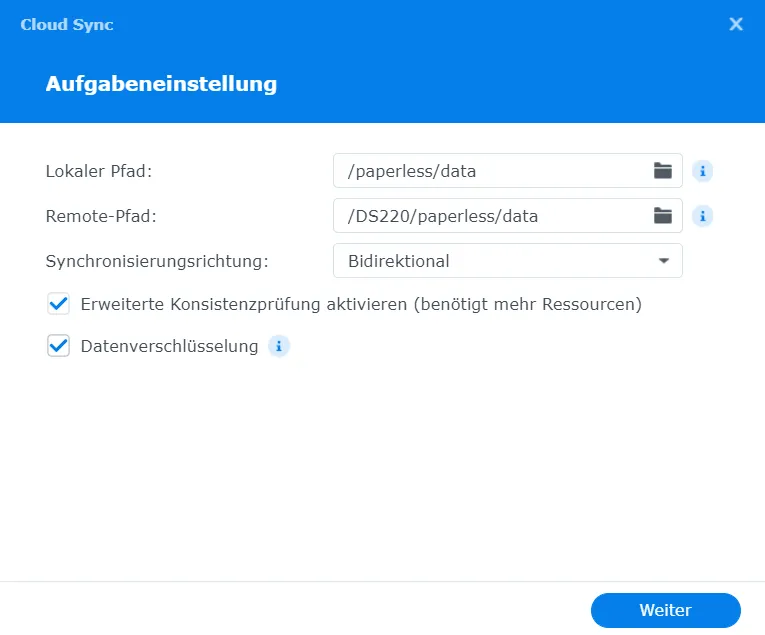
This will automatically sync these folders with the set service.
Document Exporter
Paperless-NGX makes it easy to move your documents between Paperless instances:
Step 1: Create a new export folder in Synology’s Paperless directory, for example, named export.
Step 2: Use Portainer to run the document_exporter ../export command in the Paperless container.
Step 3: Verify the export folder for your files after some minutes.
Step 4: Set up a new Paperless instance.
Step 5: Copy the entire export folder to the new Paperless directory.
Step 6: Run document_importer ../export via Portainer in the new setup.
Step 7: Confirm the import success.
What is NGX in Paperless?
Can I install Paperless-NGX on my Synology NAS?
What is Docker Compose and how is it related to Paperless-NGX?
How do I install Paperless-NGX using Docker?
What is Portainer and how does it help with managing Docker?
How do I login to the Paperless-NGX instance on my Synology NAS?
Where can I find the Paperless-NGX Docker image?
What are the document types that I can consume with Paperless-NGX?
I have a question that is not answered here. What should I do?
Conclusion
Paperless-NGX offers an efficient, self-hosted solution for digitizing and managing your documents. By installing it on a Synology NAS with Docker and Portainer, you can maintain tight control over your data and automate tedious tasks like scanning, file conversion, and metadata organization.
If you have tips or questions about your setup — from security and performance optimizations to backup strategies — please share them in the comments below. Happy archiving!
Related Articles
Paperless office with DMS Paperless-ngx on Homeserver
Install Paperless-ngx with Docker on your homeserver and transform your office into a paperless system. The complete step-by-step guide for your DMS setup.
Immich: Easy Self-Hosted Photo Management Server Setup Guide
Set up Immich as a private photo cloud on your homeserver. Step-by-step guide for NAS or Ubuntu — the privacy-friendly alternative to Google Photos.
Install Linkwarden: Self-Hosted Bookmark Manager on Synology
Install Linkwarden on your Synology NAS and take control of your bookmarks. A self-hosted bookmark manager with easy Docker setup – manage links efficiently!
Synology NAS Setup: Your First Homeserver Step-by-Step
Set up your Synology DiskStation from scratch: VPN, DDNS, Firewall, Docker, and Nginx Proxy Manager. The complete NAS homeserver setup guide for beginners.