Synology NAS Setup: Your First Homeserver Step-by-Step
Set up your Synology DiskStation from scratch: VPN, DDNS, Firewall, Docker, and Nginx Proxy Manager. The complete NAS homeserver setup guide for beginners.
Table of Contents
CAUTION
Please note that initially, I wrote this blog post in German. This translation is for your convenience. Although every effort has been made to ensure accuracy, there may be translation errors. I apologize for any discrepancies or misunderstandings resulting from the translation. I am grateful for any corrections in the comments or via mail.
This series of instructions is about setting up your home server environment. So that one blog post becomes manageable, I have divided the setup into several posts. Here, I deal with my Synology NAS. It is a beginner guide and shows a possible complete configuration from a to z.
However, some points may need to be clarified. In this case, please use the comment function. If necessary, I will amend the text or publish a new blog post.
Synology NAS
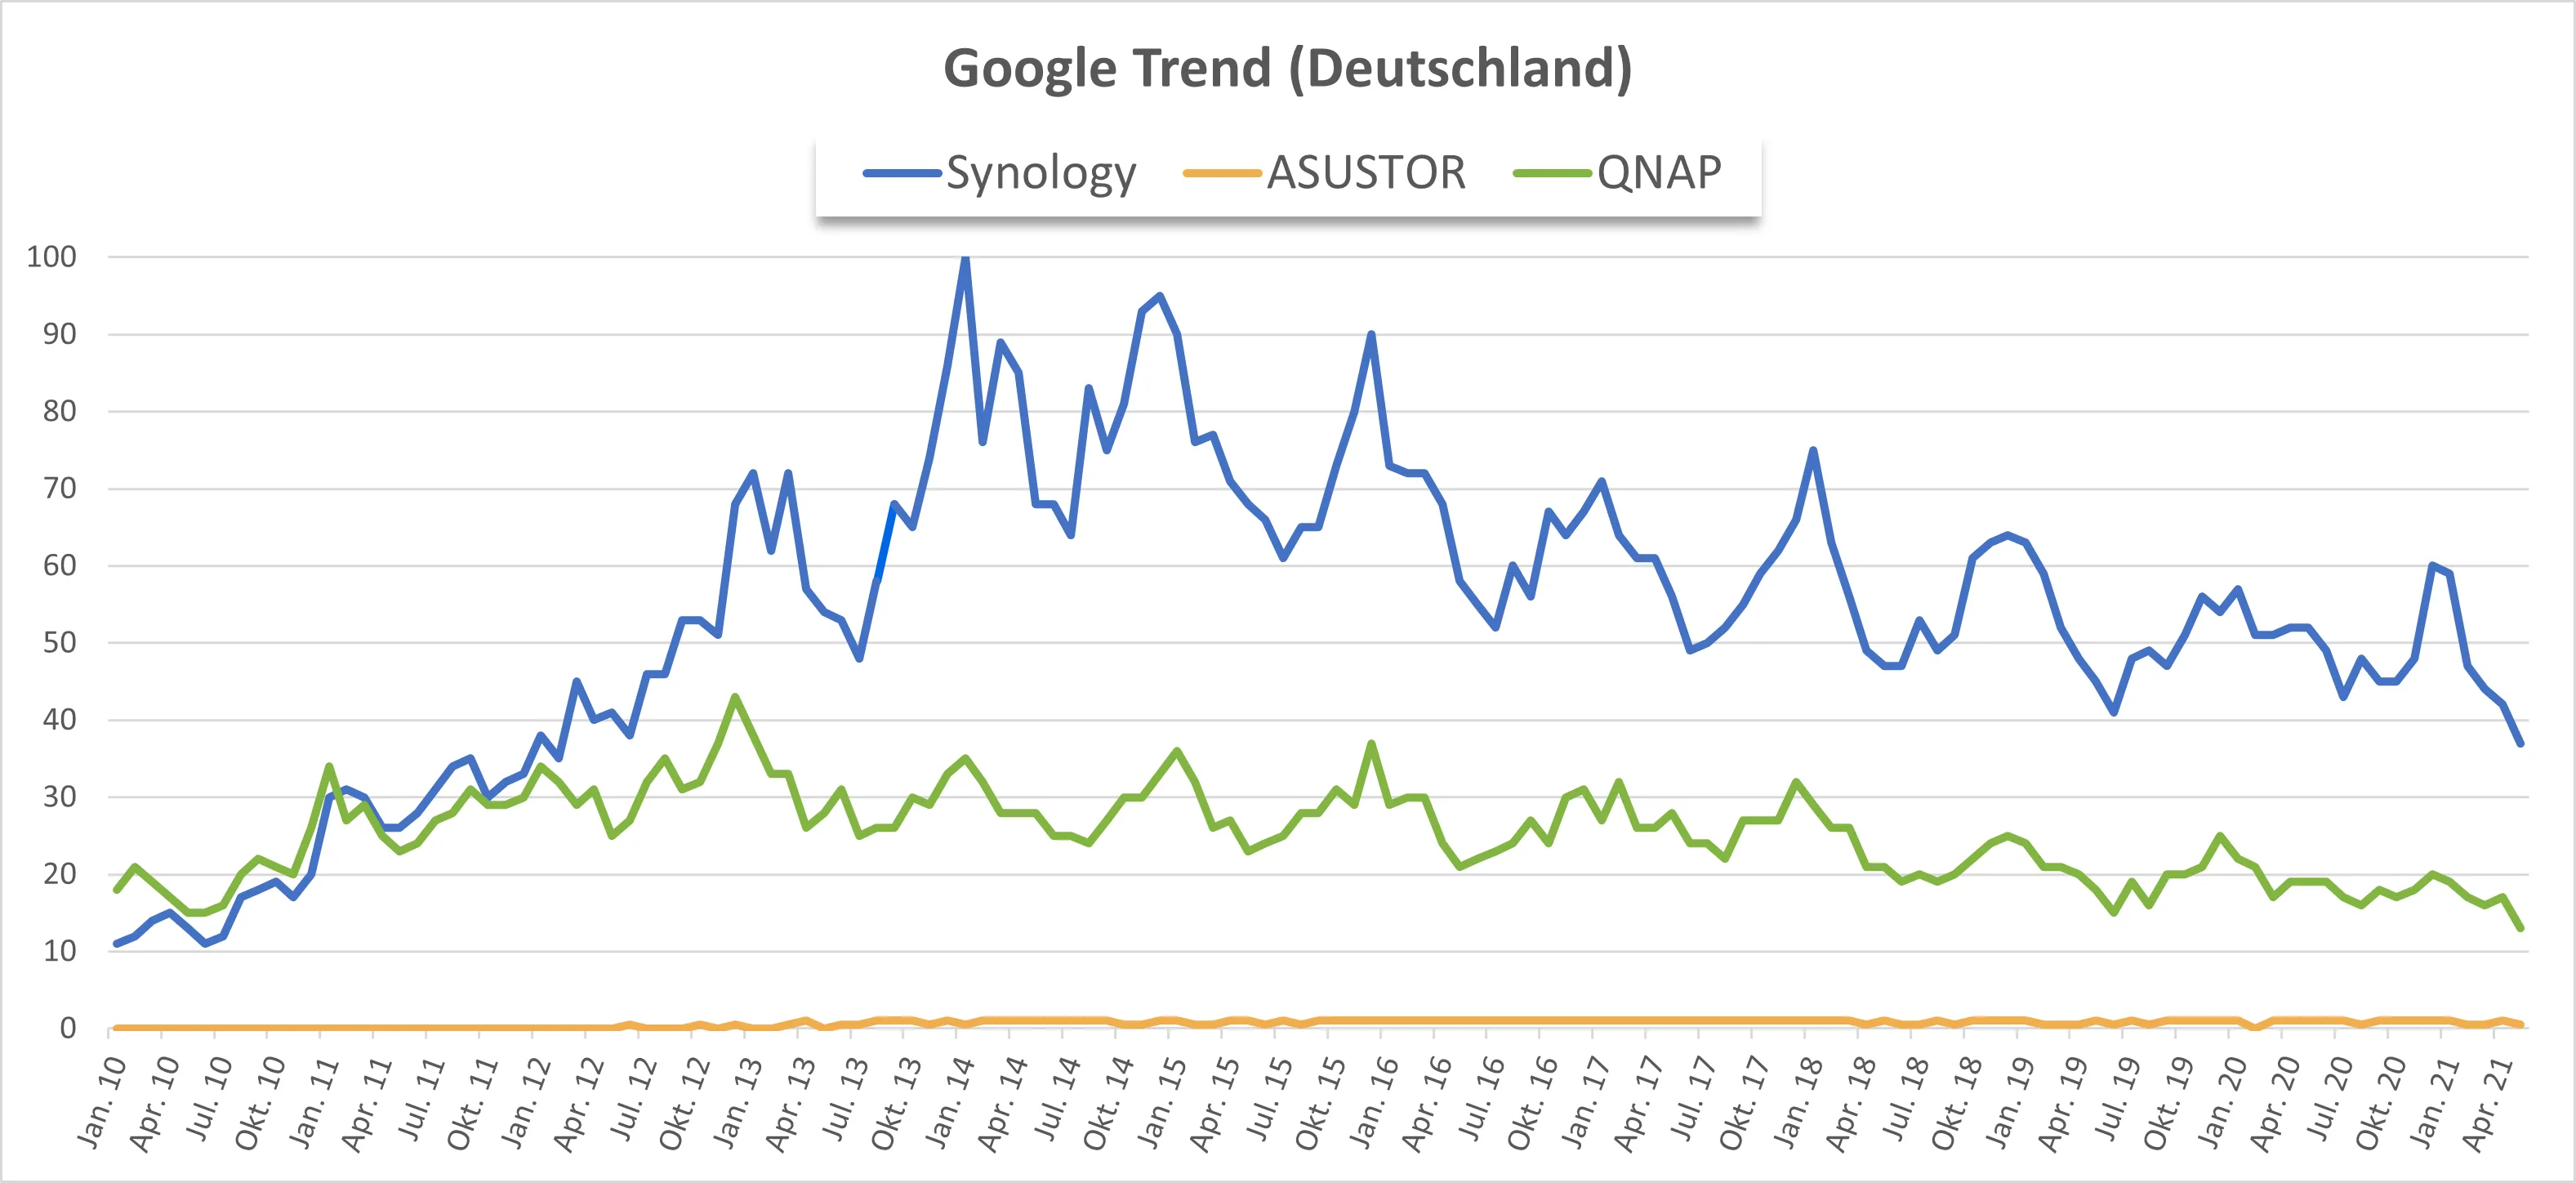
Look at Google Trends and compare Synology with QNAP and Asustor. You can quickly see that Synology is probably the best-known manufacturer. However, it was searched for less frequently than it was in 2014.
Of course, other NAS manufacturers exist, but I won’t go into them here. I bought a Synology DS220+(Amazon Affiliate Link) some time ago, primarily because of the option to expand the integrated RAM.
The setup is similar to that of an Asustor NAS, which I wrote a few days ago. Nevertheless, I would like to show you what the setup of your own Synology NAS could look like.
Installation
Additional RAM
Before switching on, the additional RAM must first be inserted if required. I bought a Crucial CT8G4SFS8266 8GB memory(Amazon Affiliate Link). Unfortunately, there is no guarantee that the RAM will be recognized. When inserting it, you have to ensure the RAM bar is firmly inserted. The first few times, I inserted the RAM too weakly, and my NAS continued to start with 2 GB. Only after I tried again and heard a click did it start with 10 GB.
Hard disks
As with my Asustor NAS, I do not use RAID in the Synology Diskstation, although I have 2 hard disk slots. RAID is not a backup, and it’s too expensive for me to use it alongside a backup. I would also prefer an SSD as a system disk because it has speed, power consumption and volume advantages. I use an older version of a Crucial MX500 500GB SSD(also Amazon Affiliate Link) as a system disk (the DSM is written to each disk) and an older version of a Western Digital WD Red Plus 4TB HDD(again Amazon Affiliate Link) as additional storage space. In principle, any HDD can be used; I like WD Red or Seagate Ironwolf.
Set up the NAS
Connection to the network
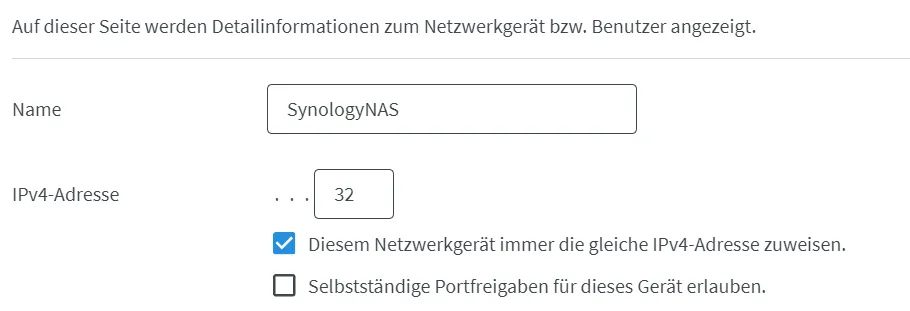
In my router network display, after connecting the NAS to the network via LAN, I search for the IP address assigned by the DHCP server for my NAS.

I also make sure that the device always gets the same IP address.
It is best if the IP address is outside the DHCP range, i.e. it is not assigned by the router. Suppose the router does not have a setting for posting a fixed IP address. In that case, you can also configure the Synology settings later so that the IP address remains the same. The changes will only take effect when the DiskStation restarts.
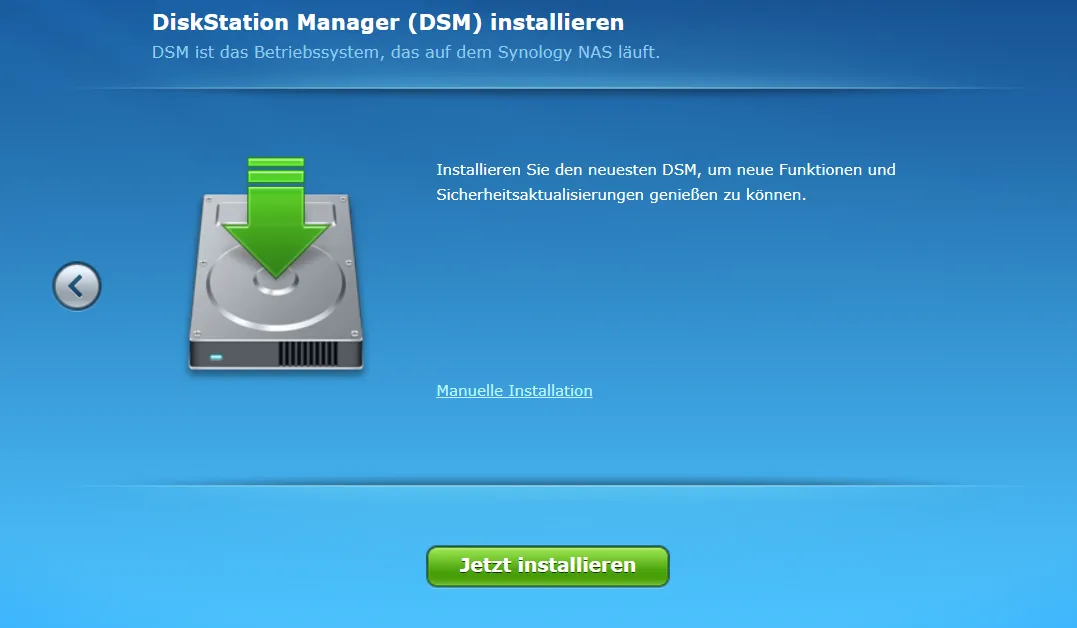
I now enter the IP address in my web browser. A web wizard appears.
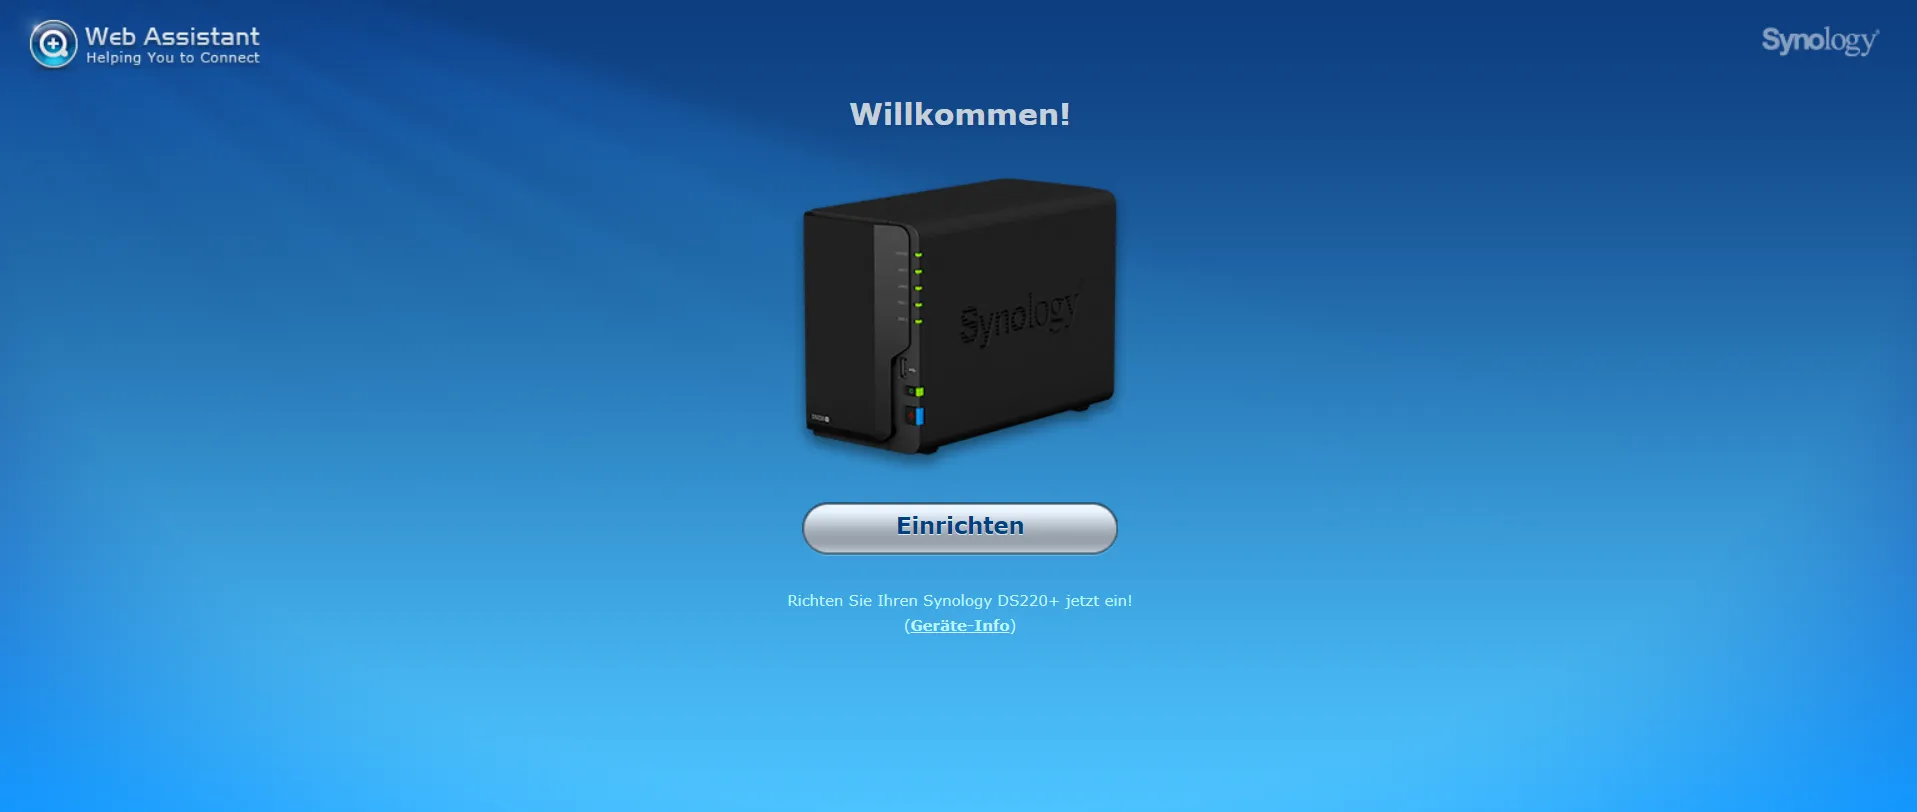
On the second screen I click on “Install now”.
When the installation is finished, I create an administrator account.
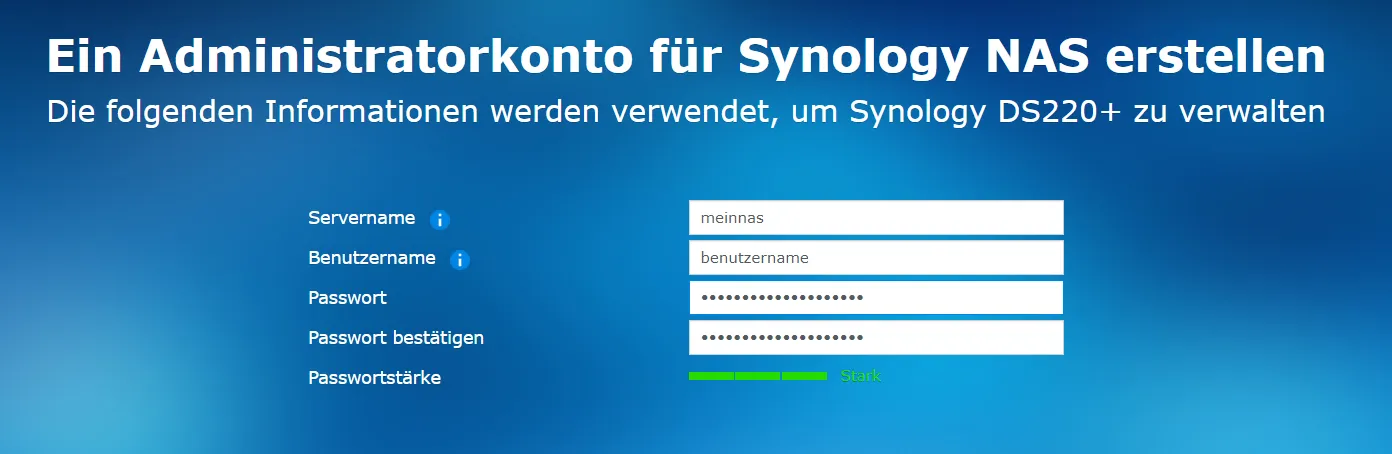
It is recommended to use a strong password.
The connection with Quick-Connect can be skipped for the time being. I also do not check the box to share my network location via Synology-Find.
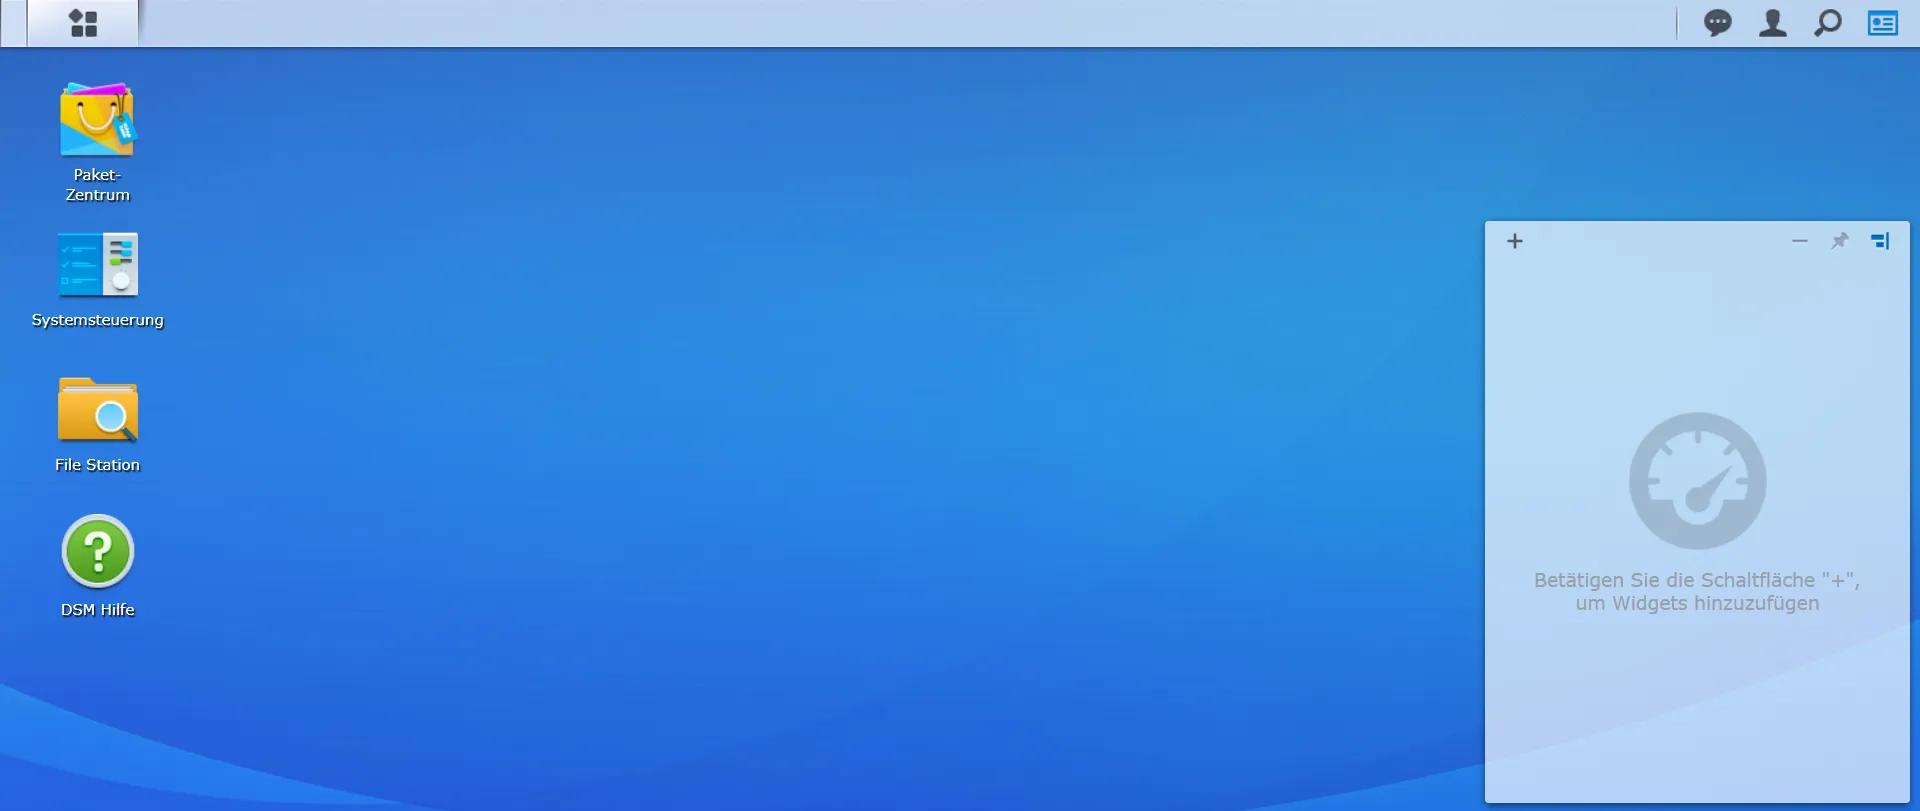
Then you end up on the desktop of the DSM.
If you cannot set up a fixed IP address via the DHCP server (router), this is possible in the Control Panel under Network. Simply select “Edit” and switch to manual.

Set up hard disks
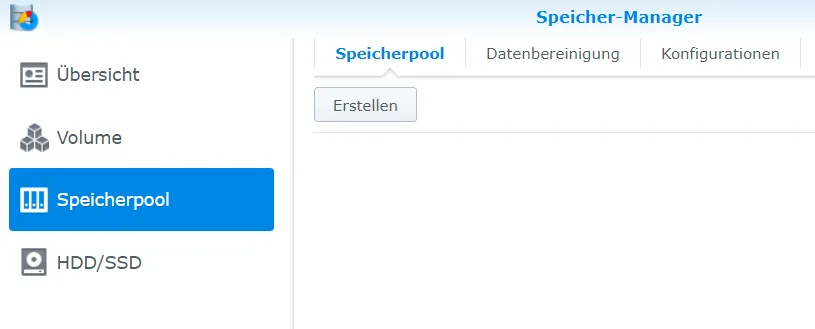
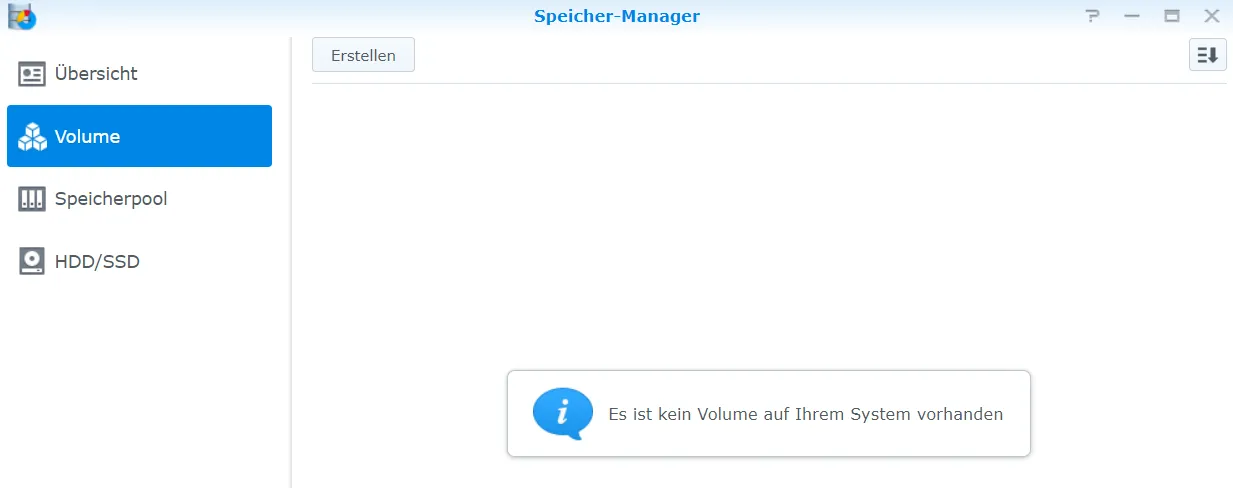
Now, we need to mount the hard disks as a volume. To do this, open the storage manager hidden under the menu button.

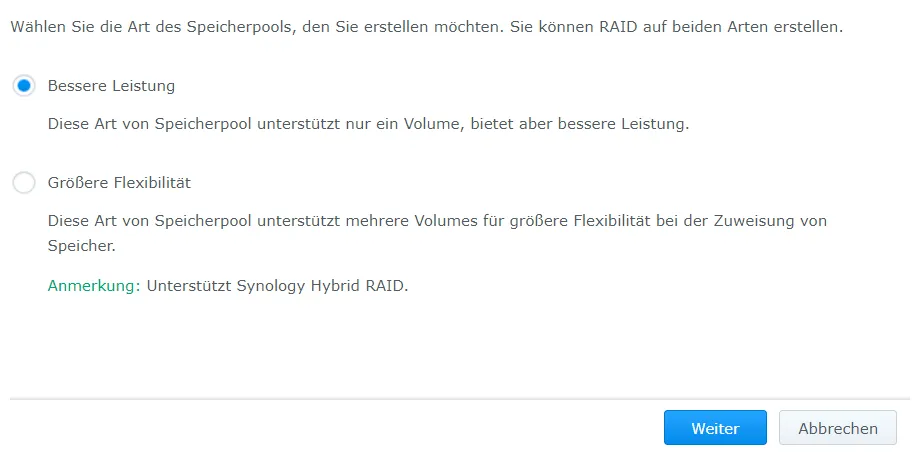
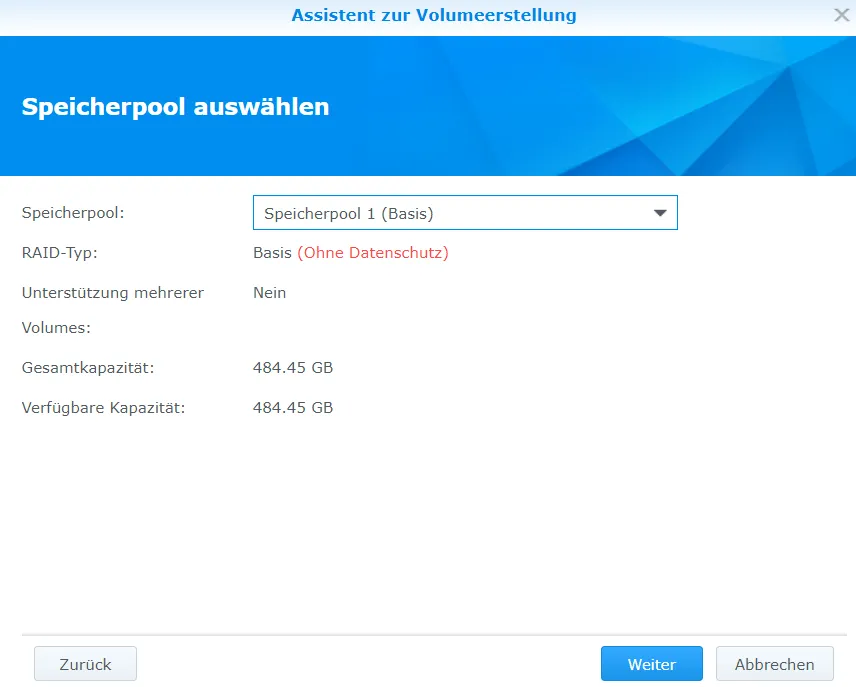
Under the menu item Storage pool I press Create.
In the next step, I select better performance, as one volume per pool is enough for me. Honestly, I don’t know if what you choose here without RAID makes a difference.
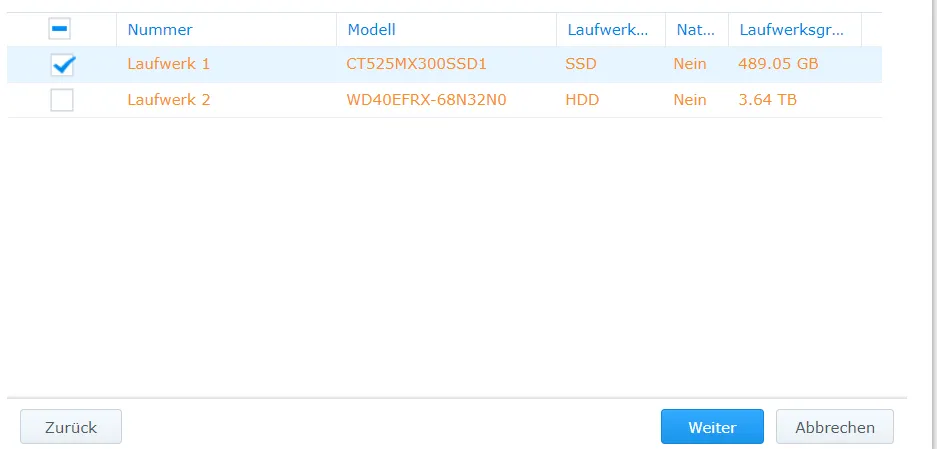
I choose base as RAID type.

Then I select only the SSD.
Now I create a new volume.
I want the custom way.
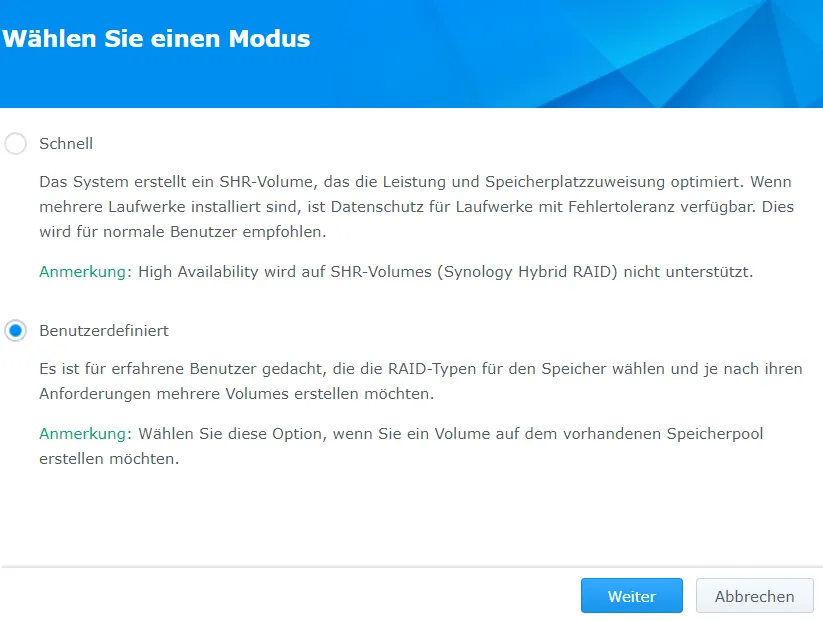
Then I select the storage pool I just created.
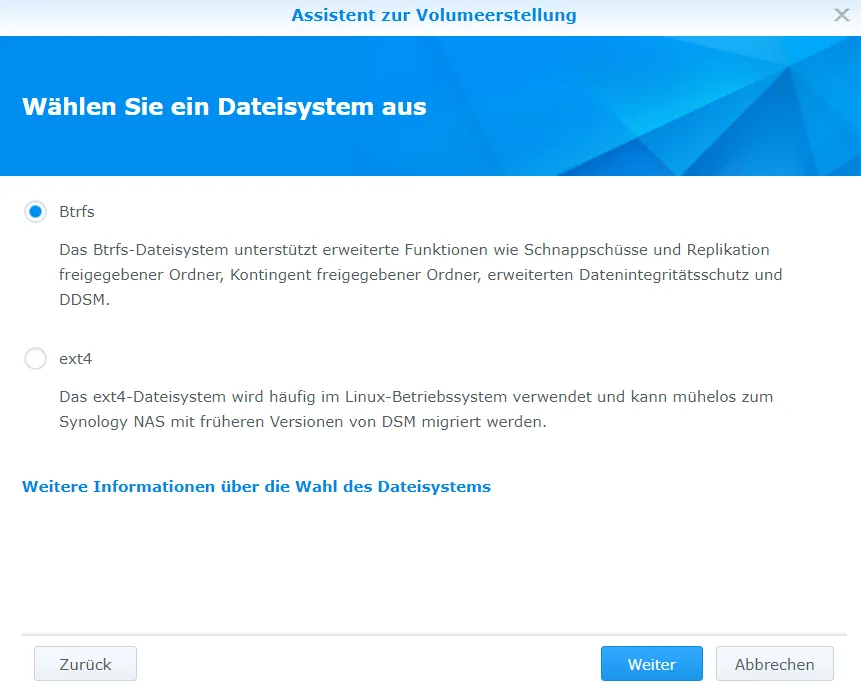
I want Btrfs as the file type. In contrast to the Asustor NAS, I can still create user quotas here.
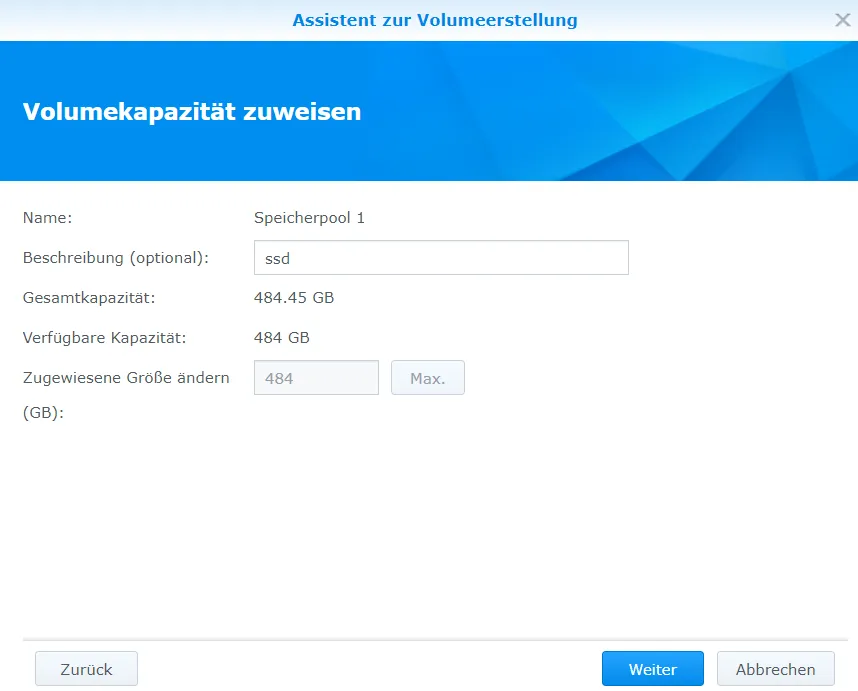
The entire memory should be allocated.
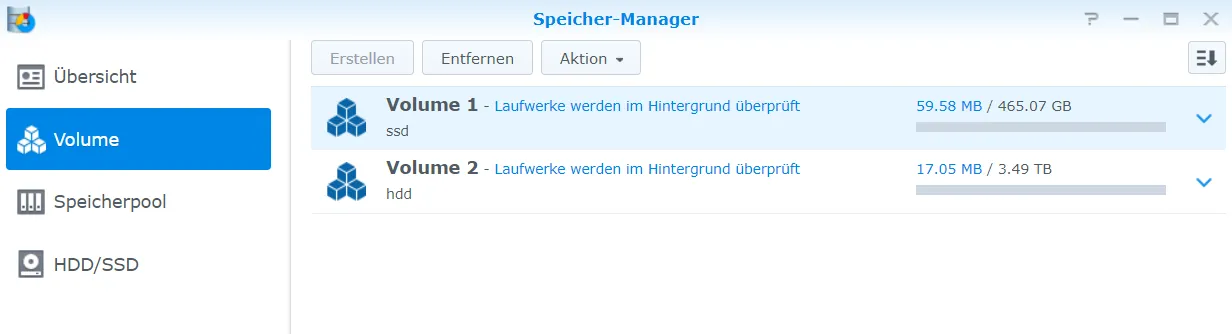
Now I repeat all the steps with the HDD. In the end I have two volumes.
Home folder for users
Every user should have a home folder to save their files. Fortunately, it is also possible here (in contrast to the Asustor system) to choose where the folder should be located. In the Control Panel, I go to Users and can activate the Home service, including the recycle bin.

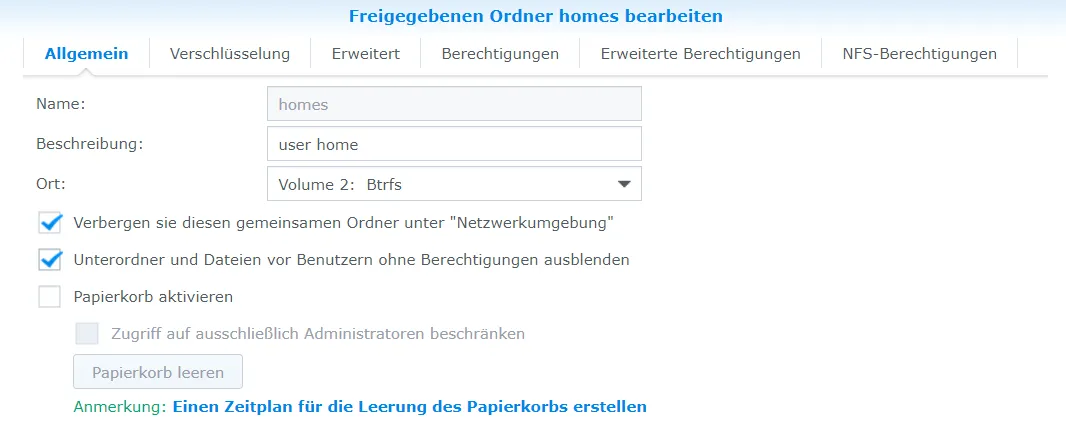
Under Shared folder you can now see homes, I press “Edit”.
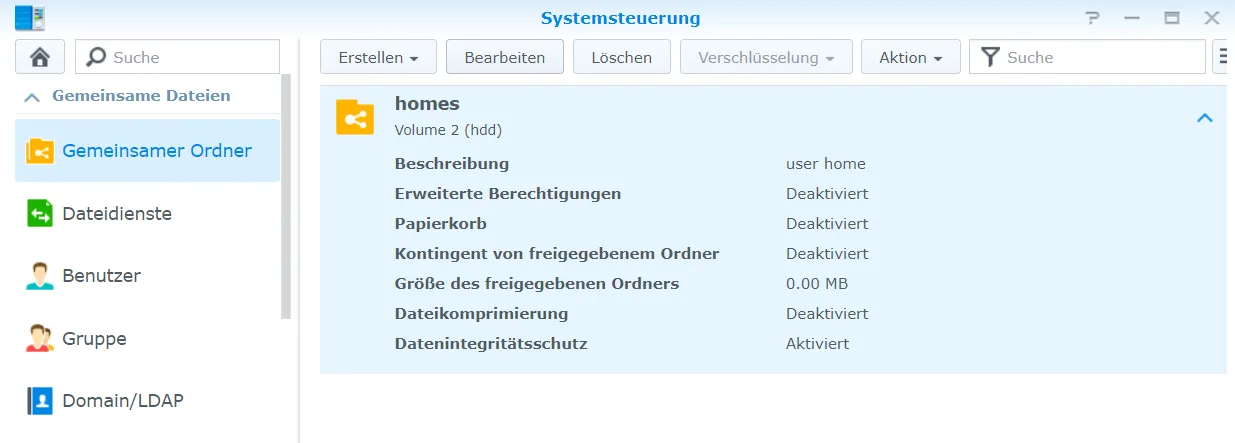
I do not want this folder to be displayed in the network environment.
Connect network drive
I would now like to connect the NAS as a network drive.
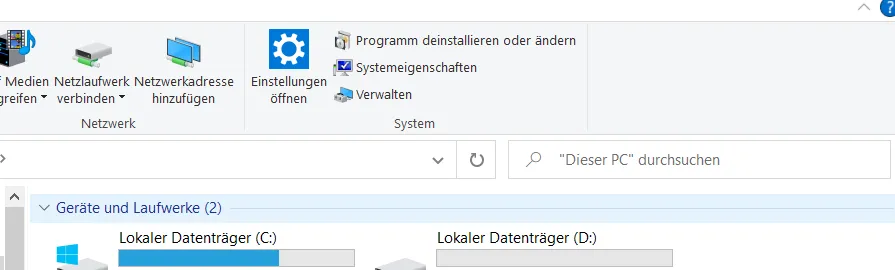
Windows
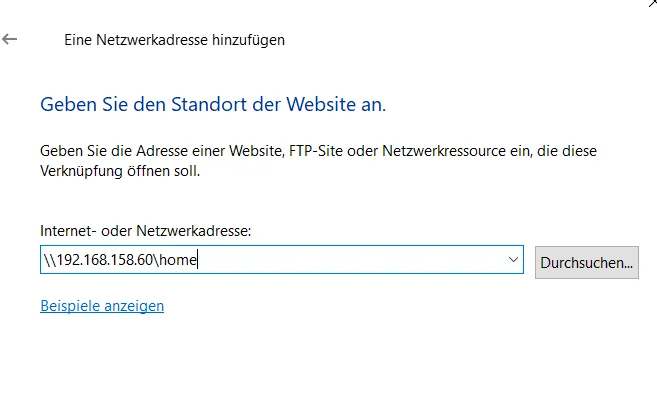
I click on Add network address in File Explorer under “This PC”.
After two backslashes, I enter the IP address of the NAS here, including the home directory.
After I have entered the login data, I get an empty window.

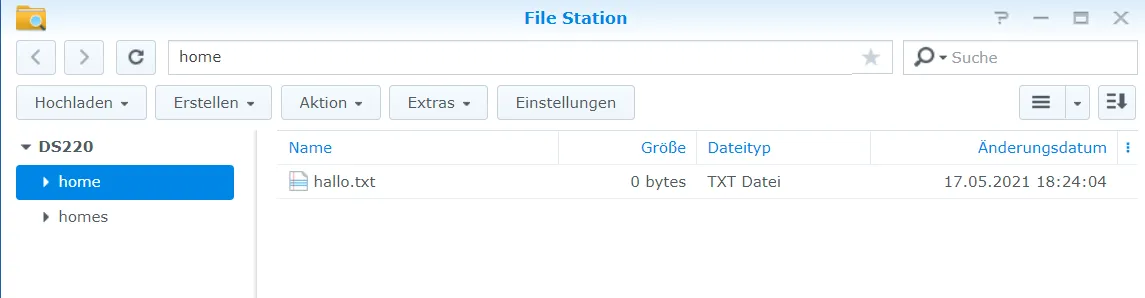
As a test I create a text file.

I can now also see this in the NAS.
Android
I use the program CX File Explorer (you can also use any other program that can create network drives).
Cx File Explorer File manager app with clean interface to provide easier management of files
In the app I create a new storage under “Network”.
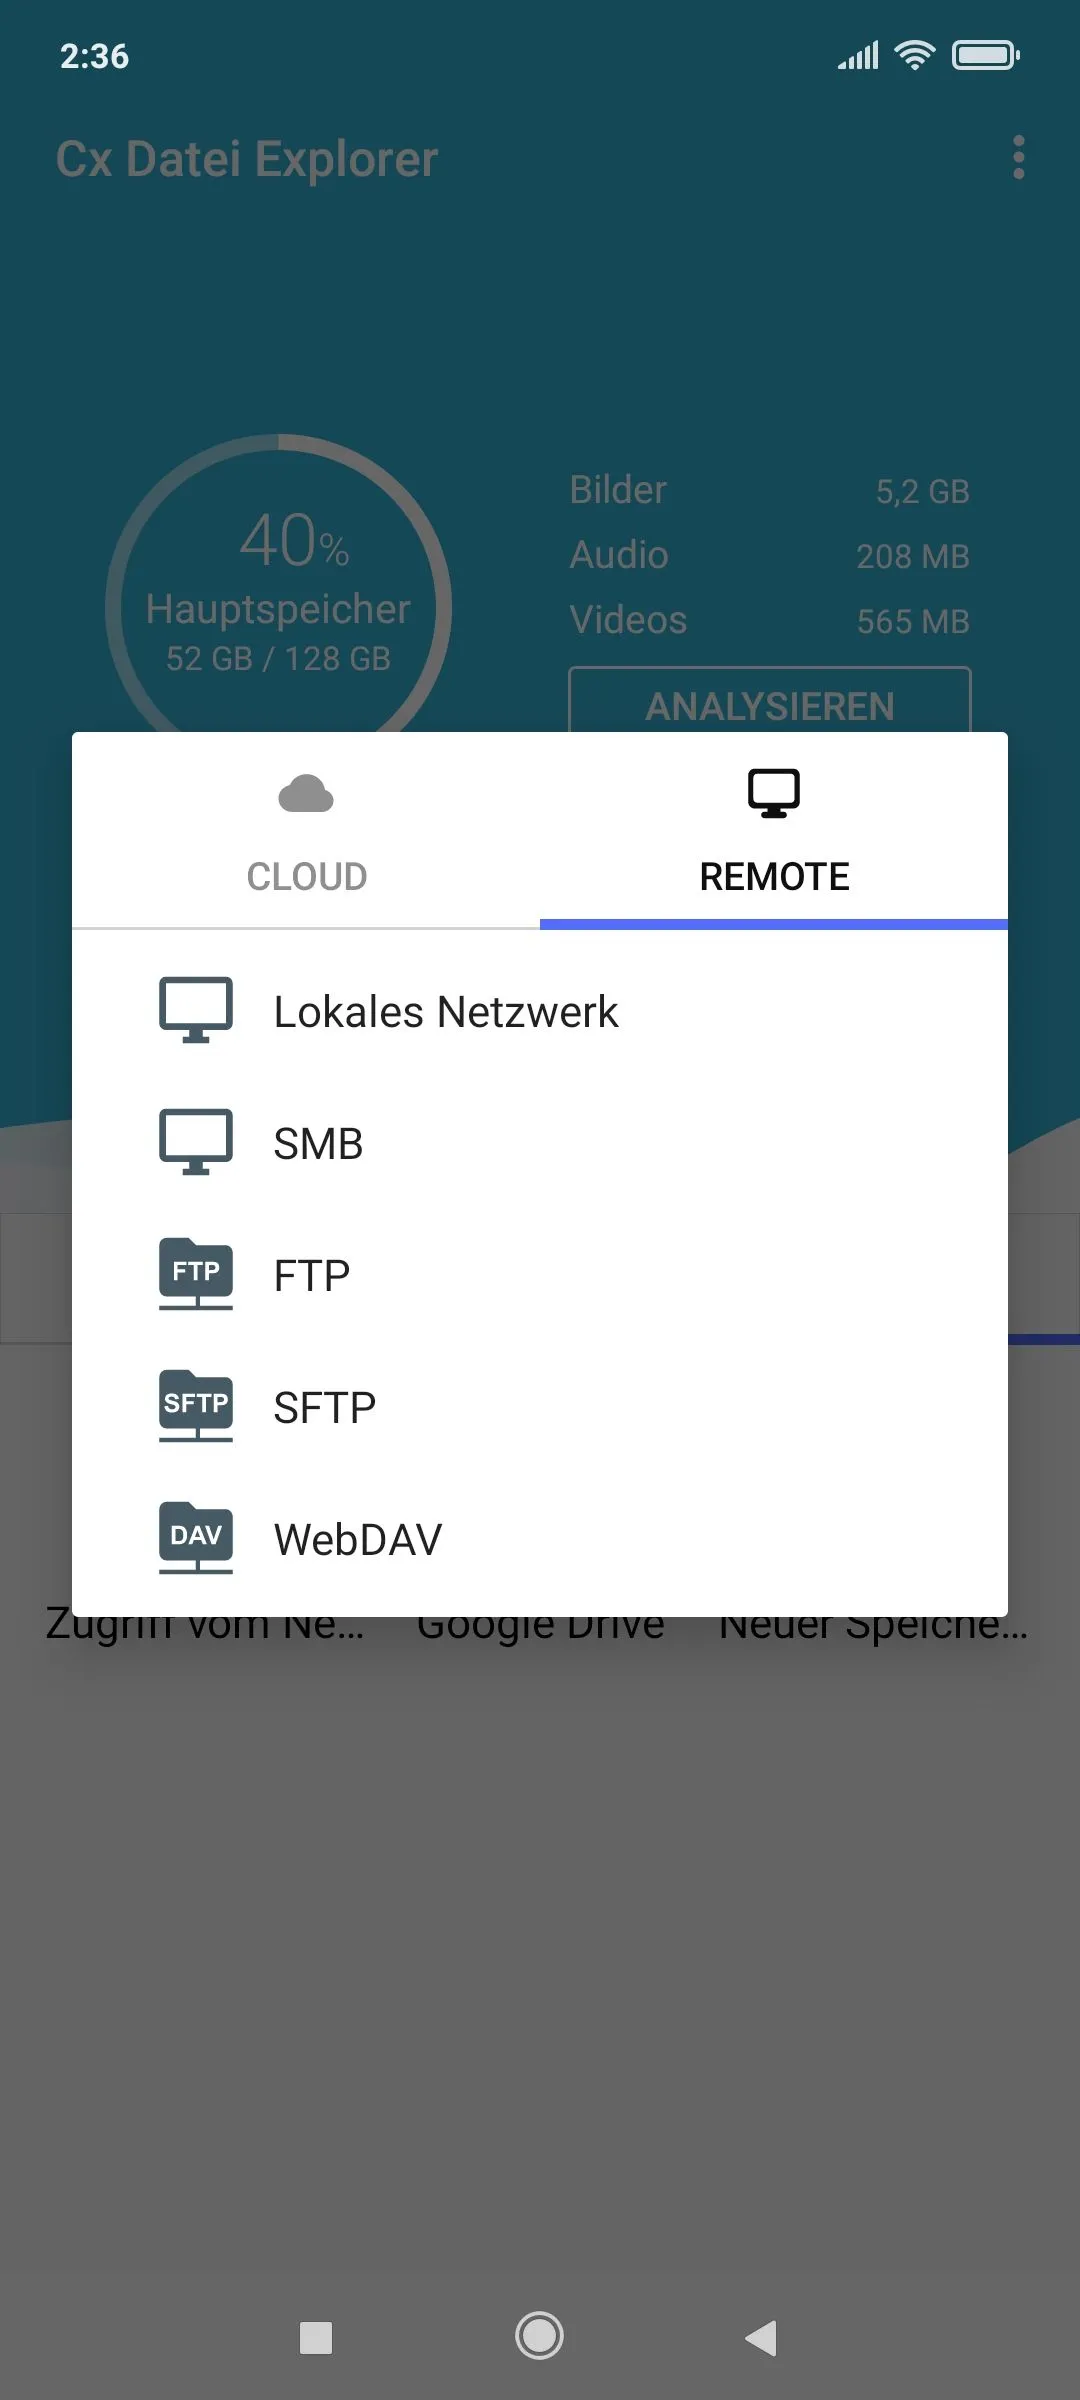
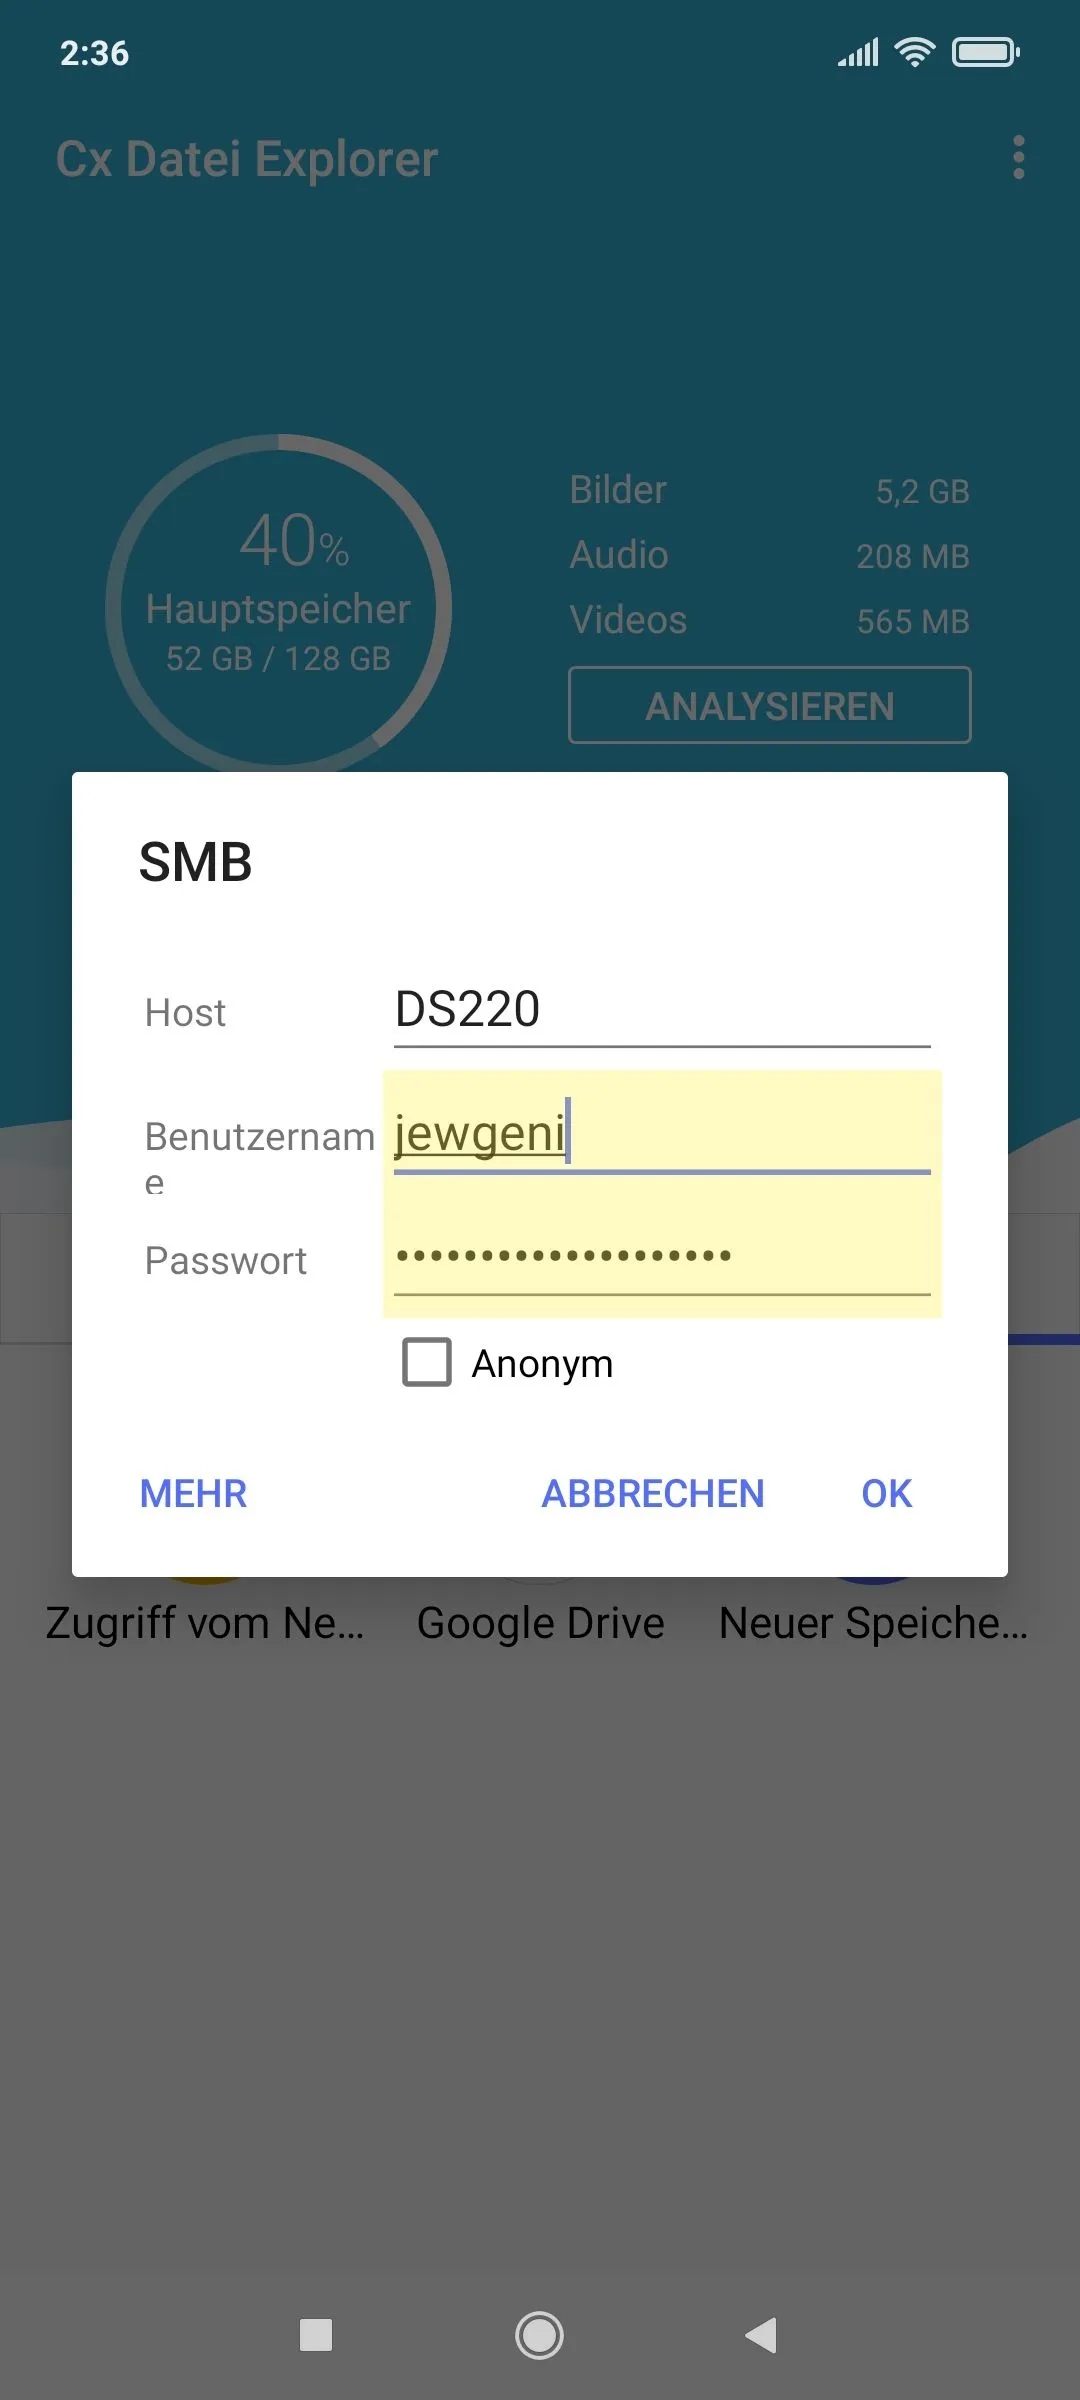
I select SMB. The host (name) of the Synology NAS can be entered for the host.
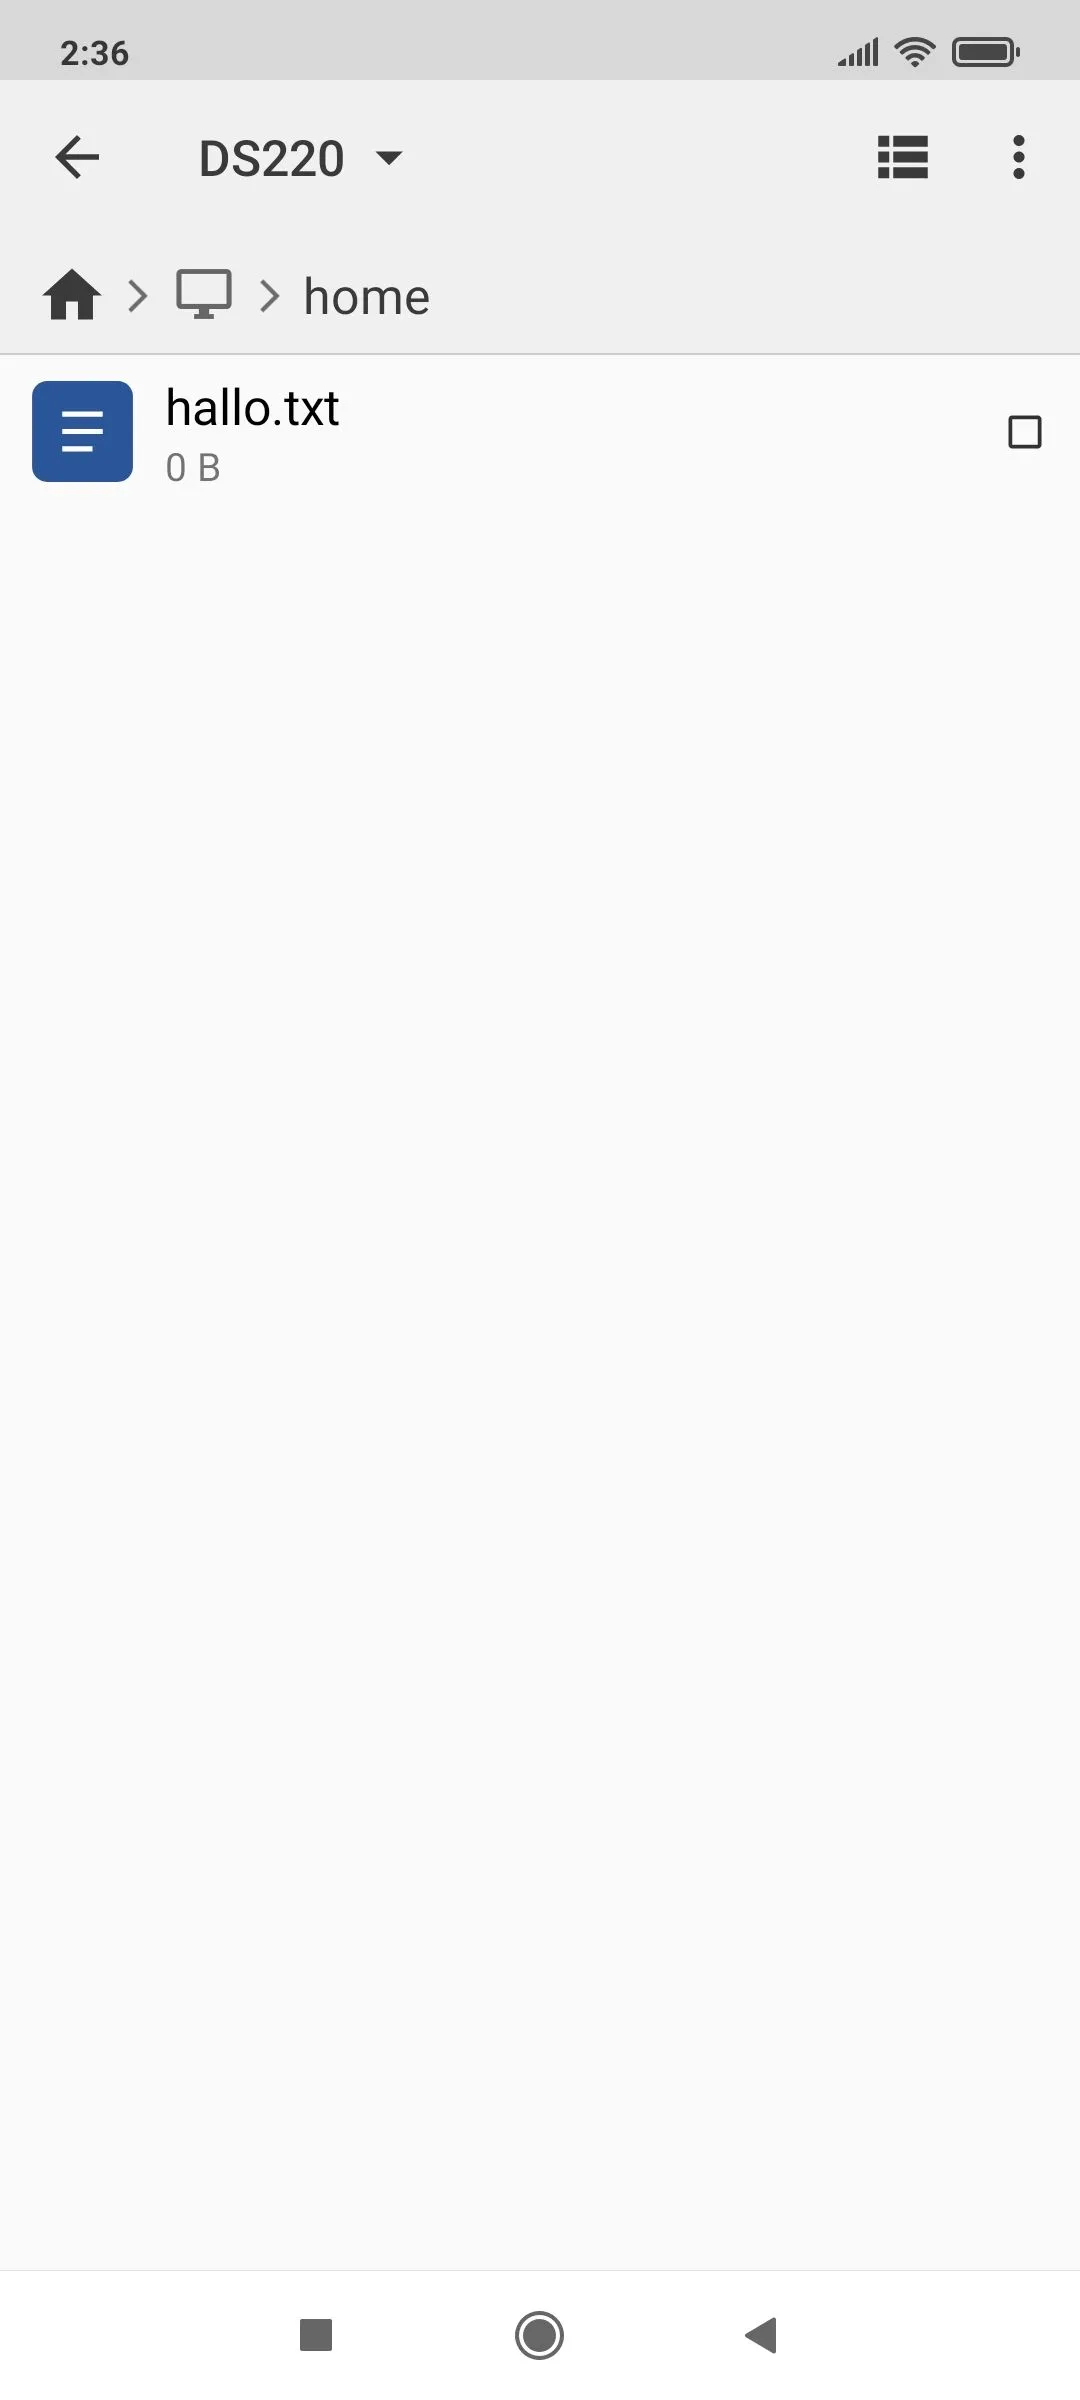
At the end I see the text file I just created.
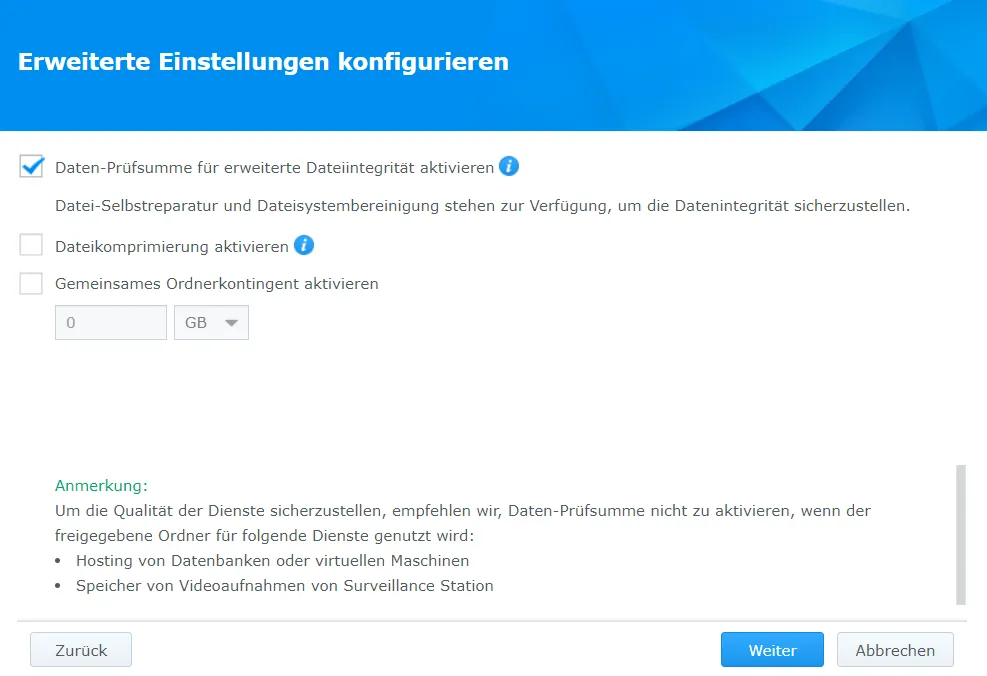
Create shared folders
It is possible to create additional shared folders via the control panel.

I create the backup folder on volume 1.
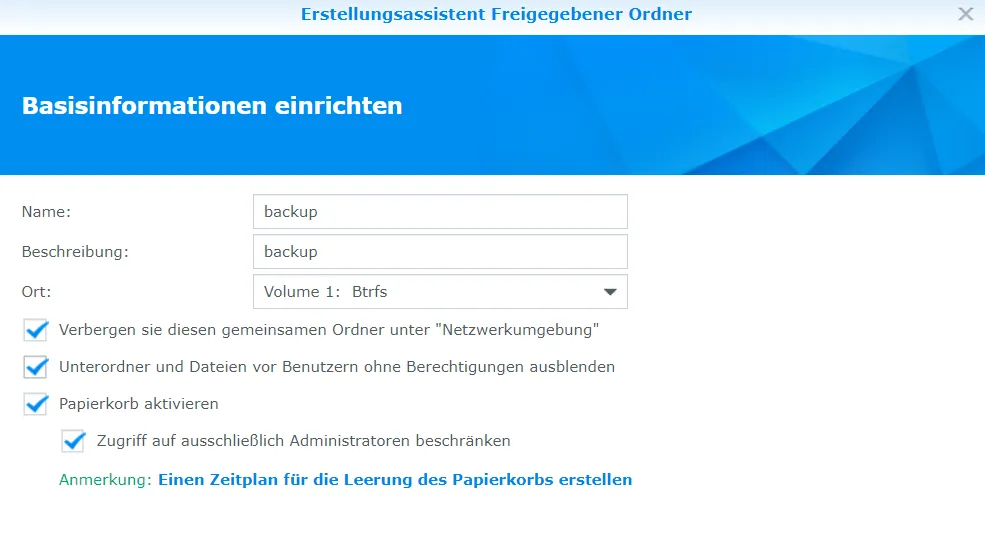
I also think the data checksum is basically good.
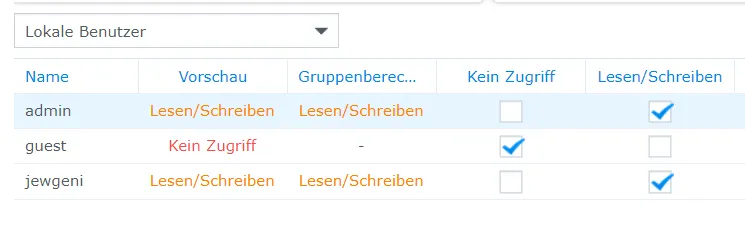
I grant the admin and myself read and write permissions.
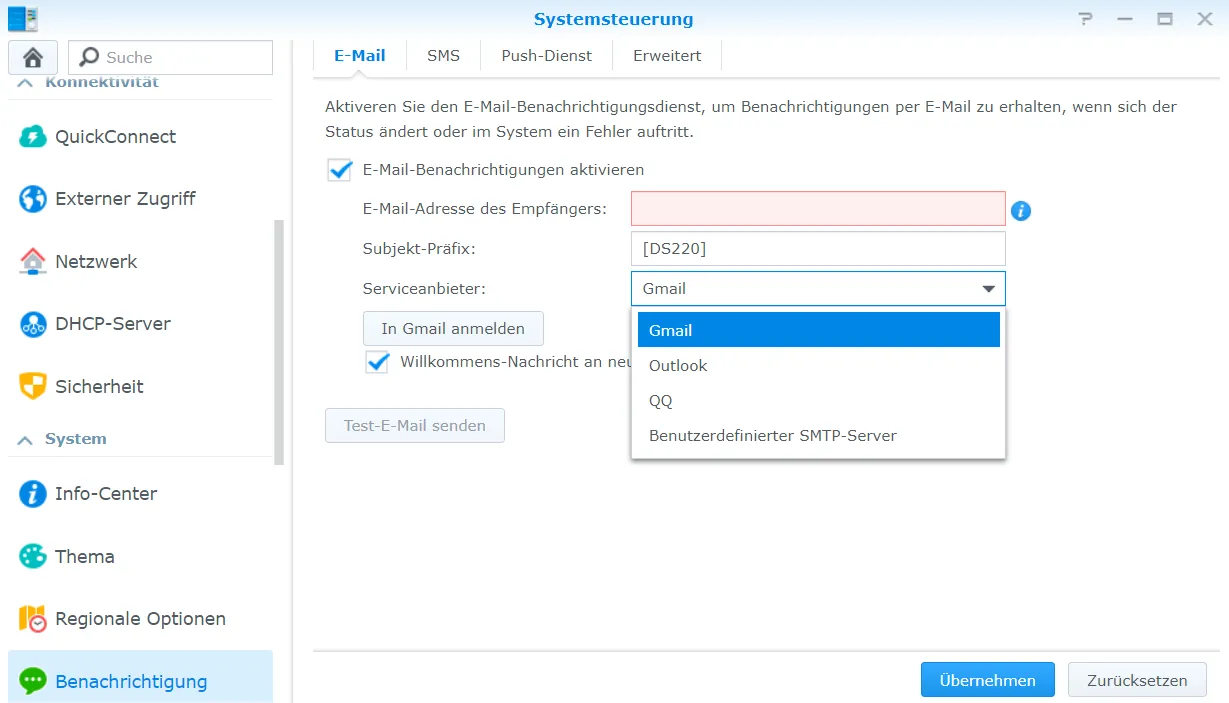
Enable notifications
The NAS should be able to send me notifications by e-mail, this must be activated. This is possible in the control panel under “Notifications”.
Check and clean up hard disks
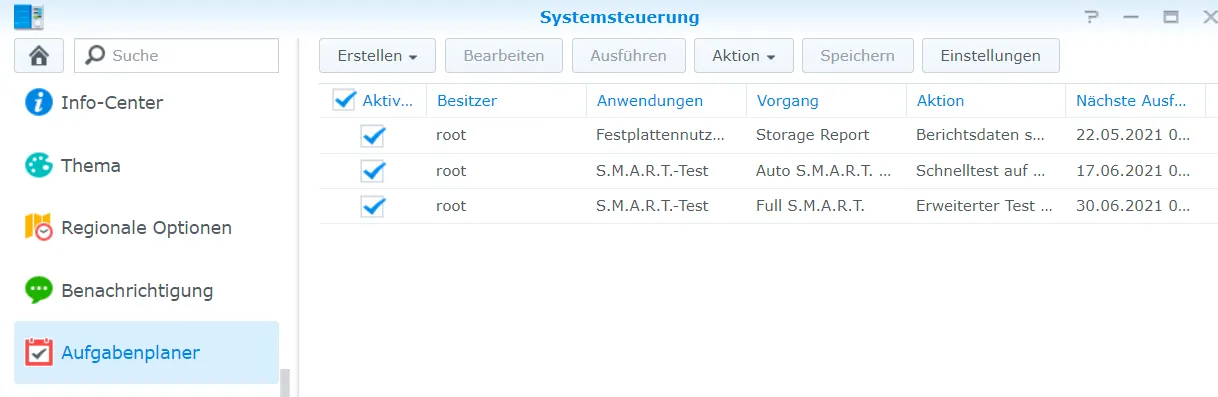
In the storage manager, I ensure notifications and the monthly report are activated.
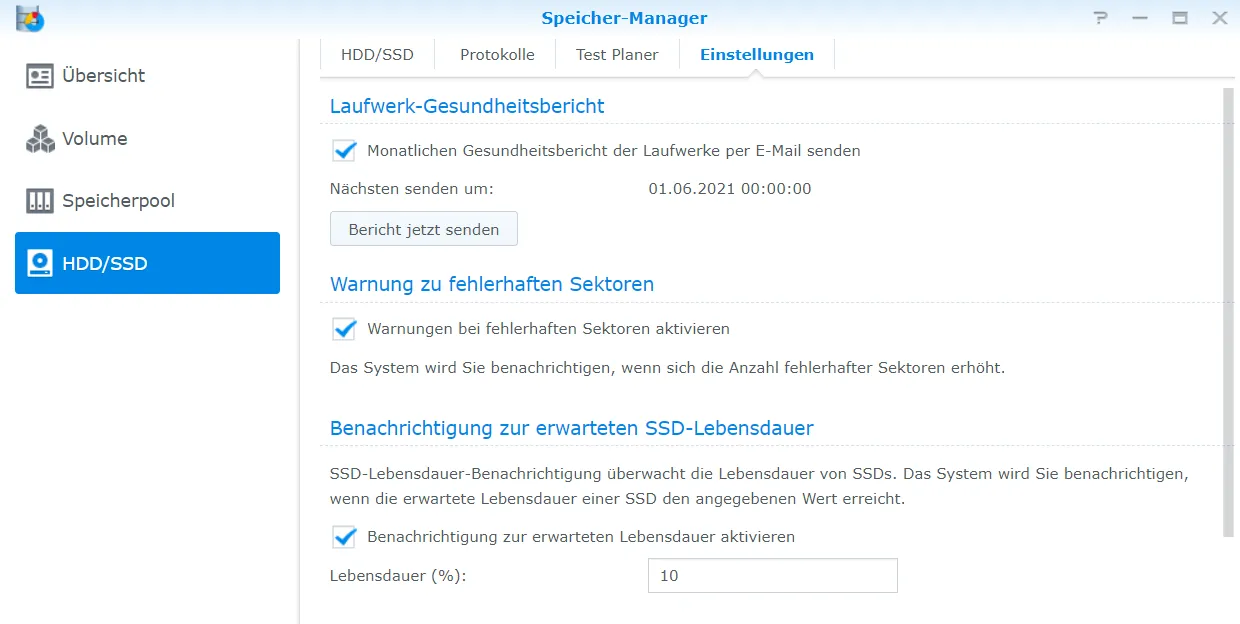
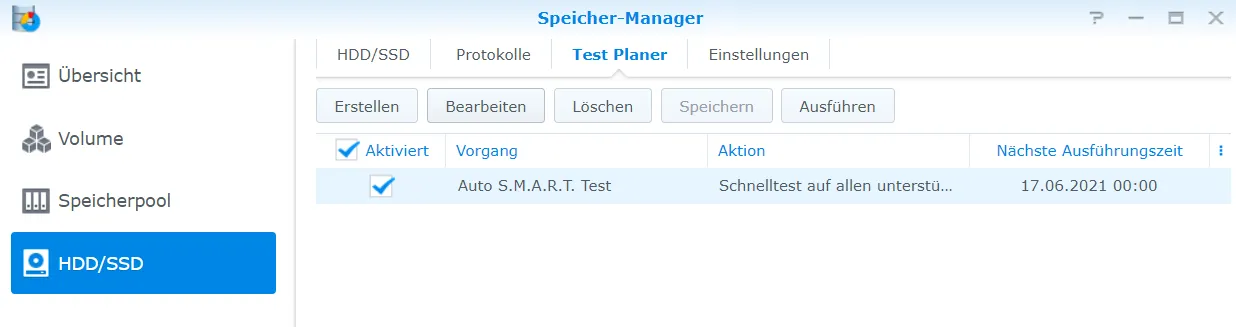
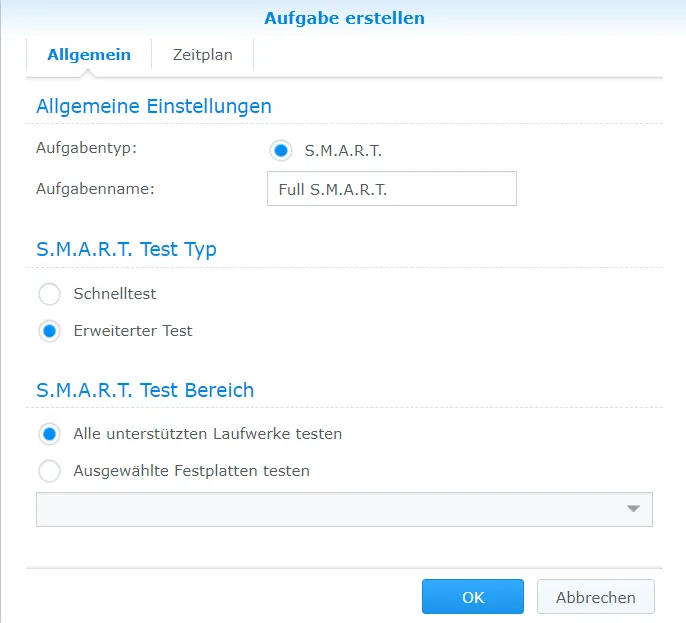
There should already be an Auto S.M.A.R.T test in the Test Planner. I create an additional test.
I select extended test.
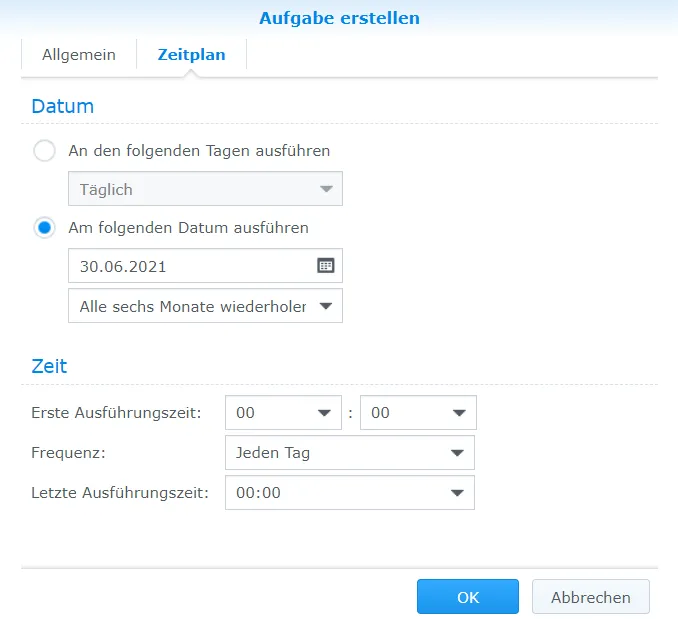
In the schedule I set that it should be repeated every 6 months.
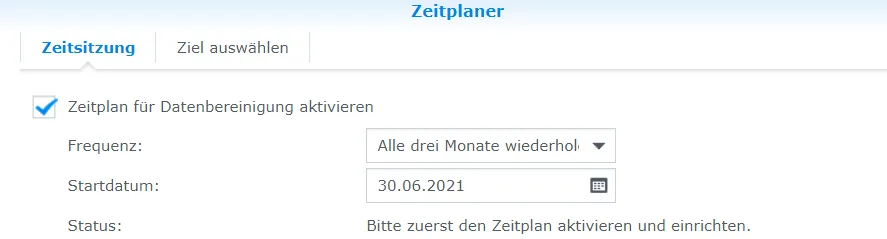
Now I create a schedule for a data cleanup in the storage pool.
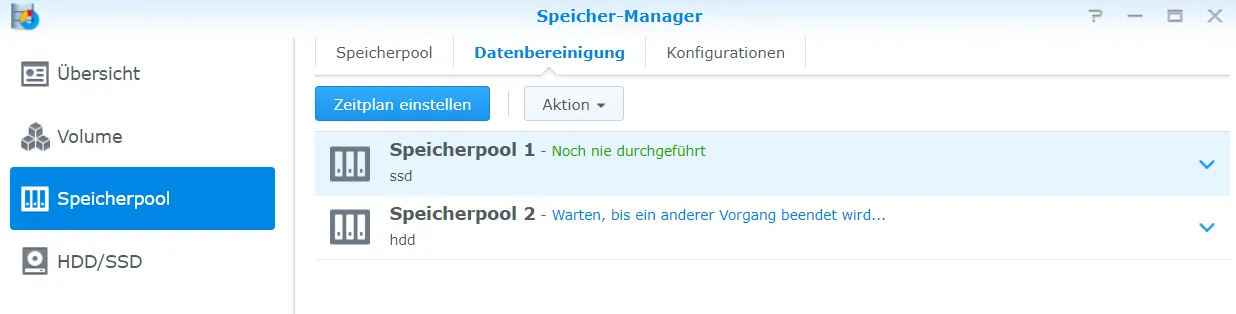
Here I specify how often the process should be repeated.
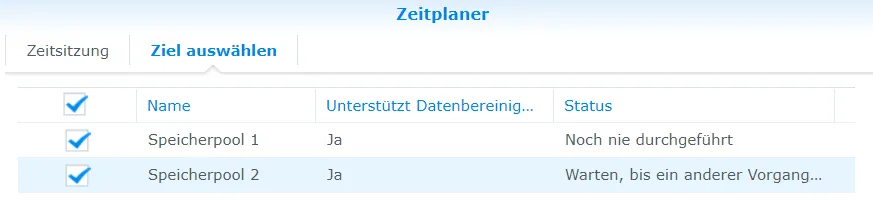
I have selected all pools as the target.
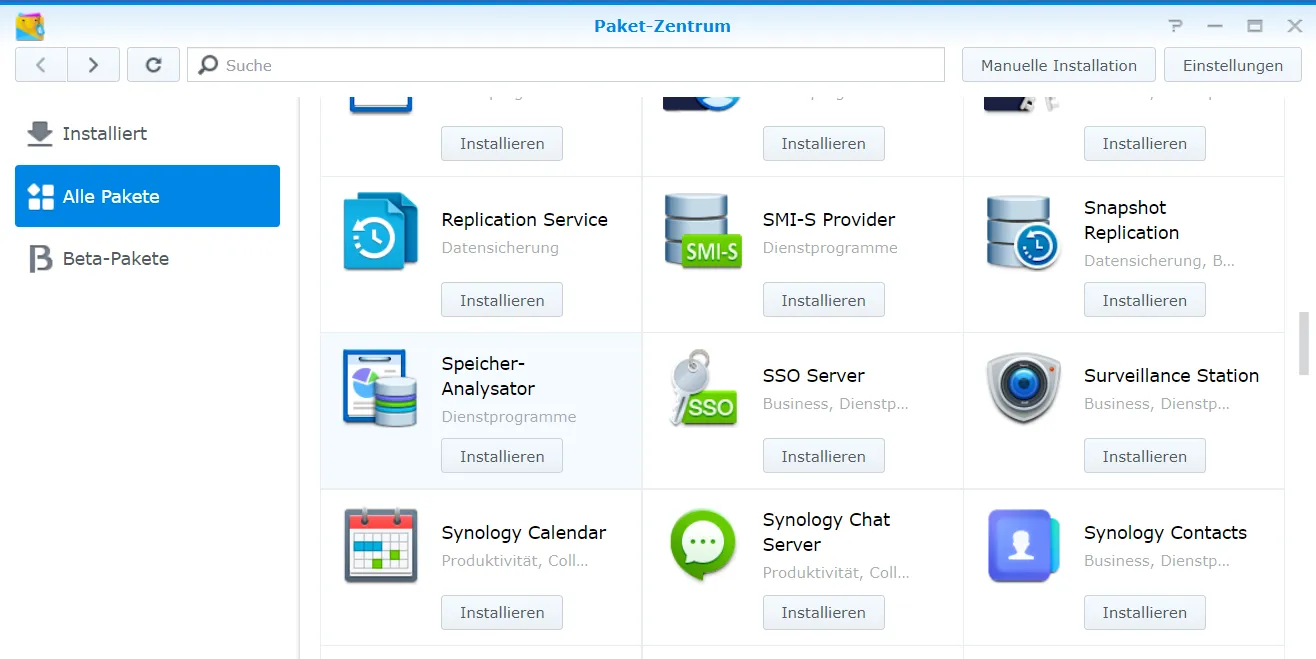
For the memory analysis I download the memory analyzer from the package center.
I want a weekly report and have created a new subfolder in the backup share folder.
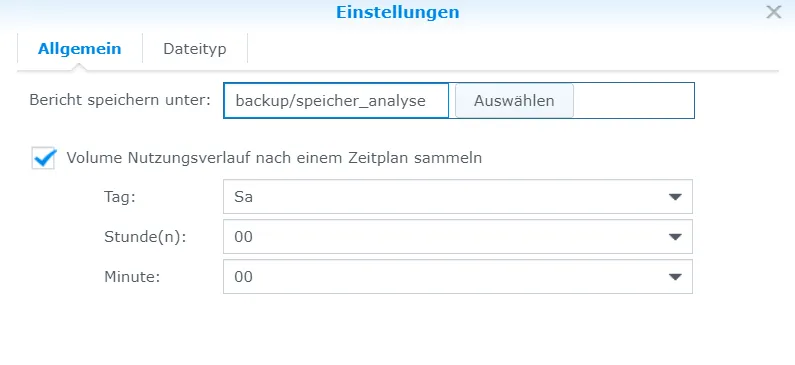
I also create a report profile (I leave all menu items unchanged, so I save the description). You might want to deselect some report items if they seem uninteresting.

Recycle Bin
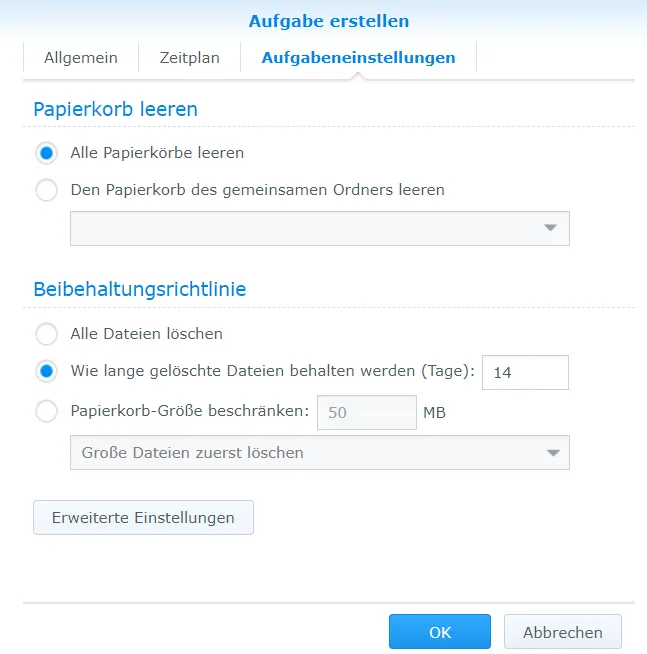
You can now activate automatic recycle bin emptying. This is possible in the task scheduler.
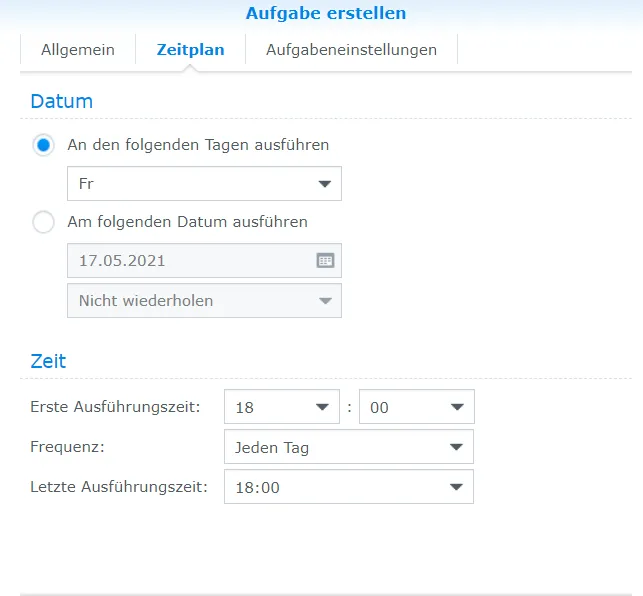
I would like the emptying to take place every Friday.
In addition, files that are still fresh in the garbage can should be kept. Only if they have been in there for more than 14 days on Friday may they be deleted automatically.
Dynamic domain
If you did not set up DynDNS in the Fritz!Box or another device in the home network, you can do this in the DiskStation. The prerequisite is a public IPv4 address (no DS-Lite). You should be able to see this, for example, if you call up a page such as WieistmeineIP.
Netcup
Once again I recommend Netcup (Ref-Link). Here, a .de domain costs €5 per year (permanently, i.e. also in the second year). The good thing is that an API is also offered here, via which the NAS can change the DNS entries.
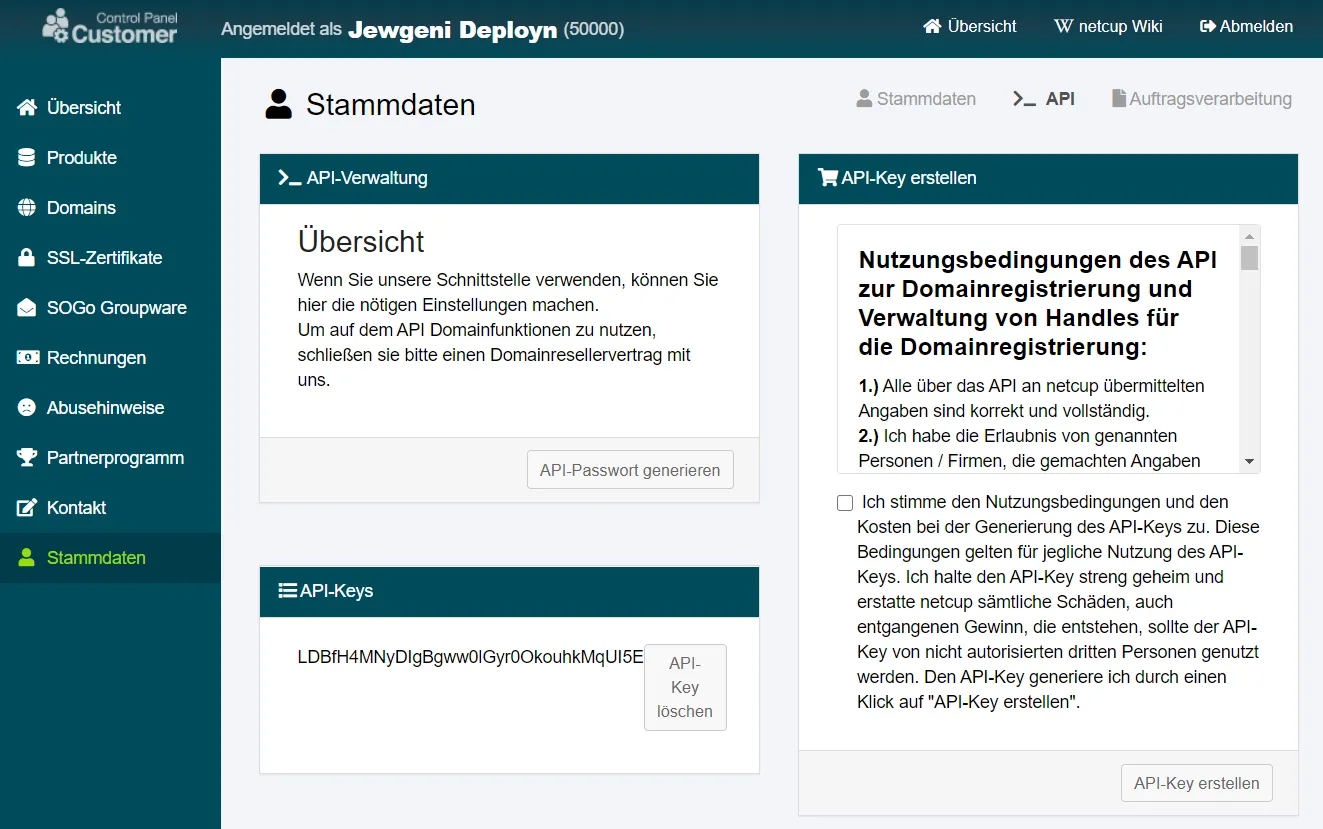
I would now like to use the purchased domain as the address for my home, I need the API key and the API password for this. In contrast to the procedure with the Fritz!Box, no additional web space is required.
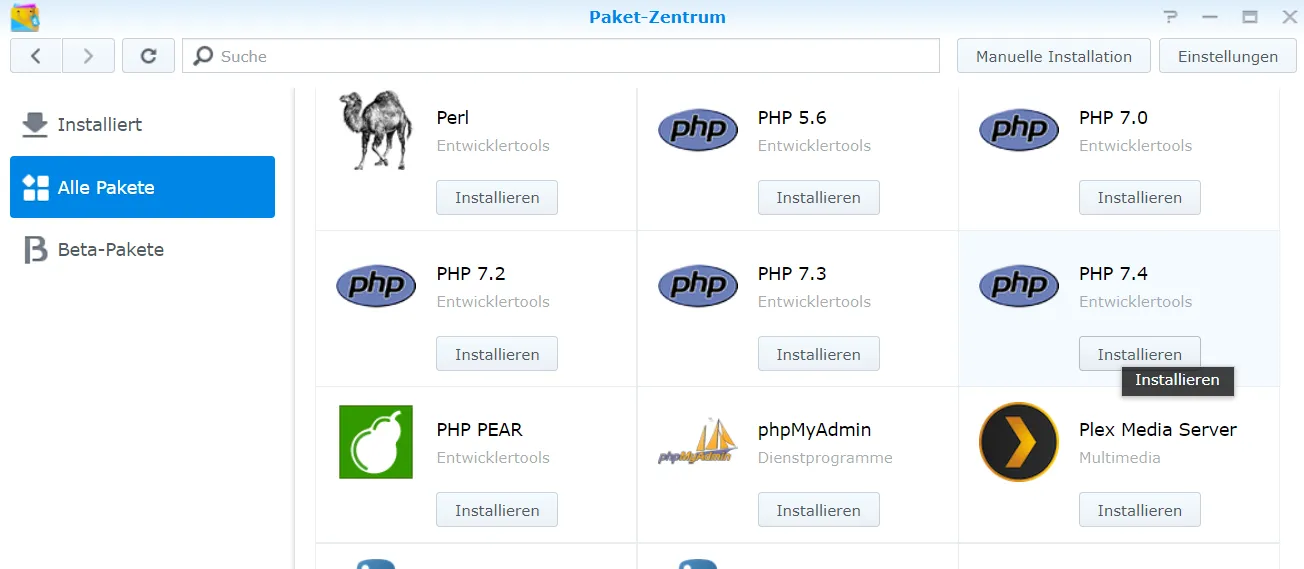
First, I install PHP 7.4 on the NAS.
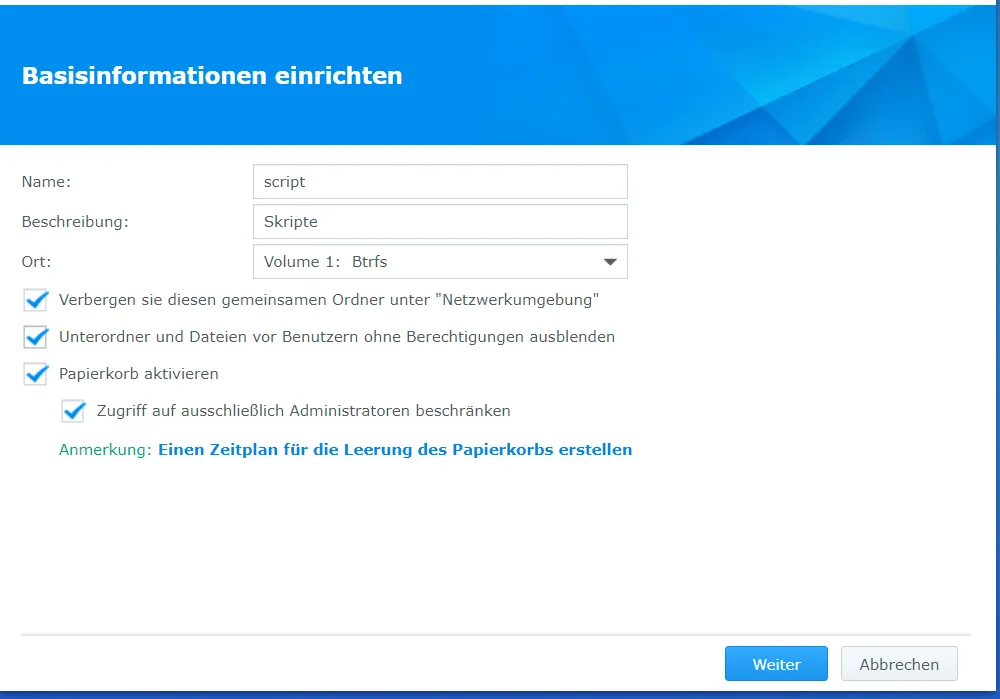
Then I create the share folder where I want to put my scripts.
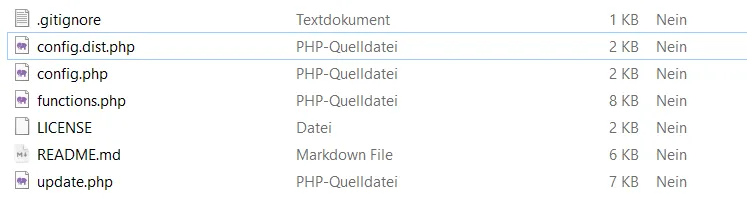
Fortunately, a Netcup employee has created an unofficial PHP script. It should ensure that your own current IP address is entered in the DNS settings of the domain. The script by Lars-Sören Steck can be downloaded here.

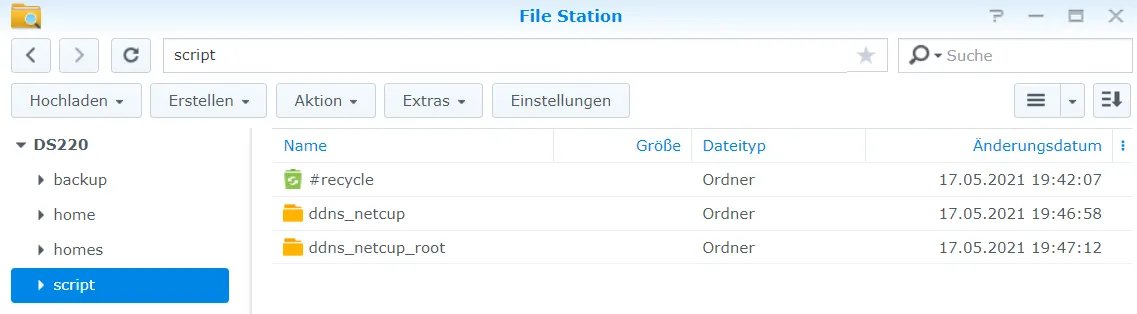
I create two subfolders in the script folder, for the root and wildcard domains.
Before I put the script into the folders, I copy the file config.dist.php and change it to config.php. I adjust the values in it. I enter an @ in the line with host. This adjusts the domain without a subdomain.
define(‘HOST’, ‘@’);
I load this data package into the ddns_netcup and the ddns_netcup_root folder.
I adjust the host line in the ddns_netcup folder.
define(‘HOST’, ‘*’);
This changes both the root domain and any subdomain that is not defined more precisely.
Now the script just needs to be executed. To do this, create a task in the task scheduler with a user-defined script. The update script must be called as a script via php.
php volume1/script/ddns_netcup/update.php
php volume1/script/ddns_netcup_root/update.php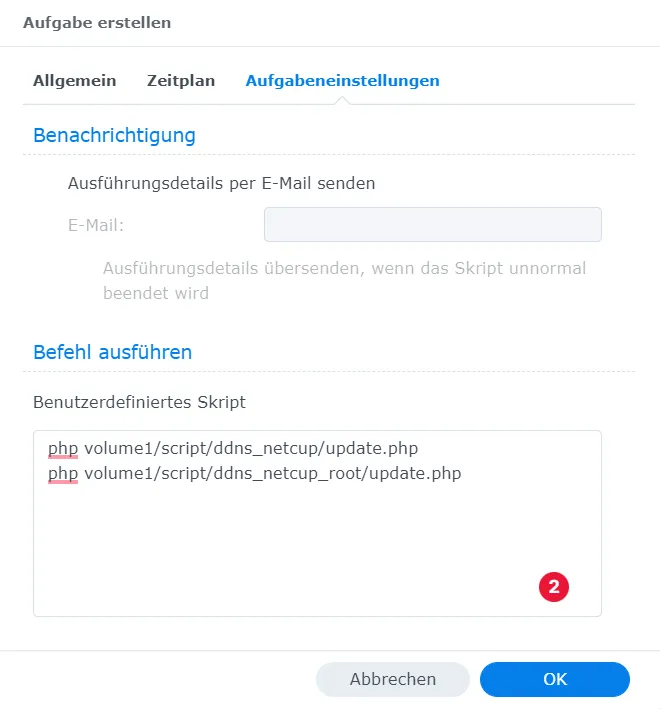
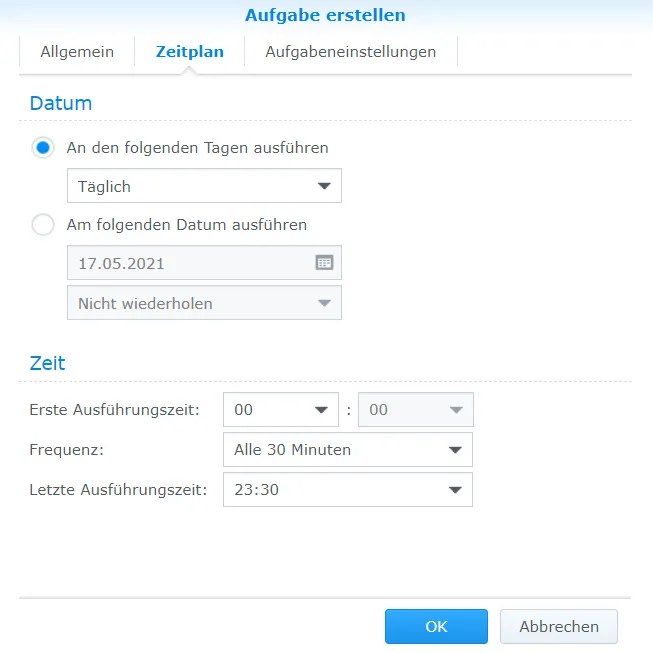
I enter a frequency of every 30 minutes. If you know when the IP address changes, you can of course limit the time period. Of course, you can also set a higher frequency.
Troubleshoot
If it does not work, you should first check whether your IP address appears in the domain’s DNS settings. There should be an A entry. If not, you should check the API logs to see why nothing has been updated.
Sometimes, it takes a while until the DNS setting is updated. You can try entering your domain at https://ping.eu/nslookup/ and see which IP address is displayed. Otherwise, you should also open a local terminal and try to ping the domain with ping domain.de.
Suppose you are not using a reverse proxy on another device. In that case, you must set up port forwarding of ports 80 and 443 to the Synology NAS on the router. You can use the built-in reverse proxy or something like Nginx Proxy Manager (more on this later).
An alternative would be QuickConnect from Synology.
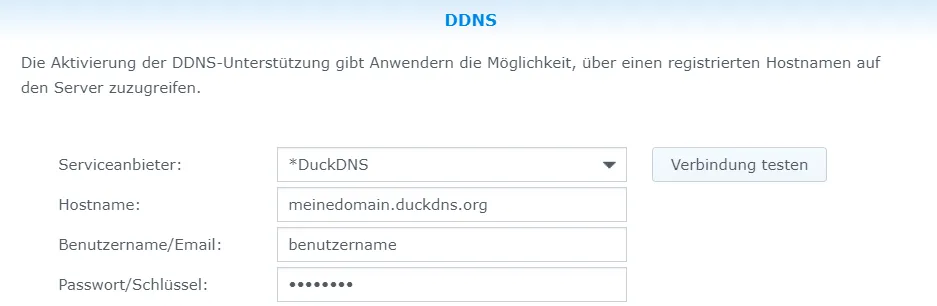
DDNS
Another option is to click on “Add” (predefined service providers) or “Customize” (define your own service provider) under the menu item External Access in the Control Panel.
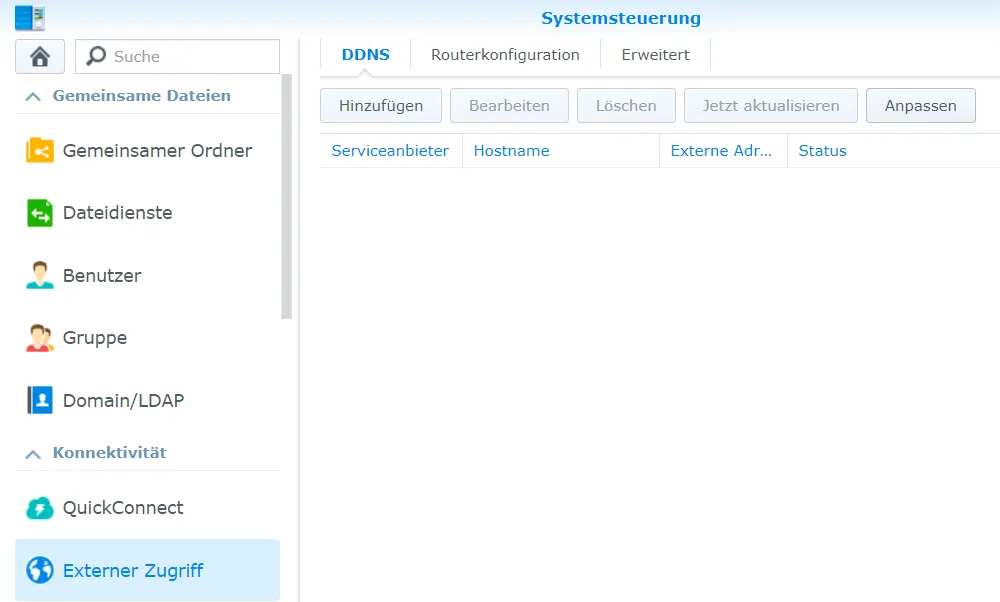
This also allows you to access services such as DuckDNS by creating a new service under “Customize”.
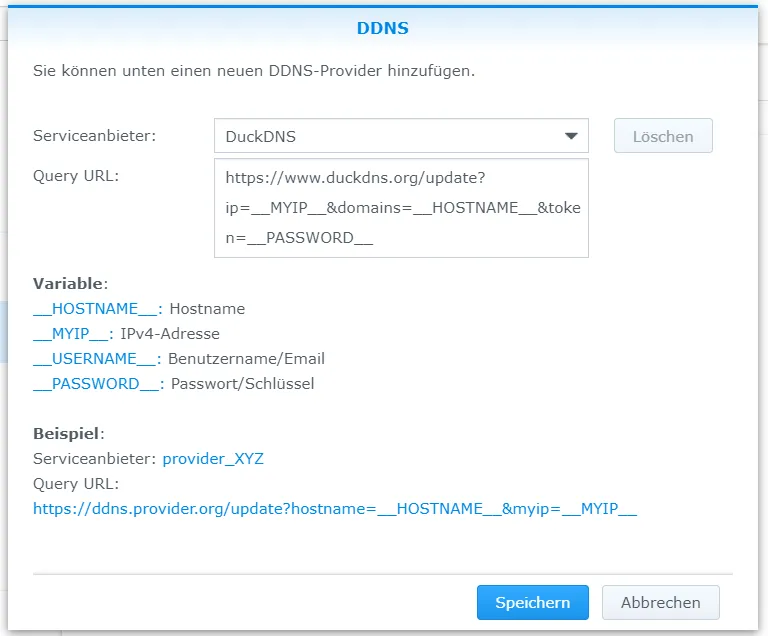
A new DDNS service can then be added.
Security
Next, you should make some security settings if necessary.
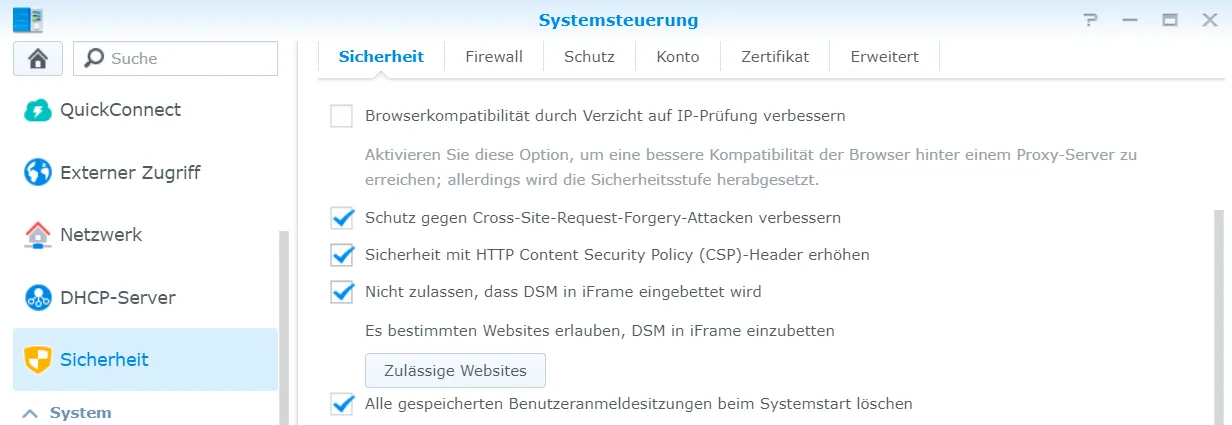
iFrame integration
The integration as iFrame should be deactivated in the control panel as long as you do not need this function.
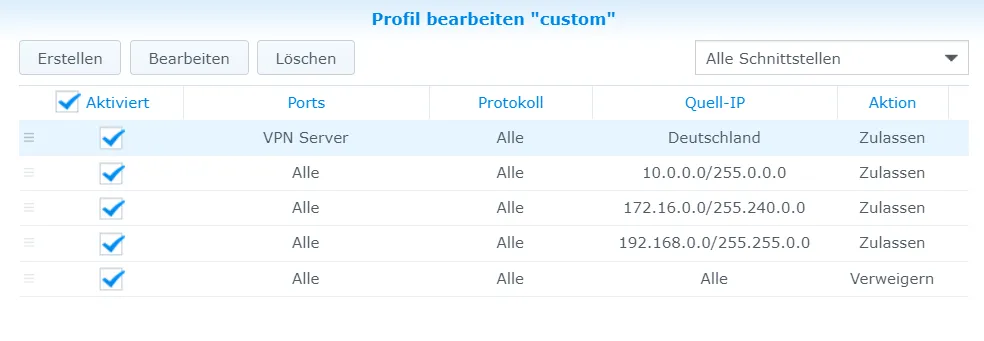
Firewall
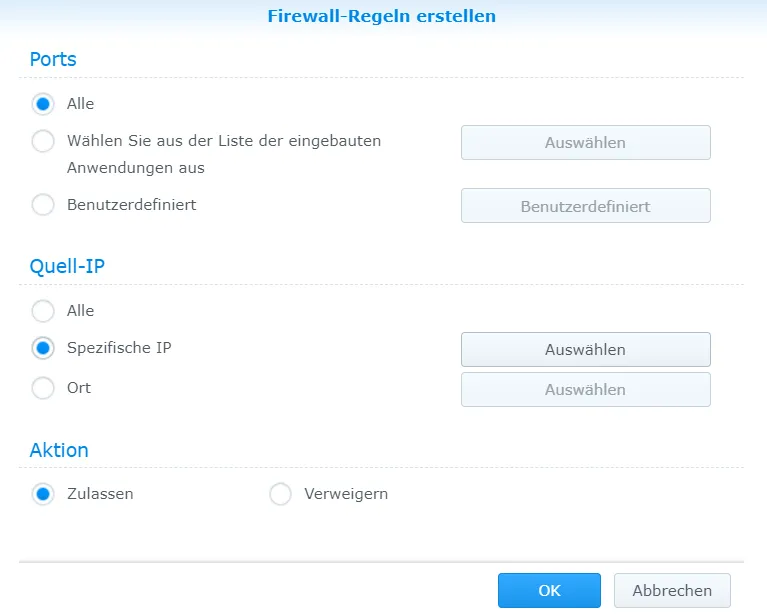
Next, the firewall should be activated.
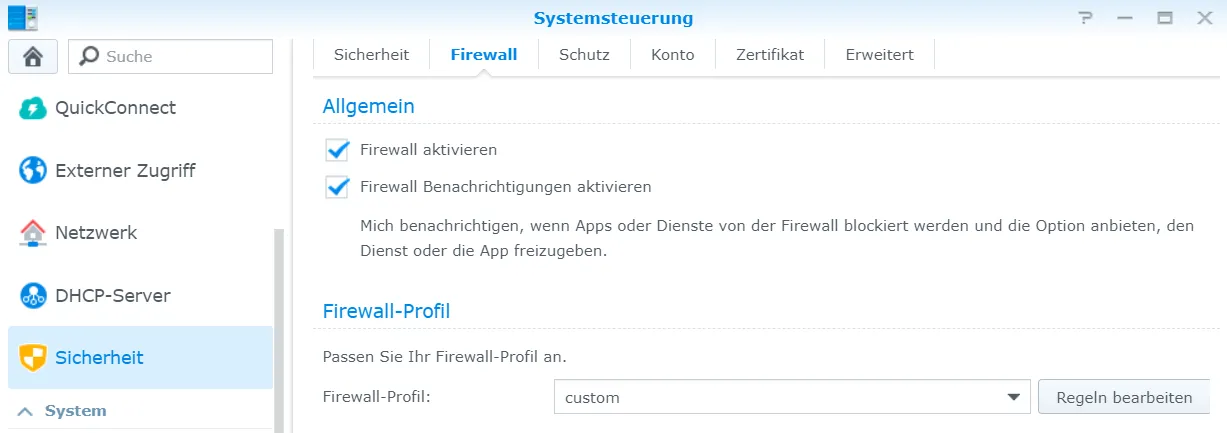
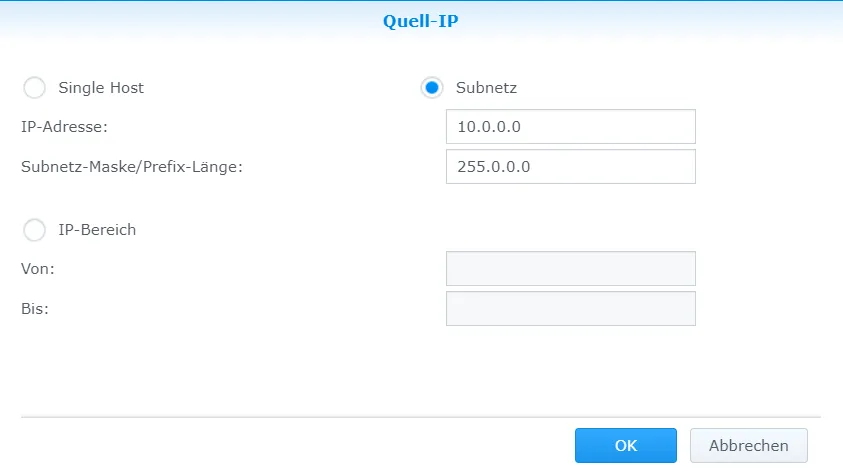
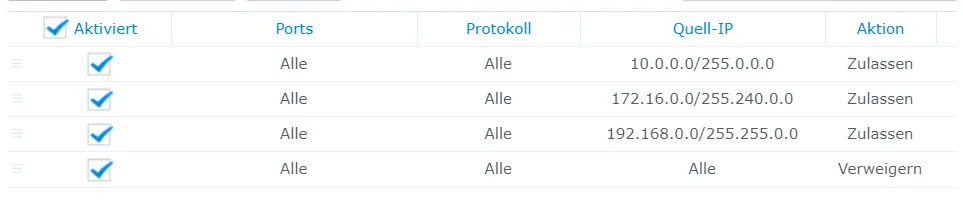
New rules can be created under Edit rules. In the first rule, I want to allow the local network access to all ports.
For the specific IP, I enter the range 10.0.0.0 - 10.255.255.255.
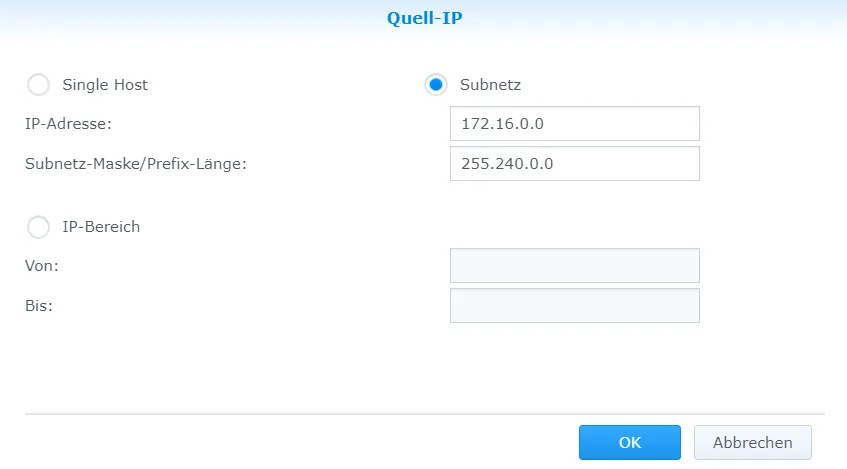
Next, I also want to allow the range between 172.16.0.0 - 172.31.255.255 to access all ports (you could also select individual services instead).
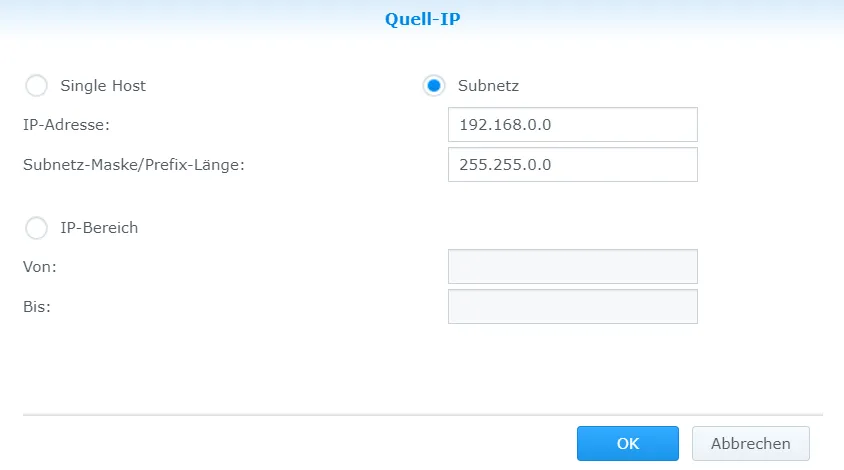
Then I need access from the range 192.168.0.0 - 192.168.255.255
Finally, I deny access with all other IPs. The order of the rules is important, as they are executed from top to bottom. If you put the rule with “Deny” at the top, the remaining rules are no longer observed.
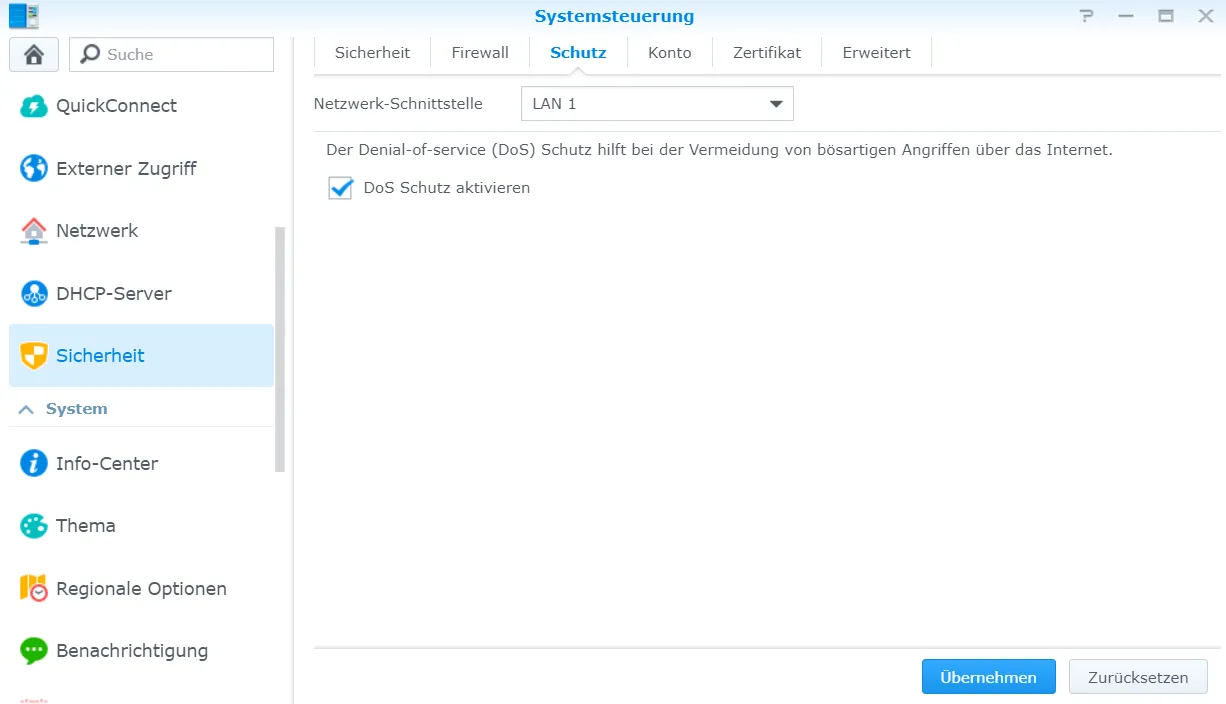
DoS protection
Next, I activate the DoS protection.
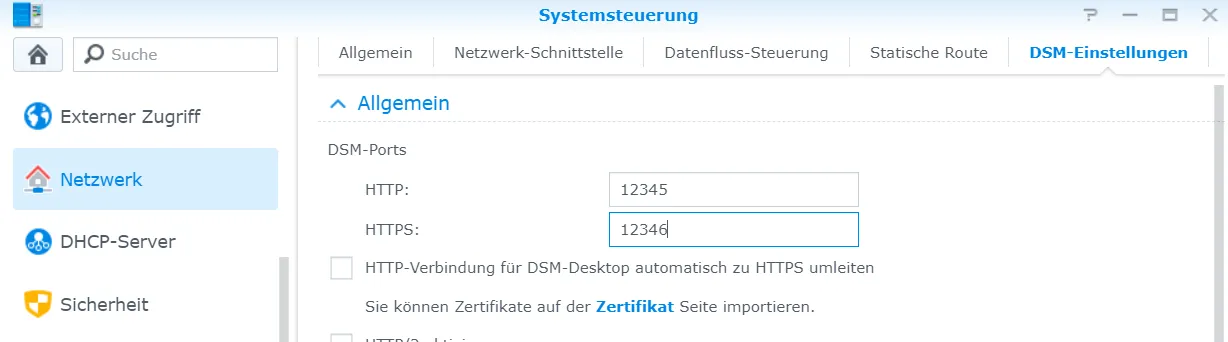
Change default ports
Finally, I change the default ports in the DSM settings.
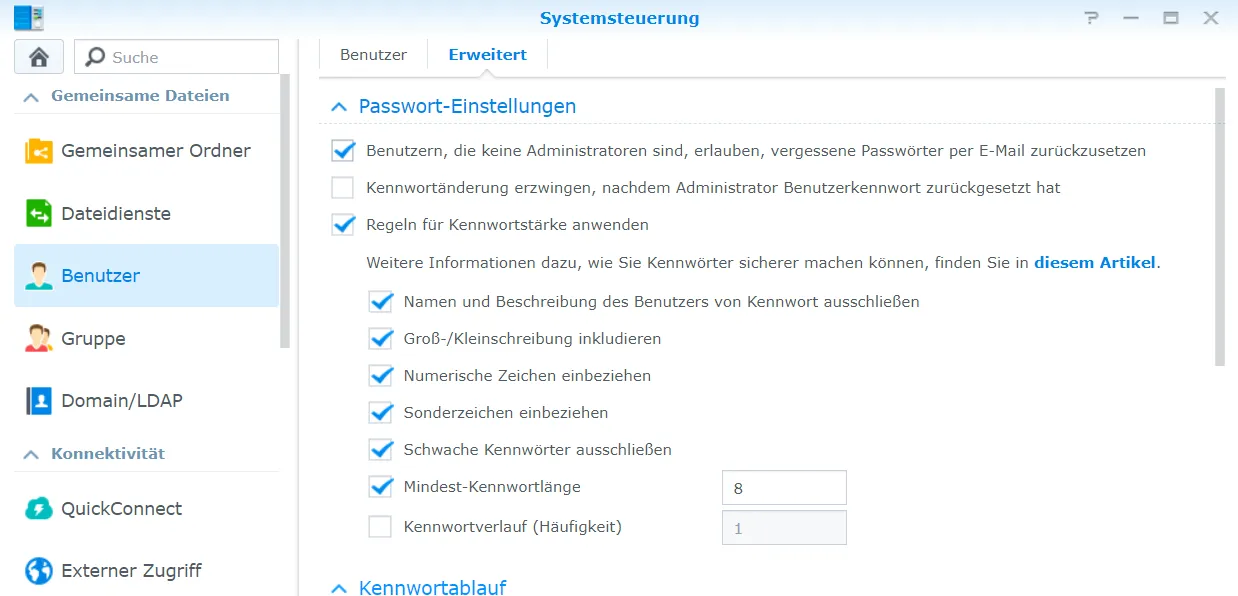
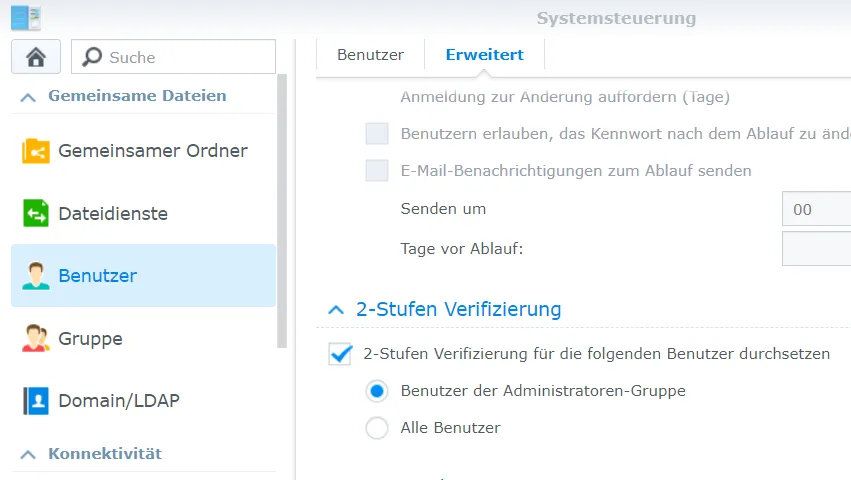
Password settings
For all users, I specify that special characters must appear in the password and that weak passwords should also be excluded.
In addition, 2-factor authentication is to be enforced for admin users.
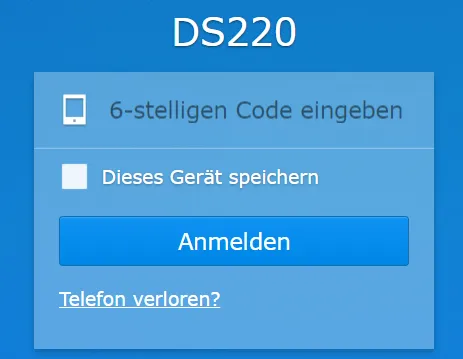
The setup wizard then opens. An authentication application is required. The following software is possible, among others:
Android - Google Authenticator iOS - Google Authenticator Windows - WinAuth MacOS - Keepas
The next time you log in, you will be asked for the token.
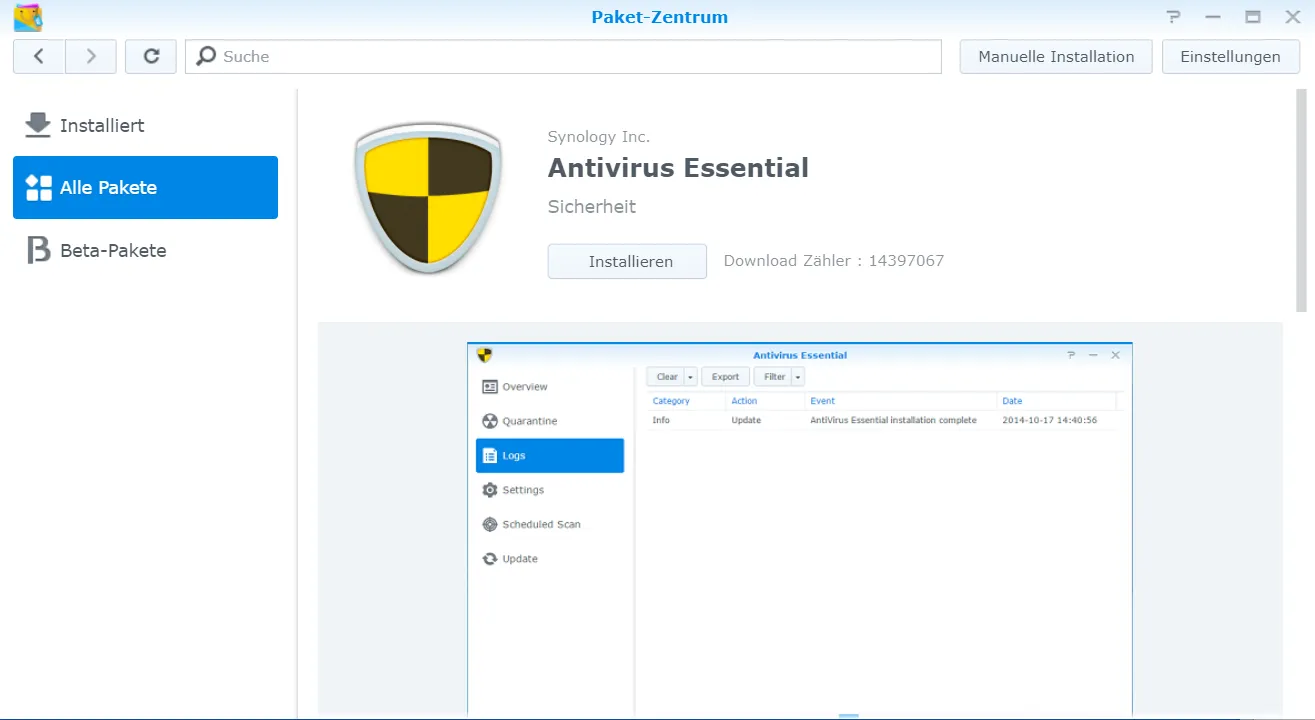
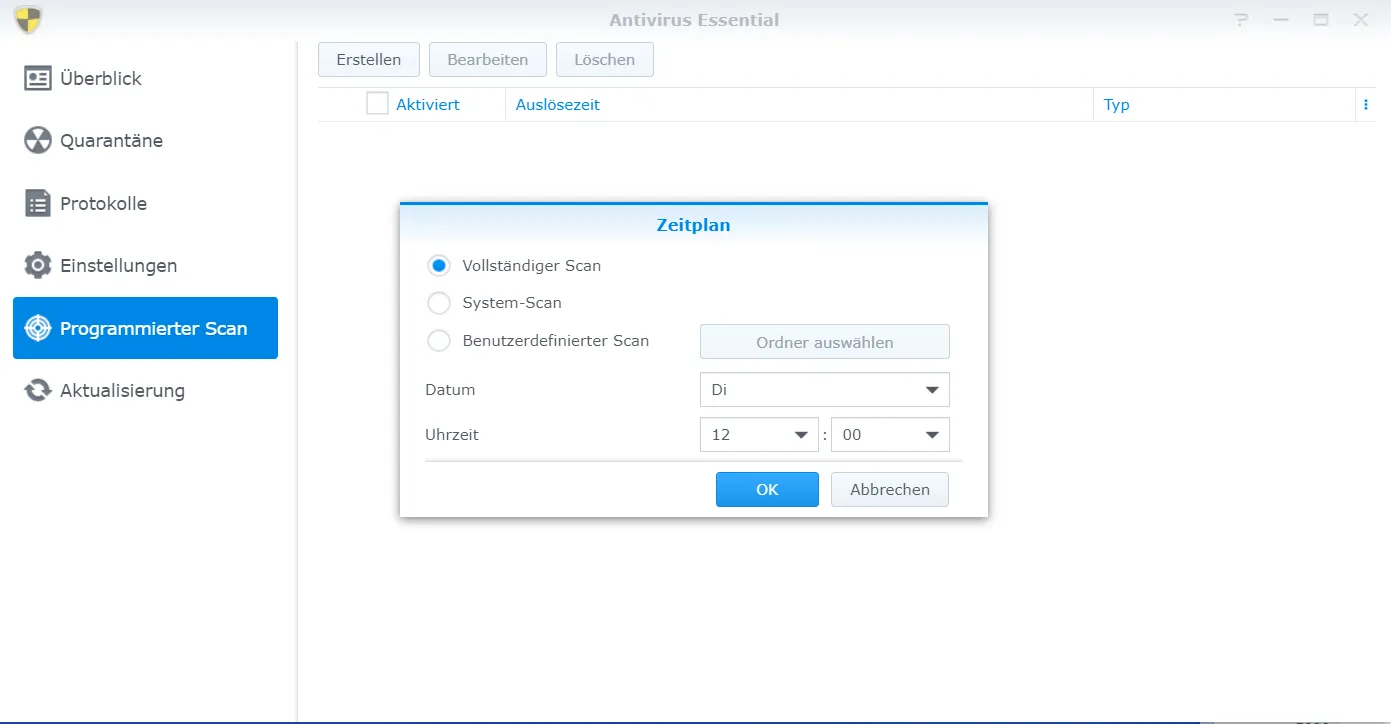
Antivirus
I also install an antivirus program from the package center.
Here I run the full scan once (shouldn’t take too long if the NAS is still pretty empty).
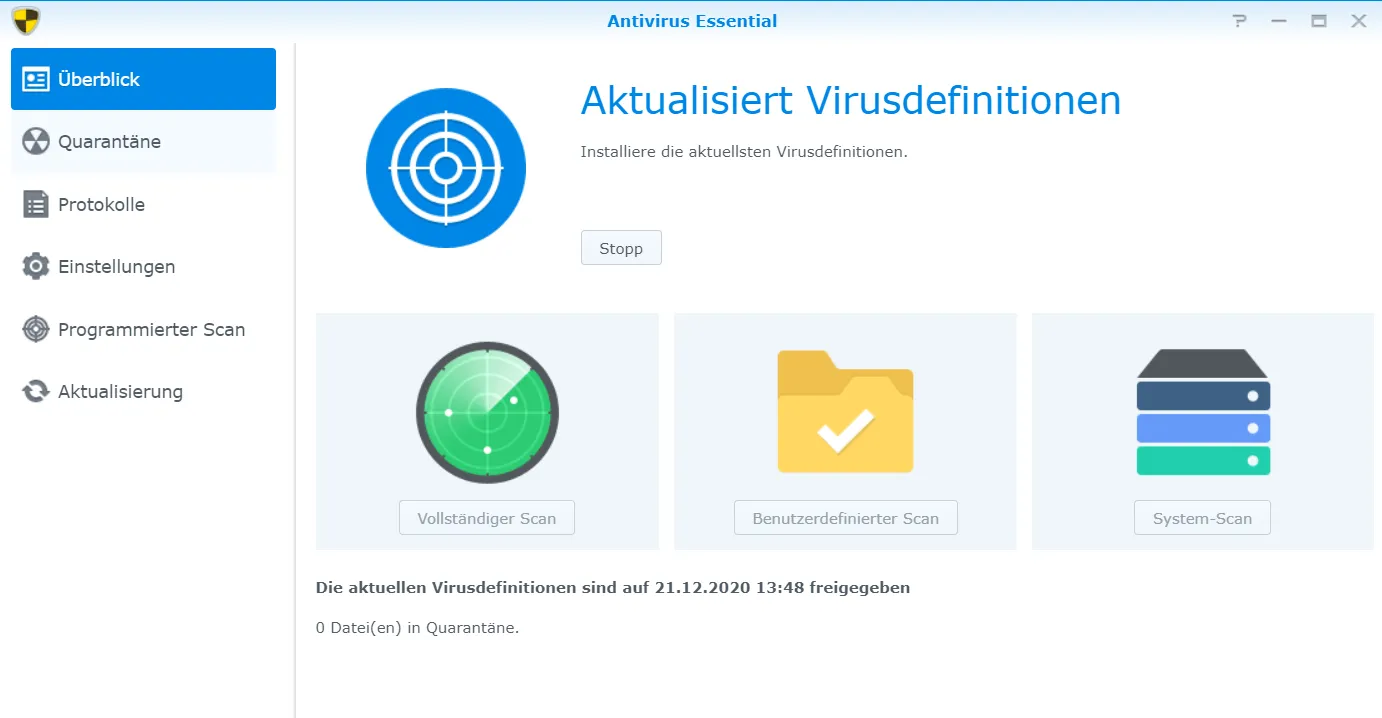
After that I create a scheduled scan, once a week.
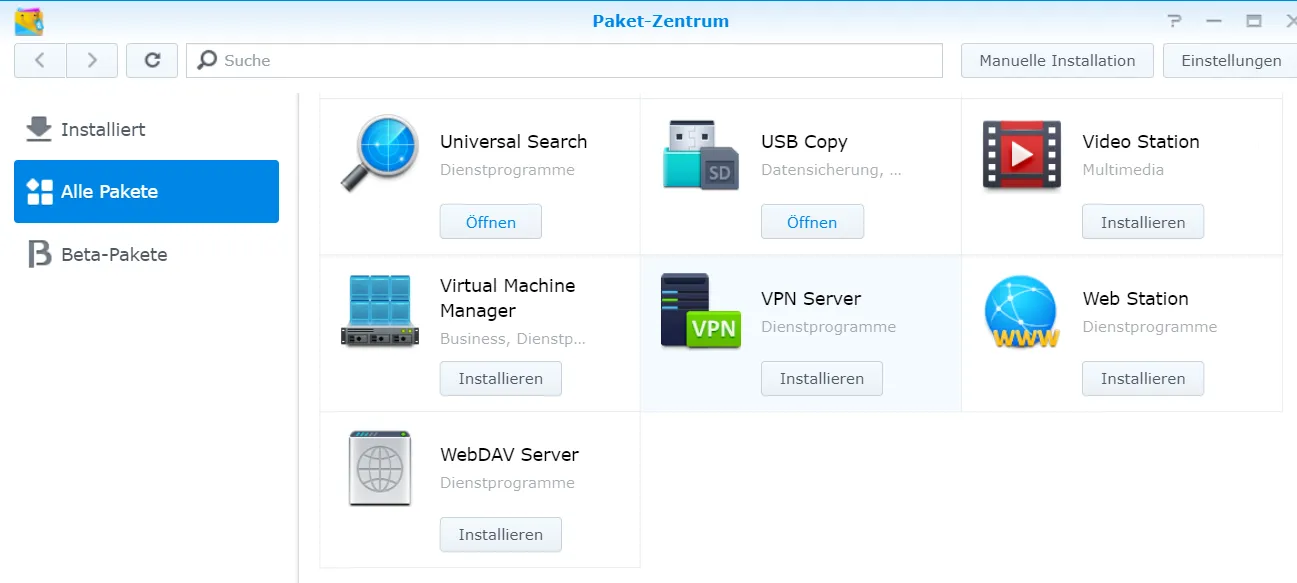
VPN
I don’t use the Synology for this, but a VPN can be set up. To do this, download the VPN server from the package center.
A firewall notification appears. I want to use OpenVPN, so I just select the port.

You can adjust the rule if you intend to use something other than the VPN service from abroad.
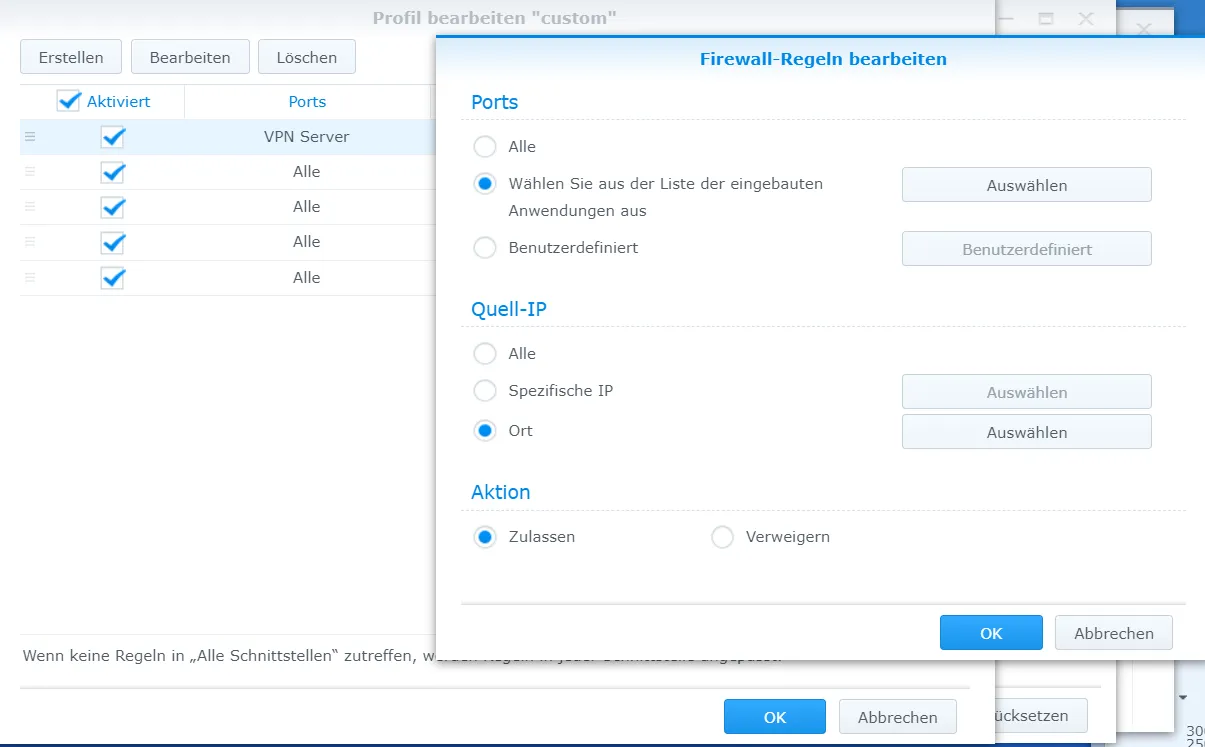
This then looks like this.
Now the OpenVPN server must be activated in the newly installed program.
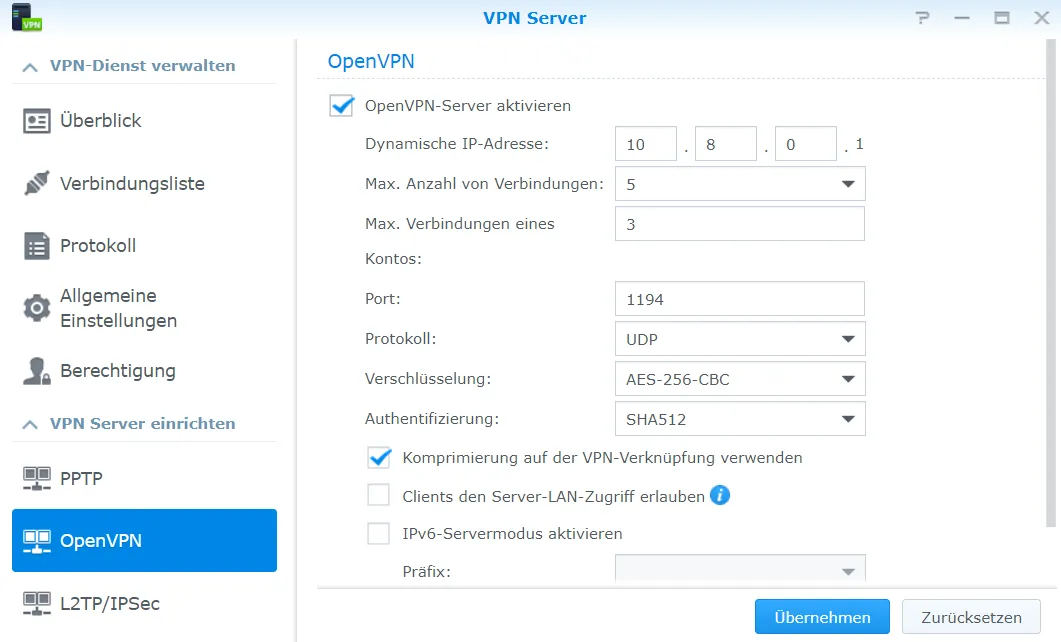
A share must be created for the Synology DiskStation in the router.
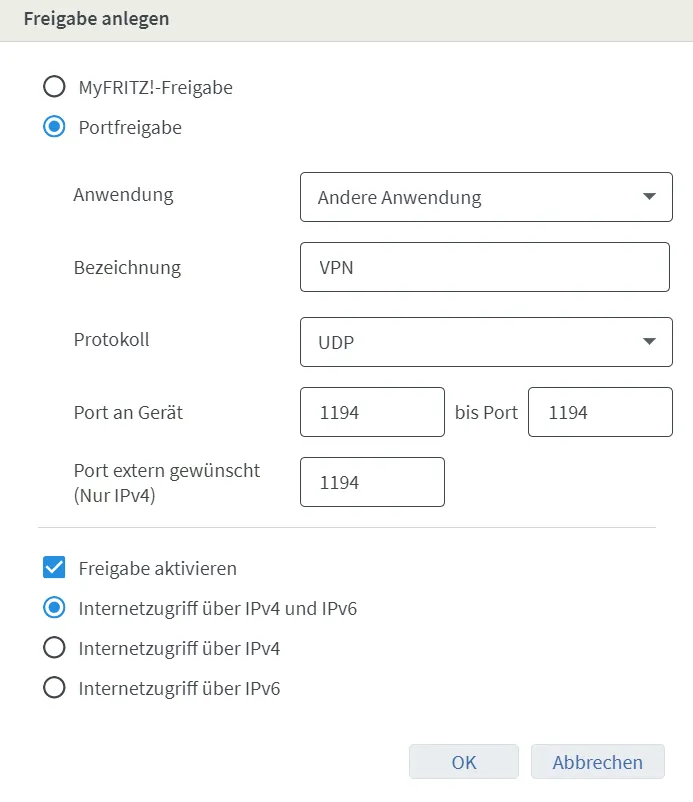
Port sharing is unnecessary if you forward a domain to port 1194 of the NAS in your proxy manager. How to get an Nginx proxy manager running is described later.
It is then possible to connect with the configuration file from the DiskStation. It must be integrated into the client’s OpenVPN program (i.e., computer or smartphone).
USB Copy
Now I would like to take a closer look at a few applications. First of all, the pre-installed USB Copy. It is only pre-installed if there is a USB Copy button on the NAS, as on my DS220+.
I create a new shared folder for this.
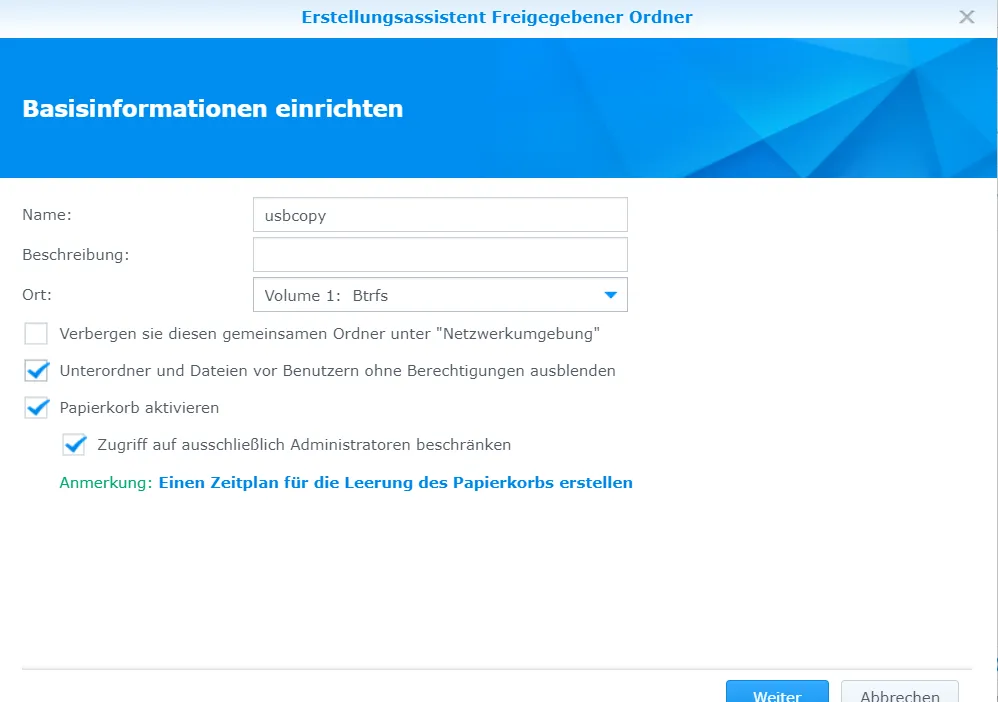
Then activate the USB Copy button and select the newly created folder as the destination.
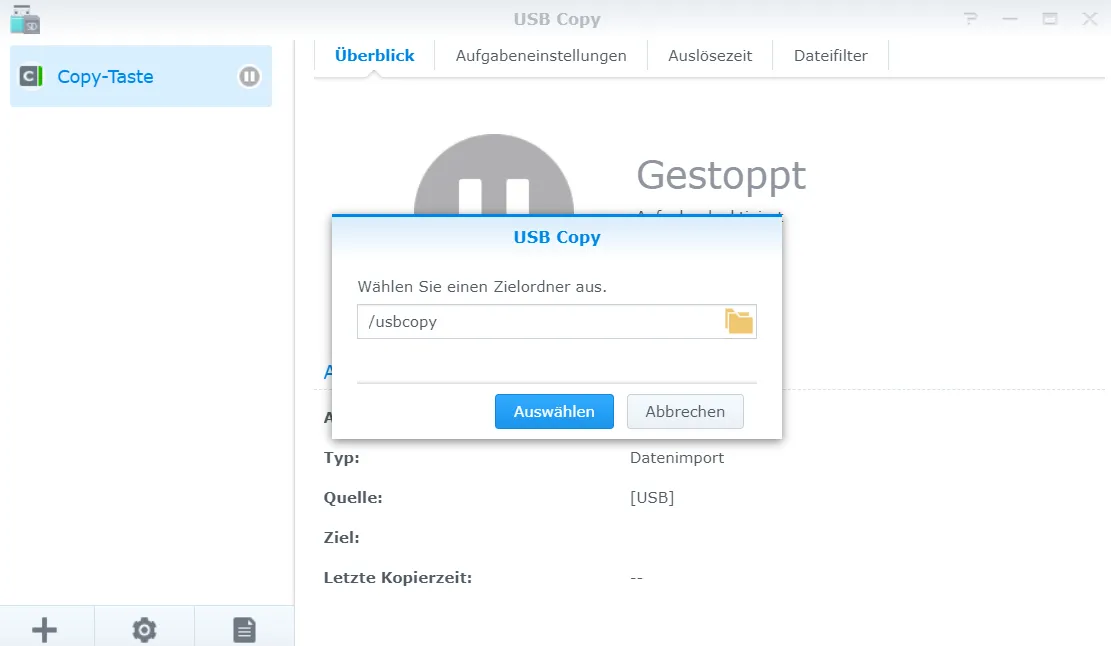
That’s it already. Suppose a USB stick is now inserted into the port next to the button, and the button triggers the copy process. In that case, all files on the USB stick are copied to the NAS in the usbcopy folder.
Cloud Sync
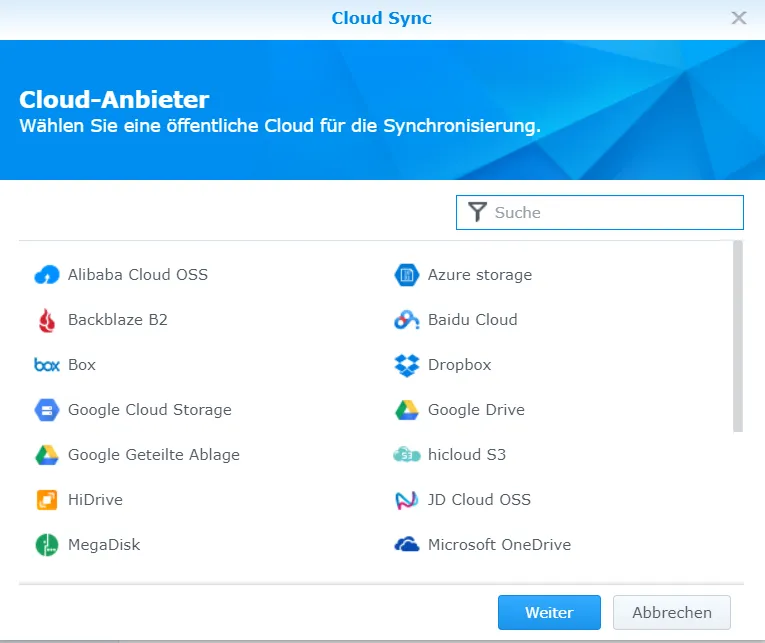
With Cloud Sync you can synchronize some data with cloud providers.
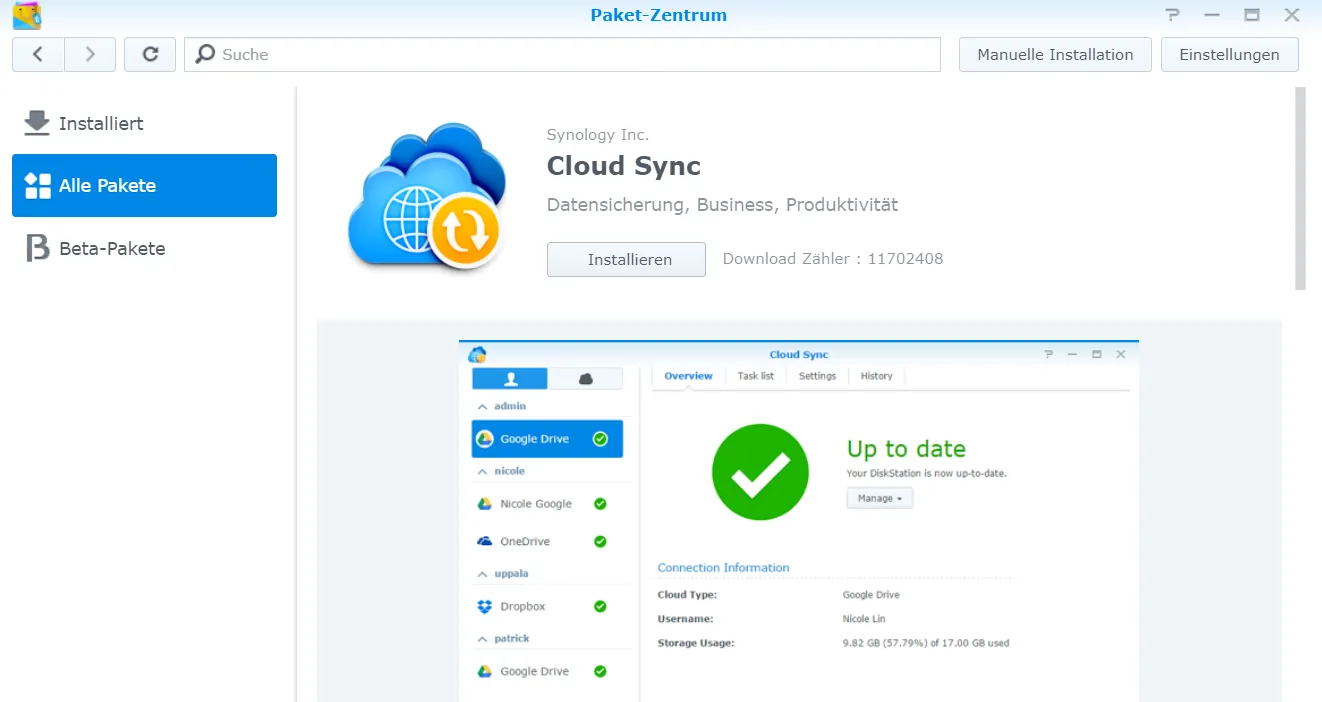
You can use several providers, including Box, Dropbox, Google Drive, Microsoft One Drive and WebDAV.
For bidirectional connections, make sure that the data in the cloud is deleted when it is deleted on the NAS.
Docker
I like to use Docker for many services, so I would also like to install it on the Synology DiskStation.
Docker installation
Docker is located in the package center. Please note that this is currently version 18.09.0.
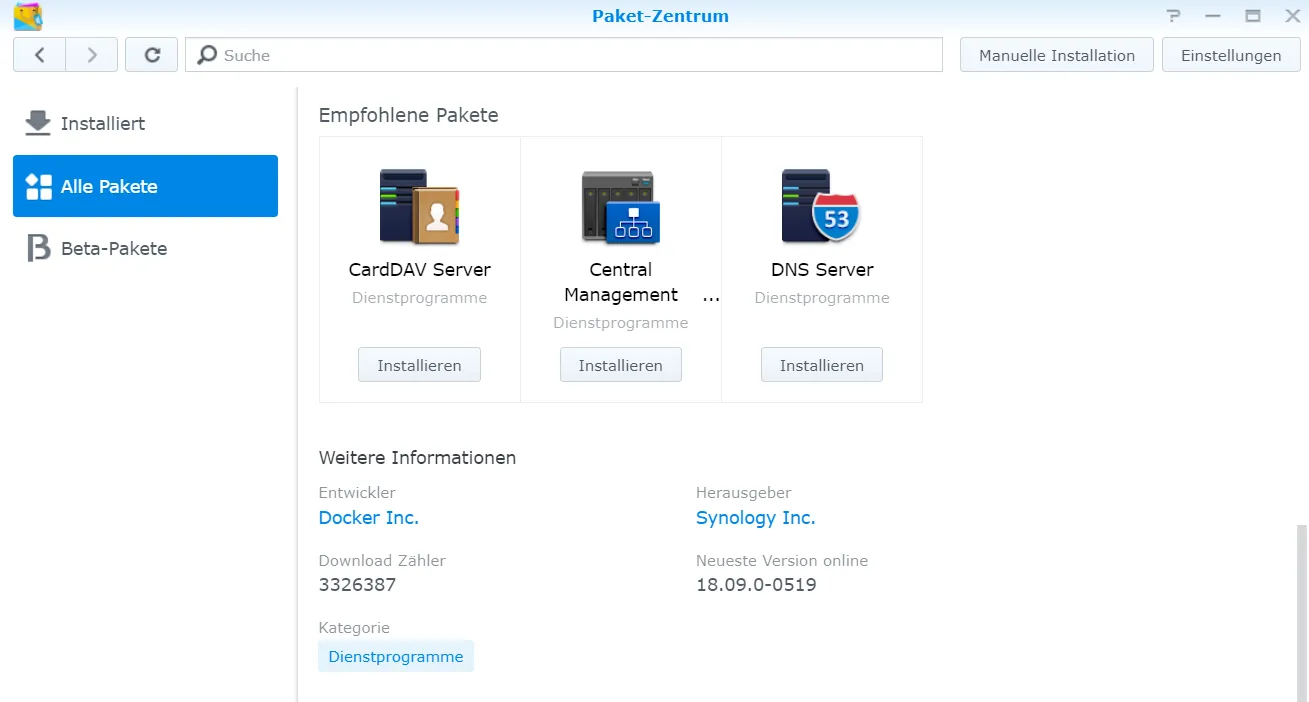
The latest version is 20.10.6. Version 18.09 will be three years old in a few months. Synology says that Docker is responsible for the package and the associated updates. Still, I doubt that this is the whole truth. I also understand that you can’t upgrade to version 20; too many things might be incompatible. But version 18.09.9 would have been nice.
You now have two options. One option is to install the latest Docker Engine via SSH. The advantage of this is that you can also install Docker-Compose. The disadvantage is that there is no graphical user interface, and the integration could be better. I decided to install the old Docker Engine from the package center.
Docker update
You should usually receive further Docker updates via the package center. If this is not the case, it is also possible to download the latest installation file from the Synology archive and install it manually.
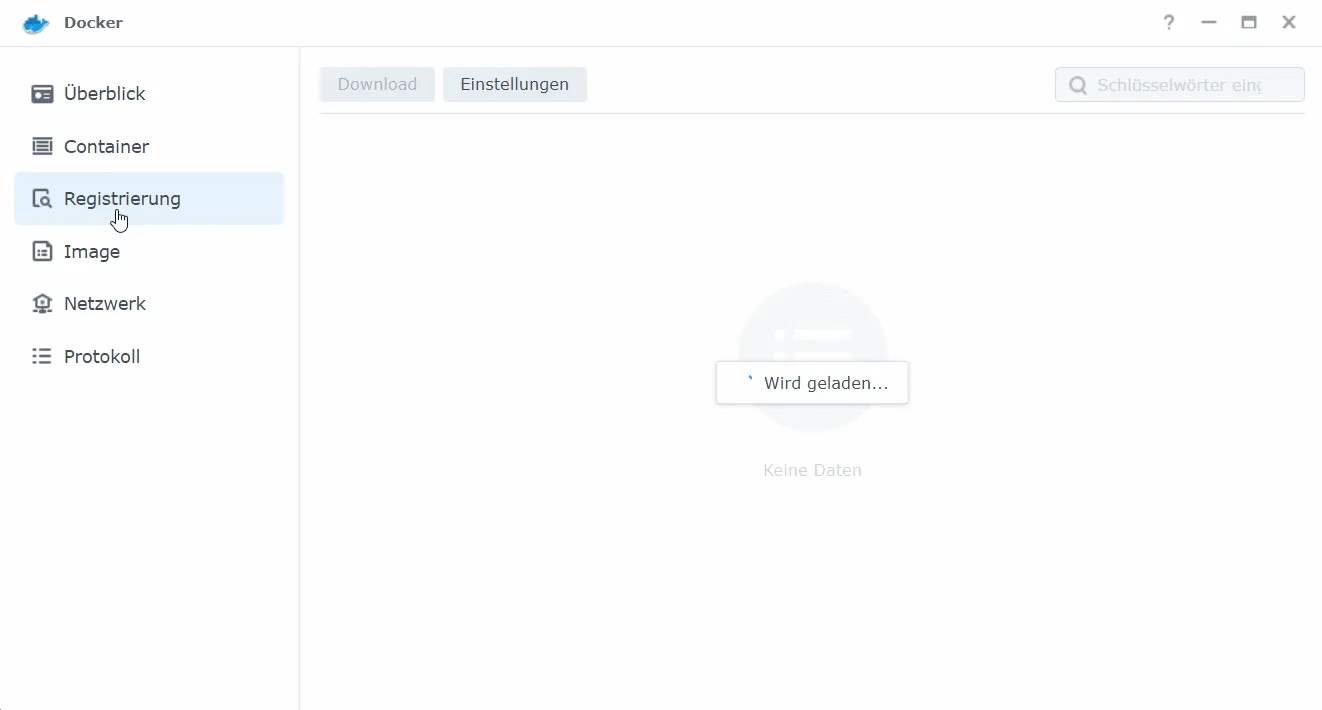
Portainer
First, I would like to install Portainer. This can now be used to run Docker-Compose. It can also be used to create a new MacVLAN network.
Portainer installation
To install Portainer, I search for Portainer in the registry and select the portainer/portainer-ce image.
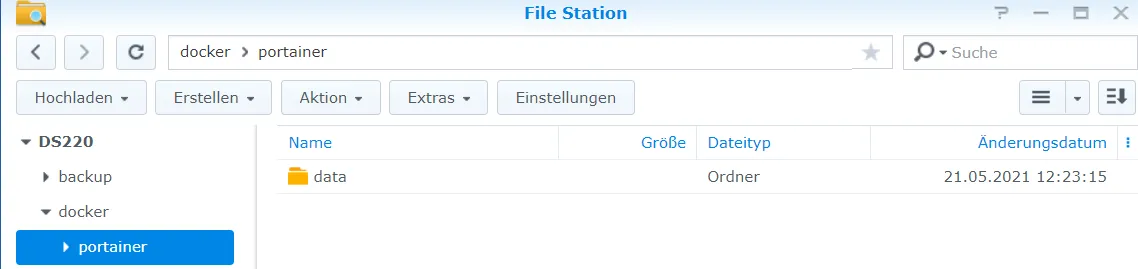
In the Docker folder, I create the subfolder portainer and the subfolder named data.
Portainer requires root access, so installation via the Docker interface is impossible. However, it is possible via the task manager.
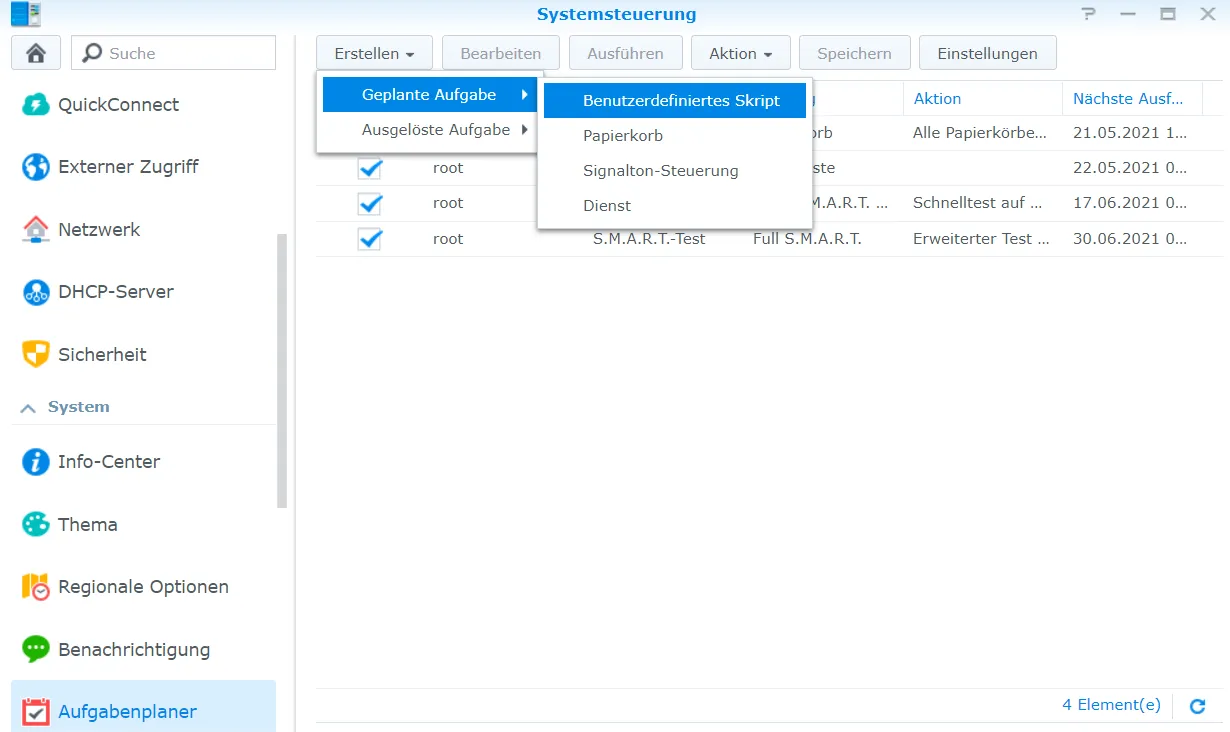
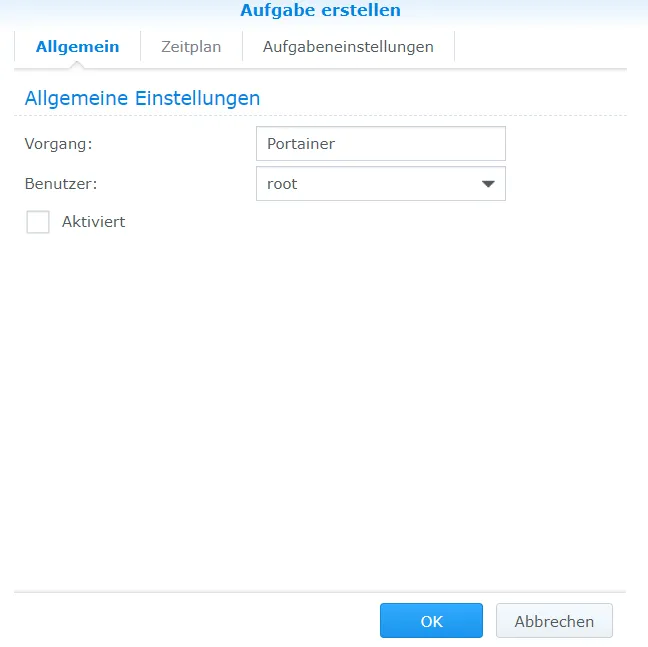
I create a custom script. It doesn’t need to be enabled (I don’t want a schedule).
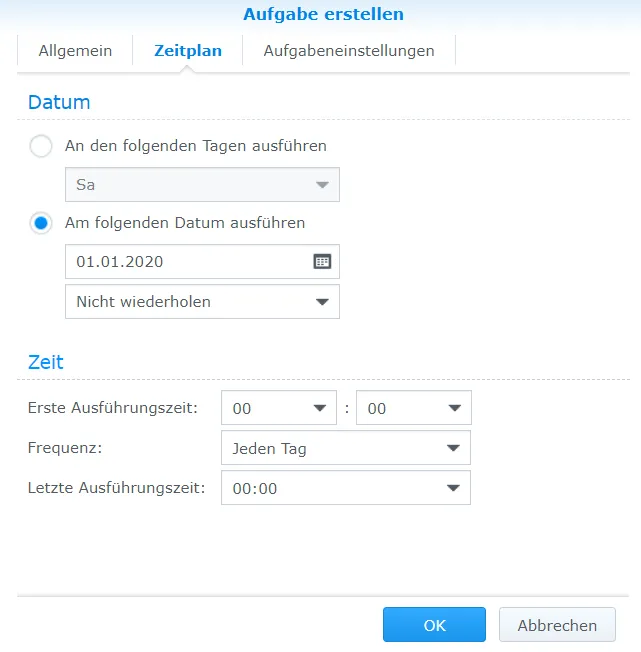
I set a past date in the schedule.
The following code is entered in the field in the task settings:
docker run -d -p 9000:9000 --name portainer --restart always -v /var/run/docker.sock:/var/run/docker.sock -v /volume1/docker/portainer/data:/data portainer/portainer-ceIf required, you can link port 9000 to another port. For example, if you want Portainer to be accessible under port 8765, change the code from 9000:9000 to 8765:9000. If the Docker folder is not located on volume1, this part must also be adapted.

As soon as the task has been created, we press execute. After execution, nothing happens at first. However, you will see a new container in the Docker interface.
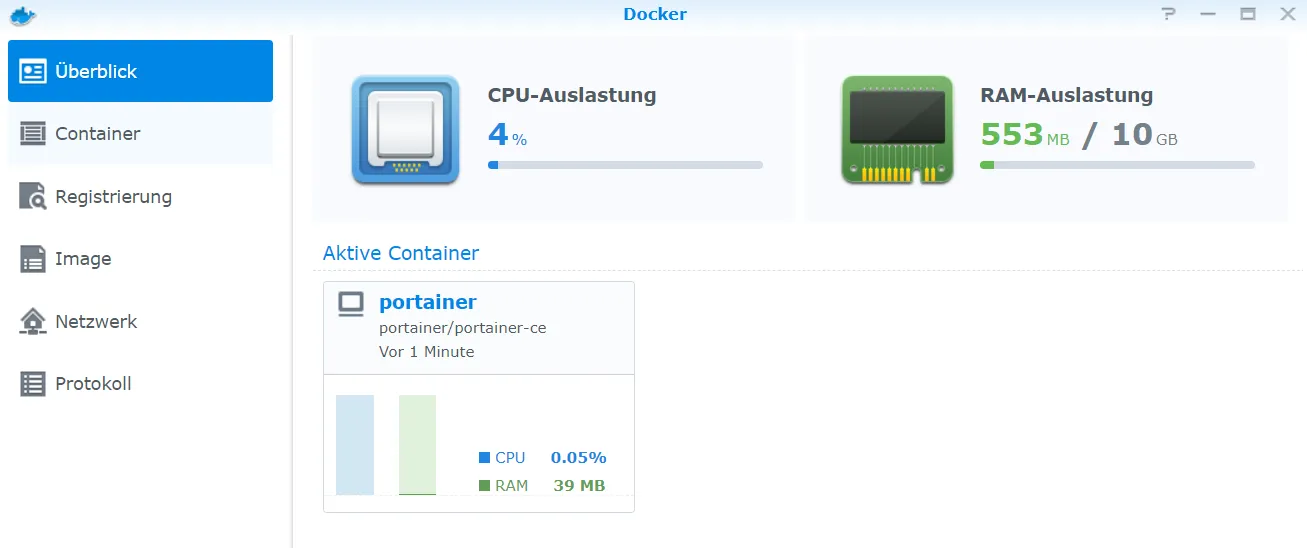
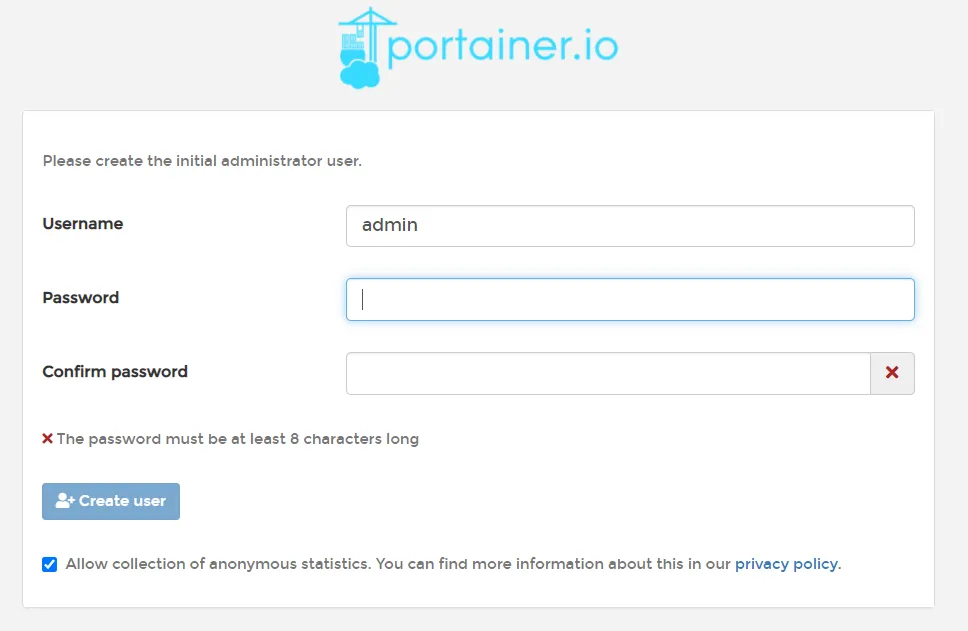
We call up the Portainer interface by calling up the IP address of the NAS with the port specified above in a web browser. Here you can create an admin account.
Select Docker in the next window. Portainer will then run.

Portainer Update
At some point, you will also want to update Portainer. This is impossible via the WebGUI; you will only be notified of a new update. On Github, you can view past releases.
First you have to download the image again.
You must then stop and delete the running Portainer container.
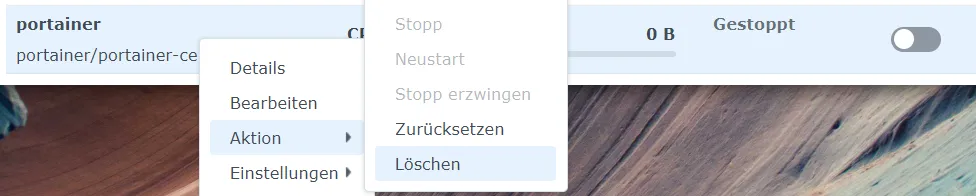
It can then be restarted via the scheduled task.
Nginx Proxy Manager
If another device is not already serving as a reverse proxy, you should set up a proxy on the NAS. Personally, I use a Raspberry Pi (see other blog post) or even better a Nuc, but it is also possible on the Synology NAS. I would like to use the Nginx Proxy Manager.
Nginx Proxy Manager Preparation
First I create a new share folder.
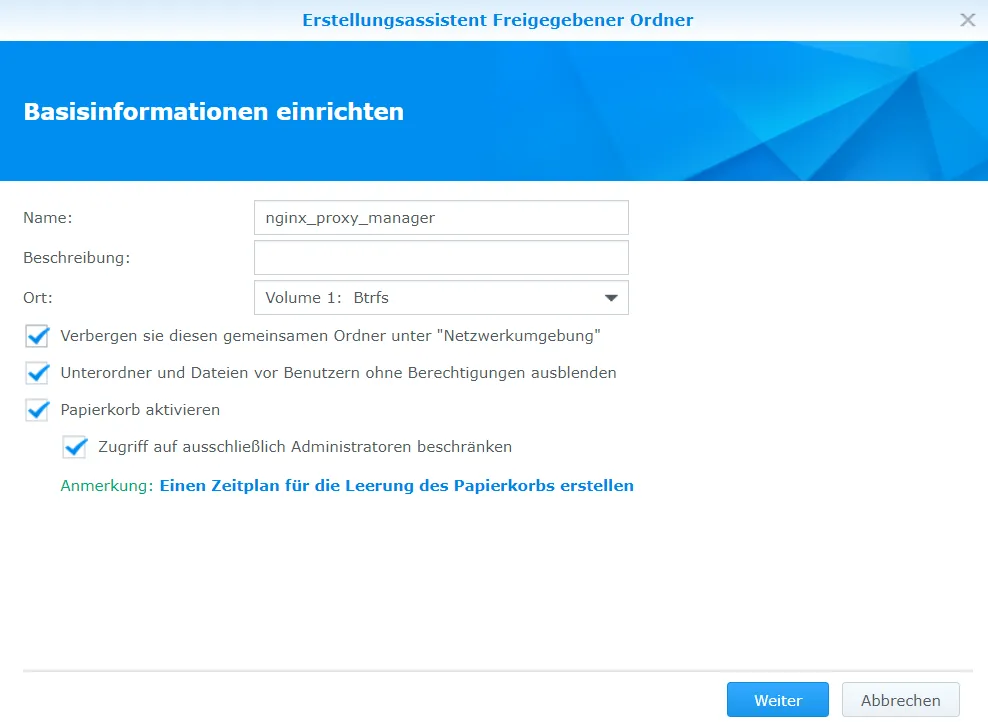
This time, for once, I don’t activate the extended file integrity.
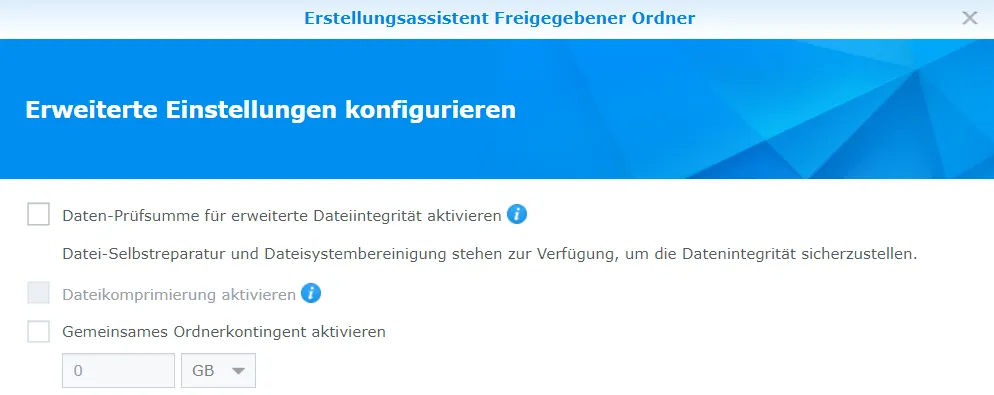
I then put three new folders in this shared folder.
volume
├── nginx_proxy_manager
│ ├── data
│ ├─── db
│ ├─── letsencrypt
New MacVLAN network
Nginx Proxy Manager needs ports 80 and 443 to work, but the NAS blocks port 443 for its own needs. I add a new network in the list of networks.

I choose an arbitrary name and use macvlan as the driver.
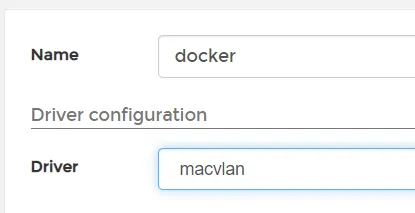
Then I have to specify the network, it should be eth0. On a Synology NAS with two LAN ports, you also have the eth1 network that you could use.

I enter the IP range of my network as the subnet. Gateway is the IP address of my router. In this case, I select the IP range from 152 to 159, which is outside the DHCP range of my router, i.e. it does not get in the way of this network.

I leave IPv6 blank and create the network.
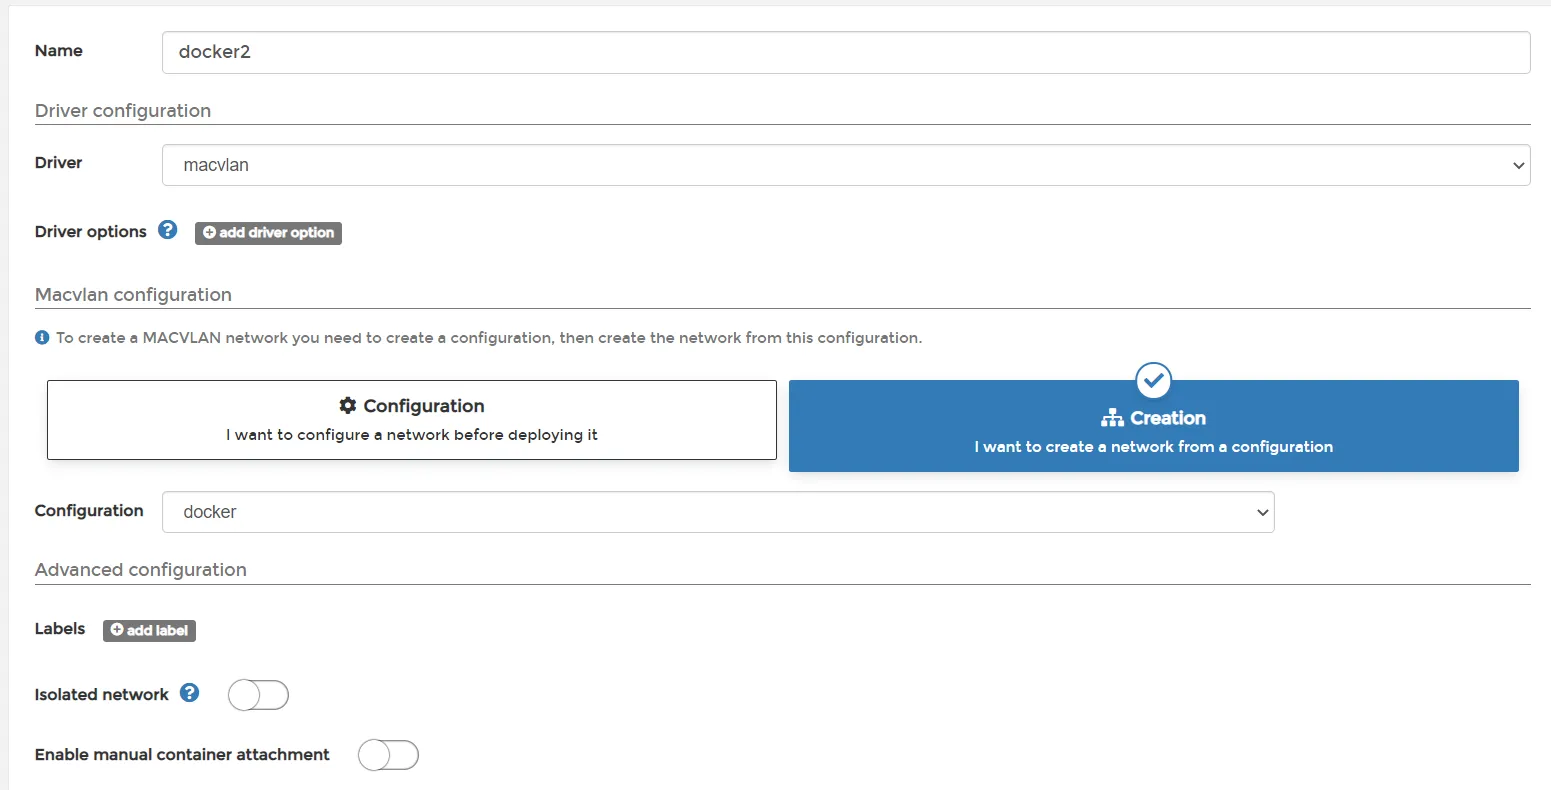
Now I add another network. This time I use Creation instead of Configuration.
Nginx Proxy Manager Installation
I create a new stack under “Stacks”.
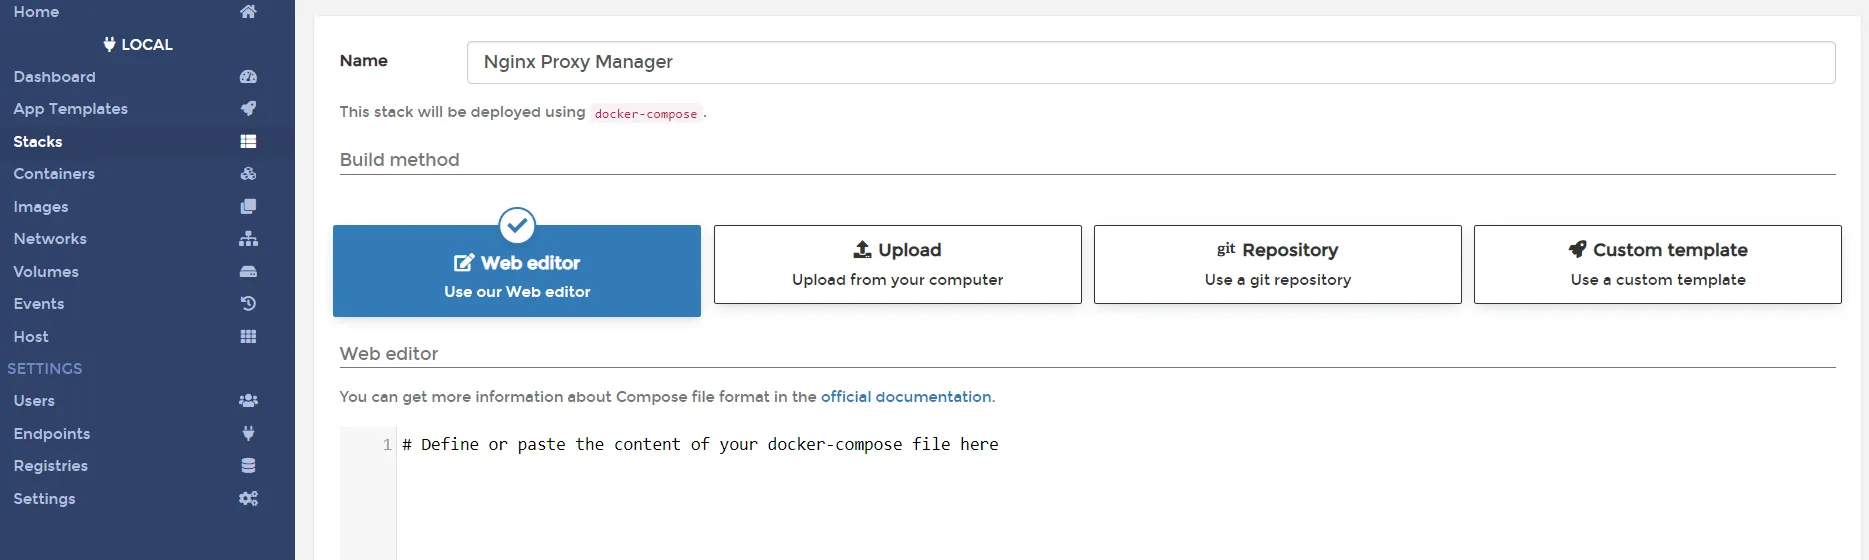
The great thing is that Portainer finally supports Docker Compose. So we enter the Docker Compose instruction.
version: "3.9"

### Networks ###
networks:
    docker2:
        name: docker2
    internal:
        external: false

### Services ###
services:
    nginx-proxy-manager:
        container_name: nginx-proxy-manager
        image: jc21/nginx-proxy-manager
        restart: always
        networks:
            - docker2
            - internal
        ports:
            - "80:80"
            - "443:443"
            - "81:81"
        environment:
            DB_MYSQL_HOST: npm_db
            DB_MYSQL_PORT: 3306
            DB_MYSQL_USER: npm
            DB_MYSQL_PASSWORD: npm
            DB_MYSQL_NAME: npm
            DISABLE_IPV6: "true"
        volumes:
            - /volume1/nginx_proxy_manager/data:/data
            - /volume1/nginx_proxy_manager/letsencrypt:/etc/letsencrypt
        depends_on:
            - npm_db

    npm_db:
        container_name: npm_db
        image: mariadb
        # image: yobasystems/alpine-mariadb:10.4.17-arm32v7
        # Use the lower image with an ARM CPU
        restart: always
        networks:
            - internal
        environment:
            MYSQL_ROOT_PASSWORD: npm
            MYSQL_DATABASE: npm
            MYSQL_USER: npm
            MYSQL_PASSWORD: npm
        volumes:
            - /volume1/nginx_proxy_manager/db:/var/lib/mysql
The network name should be adjusted if a different one is used. The password can be modified. The volume must also be adjusted in three places if it has been named differently. Now you have to wait a little.

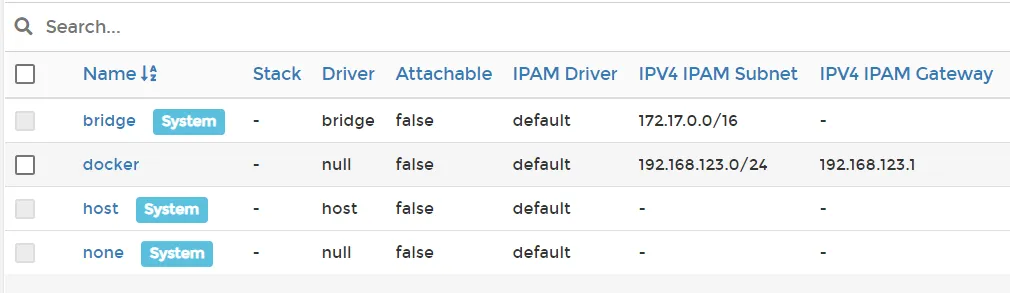
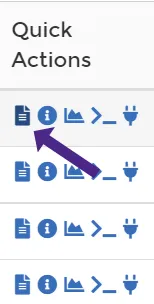
I click on nginx-proxy-manager to see which IP address it has. This is at the bottom.
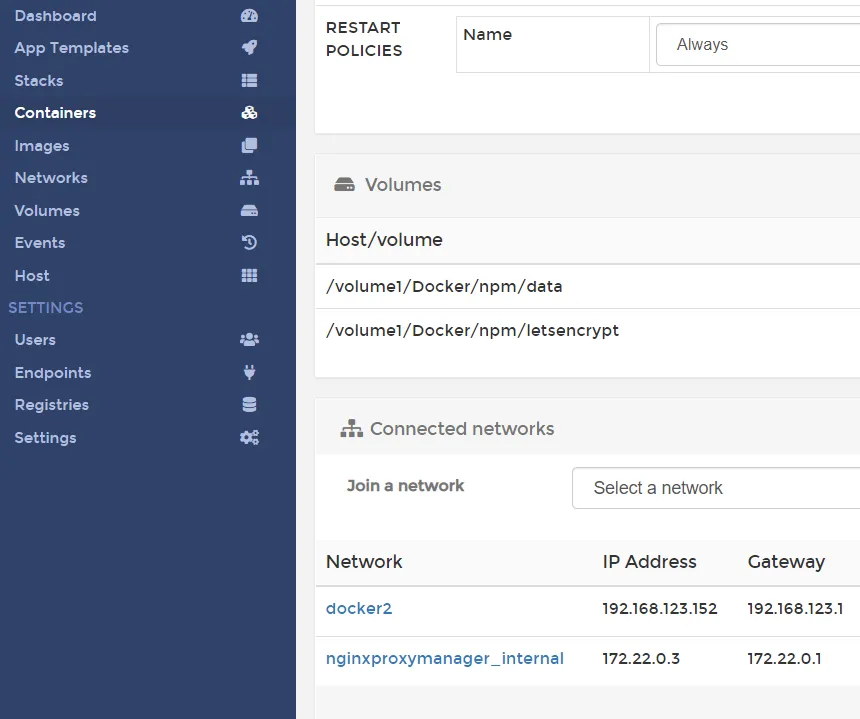
I visit this IP address including port 81 with my browser and get to this page (i.e. 192.168.123.152:81 for me).
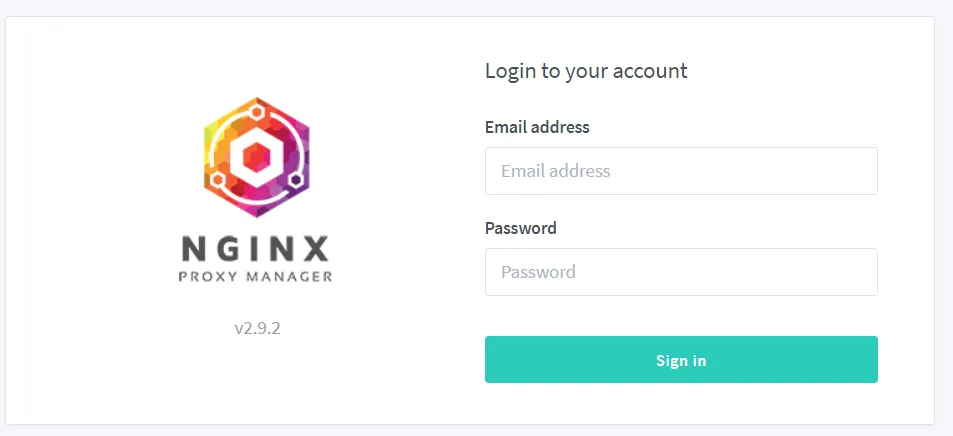
Here I can log in with admin@example.com and changeme as password. The login data should also be changed immediately. You must allow access to ports 80 and 443 in the Synology firewall if you have set it up. Now you can enable ports 80 and 443 (preferably not 81!) for this IP address in the router and have thus set up your nginx-proxy-manager.
Troubleshooting
What should you do if the web interface cannot establish the connection? First, you can check the logs of the two containers to see if there is an error.
You can then try to adjust the Docker-Compose file and use the default value (“npm”) for the database user, name, and password. However, the DB host remains “npm_db” if you have not named it differently.
You then have the option of using other images. It is crucial here that you delete all folders in the nginx-proxy-manager directory and create them again to ensure that there are no leftovers you do not want to take with you, even if the folders appear empty. This applies, in particular, to the database folder.
[...]
services:
  nginx-proxy-manager:
    container_name: nginx-proxy-manager
    image: jc21/nginx-proxy-manager
    # image: jc21/nginx-proxy-manager:2.9.14
    # image: jc21/nginx-proxy-manager:2.8
  [...]
  npm_db:
    container_name: npm_db
    image: mariadb
    # image: jc21/nginx-proxy-manager
    # image: mariadb:10.6
    # image: yobasystems/alpine-mariadb
    # image: linuxserver/mariadb
Moments
As of June 1, Google Photos will no longer allow you to upload pictures from your cell phone without them being counted against your storage space. This is a pity; a replacement for this could be Moments.
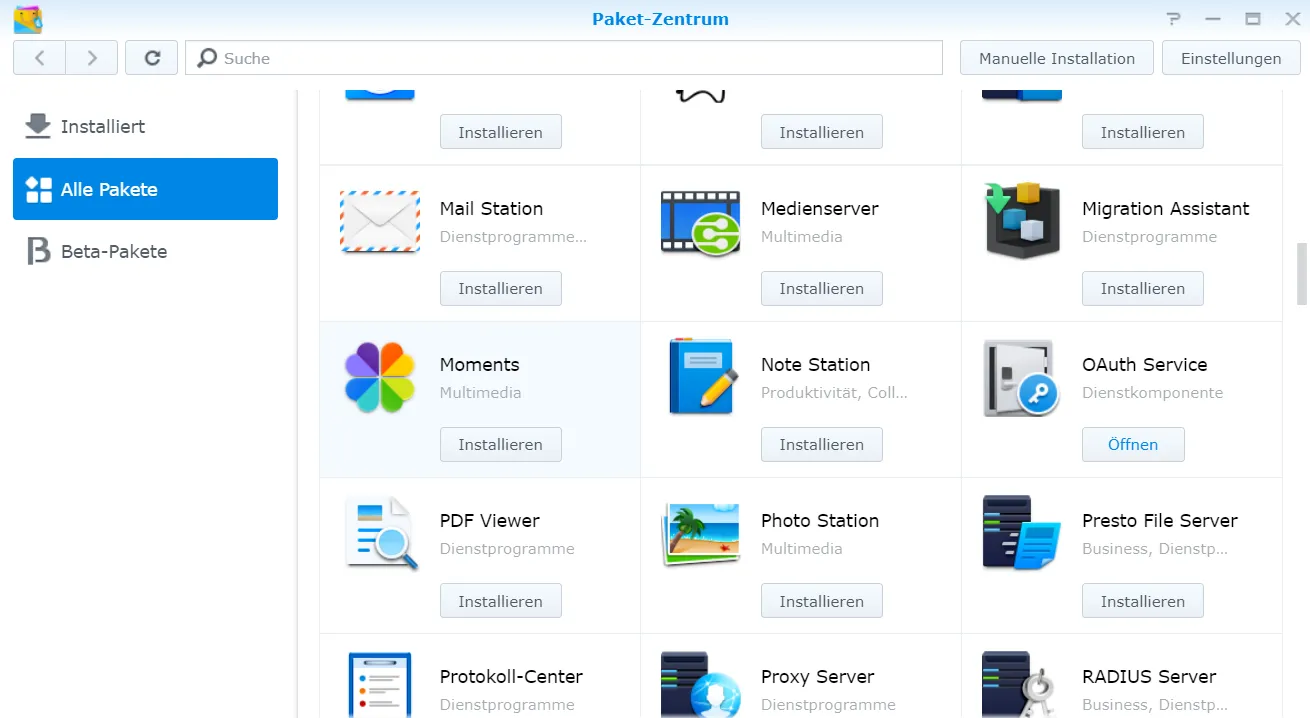
A few more packages are installed during the installation. Then you have to install the smartphone app.
Synology Moments
Easy to refresh your special moments in life.
In the app, you can either enter the local IP address of the DiskStation or forward a domain routed to the home network to the set port in your proxy manager. You can then access Moments while on the move.
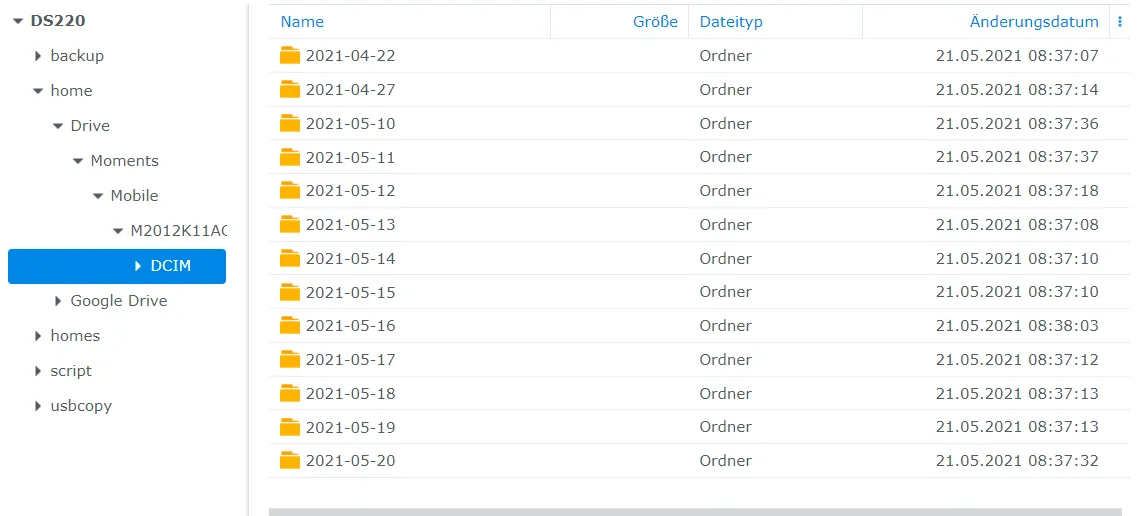
The images from the smartphone are then automatically synchronized with the NAS.
Done
The NAS is now running. If you have any questions or would like further explanations (also about other services), please feel free to leave a comment 😀
Related Articles
Asustor NAS Homeserver Setup with Docker: VPN, Gitea & Calibre
Set up your Asustor NAS as a homeserver step by step: VPN, firewall, reverse proxy, Gitea and Calibre with Docker. The complete NAS homeserver guide.
Install Linkwarden: Self-Hosted Bookmark Manager on Synology
Install Linkwarden on your Synology NAS and take control of your bookmarks. A self-hosted bookmark manager with easy Docker setup – manage links efficiently!
How to Install Paperless-ngx on a Synology NAS with Docker
Learn how to install Paperless-NGX on your Synology NAS — a powerful open-source document management system — using Docker and Portainer. Step-by-step guide.
Paperless office with DMS Paperless-ngx on Homeserver
Install Paperless-ngx with Docker on your homeserver and transform your office into a paperless system. The complete step-by-step guide for your DMS setup.