



Install Yuvomi: Family Planner with Docker and Caddy
Install Yuvomi with Docker and Caddy, get to know the modules and connect the calendar to Google Calendar, iCloud or Nextcloud. Step by step.
Contents
Yuvomi 2.89.1Caddy 2.11Docker 29.9Debian 13Yuvomi is a family planner that you run yourself. Tasks, calendar, shopping list, meal plan, household budget and more live in a single web app that you use on your phone like a normal app. Your data stays on your server, there is no subscription and no provider in between.
In this guide I install Yuvomi with Docker on a Debian 13 server and secure it with HTTPS through Caddy. It also covers how to connect the calendar to Google Calendar, iCloud or another calendar service.
Summary
- Install Docker and create the folder
~/yuvomi. - Create
compose.yaml,Caddyfileand.env. - Start with
sudo docker compose up -dand create the admin account athttps://{{domain}}. - Connect the calendar: feed for Google Calendar, ICS subscription, CalDAV, or the Google connection with credentials from Google Cloud.
What is Yuvomi?
Many households have a separate app for everything: one for tasks, one for the family calendar, one for the shopping list, one for recipes. Yuvomi bundles them. You decide which building blocks (modules) are visible. Anything you don’t need, you switch off and it disappears from the menu.
The modules work together. The meal plan for the next seven days becomes a shopping list with one click, completed tasks earn points that children trade for rewards, and a receipt is attached to the booking and to the inventory item at the same time.
The software is released under the MIT license and is free. It runs as a single container, needs at least 256 MB of RAM and stores everything in one SQLite file.
Prerequisites
sudo you run single commands as administrator, for example the Docker installation. The user you log in with over SSH needs this right. If you only have root so far, create your own user with adduser name and usermod -aG sudo name (replace name with the name you want).{{domain}}. It must point to your server’s IP address with an A record.Push notifications, installing the app on your phone and the Google connection only work with an address that starts with https://.
Install Docker
Connect to the server over SSH. Docker comes from the official Docker repository. First save the key that Debian uses to verify the packages:
sudo apt update
sudo apt install -y ca-certificates curl
sudo install -m 0755 -d /etc/apt/keyrings
sudo curl -fsSL https://download.docker.com/linux/debian/gpg -o /etc/apt/keyrings/docker.asc
sudo chmod a+r /etc/apt/keyrings/docker.asc
Then add the package source. Copy the whole block, including the line EOF:
sudo tee /etc/apt/sources.list.d/docker.sources <<EOF
Types: deb
URIs: https://download.docker.com/linux/debian
Suites: $(. /etc/os-release && echo "$VERSION_CODENAME")
Components: stable
Architectures: $(dpkg --print-architecture)
Signed-By: /etc/apt/keyrings/docker.asc
EOF
Install Docker:
sudo apt update
sudo apt install -y docker-ce docker-ce-cli containerd.io docker-buildx-plugin docker-compose-plugin
All Docker commands in this guide start with sudo. Check that Docker is running:
sudo docker psYou see a table with the columns CONTAINER ID, IMAGE and more, still without rows. A detailed explanation of every step and the variant for Ubuntu is in Docker Basics.
Create folders and files
Create a directory for Yuvomi with two subfolders:
mkdir -p ~/yuvomi/data ~/yuvomi/backups
cd ~/yuvomidataholds the database with all events, tasks and accounts.backupsreceives Yuvomi’s automatic backups.
On start, Yuvomi sets the owner of both folders to user ID 1000, the user it runs as. You don’t have to configure anything. If your user has a different ID (check with id -u), the folders no longer belong to you afterwards. That does not affect operation. When you copy or back up the folders you then need sudo, as in the Backup section.
The compose.yaml
The project’s own docker-compose.yml publishes port 3000 straight to the network, so without HTTPS. I use my own file instead, in which only Caddy is reachable from outside.
nano compose.yamlservices:
yuvomi:
image: ghcr.io/ulsklyc/yuvomi:latest
container_name: yuvomi
restart: unless-stopped
env_file:
- .env
volumes:
- ./data:/data
- ./backups:/backups
caddy:
image: caddy:2
container_name: caddy
restart: unless-stopped
ports:
- "80:80"
- "443:443"
volumes:
- ./Caddyfile:/etc/caddy/Caddyfile
- caddy_data:/data
- caddy_config:/config
volumes:
caddy_data:
caddy_config:env_filereads all settings from the file.env, which you create in a moment../data:/dataand./backups:/backupsconnect the folders on the server to the folders in the container. Your data survives every update.- Yuvomi has no
portsentry. It is only reachable through Caddy.
The Caddyfile
nano Caddyfile{{domain}} {
reverse_proxy yuvomi:3000
}On first start, Caddy gets a certificate from Let’s Encrypt and passes all requests on to Yuvomi. Yuvomi listens on port 3000 inside the container.
The .env
The .env contains two secrets. Generate two random values by running this command twice and copy the outputs:
openssl rand -hex 32Create the file and put the two values into the first lines:
nano .envSESSION_SECRET=first-random-value
DB_ENCRYPTION_KEY=second-random-value
NODE_ENV=production
BASE_URL=https://{{domain}}
SESSION_SECURE=true
TRUST_PROXY=1
TZ=Europe/BerlinRestrict access to the file, because it contains keys:
chmod 600 .env| Variable | Effect |
|---|---|
SESSION_SECRET |
Key for the login in the browser. |
DB_ENCRYPTION_KEY |
Key Yuvomi uses to encrypt the database (AES-256). |
NODE_ENV |
production switches on production mode. Without the line, Yuvomi reports development in its log. |
BASE_URL |
The public address. Yuvomi needs it for links in emails and for the calendar feed. |
SESSION_SECURE |
Send cookies over HTTPS only. |
TRUST_PROXY |
Yuvomi trusts the Caddy in front of it and so sees the visitors’ real IP address. |
TZ |
Time zone of the server. It decides how events appear in calendar feeds and synchronized calendars. |
Start Yuvomi
sudo docker compose up -dCheck the status:
sudo docker compose pscaddy and yuvomi must show Up. You can see in the log whether Caddy got the certificate:
sudo docker compose logs caddy | grep "certificate obtained"The log of Yuvomi must contain Environment: production:
sudo docker compose logs yuvomi | tail -n 12Then call the health check:
curl https://{{domain}}/health
{"status":"ok","timestamp":"2026-11-12T06:49:20.225Z"}Create the admin account
Open https://{{domain}} in the browser. On the first visit you land on the page /setup, where you create the administrator account.
Username: You log in with it. It cannot be changed later.Display name: This is how you appear in the calendar and in tasks.Password: At least 8 characters, preferably much longer.
After you click Create account you are signed in. A short welcome dialog explains the basic idea, and you can close it with Skip.
The interface
| Group | Modules |
|---|---|
| Plan | Calendar, Tasks, Rewards, Notes |
| Household | Kitchen (Meals, Recipes, Shopping, Pantry), Housekeeping, Documents |
| People | Contacts, Birthdays, Health |
| Finance | Budget |
At the top is the Overview: it shows at a glance what is on today. Top right, New creates an event, a task or a shopping entry quickly.
Three more modules are switched off at first: Inventory, Waste collection and Schedule. You switch them on under Settings, Modules, Active modules. That is also where you switch off everything your household does not need.
What the modules do
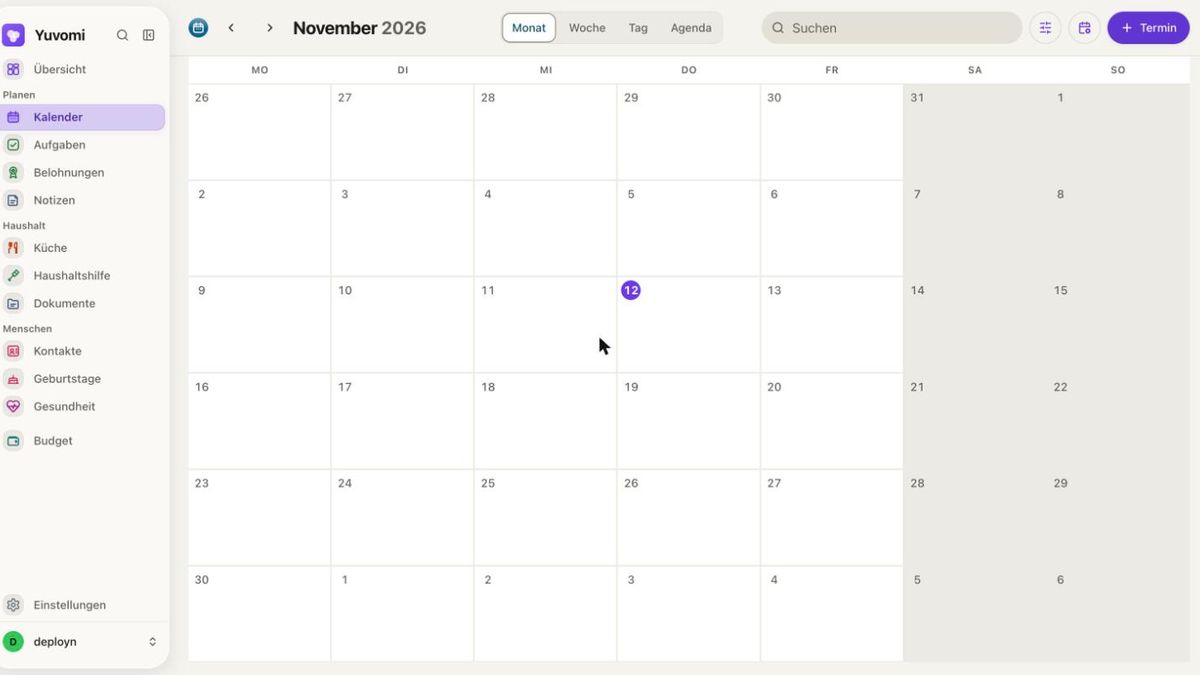
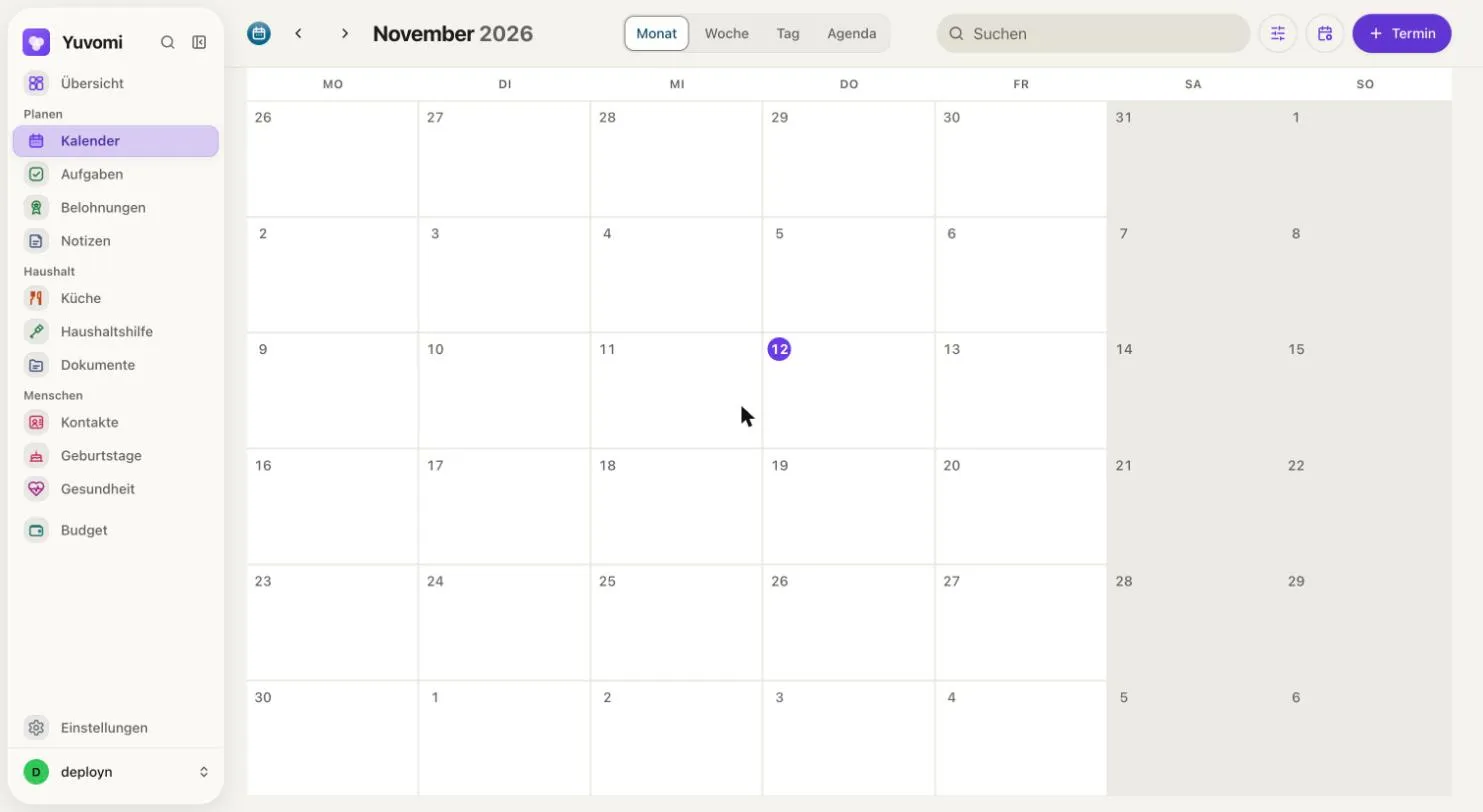
- Calendar: Shared events with month, week, day and agenda views. Every event can be assigned to one or more people.
- Tasks: A task list with deadlines, subtasks and recurring tasks such as “take out the trash”. You see who completed what.
- Rewards: Completed tasks earn points. Children “buy” rewards with the points, which you define beforehand.
- Notes: Short notes, also as a checklist you can tick off.
- Kitchen: A weekly plan for meals, your own recipes and a shared shopping list sorted by supermarket aisle. One click moves the ingredients of the next days onto the shopping list. The pantry remembers amounts and best-before dates.
- Documents: Important family papers in folders, searchable.
- Contacts and Birthdays: An address book with phone numbers and a list of birthdays with reminders.
- Health: Values, medication and preventive appointments per person. Health data is sensitive, which is what the database encryption from the
.envis for. - Budget: Income, expenses, accounts and shared costs. Yuvomi calculates who owes whom how much.
Invite family members
Under Settings, Household, Members you manage the people. New members receive an invitation link that is valid for seven days. When they open it, they choose their own password. For children without a phone you create an account directly. Under Roles & permissions you decide per role which modules someone may use fully, read only, or not see at all.
Yuvomi as an app on your phone
Open https://{{domain}} in your phone’s browser. Android offers Install after a short while. On the iPhone you tap Share and then Add to Home Screen. The app then appears like any other, without an app store. Reminders arrive as push notifications, even when the app is closed.
Connect the calendar to other calendars
| Goal | Way | What happens | Effort |
|---|---|---|---|
| See Yuvomi events in Google Calendar | Export calendar feed | Enter an event in Yuvomi: it appears in Google. Not the other way round. | small |
| See Google events in Yuvomi | ICS subscription | Enter an event in Google: it appears in Yuvomi. Not the other way round. | small |
| Sync with Google in both directions | Google connection (OAuth) | Enter an event in one place: it appears in both. | large |
| Sync with iCloud, Nextcloud or Radicale | CalDAV account | Enter an event in one place: it appears in both. | medium |
The first two ways need no credentials, and you can combine them.
Show Yuvomi events in Google Calendar
This is the most common wish: the family’s events should appear in Google Calendar on your phone. Yuvomi provides a feed for that.
Switch on the feed in Yuvomi
Open
Settings,Modules,Calendarand scroll toExport calendar feed. Turn the switch on. TheFeed addressappears below it:Feed addresshttps://{{domain}}/feed/calendar/SECRET-TEXT.icsWith
Copy addressyou put it on the clipboard.Subscribe to the feed in Google Calendar
Open
calendar.google.comon a computer. The option does not exist in the phone app. Next toOther calendarson the left, click the plus and chooseFrom URL. Paste the address and confirm withAdd calendar.It shows up on your phone by itself
A calendar added by URL is linked to your Google account. In the Google Calendar app it appears under
Other calendarsas soon as you switch it on there.
- The feed is read-only. You keep creating and changing events in Yuvomi.
- Google refreshes subscribed calendars only every few hours. A new event therefore appears with a delay. That is Google’s doing, not Yuvomi’s.
- Anyone who knows the address sees all your visible events. Don’t share it.
Generate new linkinvalidates the old address. - The same address works in Apple Calendar, Thunderbird and any other app with ICS support. The switch
Show assigned people in the titleappends the names to every event, for examplePool party (Mom, Dad). - You export the birthday calendar with a separate switch and a separate address.
Read Google events in Yuvomi
The reverse way: your Google calendar should appear in Yuvomi. For this, Google provides a secret web address (iCal address) behind which the calendar lies as a text file. You don’t have to set anything up at Google.
Get the secret address from Google
Open
calendar.google.comon a computer. In the left column, hover over the calendar you want, click the three dots and thenSettings and sharing. In the sectionIntegrate calendaryou copy theSecret address in iCal format.Subscribe in Yuvomi
Open
Settings,Modules,Calendarand the sectionICS Subscriptions. Paste the address and save. Alternatively you import a downloaded.icsfile once.
Here too, events flow in one direction only. You create new events at Google, and Yuvomi reads them in regularly. The address must start with https:// and be reachable from the internet. For security reasons Yuvomi blocks addresses in your home network, unless you allow them in the .env with ICS_SUBSCRIPTION_ALLOW_PRIVATE_NETWORK=true.
Sync with Google in both directions
If events you create in Yuvomi should land in your Google calendar and the other way round, you need the Google connection. For that, Yuvomi has to be registered at Google as an application of its own, so that you can allow it to access your account without giving it your password (OAuth).
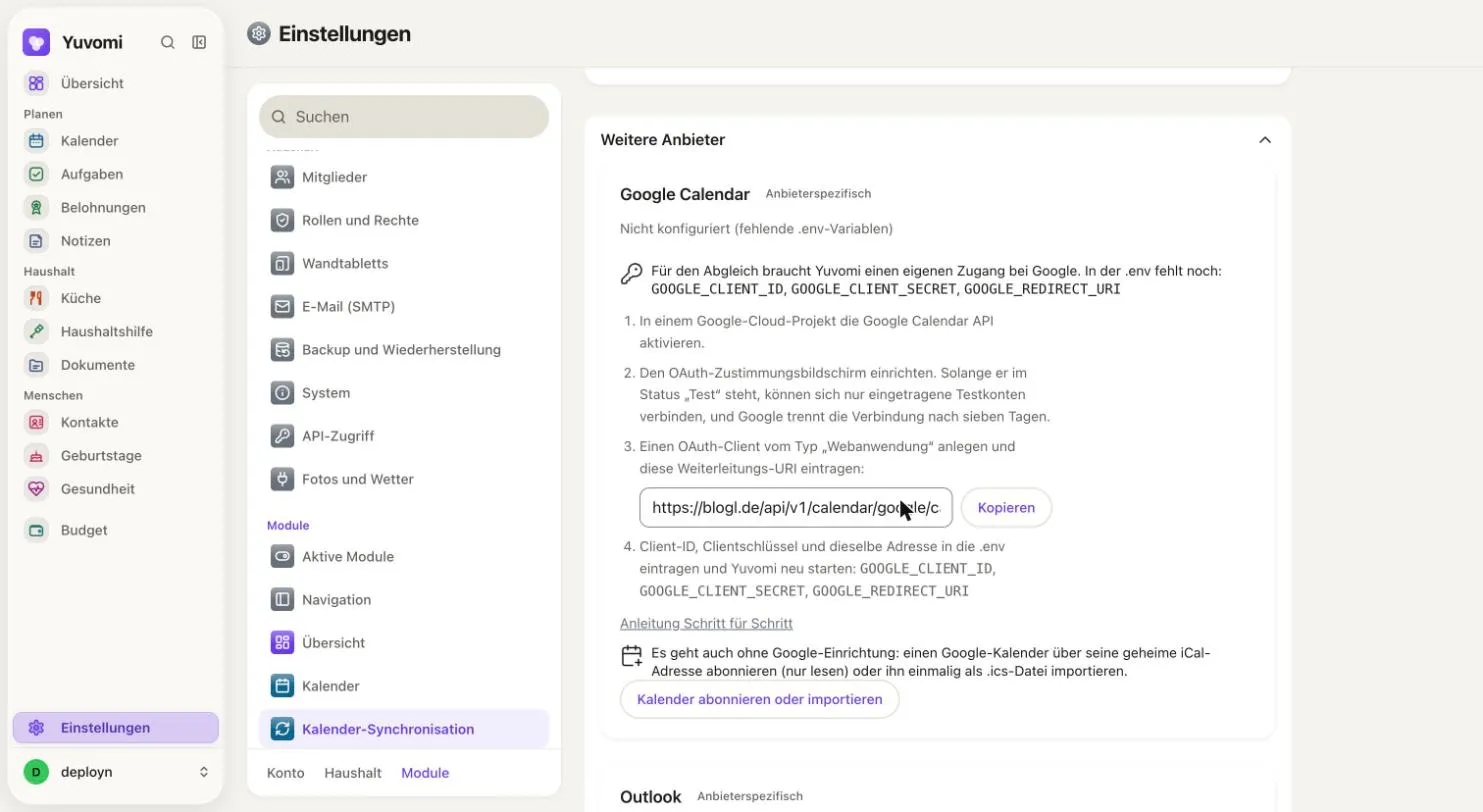
Under Settings, Modules, Calendar sync in the section More providers, the Google Calendar card shows exactly what is missing: the three variables GOOGLE_CLIENT_ID, GOOGLE_CLIENT_SECRET and GOOGLE_REDIRECT_URI. The steps and the redirect URI to copy are there too.
Create a project and enable the Calendar API
Open the Google Cloud Console and create a new project. Enable the
Google Calendar APIthere.Set up the consent screen
Set up the OAuth consent screen. Choose
Externalas user type. As long as the status isTesting, only accounts you add as test users can connect. Add your Google account there.Create an OAuth client
Create an OAuth client of the type
Web application. Under authorized redirect URIs, enter this address exactly as shown, without a slash at the end:Redirect URIhttps://{{domain}}/api/v1/calendar/google/callbackGoogle then shows you a
Client IDand aClient secret.Enter the values in the .env
Open the file and add the three lines:
Terminalbashnano ~/yuvomi/.env.envGOOGLE_CLIENT_ID=your-client-id GOOGLE_CLIENT_SECRET=your-client-secret GOOGLE_REDIRECT_URI=https://{{domain}}/api/v1/calendar/google/callbackThe redirect URI must match the one entered at Google character for character.
Recreate Yuvomi
A simple restart does not reliably re-read the
.env. Recreate the container instead:Terminalbashcd ~/yuvomi sudo docker compose up -d --force-recreate yuvomiConnect
Open
Settings,Modules,Calendar syncagain. Instead of the instructions, the buttonConnect with Googlenow appears. Sign in under the domain for this, not through the IP address. Then choose underSynced calendarswhich Google calendars Yuvomi syncs. The import only starts once you tick one.
- Events you create in Yuvomi go to Google only if you pick a Google calendar under
Sync targetin the event form. Otherwise the event stays local. - With the switch
Read-only, Yuvomi imports but writes nothing back to Google. - One Google account can be connected per installation.
- Reminders are not transferred. You set them in Yuvomi, and they come from Yuvomi.
Without this effort, the feed from the first section works, but only in one direction.
Sync with iCloud, Nextcloud or Radicale
CalDAV is a standard that iCloud, Nextcloud and many other services speak. Yuvomi syncs over it in both directions and needs nothing in the .env. Open Settings, Modules, Calendar sync and click Add CalDAV Account under CalDAV Calendars.
You need three details: the address of the CalDAV server, the user name and a password. For Apple that is an app-specific password, which you create at account.apple.com under Sign-In and Security. Your normal Apple password does not work. As address you use https://caldav.icloud.com. For Nextcloud you find the address in the calendar settings under Copy private link. With Connect & test, Yuvomi checks the credentials and lists your calendars. You choose which ones are synced.
Yuvomi syncs every 15 minutes. You change that in the .env with SYNC_INTERVAL_MINUTES.
Outlook.com
For personal Microsoft accounts there is only one way from Yuvomi to Outlook. It needs an app registration in a Microsoft Entra directory. That is more effort than at Google, so I don’t go into it here. The feed from the first section is the easier route here too: Outlook can subscribe to ICS addresses.
Backup
Yuvomi backs itself up: every night at 2 a.m. (in the time zone from TZ) it puts a backup in ~/yuvomi/backups and keeps the last seven. You find manual backups and restore under Settings, Household, Backup and restore.
A backup on the same server does not protect you if the server fails. So copy the whole folder somewhere else regularly:
cd ~
sudo tar czf yuvomi-backup.tar.gz yuvomi
The file also contains your .env with all the keys. Don’t store it unencrypted.
Update Yuvomi
cd ~/yuvomi
sudo docker compose pull
sudo docker compose up -d
Data and settings live in data and .env, outside the container. After the update you check in the log that the database migrations ran through:
sudo docker compose logs yuvomi | tail -n 12I use the image with the tag latest. If you want full control over updates, put a fixed version in the compose.yaml, for example ghcr.io/ulsklyc/yuvomi:2.89.1.
When something goes wrong
- Caddy shows
502 Bad Gateway: Yuvomi is not running yet or keeps restarting. Checksudo docker compose psandsudo docker compose logs yuvomi. A placeholder you did not replace or a typo in the.envstops the start. - No certificate: Check that the domain’s A record points to the server and that ports 80 and 443 are open.
sudo docker compose logs caddynames the reason. - The log says
Environment: development:NODE_ENV=productionis missing in the.env. - Login does not work:
SESSION_SECURE=truerequires HTTPS. Open Yuvomi only throughhttps://{{domain}}, not through the IP address. - Google reports
redirect_uri_mismatch: The address at Google and the value ofGOOGLE_REDIRECT_URIare not identical character for character. Watchhttps, upper and lower case, and a slash at the end. - Events are shifted by hours: Check the time zone under
Settings,Account,Appearanceand the variableTZ. - New events are missing in Google Calendar: With a subscribed feed, Google refreshes only every few hours. Wait, or use the Google connection.
Who is Yuvomi for?
Yuvomi suits families and couples who want tasks, events, shopping and the household budget in one place and don’t mind running the server themselves. The range of functions is large, and you switch off what you don’t need.
- You take care of updates, backups and the database key yourself.
- Syncing with Google takes effort because Google demands it. The feed is the quick way.
Conclusion
With Docker and Caddy, Yuvomi runs behind HTTPS in a few minutes. For the calendar, an exported feed and, if needed, an ICS subscription are enough for most people. If you want to sync with Google in both directions, you set up an OAuth client at Google once and enter three values in the .env. With iCloud and Nextcloud, CalDAV works without a detour through the .env.
FAQ
Frequently asked questions
Is Yuvomi free?
Yes. Yuvomi is released under the MIT license and costs nothing. You only pay for the server and your domain.
How much hardware does Yuvomi need?
At least 256 MB of RAM. The image is about 500 MB and runs on amd64 and arm64, for example on a Raspberry Pi 4 or 5.
Can I connect Yuvomi to Google Calendar?
Yes, in two ways. The easy one: in Yuvomi you switch on the calendar feed under Settings, Modules, Calendar and subscribe to the address in Google Calendar by URL. Syncing in both directions needs an OAuth client from the Google Cloud Console.
Why do Yuvomi events appear in Google Calendar with a delay?
Google refreshes subscribed calendars only every few hours. That cannot be sped up. If you need changes immediately, use the Google connection via OAuth.
How long does the Google connection last?
As long as the OAuth consent screen at Google has the status Testing, the connection expires after seven days and you reconnect Yuvomi. With the status In production that no longer happens.
Does Yuvomi work with iCloud calendars?
Yes, via CalDAV. Under Settings, Modules, Calendar sync you add a CalDAV account with the address https://caldav.icloud.com and an app-specific password from Apple.
What happens if I lose the database key?
The database can then no longer be opened, not even from a backup. So store the value of DB_ENCRYPTION_KEY in a password manager.
How do I update Yuvomi?
In the folder with the compose.yaml you run sudo docker compose pull and then sudo docker compose up -d. Data and settings are kept.