



Docker for Beginners: Install It, Run Containers, Understand Images
Learn Docker step by step: images and containers explained, installation on Debian and Ubuntu, your first web server, managing containers and updating Docker.
Contents
Docker 29.9Docker Compose 5.7nginx 1.30Debian 13Ubuntu 26.04You got a program running on your own computer, copied it to a server, and suddenly nothing works. A library is missing, the version is wrong, or another program already uses the same port. Docker solves this by packing a program together with everything it needs into one package. That package starts the same way on every machine that has Docker.
In this post we install Docker on a Linux server and use it to start a web server, step by step.
What you need
- A Linux server, ideally running Debian or Ubuntu. Whether it is a cloud server, a Raspberry Pi or a computer on your home network does not matter for the Docker commands. Below I use servers running Debian 13 and Ubuntu 26.04. How to pick and secure a server is covered in my guide VPS for beginners. If you create it at Hetzner, the Cloud-Init generator helps you set up the user.
- A connection via SSH. This is the way your computer sends commands to the server. The VPS guide covers that as well.
- A user who may use
sudo. Below, the user is called deployn. If you are logged in asroot, leave out the wordsudoin all commands.
You copy the commands in the grey boxes into the terminal and confirm with Enter. Characters like $ at the start of a line are not part of the command, and I do not write them. If the terminal still feels unfamiliar, read the most important Linux commands first.
Connect to your server now:
ssh {{username}}@{{server_ip}}You can tell it worked from the prompt. It starts with deployn@ and the name of your server.
The most important terms
Before we install anything, let us clarify a few words that appear in every Docker guide. The order is: a blueprint becomes a running application.
| Term | Meaning |
|---|---|
| Image | A finished, unchangeable package made of a program and everything it needs. The image is the blueprint. |
| Container | A running program that was started from an image. You can start as many containers from one image as you like. |
| Registry | A storage place for images. The best known is Docker Hub. Docker fetches images from there when they are not yet on your server. |
| Dockerfile | A text file that describes how an image is built. You only need it once you create your own images. It does not appear in this post. |
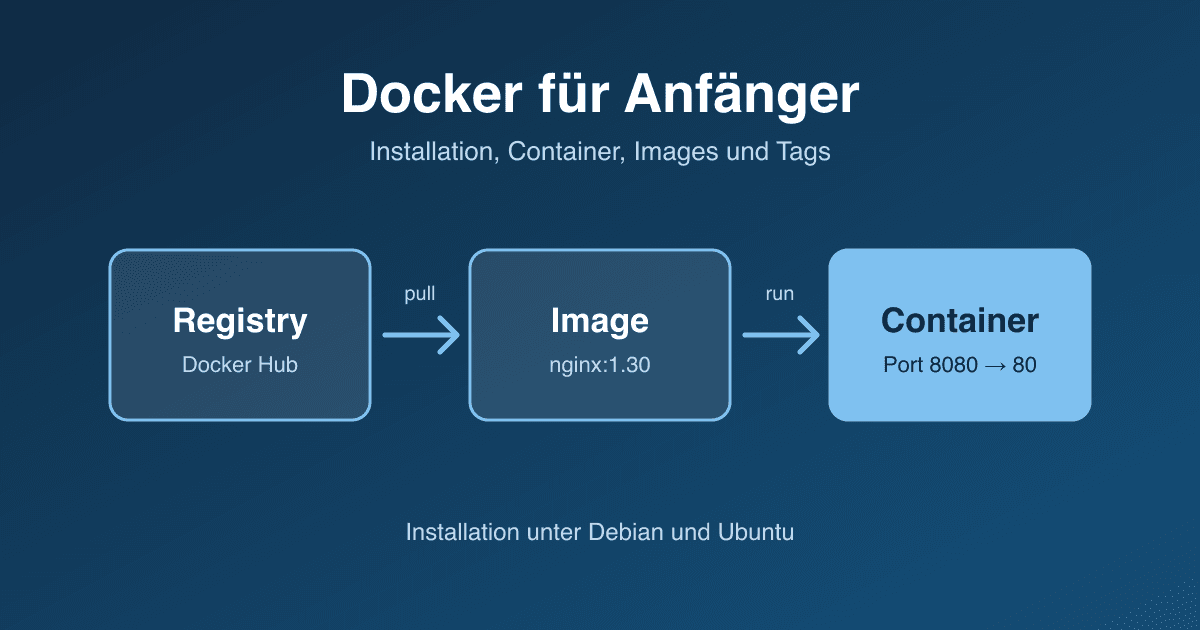
The flow in one sentence: Docker fetches an image from a registry and starts a container from it.
Is a container a virtual machine?
No. A virtual machine brings a complete operating system of its own. A container shares the kernel of the operating system with your server and is only walled off from the other programs. Think of an apartment building: every flat has its own doors and furniture, but all share the foundation and the heating. That is why containers start in seconds and need less memory than virtual machines.
Installing Docker
Debian offers Docker in its own package archive, but the version there is not current. So we use the package source that Docker maintains itself. It consists of five small steps.
Step 1: Remove old Docker packages
On a freshly created server you have nothing to remove. The command does no harm anyway. It only removes packages that would clash with Docker from the official source:
Debian
sudo apt remove $(dpkg --get-selections docker.io docker-compose docker-doc docker-buildx podman-docker containerd runc | cut -f1)Ubuntu
sudo apt remove $(dpkg --get-selections docker.io docker-compose docker-compose-v2 docker-doc docker-buildx podman-docker containerd runc | cut -f1)Messages like dpkg: no packages found matching docker-compose only mean that this package was not installed. Containers and images that already exist on the server stay in place.
Step 2: Store Docker’s key
Linux checks installed packages with a digital key, so nobody can slip you modified software. We fetch this key now. Choose the tab for your system:
Debian
sudo apt update
sudo apt install ca-certificates curl
sudo install -m 0755 -d /etc/apt/keyrings
sudo curl -fsSL https://download.docker.com/linux/debian/gpg -o /etc/apt/keyrings/docker.asc
sudo chmod a+r /etc/apt/keyrings/docker.asc
Ubuntu
sudo apt update
sudo apt install ca-certificates curl
sudo install -m 0755 -d /etc/apt/keyrings
sudo curl -fsSL https://download.docker.com/linux/ubuntu/gpg -o /etc/apt/keyrings/docker.asc
sudo chmod a+r /etc/apt/keyrings/docker.asc
Step 3: Add the package source
Now you tell the system where to find the Docker packages. Copy the whole block, including the last line EOF:
Debian
sudo tee /etc/apt/sources.list.d/docker.sources <<EOF
Types: deb
URIs: https://download.docker.com/linux/debian
Suites: $(. /etc/os-release && echo "$VERSION_CODENAME")
Components: stable
Architectures: $(dpkg --print-architecture)
Signed-By: /etc/apt/keyrings/docker.asc
EOF
Ubuntu
sudo tee /etc/apt/sources.list.d/docker.sources <<EOF
Types: deb
URIs: https://download.docker.com/linux/ubuntu
Suites: $(. /etc/os-release && echo "${UBUNTU_CODENAME:-$VERSION_CODENAME}")
Components: stable
Architectures: $(dpkg --print-architecture)
Signed-By: /etc/apt/keyrings/docker.asc
EOF
The command writes a small text file and prints its content once more. The line Suites: contains the name of your version, for example trixie on Debian 13 and resolute on Ubuntu 26.04.
sudo apt updateThe output now contains a line with download.docker.com. That means your server knows the new source.
Step 4: Install Docker
sudo apt install docker-ce docker-ce-cli containerd.io docker-buildx-plugin docker-compose-pluginThese are several packages in one command: the Docker Engine (docker-ce), the command line program (docker-ce-cli), a helper component (containerd.io) and two extensions. One of them, docker-compose-plugin, you will need later for Docker Compose.
Debian shows a list of packages and asks Do you want to continue? [Y/n]. Press Enter to confirm. The capital Y shows that “yes” is the default. The installation takes one to two minutes.
Step 5: Check the installation
sudo docker --version
sudo docker compose versionDocker version 29.9.3, build 5457199
Docker Compose version v5.7.0Your numbers may be higher. What matters is that versions appear at all. You can also check that the Docker service runs in the background and starts automatically when the server boots:
systemctl is-active docker
systemctl is-enabled dockeractive
enabledIf something else appears here, start the service with sudo systemctl start docker and switch on autostart with sudo systemctl enable docker.
Why does every command start with sudo?
Docker reaches deep into the system and needs administrator rights for that. Without sudo you get this message:
permission denied while trying to connect to the docker API at unix:///var/run/docker.sockYou can add your user to the group docker, and then sudo is no longer needed. I do not recommend it. A user in this group may start a container that mounts folders of the server. If it mounts the server’s /etc folder, for example, the container can see the file /etc/shadow, which holds the password hashes. The user is not allowed to read it on the server itself (cat /etc/shadow reports Permission denied).
docker run --rm -v /etc:/host alpine ls -l /host/shadow-rw-r----- 1 root shadow 634 Nov 7 06:17 /host/shadowSo the group docker is practically the same as administrator rights. I stay with sudo here.
The first container: hello-world
Now we start the first container. The image hello-world is a tiny test that only prints a text:
sudo docker run hello-worldThis is what happens on your server:
- Docker looks for the image
hello-worldon the server and does not find it. You see the messageUnable to find image 'hello-world:latest' locally. - Docker downloads the image from Docker Hub (
PullingandPull complete). - Docker starts a container from it. It prints a text that begins with
Hello from Docker!. - The container has nothing more to do and ends by itself.
If you see the text Hello from Docker!, your installation works. The container still exists, it just no longer runs. You will see that shortly when we manage containers.
The second container: a web server
That was a test. Now we start something you can look at in the browser. nginx is a web server, a program that delivers web pages.
sudo docker run nginxDocker downloads the image nginx and starts the container. Some lines scroll by, and the prompt does not come back:
/docker-entrypoint.sh: Configuration complete; ready for start upThis is intended. A web server has no task that ends at some point; it keeps running and waits for visitors. The terminal shows you its output, which is why it is blocked. Press Ctrl + C to stop the container.
Three problems remain. The terminal is blocked. You cannot reach the web server from the browser, because it is walled off from the outside world. And you do not know which nginx version is running. We improve the command step by step.
The complete command
sudo docker run -d -p 8080:80 --name mein-webserver nginx:1.30It looks longer, but it consists of only five parts:
| Part | Meaning |
|---|---|
docker run |
Start a new container. |
-d |
“Detached”: the container runs in the background and the terminal stays free. |
-p 8080:80 |
Forward requests that arrive at port 8080 of your server to port 80 in the container. More on this in a moment. |
--name mein-webserver |
Give the container a name. Without a name, Docker picks a random one like musing_elbakyan. |
nginx:1.30 |
The image: the name on the left of the colon, the tag on the right. The tag sets the version. |
The first time, the output is long because the image gets downloaded. At the end there is a long string of characters, the ID of the new container.
What does 8080:80 mean?
A computer has many ports, numbered entrances through which programs accept requests. By default, the browser sends requests for normal web pages to port 80 (HTTP) and 443 (HTTPS). The nginx web server in the container waits on port 80. That port only exists inside the container, and nobody from outside can reach it.
With -p 8080:80 you build a connection: whatever arrives at port 8080 on the server ends up at port 80 in the container. The number on the left belongs to the server, the number on the right to the container. The right number is fixed by nginx. You can choose the left one freely as long as the port is still free.
Look at it in the browser
Open this address in your browser:
http://{{server_ip}}:8080You see the page “Welcome to nginx!”. You have just started a web server without installing it.
To check on the server itself:
curl -s localhost:8080 | head -n 8<!DOCTYPE html>
<html>
<head>
<title>Welcome to nginx!</title>Several web servers side by side
Because every container is walled off, you can run several at the same time, even in different versions. Start two more:
sudo docker run -d -p 8081:80 --name mein-webserver-2 nginx:1.30
sudo docker run -d -p 8082:80 --name mein-webserver-3 nginx:1.28
Now three web servers run, reachable at ports 8080, 8081 and 8082, two of them in version 1.30 and one in version 1.28. Without Docker you would have to keep three installations apart.
What happens when you make a mistake? Repeat the first command with a different name but the same port:
sudo docker run -d -p 8080:80 --name zweiter nginx:1.30docker: Error response from daemon: ... Bind for 0.0.0.0:8080 failed: port is already allocatedPort 8080 is already taken. Choose another one. And when you use a name twice:
docker: Error response from daemon: Conflict. The container name "/mein-webserver" is already in use by container "...". You have to remove (or rename) that container to be able to reuse that name.Every name may only appear once. Note also that the failed start still leaves a container with the status Created behind. It shows up in the list (sudo docker ps -a), and you remove it with sudo docker rm zweiter. How that works is shown in the next section.
Managing containers
A web server is only useful once you can also stop it, inspect it and delete it. Seven commands cover that.
Show running containers
sudo docker psCONTAINER ID IMAGE COMMAND CREATED STATUS PORTS NAMES
e8e360e0586c nginx:1.28 "/docker-entrypoint.…" 2 seconds ago Up 2 seconds 0.0.0.0:8082->80/tcp, [::]:8082->80/tcp mein-webserver-3
276fdfb7fef4 nginx:1.30 "/docker-entrypoint.…" 6 seconds ago Up 6 seconds 0.0.0.0:8081->80/tcp, [::]:8081->80/tcp mein-webserver-2
758f8ae64784 nginx:1.30 "/docker-entrypoint.…" 6 seconds ago Up 6 seconds 0.0.0.0:8080->80/tcp, [::]:8080->80/tcp mein-webserverEvery line is a container. Four columns matter for you: the ID (CONTAINER ID), the image, the status (Up means: running) and the name on the far right. 0.0.0.0:8080->80/tcp means that port 8080 of the server points to port 80 of the container. The second entry with [::] is the same forwarding for IPv6, the newer form of internet addresses.
A command with the same effect is sudo docker container ls. It is longer; docker ps is shorter and more common.
Only the IDs, without a table, come from the flag -q (“quiet”):
sudo docker ps -qWhich flags a command has is shown by --help, for example sudo docker ps --help.
Stop and restart containers
You stop a container by its name:
sudo docker stop mein-webserver-3Docker prints the name as confirmation. The page on port 8082 no longer loads. Instead of the name you can also use the ID, and the first few characters are enough as long as they are unique, so for instance e8e.
The container is not gone. docker ps only shows running containers; with -a (“all”) you also see the stopped ones:
sudo docker ps -aCONTAINER ID IMAGE COMMAND CREATED STATUS PORTS NAMES
e8e360e0586c nginx:1.28 "/docker-entrypoint.…" 2 seconds ago Exited (0) Less than a second ago mein-webserver-3
276fdfb7fef4 nginx:1.30 "/docker-entrypoint.…" 6 seconds ago Up 6 seconds 0.0.0.0:8081->80/tcp, [::]:8081->80/tcp mein-webserver-2
758f8ae64784 nginx:1.30 "/docker-entrypoint.…" 6 seconds ago Up 6 seconds 0.0.0.0:8080->80/tcp, [::]:8080->80/tcp mein-webserverOn your server this list also contains the hello-world container and the first nginx container with their random names, both with the status Exited. You start a stopped container again with:
sudo docker start mein-webserver-3Remove containers
With docker rm you delete a container for good:
sudo docker rm mein-webserver-3A running container cannot be deleted. Docker then reports cannot remove container "mein-webserver-3": container is running: stop the container before removing or force remove. First stop, then rm. The same in one step is sudo docker rm -f mein-webserver-3.
You remove all stopped containers at once with:
sudo docker container pruneDocker asks first (Are you sure you want to continue? [y/N]). Here N is the default. So you have to type y; a bare Enter cancels.
What happens to files in a container when you delete it
This is the most important property of containers and a frequent beginner mistake. Try it out. Create a file in the running container mein-webserver:
sudo docker exec mein-webserver sh -c "echo hallo > /usr/share/nginx/html/test.html"
curl -s localhost:8080/test.htmlhallodocker exec runs a command in a running container. Here it creates a file that nginx serves right away. Stopping and starting again changes nothing; the file is still there afterwards. Now we delete the container and start a new one from the same image:
sudo docker stop mein-webserver
sudo docker rm mein-webserver
sudo docker run -d -p 8080:80 --name mein-webserver nginx:1.30
curl -s -o /dev/null -w "%{http_code}\n" localhost:8080/test.html404The status code 404 means “not found”. The file is gone. A container is like a disposable product that can be recreated from the image at any time. Everything you change inside it is lost when it is removed. Programs that must keep data, such as databases or photo collections, therefore store it outside the container. For that there are volumes and bind mounts, a topic of its own.
Read the logs
When something does not work, you look at the logs first. These are the messages a program writes about its work:
sudo docker logs --tail 2 mein-webserver2026/11/07 06:25:27 [error] 30#30: *1 open() "/usr/share/nginx/html/test.html" failed (2: No such file or directory), client: 172.17.0.1, server: localhost, request: "GET /test.html HTTP/1.1", host: "localhost:8080"
172.17.0.1 - - [07/Nov/2026:06:25:27 +0000] "GET /test.html HTTP/1.1" 404 153 "-" "curl/8.14.1" "-"You can see that the request for /test.html was answered with 404, and the reason: No such file or directory. --tail 2 shows only the last two lines. With -f (“follow”) the terminal stays open and shows new entries as they arrive. You end that with Ctrl + C.
Look inside a container
With exec and a shell you open a terminal inside the container:
sudo docker exec -it mein-webserver bash-i keeps the input open, -t provides a proper terminal. The prompt changes:
root@06fa4833f3b5:/#You are now inside the container. The name after the @ is the container ID. Here you can run ls /usr/share/nginx/html and you see 50x.html and index.html. With exit you return to the server.
Some images have no shell called bash. Then you get exec: "bash": executable file not found in $PATH, and you try sh instead. This affects especially slim images, as you will see in the next section.
Images and tags
At the start, Docker downloaded the image and stored it. This list shows what lies on your server:
sudo docker image lsIMAGE ID DISK USAGE CONTENT SIZE EXTRA
nginx:1.28 fda7399e8104 161MB 0B U
nginx:1.30 53d8f012a1a7 163MB 0B UThe part before the colon is the name, the part after it is the tag. The tag sets which version you get. The U in the last column means that a container is currently using this image.
Two images with the same name but a different tag are different images. The image ID tells them apart. With Docker, the same ID means the same content: if two tags had the same ID, they would take up the disk space only once.
Why you should avoid latest
If you leave out the tag, Docker adds latest. So sudo docker run nginx is the same as sudo docker run nginx:latest. The name sounds like “the newest version”, but it is just a tag like any other. The author of the image decides what it points to and can switch it to a new version at any time.
At the time of this post, nginx:latest pointed to nginx 1.31.8, while nginx:1.30 delivered exactly version 1.30. If you use latest and recreate your container, you eventually get a different version than before, possibly with different settings. That is why I specify a fixed tag in every project. Then I know what runs.
Reading version numbers
Most programs number their versions in the pattern Major.Minor.Patch, for example 1.30.2. This is called semantic versioning. It helps you estimate how risky an update is:
| What changes | Example | Meaning |
|---|---|---|
| The last number | 1.30.1 → 1.30.2 |
Bug fix. The update is usually unproblematic. |
| The middle number | 1.30.2 → 1.31.0 |
New features that should still support old ones. |
| The first number | 1.31.0 → 2.0.0 |
Big change. Existing settings may stop working afterwards. |
With Docker images, a tag can be coarse or fine. nginx:1.30 keeps you on version 1.30 and picks up bug fixes. nginx:1 also follows bigger jumps within version 1. At the time of my test, this tag delivered nginx 1.31.8. Which tags exist and what they mean is decided by each project. You find an overview in the “Tags” tab of the image on Docker Hub.
The alpine tag
On Docker Hub there are many images with an addition in the tag, such as nginx:1.30-alpine. Alpine is a Linux trimmed for small size. Download the image and compare:
sudo docker pull nginx:1.30-alpine
sudo docker image ls nginxIMAGE ID DISK USAGE CONTENT SIZE EXTRA
nginx:1.28 fda7399e8104 161MB 0B U
nginx:1.30 53d8f012a1a7 163MB 0B U
nginx:1.30-alpine 1390db6b01a8 62.4MB 0BThe Alpine variant takes only about a third (62.4 MB against 163 MB). Smaller images download faster, take less space and contain fewer programs that could have security holes. The price is that some things are missing. Start a container from the Alpine image and try to look inside:
sudo docker run -d --name alp nginx:1.30-alpine
sudo docker exec alp bashOCI runtime exec failed: exec failed: unable to start container process: exec: "bash": executable file not found in $PATHThe image has no bash. It works with sh:
sudo docker exec -it alp shRemove this test container afterwards with sudo docker rm -f alp.
Delete images
You delete an image with docker image rm. As long as a container uses it, Docker refuses:
Error response from daemon: conflict: unable to remove repository reference "nginx:1.30-alpine" (must force) - container 6bf29c9edd00 is using its referenced image 1390db6b01a8Remove the container first, then it works:
sudo docker rm -f alp
sudo docker image rm nginx:1.30-alpine
Cleaning up
At the end we remove everything we started in this post. How much space Docker uses on your server is shown by:
sudo docker system dfTYPE TOTAL ACTIVE SIZE RECLAIMABLE
Images 2 2 323.4MB 0B (0%)
Containers 3 3 3.285kB 0B (0%)
Local Volumes 0 0 0B 0B
Build Cache 0 0 0B 0BRemove the containers, and then all images that no container uses any more:
sudo docker rm -f mein-webserver mein-webserver-2 mein-webserver-3
sudo docker image prune -a
image prune -a asks (y/N) and then deletes every image without a container. That is handy for cleaning up. On a server with running applications, first check briefly that all of them are running, otherwise images get deleted that you have to download again later.
Updating Docker
You do not have to uninstall Docker to update it. Docker comes from a package source, and you update it like everything else on Debian:
sudo apt update
sudo apt install --only-upgrade docker-ce docker-ce-cli containerd.io docker-buildx-plugin docker-compose-plugin
Alternatively, sudo apt upgrade updates the whole system and Docker with it.
When Docker updates, the Docker service restarts, and the containers are stopped in the process. Containers you started with --restart unless-stopped come back up on their own. All others stay at Exited until you start them with docker start. After a restart of the Docker service (sudo systemctl restart docker), containers without this setting are at Exited. So do not schedule updates for a moment when someone is using your service. The data itself lies in /var/lib/docker and stays untouched. If your data matters to you, back it up beforehand anyway. sudo docker info shows the folder /var/lib/docker as “Docker Root Dir”.
The Docker update does not replace the images of your containers. A container keeps running with the image it was started from. For a newer version of a program you fetch the new image (sudo docker pull nginx:1.30 downloads bug fixes if there are any) and recreate the container. With Docker Compose that takes two commands.
Common errors
| Message | Cause and solution |
|---|---|
docker: command not found |
Docker is not installed, or docker.io was installed. Follow the steps above. |
permission denied while trying to connect to the docker API |
You forgot sudo. |
port is already allocated |
The port left of : is already in use. Choose another or remove the container that holds it. |
The container name ... is already in use |
The name is taken. Choose another or remove the old container with docker rm. |
cannot remove container ...: container is running |
First docker stop, then docker rm, or docker rm -f. |
exec: "bash": executable file not found in $PATH |
The image has no bash. Use sh. |
| The page does not load in the browser | Check with sudo docker ps whether the container runs and which port is entered. Then sudo docker logs. |
Conclusion
Six commands already take you far: docker run starts a container, docker ps shows what runs, docker logs tells you what goes wrong, docker stop and docker rm stop and remove it, and docker image ls shows the downloaded images. Three ideas matter: containers are created from images, files in a container disappear with it, and fixed tags instead of latest keep your installation reproducible.
In the long run you will not want to type such commands by hand every time. That is what Docker Compose is for: you write all settings into one file once. You can see Compose in use in my guides on Uptime Kuma or Vaultwarden.
Which step took you the longest? Tell me in the comments and I will extend that part.
FAQ
Frequently asked questions
What is the difference between an image and a container?
An image is the template: a finished package of program and accessories that does not change. A container is a running program that was started from the image. You can start as many containers from one image as you like.
Is a Docker container a virtual machine?
No. A virtual machine brings a complete operating system. A container shares the kernel with the server and is only walled off from other programs. That is why it starts faster and needs less memory.
Why shouldn't I install Docker with apt install docker.io?
The Debian package docker.io lags several major versions behind the current one. On Debian 13 it is version 26.1.5, while the official version is 29.9.3.
How do I update Docker without losing data?
With sudo apt update and sudo apt install --only-upgrade docker-ce docker-ce-cli containerd.io docker-buildx-plugin docker-compose-plugin. Uninstalling is not necessary. Containers and volumes are kept, but the containers are restarted briefly during the update.
Is Docker Desktop free?
For individuals, education, open source projects and small businesses, yes. According to Docker the limit is fewer than 250 employees and less than 10 million US dollars in annual revenue. The Docker Engine you install on a Linux server is not affected by this.
Why does my container not run although the command showed no error?
Check the status with sudo docker ps -a and the cause with sudo docker logs NAME. If the container shows Exited, the program in the container has ended. The reason is in the logs.
Do I always have to type y when asked?
Not with apt. At the prompt [Y/n], yes is the default (capital Y), and Enter is enough. For docker container prune or docker image prune -a the prompt reads [y/N]: there, no is the default and you have to type y.