



Install Pocket ID: Single Sign-On with Passkeys for Your Self-Hosted Apps
Install Pocket ID with Docker and Caddy and connect apps like Paperless-ngx, Actual Budget and Forgejo. With passkeys, groups and an nginx example.
Contents
Pocket ID 2.19.2Caddy 2.11Docker 29.9Ubuntu 26.04Actual Budget 26.11.0Paperless-ngx 3.4.2Forgejo 17.0.1nginx 1.30oauth2-proxy 7.15If you run several self-hosted apps, you know the problem: every app has its own login with its own password. Pocket ID fixes that. You sign in to Pocket ID once, with a passkey instead of a password. After that, you log in to every connected app with one click.
In this post I install Pocket ID with Docker and Caddy, create my account and connect four examples: Actual Budget, Paperless-ngx, Forgejo and a plain nginx page that has no login of its own.
The screenshots show the German interface; the menu names in the text are the German ones too, so you can match them directly.
What is Pocket ID?
Pocket ID is an OpenID Connect (OIDC) provider. OIDC is a standard that lets an app hand its login over to another service. The app asks Pocket ID “who is this?”, and Pocket ID answers with a username and an email address.
What sets Pocket ID apart: it has no passwords. You sign in only with passkeys, for example with a fingerprint or face scan on your phone, a password manager or a hardware key. Pocket ID is much leaner than Authentik or Keycloak and needs just one container.
These are the key terms:
| Term | Meaning |
|---|---|
| OIDC | OpenID Connect, the standard for logging in through a central service. |
| Client | An app that signs in through Pocket ID, for example Paperless-ngx. |
| Passkey | Passwordless login based on a cryptographic key on your device. |
| Callback URL | The address Pocket ID sends the user back to after login. |
| Client ID and client secret | Credentials the app uses to identify itself to Pocket ID. |
| User group | A collection of users that you use to control access to apps. |
Prerequisites
- A server: I use a small VPS from Hetzner running Ubuntu 26.04. Pocket ID itself needs very few resources.
- A domain with subdomains: Pocket ID gets its own address, for example
{{id_domain}}, and so does every app, for examplepaperless.{{base_domain}}. All of them must point to your server with an A record. A wildcard record*.{{base_domain}}saves you the individual entries. - Open ports: ports 80 and 443 must be reachable.
- A device with passkey support: your smartphone, your password manager or a security key. Passkeys only work over HTTPS, which is why you need the domain.
Install Docker
Connect to the server over SSH and install Docker:
curl -fsSL https://get.docker.com | sudo shThen create a shared Docker network. Caddy uses it later to reach all apps:
sudo docker network create proxyStart Pocket ID with Docker Compose and Caddy
Create a directory for Pocket ID:
mkdir ~/pocketid
cd ~/pocketid
Create the compose.yaml:
nano compose.yamlservices:
pocket-id:
image: pocketid/pocket-id:v2
container_name: pocket-id
restart: unless-stopped
env_file: .env
volumes:
- ./data:/app/data
healthcheck:
test: ["CMD", "/app/pocket-id", "healthcheck"]
interval: 1m30s
timeout: 5s
retries: 2
start_period: 10s
networks:
- proxy
caddy:
image: caddy:2
container_name: caddy
restart: unless-stopped
ports:
- "80:80"
- "443:443"
volumes:
- ./Caddyfile:/etc/caddy/Caddyfile
- caddy_data:/data
- caddy_config:/config
networks:
- proxy
volumes:
caddy_data:
caddy_config:
networks:
proxy:
external: trueThe ./data folder holds the Pocket ID database. The v2 tag keeps you on the current major version.
Generate a random key:
openssl rand -base64 32Create the .env file and enter the key there:
nano .envAPP_URL=https://{{id_domain}}
ENCRYPTION_KEY=PASTE-THE-RANDOM-KEY-HERE
TRUST_PROXY=true
PUID=1000
PGID=1000APP_URLis the address where you open Pocket ID, with no path at the end.ENCRYPTION_KEYencrypts sensitive data such as the signing keys. Back it up, because without it the database is unusable.TRUST_PROXY=truemakes Pocket ID show the users’ real IP addresses in the audit log instead of Caddy’s.PUIDandPGIDset which user owns the files in./data.
Create the Caddyfile:
nano Caddyfile{{id_domain}} {
reverse_proxy pocket-id:1411
}Start both containers:
sudo docker compose up -dsudo docker compose ps shows the status. Pocket ID reports healthy once it is ready. You can check whether Caddy got the certificate here:
sudo docker compose logs caddy | grep "certificate obtained"Create your admin account
Open https://{{id_domain}}/setup in your browser. This page only works while no account exists. Enter username, email address and name, and click “Sign Up”. Then add your first passkey with “Add Passkey”.
Do this right after the start. While no account exists, anyone who knows the address can create the admin account. On my test server, scanners were already hitting the domain a few minutes after the start.
Afterwards you land in the settings. Under “Mein Konto” you see your passkeys:
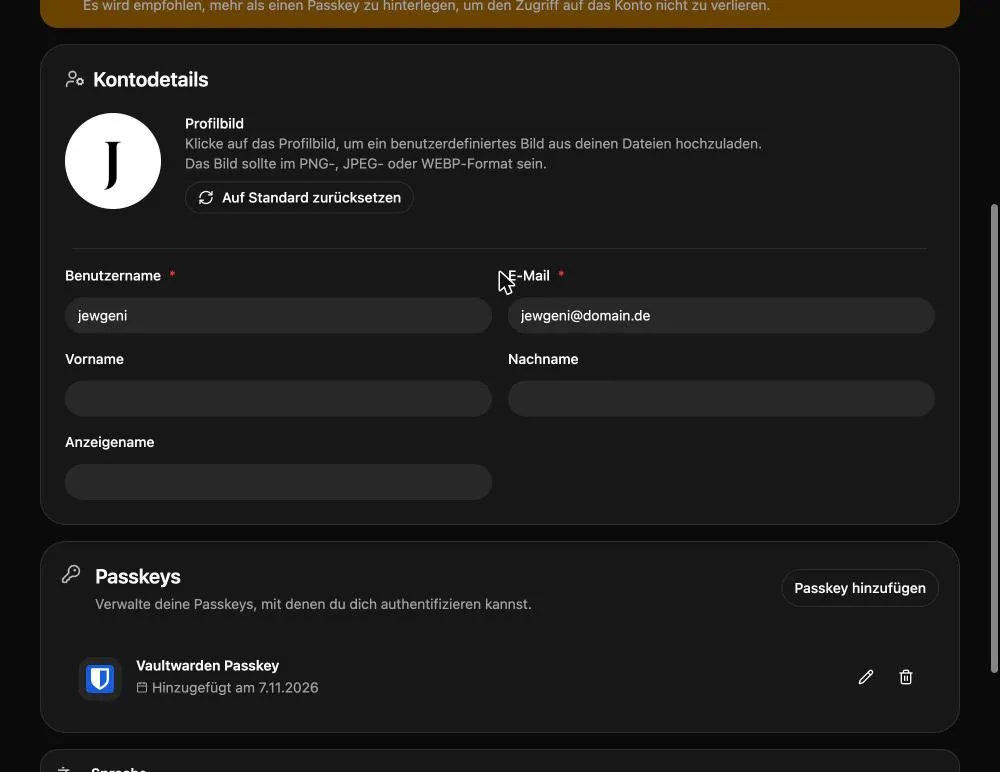
Pocket ID points out at the top that only one passkey is registered. Add a second one with “Passkey hinzufügen”, for example on another device. Otherwise you lock yourself out if you lose your only device. You can change the language at the bottom of the same page.
The interface at a glance
On the left you find “Mein Konto”, “Meine Apps” and “Audit-Protokoll”. Under “Verwaltung” are the admin pages for users, user groups and OIDC clients.
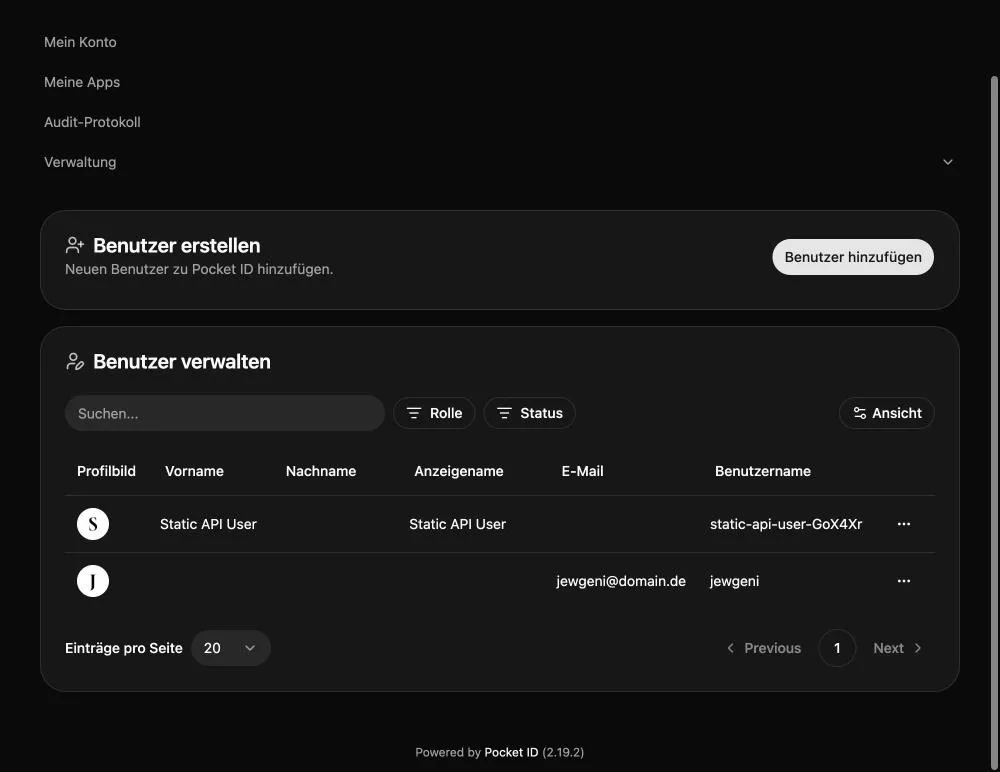
Under “Benutzer” you see all accounts. The “Static API User” only appears if you set a STATIC_API_KEY in the .env, and you can ignore it:
Connect an app: the pattern is always the same
Every app follows the same pattern. You create a client in Pocket ID, copy three values into the app and enter the app’s callback URL in Pocket ID.
Go to “Verwaltung” -> “OIDC Clients” and click “OIDC-Client hinzufügen”. A form appears:
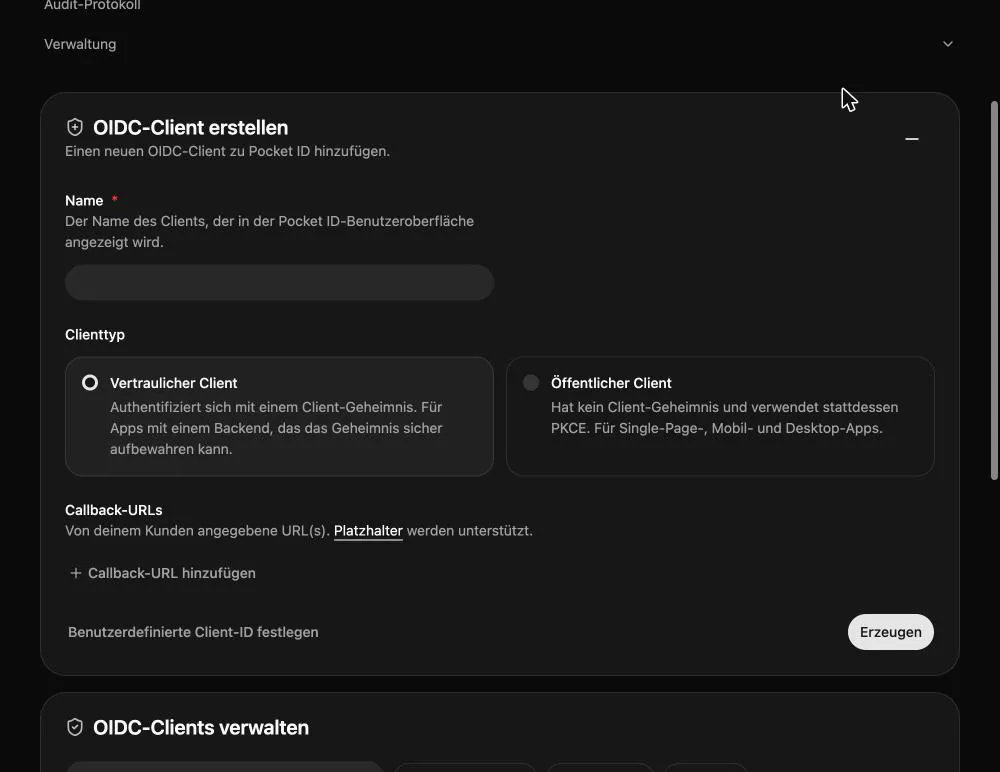
You fill in three things:
- Name: the name of the app. It shows up later at login.
- Client type: “Vertraulicher Client” (confidential) is right for apps with their own server, which is almost everything in this post. “Öffentlicher Client” (public) is meant for pure browser, mobile or desktop apps.
- Callback URL: the address Pocket ID sends the user back to. Pocket ID only redirects to URLs you enter here. The right URL is in each app’s documentation; below you find it for all the examples.
After “Erzeugen” the client page opens. It lists all the values you need for the app:
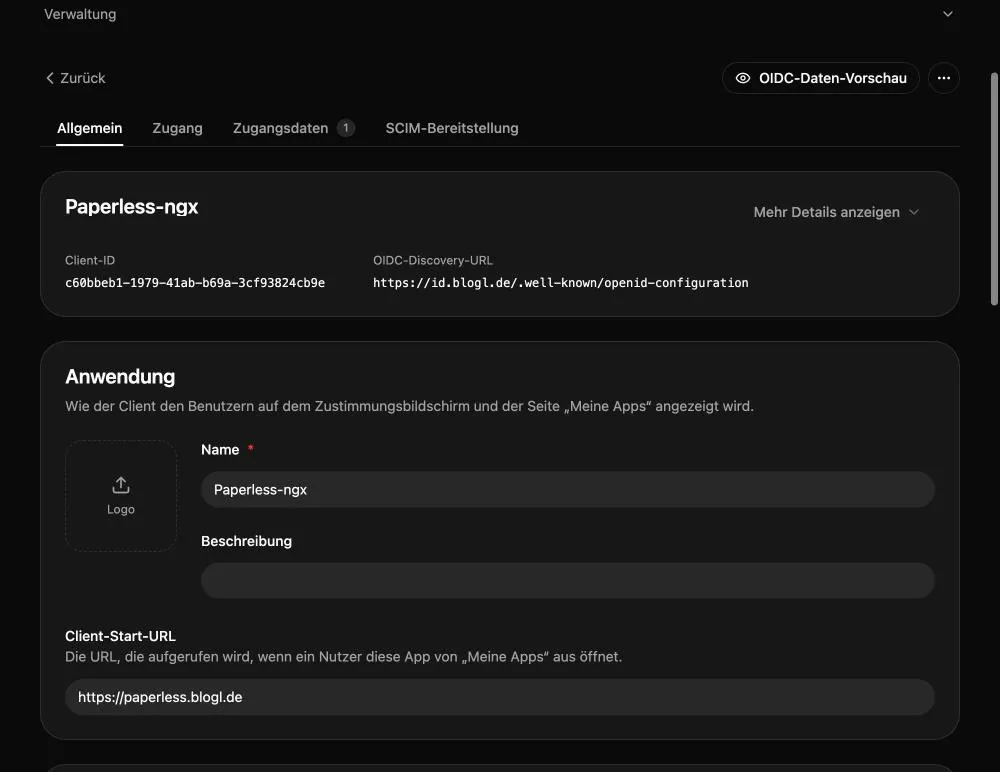
“Mehr Details anzeigen” shows the individual addresses as well:
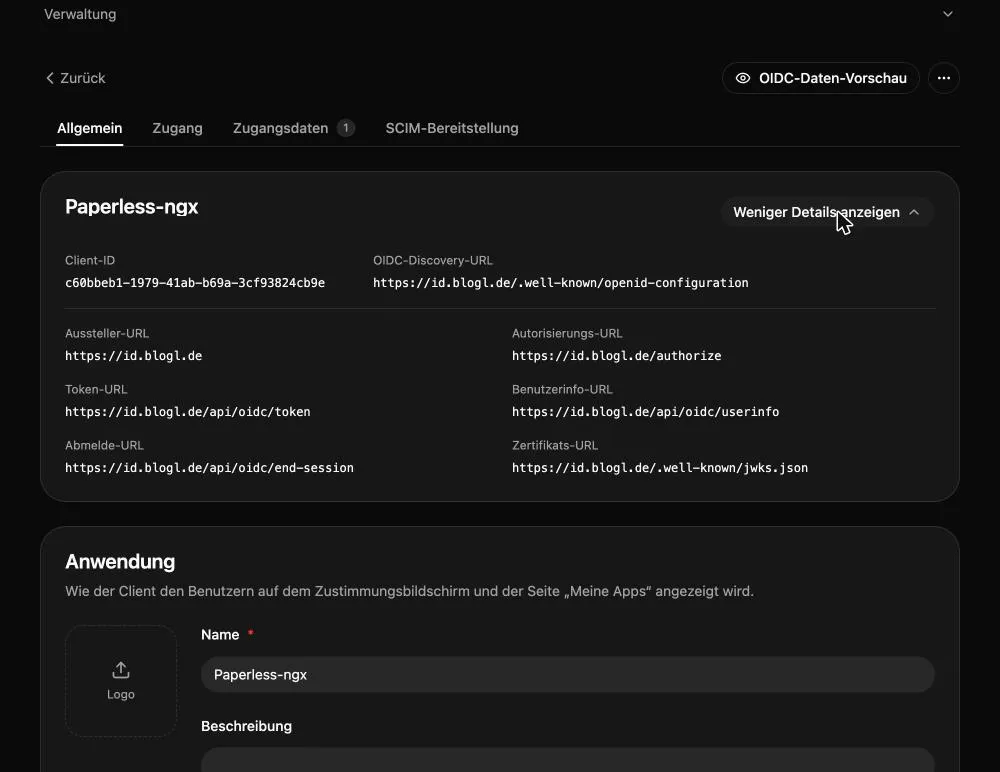
Most apps only need the client ID, the client secret and the discovery URL https://{{id_domain}}/.well-known/openid-configuration. Some apps want the addresses one by one:
| Value | Address |
|---|---|
| Issuer | https://{{id_domain}} |
| Authorization | https://{{id_domain}}/authorize |
| Token | https://{{id_domain}}/api/oidc/token |
| User info | https://{{id_domain}}/api/oidc/userinfo |
| Log out | https://{{id_domain}}/api/oidc/end-session |
Pocket ID shows the client secret only once, right after creating the client. Copy it immediately. On the “Zugangsdaten” tab you create a new secret when needed, and several secrets can be active at the same time:
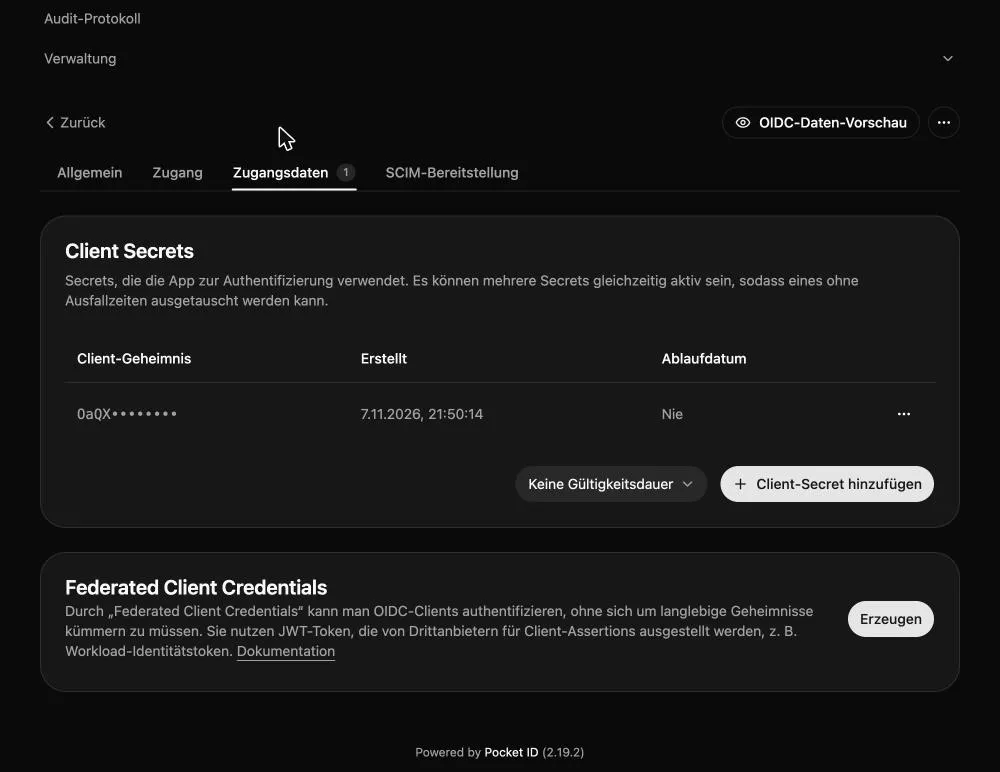
Most apps use openid profile email as scopes.
Example 1: Actual Budget
Actual Budget has OIDC built in. The callback URL is https://actual.{{base_domain}}/openid/callback. Create a client in Pocket ID with that name and URL and copy the client ID and secret.
How to install Actual Budget itself is in my Actual Budget guide. For Pocket ID you add a .env next to the compose.yaml:
ACTUAL_OPENID_DISCOVERY_URL=https://{{id_domain}}
ACTUAL_OPENID_CLIENT_ID=YOUR-CLIENT-ID
ACTUAL_OPENID_CLIENT_SECRET=YOUR-CLIENT-SECRET
ACTUAL_OPENID_SERVER_HOSTNAME=https://actual.{{base_domain}}
ACTUAL_OPENID_SERVER_HOSTNAME is the address of Actual itself. Without this line, Actual does not offer the OpenID login. In Actual’s Docker Compose file, the service has to read the file:
services:
    actual_server:
        image: actualbudget/actual-server:latest
        container_name: actual_server
        restart: unless-stopped
        env_file: .env
        volumes:
            - ./data:/data
        networks:
            - proxy

networks:
    proxy:
        external: true
env_file is the important part: Docker Compose reads a .env file only for placeholders in the Compose file, not automatically into the container. Restart Actual with sudo docker compose up -d --force-recreate.
Add an entry for the app to the Caddyfile of Pocket ID and reload Caddy:
actual.{{base_domain}} {
    reverse_proxy actual_server:5006
}cd ~/pocketid
sudo docker compose exec caddy caddy reload --config /etc/caddy/CaddyfileThis pattern applies to every example: a new entry in the Caddyfile, a reload, done. The name after reverse_proxy is the app’s container_name, and the app has to be in the proxy network.
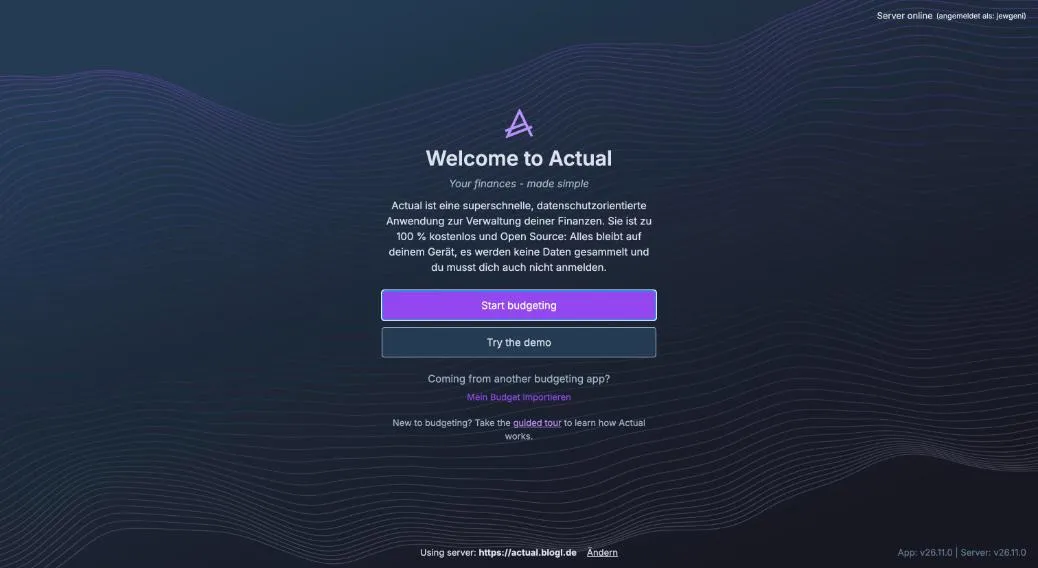
When you open https://actual.{{base_domain}} you now see “Bei dieser Actual-Instanz anmelden” with the “OpenID verwenden” button:
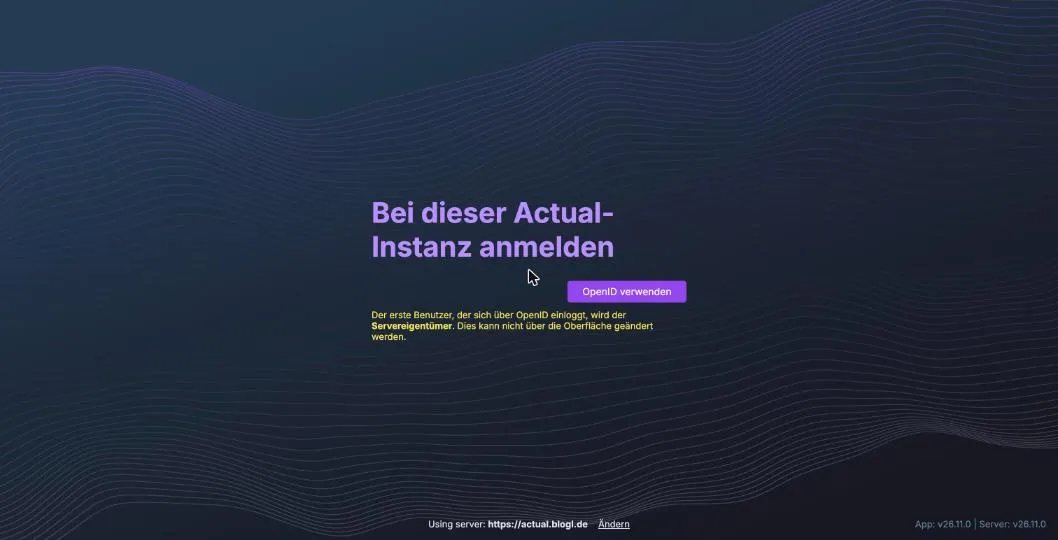
The first user who logs in through OpenID becomes the server owner. This cannot be changed in the interface, so log in yourself first. After the click, Pocket ID asks whether Actual may access your email address and profile. You confirm with “Anmelden”. Afterwards Actual shows “angemeldet als” with your username at the top right:
Example 2: Paperless-ngx
For Paperless-ngx the callback URL is:
https://paperless.{{base_domain}}/accounts/oidc/pocket-id/login/callback/The pocket-id part in the middle is the provider_id from the configuration below. Both must match. I describe the Paperless-ngx installation in my Paperless guide for a VPS. On the webserver container you set two environment variables. I put them in an .env file that the service reads through env_file:
PAPERLESS_URL=https://paperless.{{base_domain}}
PAPERLESS_APPS=allauth.socialaccount.providers.openid_connect
PAPERLESS_SOCIALACCOUNT_PROVIDERS={"openid_connect":{"SCOPE":["openid","profile","email"],"OAUTH_PKCE_ENABLED":true,"APPS":[{"provider_id":"pocket-id","name":"Pocket ID","client_id":"YOUR-CLIENT-ID","secret":"YOUR-CLIENT-SECRET","settings":{"server_url":"https://{{id_domain}}"}}]}}PAPERLESS_SOCIALACCOUNT_PROVIDERS has to be on a single line, without quotes around it, or Compose reads the quotes as part of the value.
After a restart, the Paperless login page shows the entry “oder anmelden über” and a “Pocket ID” button below the password form. On the first login, Paperless asks once more for username and email address, prefilled from Pocket ID:
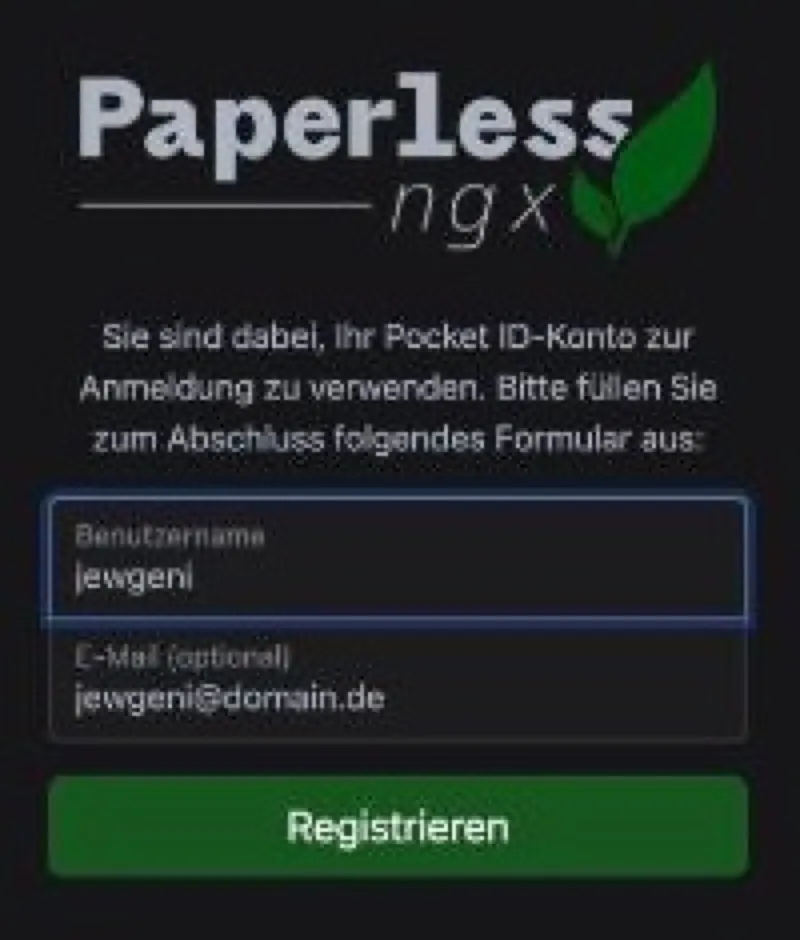
With the variable PAPERLESS_SOCIAL_AUTO_SIGNUP=true you skip this page and Paperless creates the user right away.
Important: a new user created through Pocket ID has no permissions in Paperless at first. The interface does not load properly, and the log shows lines like Forbidden: /api/ui_settings/. You have two ways to fix it:
- Once: an existing admin gives the user permissions under “Einstellungen” -> “Benutzer & Gruppen”. If you have no admin yet, do it on the server:
sudo docker compose exec webserver python3 manage.py shell -c "
from django.contrib.auth.models import User
u = User.objects.get(username='your-username')
u.is_superuser = True
u.is_staff = True
u.save()
"- Permanently:
PAPERLESS_SOCIAL_ACCOUNT_DEFAULT_GROUPSautomatically assigns new SSO users to a Paperless group whose permissions you created in Paperless beforehand.
After that the dashboard opens:
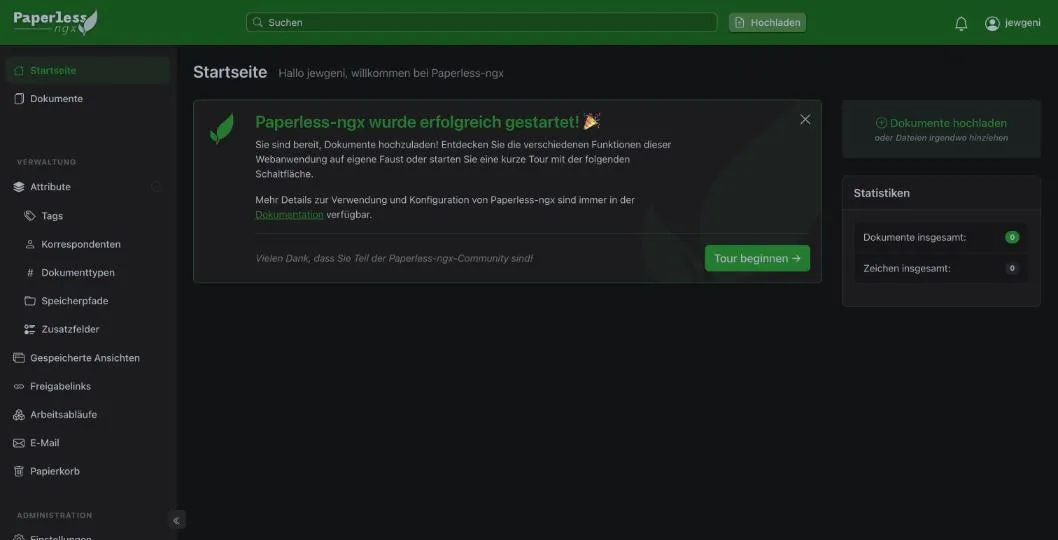
Two more variables are handy: PAPERLESS_REDIRECT_LOGIN_TO_SSO=true sends the login page straight to Pocket ID. PAPERLESS_DISABLE_REGULAR_LOGIN=true removes the password form. Only turn the latter on once the SSO login works reliably and at least one account has admin rights.
Example 3: Forgejo
For Forgejo the callback URL is:
https://git.{{base_domain}}/user/oauth2/PocketID/callbackForgejo builds the callback URL from the name of the login source. The PocketID part of the URL must therefore match exactly the name you enter below as “Authentication name”, including upper and lower case. If you pick a different name, replace PocketID in the URL with it. How to install Forgejo is in my Forgejo guide.
There are two ways. Through the interface, go to “Administratoreinstellungen” -> “Identität u. Zugriff” -> “Authentifizierungsquellen” in Forgejo and click “Authentifizierungsquelle hinzufügen”. There you choose:
- Authentication type: OAuth2
- Authentication name:
PocketID - OAuth2 provider: OpenID Connect
- Client ID and client secret: the values from Pocket ID
- OpenID Connect auto-discovery URL:
https://{{id_domain}}/.well-known/openid-configuration - Additional scopes:
openid email profile - Skip local 2FA: checked, because Pocket ID handles the protection
It is faster on the server with a single command:
sudo docker exec -u git forgejo forgejo admin auth add-oauth \
--name PocketID \
--provider openidConnect \
--key "YOUR-CLIENT-ID" \
--secret "YOUR-CLIENT-SECRET" \
--auto-discover-url https://{{id_domain}}/.well-known/openid-configuration \
--scopes "openid email profile" \
--skip-local-2fasudo docker exec -u git forgejo forgejo admin auth list checks the result. In the interface the source then appears in the list:

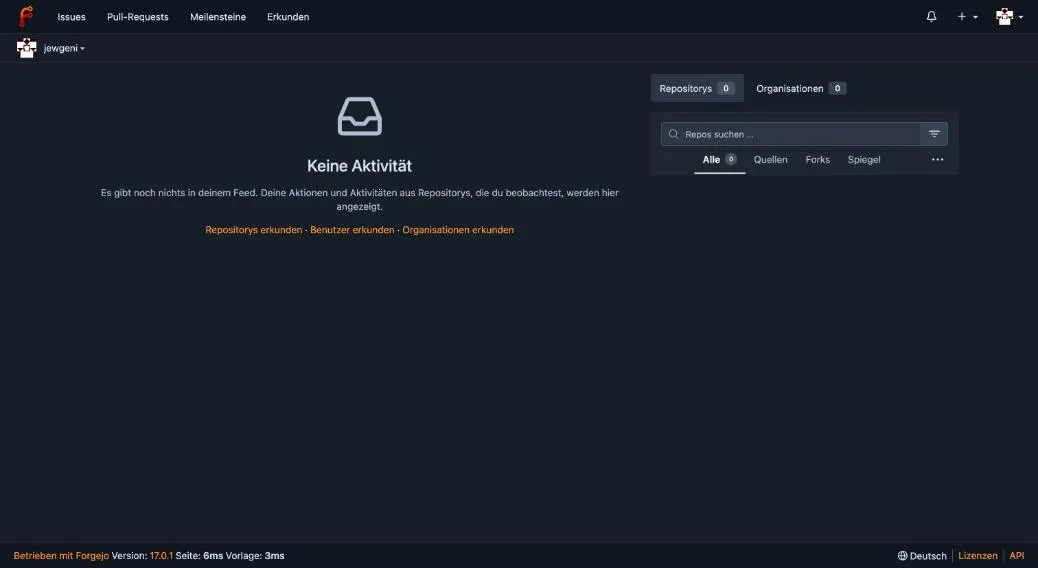
The Forgejo login page now shows the “Anmelden mit PocketID” button:
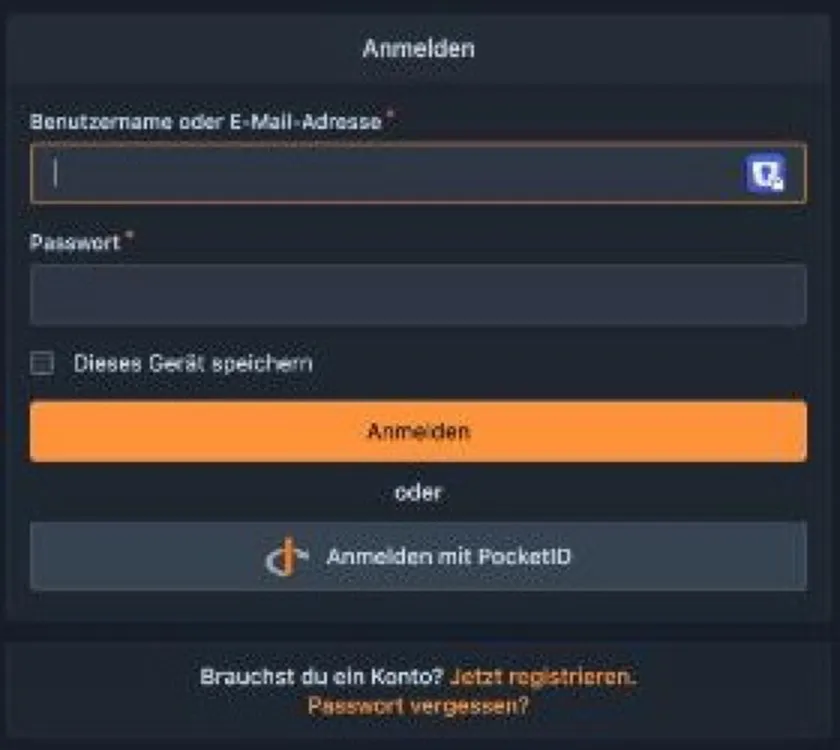
On the first login, Forgejo asks whether you want to create a new account or link an existing one. After that you are signed in:
Example 4: Protect a page that has no login of its own
Not every app can do OIDC. A static web page, a dashboard or a tool without a login can still sit behind Pocket ID. For that you need oauth2-proxy, a small service that handles the login with Pocket ID. Your reverse proxy asks it on every request whether the visitor is signed in.
The flow: a visitor opens https://site.{{base_domain}}. The reverse proxy asks oauth2-proxy. If the visitor is not signed in, it sends them to Pocket ID. After login it serves the page. The app behind it needs to know nothing about all this.
This works with Caddy, which you already use for HTTPS, and with nginx. I show both variants. Pick one, because both need the same address site.{{base_domain}}.
Create a client in Pocket ID, for example named “Caddy Seite”, with this callback URL:
https://site.{{base_domain}}/oauth2/callbackBoth variants need the same .env for oauth2-proxy. Create it in the folder of the variant you use. Generate the cookie secret with openssl rand -base64 32 | tr '+/' '-_':
OAUTH2_PROXY_PROVIDER=oidc
OAUTH2_PROXY_OIDC_ISSUER_URL=https://{{id_domain}}
OAUTH2_PROXY_CLIENT_ID=YOUR-CLIENT-ID
OAUTH2_PROXY_CLIENT_SECRET=YOUR-CLIENT-SECRET
OAUTH2_PROXY_COOKIE_SECRET=YOUR-COOKIE-SECRET
OAUTH2_PROXY_REDIRECT_URL=https://site.{{base_domain}}/oauth2/callback
OAUTH2_PROXY_EMAIL_DOMAINS=*
OAUTH2_PROXY_HTTP_ADDRESS=0.0.0.0:4180
OAUTH2_PROXY_COOKIE_SECURE=true
OAUTH2_PROXY_REVERSE_PROXY=true
OAUTH2_PROXY_SET_XAUTHREQUEST=true
OAUTH2_PROXY_CODE_CHALLENGE_METHOD=S256
OAUTH2_PROXY_INSECURE_OIDC_ALLOW_UNVERIFIED_EMAIL=true
OAUTH2_PROXY_SKIP_PROVIDER_BUTTON=trueA few lines need an explanation:
OAUTH2_PROXY_EMAIL_DOMAINS=*allows any email domain. You control who may sign in through groups in Pocket ID.OAUTH2_PROXY_INSECURE_OIDC_ALLOW_UNVERIFIED_EMAIL=trueis needed because Pocket ID does not mark email addresses as verified by default, whileoauth2-proxyexpects verified addresses by default.OAUTH2_PROXY_SKIP_PROVIDER_BUTTON=truesends visitors straight to Pocket ID instead of showing a page with a button first.OAUTH2_PROXY_CODE_CHALLENGE_METHOD=S256turns on PKCE, an extra protection against intercepted login codes.
Variant A: Caddy with forward_auth
Caddy has the forward_auth directive for this. You need no extra web server and no extra config file: you protect an app with one block in the Caddyfile.
Create a folder for oauth2-proxy and save the .env from above in it:
mkdir ~/oauth2-proxy
cd ~/oauth2-proxy
nano .envThe compose.yaml contains only oauth2-proxy:
services:
oauth2-proxy:
image: quay.io/oauth2-proxy/oauth2-proxy:latest
container_name: oauth2-proxy
restart: unless-stopped
env_file: .env
networks:
- proxy
networks:
proxy:
external: trueStart it with sudo docker compose up -d. Then replace the entry for site.{{base_domain}} in the Pocket ID Caddyfile with this block:
site.{{base_domain}} {
route {
reverse_proxy /oauth2/* oauth2-proxy:4180 {
header_up X-Real-IP {remote_host}
header_up X-Forwarded-Uri {uri}
}
forward_auth oauth2-proxy:4180 {
uri /oauth2/auth
header_up X-Real-IP {remote_host}
copy_headers X-Auth-Request-User X-Auth-Request-Email X-Auth-Request-Preferred-Username
@error status 401
handle_response @error {
redir * /oauth2/sign_in?rd={scheme}://{host}{uri}
}
}
reverse_proxy YOUR-APP:80
}
}How the block works:
routemakes Caddy process the directives in this order. Withoutroute, Caddy sorts them itself, and the check can end up running after the app.- The first line passes everything under
/oauth2/tooauth2-proxy, for example the sign-in page and the callback. forward_authasksoauth2-proxyon every request whether the visitor is signed in. On a401, theredirline sends them to the login. Otherwisecopy_headerspasses username and email address to the app as headers.reverse_proxy YOUR-APP:80is your actual app. The name is itscontainer_name, and the container is in theproxynetwork.
Reload Caddy:
cd ~/pocketid
sudo docker compose exec caddy caddy reload --config /etc/caddy/CaddyfileI tested the block with a test page. Instead of reverse_proxy, it had this line, which prints the header from the login:
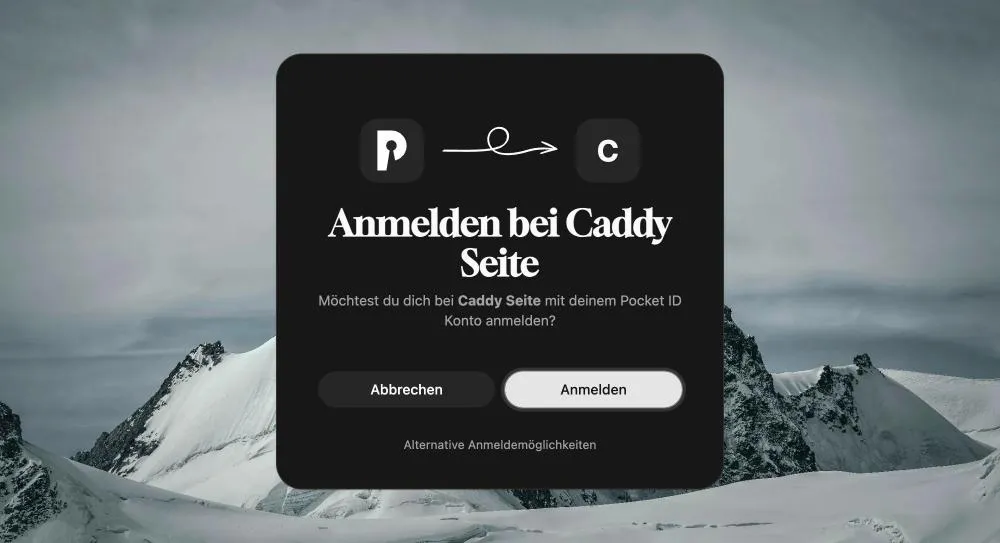
respond "Angemeldet als {http.request.header.X-Auth-Request-Preferred-Username} ({http.request.header.X-Auth-Request-Email})"When you open https://site.{{base_domain}} and are not yet signed in to Pocket ID, you see the sign-in screen. Click “Anmelden” there and confirm with your passkey. If you are already signed in, Pocket ID only asks for approval:
After that Caddy serves the page:

Your app receives the headers X-Auth-Request-Preferred-Username and X-Auth-Request-Email on every request. Apps that support an upstream login can use them to recognize or create users automatically. This is called “header authentication” and is covered in each app’s documentation.
Signing out has a catch. The /oauth2/sign_out link only ends the session at oauth2-proxy. If your Pocket ID session is still running, Pocket ID sends you straight back on the next request without asking, and you are signed in again immediately. To sign out completely, also sign out of Pocket ID: click your avatar at the top right and then “Abmelden”.
Variant B: nginx with auth_request
If your page already runs behind nginx, put the check there. Here it is a static page. Everything happens in one folder:
Then create a directory with a few files:
mkdir -p ~/nginx-site/html
cd ~/nginx-site
The file html/index.html is your page. A simple one is enough for the example:
<!doctype html>
<html lang="en">
<head><meta charset="utf-8"><title>Protected page</title></head>
<body>
<h1>Protected page</h1>
<p>nginx serves this page. Without signing in to Pocket ID you will not see it.</p>
<p><a href="/whoami">Who am I?</a> · <a href="/oauth2/sign_out">Sign out</a></p>
</body>
</html>
The file html/whoami.html shows who is signed in after login. nginx fills in the placeholders through SSI (Server Side Includes):
<p>Signed in as <!--# echo var="user" --> (<!--# echo var="email" -->)</p>The file nginx.conf is the core:
server {
    listen 80;
    server_name site.{{base_domain}};

    location /oauth2/ {
        proxy_pass http://oauth2-proxy:4180;
        proxy_set_header Host $host;
        proxy_set_header X-Real-IP $remote_addr;
        proxy_set_header X-Forwarded-Proto https;
        proxy_set_header X-Auth-Request-Redirect $request_uri;
    }

    location = /oauth2/auth {
        internal;
        proxy_pass http://oauth2-proxy:4180;
        proxy_set_header Host $host;
        proxy_set_header X-Real-IP $remote_addr;
        proxy_set_header X-Forwarded-Proto https;
        proxy_set_header Content-Length "";
        proxy_pass_request_body off;
    }

    location / {
        auth_request /oauth2/auth;
        error_page 401 = /oauth2/sign_in;

        auth_request_set $user  $upstream_http_x_auth_request_preferred_username;
        auth_request_set $email $upstream_http_x_auth_request_email;

        root /usr/share/nginx/html;
        index index.html;
    }

    location = /whoami {
        auth_request /oauth2/auth;
        error_page 401 = /oauth2/sign_in;

        auth_request_set $user  $upstream_http_x_auth_request_preferred_username;
        auth_request_set $email $upstream_http_x_auth_request_email;

        ssi on;
        default_type text/html;
        alias /usr/share/nginx/html/whoami.html;
    }
}
The line auth_request /oauth2/auth; is the doorman. It goes into every location block you want to protect. Everything in location / is reachable only after login.
Put the .env from above in the same folder. The compose.yaml contains nginx and oauth2-proxy:
services:
    nginx:
        image: nginx:stable
        container_name: nginx_site
        restart: unless-stopped
        volumes:
            - ./nginx.conf:/etc/nginx/conf.d/default.conf:ro
            - ./html:/usr/share/nginx/html:ro
        depends_on:
            - oauth2-proxy
        networks:
            - proxy

    oauth2-proxy:
        image: quay.io/oauth2-proxy/oauth2-proxy:latest
        container_name: oauth2-proxy
        restart: unless-stopped
        env_file: .env
        networks:
            - proxy

networks:
    proxy:
        external: true
Again an entry in the Pocket ID Caddyfile and a reload. The old block for site.{{base_domain}} from Variant A goes away:
site.{{base_domain}} {
    reverse_proxy nginx_site:80
}
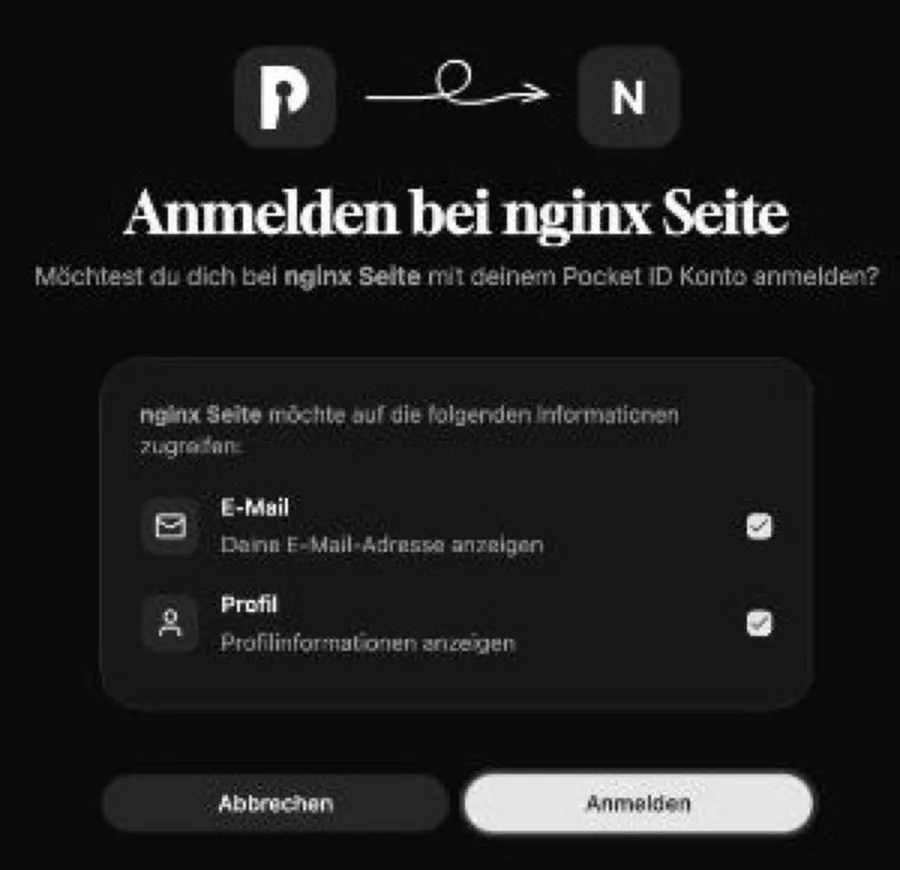
Start everything with sudo docker compose up -d. On the first visit to https://site.{{base_domain}}, nginx sends you to Pocket ID, which asks for approval:
After you confirm, you see your page:

At /whoami, nginx shows who is signed in. The values come from the headers oauth2-proxy provides. You can pass them on to any app behind nginx, for example with proxy_set_header X-User $user;:

If you change nginx config files that you mount into the container as a single file, do not just reload. Many editors and sed -i replace the file with a new one, and the container keeps seeing the old one. After such changes, recreate the container with sudo docker compose up -d --force-recreate nginx.
More apps
The Pocket ID documentation has ready-made guides for over 100 apps, including Immich, Karakeep, Nextcloud, Vaultwarden, Proxmox, Jellyfin, Open WebUI, Gitea, Grafana and Portainer. The pattern is always the same: create a client, enter the callback URL, copy client ID, secret and discovery URL into the app. How Karakeep runs is in my Karakeep guide.
Restrict access with user groups
By default, every Pocket ID user may sign in to every client. You change that with groups. This makes sense if family, colleagues or friends are on your server but not everyone should use every app.
Go to “Verwaltung” -> “Benutzergruppen” and click “Gruppe hinzufügen”. You enter a display name and a name. The name later appears in the groups claim that apps like Grafana or Paperless can use for roles. Pocket ID fills in the name field automatically from the display name. Check it before saving, or the text ends up doubled.
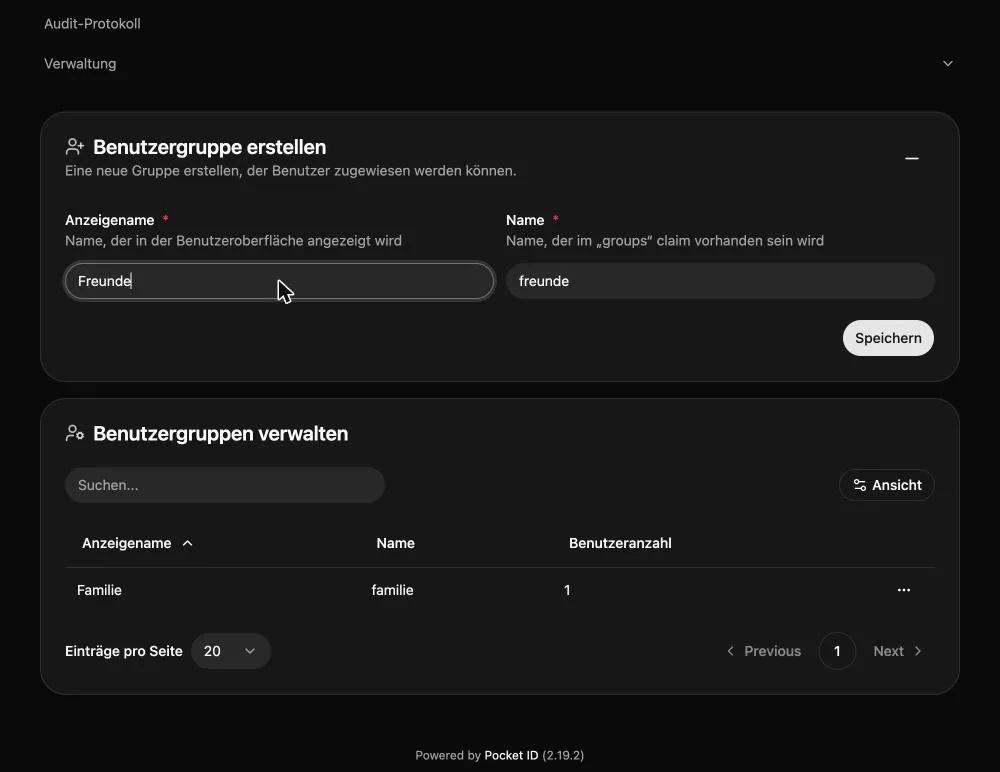
On the group’s “Benutzer” tab you pick the members and save:
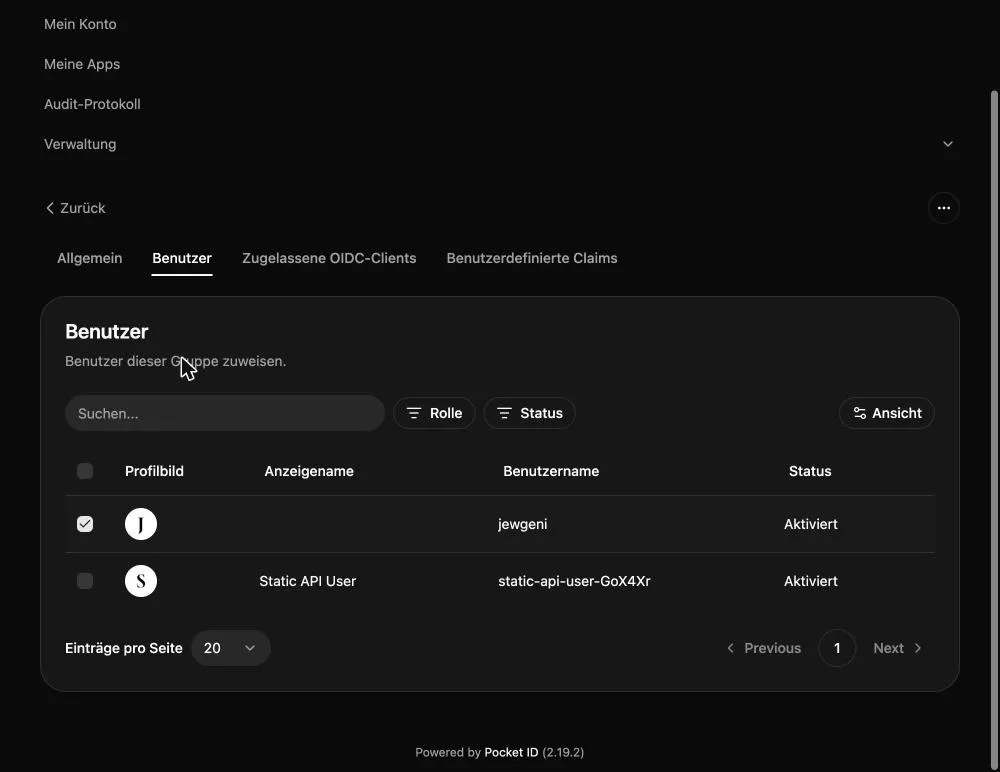
After that the group shows up in the overview:
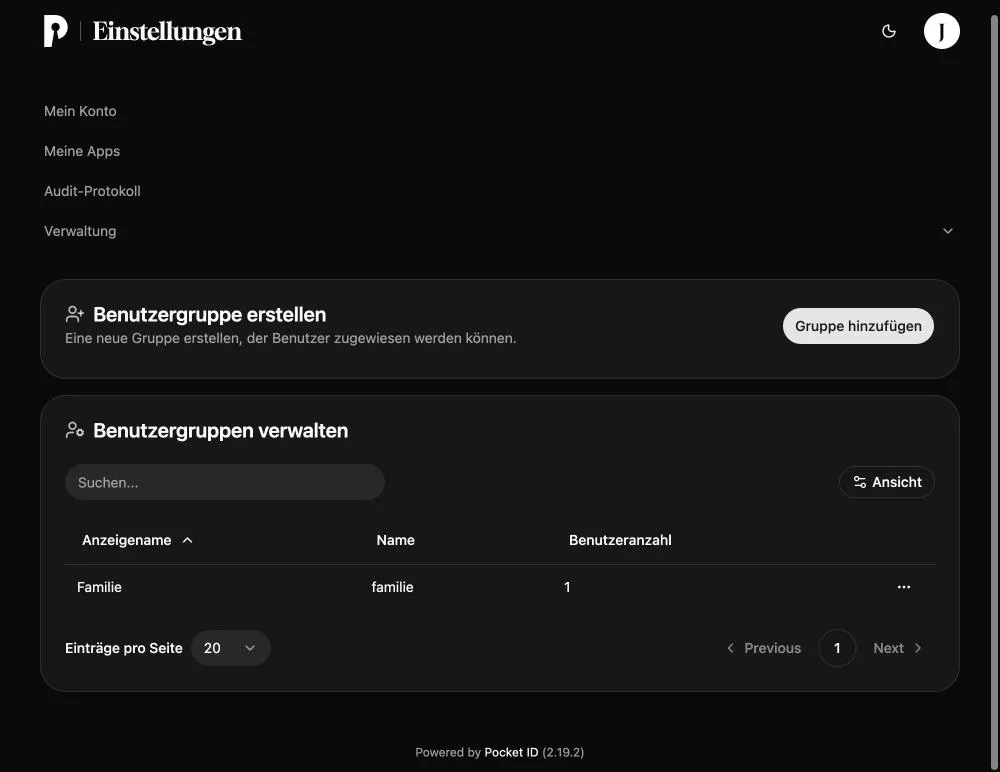
Now you restrict a client. Open it under “OIDC Clients”, switch to the “Zugang” tab and choose “Ausgewählte Benutzergruppen”. Then check the allowed groups and click “Speichern”:
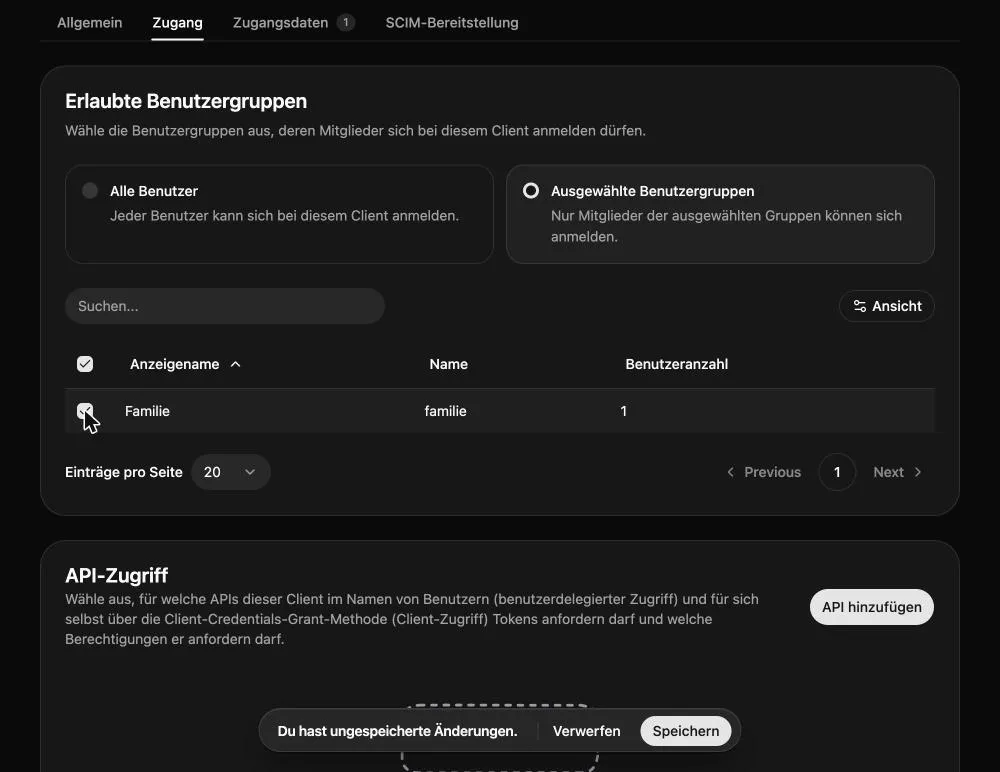
Users who are in none of these groups see this message at login:
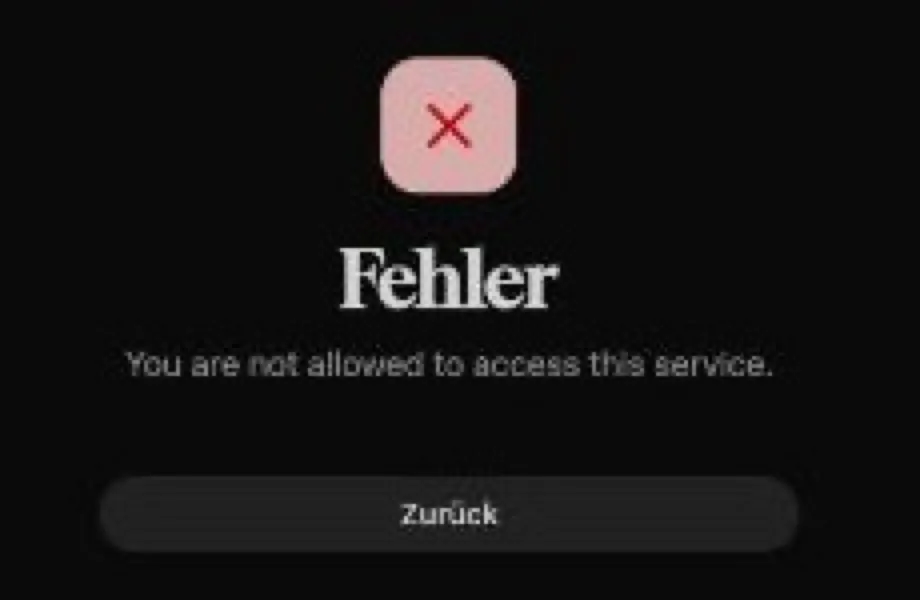
On the “Zugang” tab you can switch back to “Alle Benutzer” at any time. Note: if you choose “Ausgewählte Benutzergruppen” and check no group, nobody can use the client anymore.
My apps
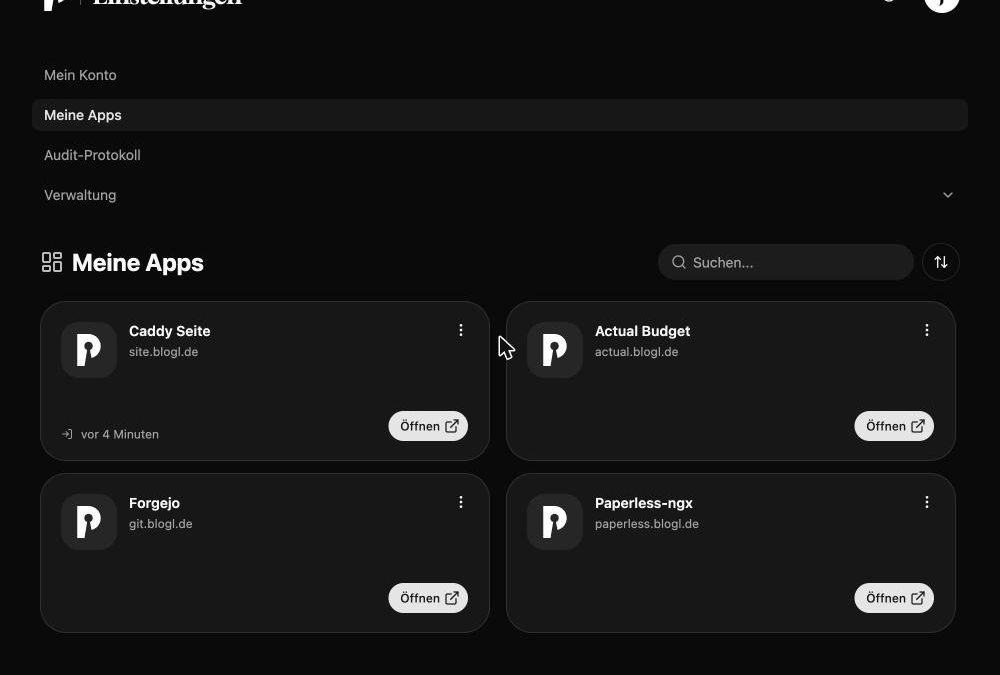
Under “Meine Apps”, every user sees the apps they have access to and opens them with one click. For an app to get a link there, enter the “Client-Start-URL” in the client under “Allgemein”, for example https://paperless.{{base_domain}}:
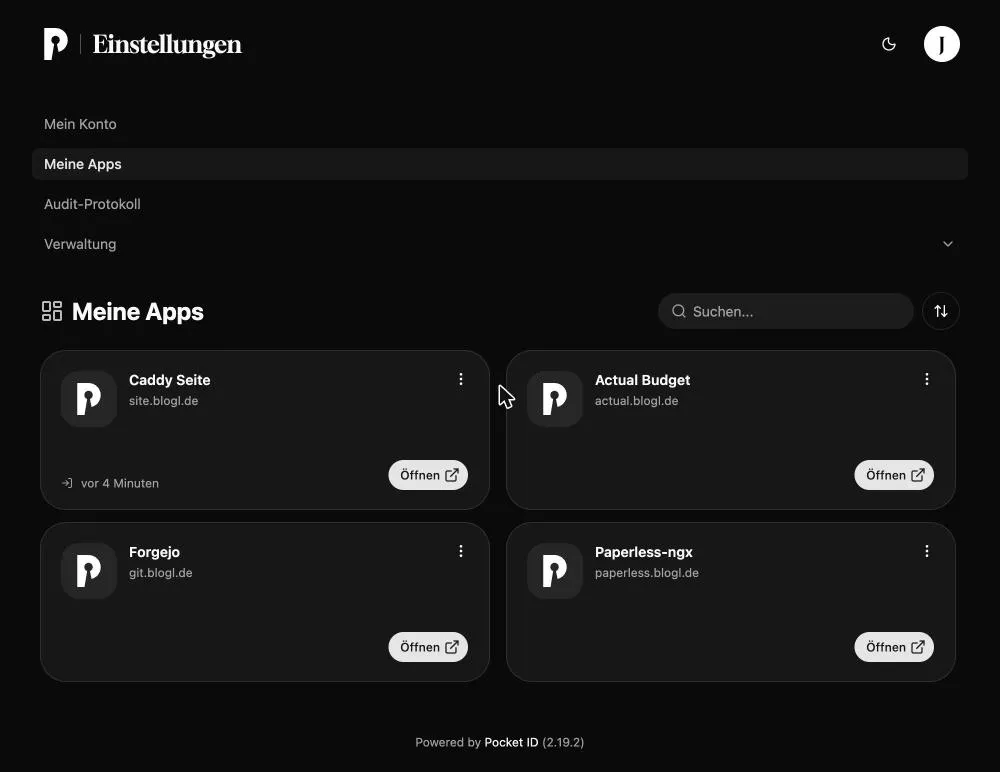
That turns Pocket ID into the starting point for your whole server: sign in once, then open every app from one page.
More settings
The most important environment variables for the Pocket ID .env, as listed in the documentation:
| Variable | Effect |
|---|---|
ANALYTICS_DISABLED=true |
Turns off the daily count of running instances. |
VERSION_CHECK_DISABLED=true |
Turns off the check for new versions on GitHub. |
STATIC_API_KEY |
An API key with admin rights (at least 16 characters), for example for scripts. It is sent in the X-API-KEY header. |
MAXMIND_LICENSE_KEY |
Downloads a geo database for the location display in the audit log. |
UI_CONFIG_DISABLED=true |
Takes the settings from environment variables instead of the interface. Only then do the SMTP, LDAP and ALLOW_USER_SIGNUPS variables take effect. |
ALLOW_USER_SIGNUPS |
disabled, withToken (sign-up through invite links) or open. |
SMTP_HOST, SMTP_PORT, SMTP_FROM, SMTP_USER, SMTP_PASSWORD, SMTP_TLS |
Mail server for one-time login links and notifications. |
LDAP_ENABLED=true |
Syncs users and groups from an LDAP directory. |
The audit log shows your own activity under “Persönlich” and that of all users under “Global”: logins, new passkeys, client approvals. With TRUST_PROXY=true the real IP addresses appear there. The “Global” tab is meant for admins.
Backup and update
Pocket ID stores everything in the data folder. Back it up together with the .env, because without the ENCRYPTION_KEY the database is useless:
cd ~
sudo tar czf pocketid-backup.tar.gz pocketid/data pocketid/.env
To update, pull new images and restart:
cd ~/pocketid
sudo docker compose pull
sudo docker compose up -d
You can see the version at the bottom of every Pocket ID page. Before bigger jumps, check the release notes.
Conclusion
Pocket ID turns many separate logins into one. The installation is a single container, sign-in runs through passkeys, and you attach new apps in a few minutes. Groups control who sees what, and with oauth2-proxy even pages without a login of their own get protection.
Do you already use central sign-in for your server apps, and which app would you connect next? Let me know in the comments.
FAQ
Frequently asked questions
What is Pocket ID?
Pocket ID is a self-hosted OpenID Connect provider where you sign in only with passkeys. Other apps use Pocket ID for their login, so you only have to authenticate once.
Is Pocket ID free?
Yes. Pocket ID is open source. For self-hosting you only pay for the server.
Do I need a domain and HTTPS?
Yes. Browsers only allow passkeys over HTTPS. For trying it out, localhost works too.
What happens if I lose my passkey?
You can no longer get into your account. So register at least two passkeys on different devices, or in a password manager with sync.
Can I keep using the apps' password logins?
Yes. The Pocket ID login is added as an extra option. In most apps you hide the password form only once the SSO login runs reliably.
How do I protect an app that has no OIDC support?
Put oauth2-proxy in front of it and wire it into nginx or another reverse proxy. The nginx example with auth_request above shows the complete configuration.
Why do I get errors in Paperless-ngx after logging in?
New users created through Pocket ID have no permissions in Paperless at first. Give the user permissions as an admin, make them a superuser, or assign a group automatically with PAPERLESS_SOCIAL_ACCOUNT_DEFAULT_GROUPS.
How do I update Pocket ID?
In the folder with the compose.yaml, run sudo docker compose pull and then sudo docker compose up -d. Your data in the data folder stays intact.