



Caddy Reverse Proxy with Docker: Caddyfile, Load Balancing and Fail2ban
Set up Caddy as a reverse proxy for Docker: automatic HTTPS, Caddyfile syntax, load balancing with health checks, headers, IP filter, basic auth, error pages and Fail2ban.
Contents
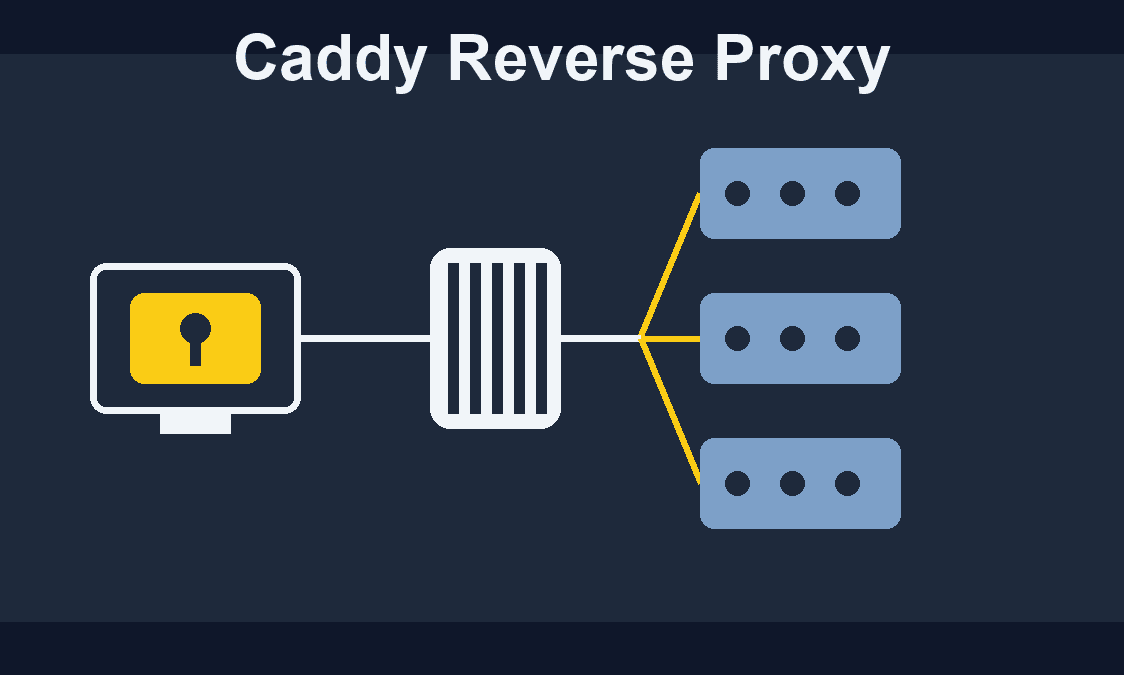
Caddy 2.11Docker 29.9Docker Compose 5.7Debian 13You have a server with 20 Docker containers, and all of them should be reachable from the internet. The problem is a classic one: you have only one public IP address, and you can claim ports 80 and 443 only once. How do you get Immich, Paperless, Nextcloud, Home Assistant and your website safely under one address? The answer is a reverse proxy.
The best-known reverse proxy is probably Nginx Proxy Manager. In my guides, though, I often use the modern alternative Caddy. Caddy fetches HTTPS certificates from Let’s Encrypt on its own, renews them automatically, and a complete configuration for a website takes three lines. In this guide I set up Caddy on a fresh server and go through the syntax of its configuration file (the Caddyfile) step by step: load balancing, health checks, headers, IP filters, password protection, redirects, error pages and Fail2ban.
What you will learn in this post
- How a reverse proxy works and how Caddy differs from Nginx Proxy Manager, Traefik and Zoraxy
- Preparing the server and domain (DNS with a wildcard record)
- Starting Caddy with Docker Compose, with a shared Docker network and handy aliases
- The Caddyfile syntax: reverse proxy, load balancing, health checks, headers, subdirectories, redirects, snippets, logging
- Restricting access: IP filter, basic auth, Fail2ban and rate limiting
- Custom error pages and a website served from files with an API forwarded to a container
- Optional: wildcard certificate via DNS challenge and HTTP/3
What you need
- A server with Docker. At home it works too, but then you have to forward ports 80 and 443 to the server in your router. If you have a DS-Lite connection (no IPv4 address of your own), forwarding is not possible. In that case, take a look at the post Reverse proxy with Pangolin.
- A domain that points to the server, and the ability to set DNS records.
Caddy needs hardly any resources. In the test, the container used about 26 MB of RAM after a few dozen requests. You need a bigger server only if you want to run many more applications next to it.
Caddy, Nginx Proxy Manager, Traefik or Zoraxy?
Several reverse proxies are good. This is how I see them:
| Proxy | Strength | Weakness |
|---|---|---|
| Nginx Proxy Manager | Web interface, very beginner-friendly | You click through every change by hand, the configuration lives in a database |
| Caddy | Very short text configuration, HTTPS automatic, HTTP/3 built in | No interface, you add containers to the file yourself |
| Traefik | Finds Docker containers by itself and reads labels | More terms, steeper learning curve |
| Zoraxy | Web interface, many extra features | Younger project |
With Caddy you get a single text file that you can back up in Git and read. I like that. If you later find manual entries too tedious, there is also the plugin caddy-docker-proxy. Like Traefik, it reads labels from containers.
You can also generate the configuration from a form: the Caddyfile generator assembles the file for you without you having to know the syntax.
Create the server
I use a VPS from Hetzner again. More notes on choosing a server are in the VPS guide.
In the Cloud Console you click “Create server” and choose:
- Location: for example Falkenstein
- Image: Debian 13 (Ubuntu 24.04 works just as well)
- Type: a small server, such as the CX23 with 2 vCPUs and 4 GB RAM. For Caddy alone, even less is enough.
- Network: a public IPv4 address
For the cloud config I use the Hetzner Cloud-Init generator. There I set: main user deployn, my SSH public key, install Docker, forbid root login and allow only login with an SSH key. How to create an SSH key is covered in the VPS guide. Then you click “Copy”, paste the text into the “Cloud config” field and create the server. After the setup the server reboots once. That takes two to three minutes.
When the server is running, you can connect with your user and check that Docker is there:
ssh {{username}}@{{server_ip}}
docker --version
docker compose versionDocker version 29.9.3, build 5457199
Docker Compose version v5.7.0I checked the root login: ssh root@... ends with Permission denied (publickey).
Instead of the terminal you can also use Visual Studio Code. With the “Remote - SSH” extension you click the green icon at the bottom left, choose “Connect current window to Host” and enter deployn@SERVER-IP. Then you open your home directory /home/deployn via “Open Folder”. The advantage is that you edit files in an editor and still have a terminal on the server. How exactly that works is explained in the post Connect VS Code to a server via SSH.
Point the domain at the server
For Caddy to get certificates, your domain must point to the server’s IP address. I set two A records at my provider (Netcup in my case):
| Type | Host | Value |
|---|---|---|
| A | @ |
SERVER-IP |
| A | * |
SERVER-IP |
The record with @ is the domain itself (domain.com). The asterisk is a wildcard: every subdomain (app1.domain.com, blog.domain.com, anything.domain.com) then points to the server. Thanks to that, you never have to create a DNS record for a new service again. If your server has an IPv6 address, you create the same records as AAAA.
Afterwards it takes a while until the change is known everywhere. Officially it is up to 48 hours; usually it takes minutes to a few hours. You can look at dnschecker.org to see which IP the DNS servers around the world return, or check in the terminal yourself:
dig +short app1.{{domain}}203.0.113.10If your server’s IP address is shown there (here the example address 203.0.113.10), you can continue. With ping app1.domain.com you see the same address. As long as you still see the old one, the change has not reached your DNS server yet. Let’s Encrypt cannot issue a certificate then, which is why waiting pays off. Too many failed attempts can get you blocked by Let’s Encrypt for a while.
Start Caddy with Docker Compose
On the server we create a directory for Caddy. It holds the Compose file, the configuration file Caddyfile and two folders for data:
mkdir -p ~/caddy/data ~/caddy/config
cd ~/caddy
touch compose.yaml Caddyfile
Open compose.yaml and enter:
services:
  caddy:
    image: caddy:2.11
    container_name: caddy
    restart: unless-stopped
    ports:
      - "80:80"
      - "443:443"
      - "443:443/udp"
    volumes:
      - ./Caddyfile:/etc/caddy/Caddyfile
      - ./data:/data
      - ./config:/config
    networks:
      - proxy

networks:
  proxy:
    external: true
image: caddy:2.11: The official image. I name the version explicitly. With2.11you get all patch updates of the 2.11 series (currently 2.11.8) but no unexpected new major version. I advise againstlatest, because an update could otherwise change something unnoticed.container_name: The name we use to address the container later.restart: unless-stopped: If the container crashes or the server restarts, Caddy starts again on its own.ports: Port 80 (HTTP) and 443 (HTTPS) of the server go to Caddy. The third line also forwards 443 via UDP. Caddy needs that for HTTP/3. If you leave the line out, everything keeps working, just without HTTP/3.volumes: TheCaddyfileis our configuration. Without it, Caddy sees no settings. The folderdatais important: Caddy stores certificates and keys there. If it is lost, Caddy has to request all certificates again, and you may hit Let’s Encrypt’s limits. The folderconfigholds the automatically saved configuration.networks: The networkproxy, which we create in a moment. Why it is needed, you will see shortly.
Create the Docker network
Docker isolates containers from each other. Containers that are not in the same network cannot see each other. So we create a network of our own that Caddy and all services Caddy should publish will join:
docker network create proxyThe name proxy is freely chosen. In the Compose file it says external: true, because the network does not belong to this project but already exists. That way any number of Compose projects can join it later.
Caddyfile and first start
The Caddyfile is still empty. We enter nothing yet and only start the container as a test:
cd ~/caddy
docker compose up -d
docker compose psNAME IMAGE COMMAND SERVICE CREATED STATUS PORTS
caddy caddy:2.11 "caddy run --config …" caddy 1 second ago Up 1 second 0.0.0.0:80->80/tcp, [::]:80->80/tcp, 0.0.0.0:443->443/tcp, [::]:443->443/tcp, 0.0.0.0:443->443/udp, [::]:443->443/udp, 2019/tcpup -d starts the container in the background (-d for “detached”). Caddy is running but has nothing to do yet.
Aliases for less typing
With the Compose file in ~/caddy you would have to change into the folder first for every command. With the option -f you give the path of the Compose file and can run the command from anywhere. So that you do not have to type the long command all the time, I create aliases. These are shortcuts for the shell. Append these lines to ~/.bashrc (for example with nano ~/.bashrc):
alias caddy-up="docker compose -f $HOME/caddy/compose.yaml up -d"
alias caddy-down="docker compose -f $HOME/caddy/compose.yaml down"
alias caddy-logs="docker compose -f $HOME/caddy/compose.yaml logs -f"
alias caddy-reload="docker compose -f $HOME/caddy/compose.yaml exec caddy caddy reload --config /etc/caddy/Caddyfile"
Then you reload the file: source ~/.bashrc. From now on these commands start, stop and watch Caddy from any folder:
| Alias | Effect |
|---|---|
caddy-up |
Start the container |
caddy-down |
Stop and remove the container |
caddy-logs |
Show and follow the logs (quit with Ctrl + C) |
caddy-reload |
Reload the Caddyfile without restarting the container |
caddy-reload is the most important one: Caddy applies the new configuration without dropping connections. If the compose.yaml changes instead (for example a new volume), you need caddy-down and caddy-up.
Set up a test app
To try out the reverse proxy we need a service. I use traefik/whoami: a tiny web server that shows which request arrived at it. It is perfect for seeing routing, headers and load balancing. We start two instances right away, app1 and app2.
mkdir ~/app
cd ~/app
nano compose.yamlservices:
app1:
image: traefik/whoami:v1.12
container_name: app1
restart: unless-stopped
networks:
- proxy
app2:
image: traefik/whoami:v1.12
container_name: app2
restart: unless-stopped
networks:
- proxy
networks:
proxy:
external: trueWhat matters are the container_name entries and the network proxy. Caddy reaches the containers in the network by their name (app1, app2). Start them:
docker compose up -dThe containers have no ports entry. They are not reachable from outside, only through Caddy. That is intended: nobody gets past Caddy this way.
What happens when the network is missing?
This is the most common mistake. Caddy then answers with 502 Bad Gateway, and the log says:
dial tcp: lookup app1 on 127.0.0.11:53: no such hostCaddy cannot find the name app1 because the container is in a different network. So you have to enter the network in two places: in the networks: block at the very bottom (here external: true) and on the service itself under services → networks. If either is missing, no connection is made. After changing networks you have to recreate the containers.
The Caddyfile: your first reverse proxy
The Caddyfile consists of site blocks. A block begins with the domain and contains, in curly braces, what should happen there. Open ~/caddy/Caddyfile:
app1.{{domain}} {
	reverse_proxy app1:80
}
That is all. The line reverse_proxy app1:80 says: all requests to app1.domain.com go to the container app1 on port 80. You indent with tabs. Then you reload the configuration:
caddy-reloadIf you now open https://app1.domain.com, you see the output of whoami. In the terminal:
curl https://app1.{{domain}}/abcHostname: 23a36a0a1600
IP: 127.0.0.1
IP: ::1
IP: 172.18.0.4
RemoteAddr: 172.18.0.2:40794
GET /abc HTTP/1.1
Host: app1.domain.com
User-Agent: curl/8.14.1
Accept: */*
Accept-Encoding: gzip
Via: 2.0 Caddy
X-Forwarded-For: 203.0.113.10
X-Forwarded-Host: app1.domain.com
X-Forwarded-Proto: httpsWhat you see here:
- The request
/abcarrived at the container. - Caddy set the headers
X-Forwarded-For(your IP),X-Forwarded-Host(the original domain) andX-Forwarded-Proto(https). That way the application knows who really called it. Many programs need that for logs and redirects. - In the browser you see the padlock: an HTTPS connection with a certificate from Let’s Encrypt. Caddy fetched it by itself on the first call. In the log (
caddy-logs) it says:
{"level":"info","logger":"tls.obtain","msg":"certificate obtained successfully","identifier":"app1.domain.com","issuer":"acme-v02.api.letsencrypt.org-directory"}A reverse proxy with HTTPS can hardly get simpler. Caddy sets up a redirect from HTTP to HTTPS automatically. You do not have to enter anything for that.
The global block
At the start of the file there can be a block without a domain. Settings for all of Caddy go there:
{
	email admin@domain.com
	# debug
}
An email address used to make sense so that Let’s Encrypt could warn you about expiring certificates. Let’s Encrypt has not done that since 2025, so the address is optional. With debug, Caddy runs in debug mode and logs more, which helps with troubleshooting. I left both out in the test; the lines are here for orientation only.
Check the format and find errors
When loading, Caddy warns you if the file is not neatly formatted:
Caddyfile input is not formatted; run 'caddy fmt --overwrite' to fix inconsistenciesThat is only a warning, and the configuration applies anyway. I fix the formatting with the built-in formatter. This works only if the file is not mounted :ro:
docker exec caddy caddy fmt --overwrite /etc/caddy/CaddyfileBefore reloading you can also check a file without applying it:
docker exec caddy caddy validate --config /etc/caddy/CaddyfileValid configurationOn an error, Caddy names the line. A reload with a faulty file aborts, and Caddy keeps running with the old configuration. So you cannot break anything.
Load balancing
Imagine you run an application twice, for example for more performance or redundancy. Caddy then distributes the requests. For that you simply name several targets behind reverse_proxy:
lb.{{domain}} {
	reverse_proxy app1:80 app2:80
}
After the reload I call the address eight times. This is how the requests are distributed (counted by container hostname):
      3 Hostname: 23a36a0a1600
      5 Hostname: ddd7674b5f61
Both containers get requests, but unevenly. That is the default: random, that is, a random target per request.
Choose the strategy
How Caddy distributes is determined by lb_policy. The list of options is in the Caddy documentation. The most important ones:
lb_policy |
Behavior |
|---|---|
random |
Random target (default) |
round_robin |
In turn, each target gets its turn |
least_conn |
The target with the fewest open connections |
first |
Always the first reachable target, the others are a reserve |
ip_hash |
The same client IP always lands on the same target |
cookie |
A cookie remembers the target (sticky sessions) |
With round_robin:
lb.{{domain}} {
	reverse_proxy app1:80 app2:80 {
		lb_policy round_robin
	}
}
Now the target changes with every request:
      1 Hostname: ddd7674b5f61
      1 Hostname: 23a36a0a1600
      1 Hostname: ddd7674b5f61
      1 Hostname: 23a36a0a1600
When a target fails: health checks
What happens if app1 fails? I stop the container with docker stop app1 and call the page six times:
200 502 200 502 200 502Every second request fails with 502 Bad Gateway, because Caddy keeps sending to the dead target. That is annoying. The solution is health checks: Caddy regularly asks each target whether it responds and sends requests only to working targets.
lb.{{domain}} {
	reverse_proxy app1:80 app2:80 {
		lb_policy round_robin
		health_uri /
		health_interval 5s
		health_timeout 2s
	}
}health_uri: The path Caddy queries. It should be a page that returns200when the service is healthy.health_interval: How often Caddy checks (here every 5 seconds).health_timeout: How long Caddy waits for an answer before the target counts as failed.
After the reload, with app1 stopped:
200 200 200 200 200 200All requests now go to app2. If I start app1 again, Caddy takes it back into the rotation after five seconds at most.
Targets on other servers
The targets do not have to be containers in the same network. You can also enter a domain or the IP address of another server. I tested this with a second server running a whoami container on port 8080:
remote.{{domain}} {
	reverse_proxy app1:80 203.0.113.20:8080 {
		lb_policy round_robin
		health_uri /
		health_interval 5s
		health_timeout 2s
	}
}
Result with six requests: three at the local app1 and three at the container on the other server. When I stopped the other server, all six requests went to app1 with 200. That way you lower the risk of an outage significantly, for example with two servers in different locations. Note: the port on the target server has to be open for this. Restrict it with the firewall to the IP address of your Caddy server.
Sticky sessions
Some applications remember the user in the server’s memory. Then a visitor should always land on the same target. For that there is lb_policy cookie:
sticky.{{domain}} {
	reverse_proxy app1:80 app2:80 {
		lb_policy cookie
	}
}
Caddy sets a cookie for this:
set-cookie: lb=937544e36d856811e8…; Path=/; HttpOnly; Secure; SameSite=NoneA client that sends the cookie back (curl -b) lands on the same container for all four requests. Without the cookie, Caddy chooses anew.
Change headers
You can pass headers on to the application. With header_up you change headers that go to the target, with header_down headers of the response that go back to the visitor:
secret.{{domain}} {
	reverse_proxy app1:80 {
		header_up X-Secret-Token "my secret token"
	}
}
In the whoami output the header now shows up:
X-Secret-Token: my secret tokenThat is handy, for example, for applications that expect a fixed header, or to remove headers: with header_up -Cookie the target receives no cookies.
Set security headers
With the header directive (without _up) you set headers on the response. It is the easiest way to enable a few security headers. A leading minus sign removes a header:
secure.{{domain}} {
	header {
		Strict-Transport-Security "max-age=31536000; includeSubDomains"
		X-Content-Type-Options "nosniff"
		X-Frame-Options "SAMEORIGIN"
		Referrer-Policy "same-origin"
		-Server
	}
	reverse_proxy app1:80
}
With curl -I https://secure.domain.com you check the result. The four headers are there, and the Server header is missing:
referrer-policy: same-origin
strict-transport-security: max-age=31536000; includeSubDomains
x-content-type-options: nosniff
x-frame-options: SAMEORIGIN
In addition, encode zstd gzip compresses responses and saves bandwidth. You simply enter it in the site block.
Subdirectories instead of subdomains
Instead of app1.domain.com and app2.domain.com you can also use paths like tools.domain.com/app1/. For that there is handle_path:
tools.{{domain}} {
	handle_path /app1/* {
		reverse_proxy app1:80
	}
	handle_path /app2/* {
		reverse_proxy app2:80
	}
}
handle_path rather than reverse_proxy alone matters here because it strips the path: if someone opens tools.domain.com/app1/abc, the container gets GET /abc. The container does not know the prefix /app1 at all. The output of whoami proves it:
GET /abc HTTP/1.1Two pitfalls:
- The path
/app1/*matches only with the trailing slash. If someone openstools.domain.com/app1without the/, no block matches, and Caddy answers with an empty page (200with no content). That also applies to the main addresstools.domain.com/. - Not every application works under a subdirectory, because it outputs links like
/css/style.css. Subdomains are therefore usually more reliable.
Forward to external sites
A reverse proxy can also serve sites outside your server. There is one peculiarity with the Host header here. An example with example.com, addressed over plain HTTP (without HTTPS):
plain.{{domain}} {
	reverse_proxy http://example.com
}
That fails. The request arrives at the target with the host plain.domain.com, and the target does not know what to do with it. In my test the service answered with status 409 and an error page (“DNS resolution error”). You have to tell Caddy to present itself as the target:
plain.{{domain}} {
	reverse_proxy http://example.com {
		header_up Host {upstream_hostport}
	}
}
{upstream_hostport} is a placeholder that Caddy fills with the host and port of the target. Now the call returns the page from example.com with status 200. With a target using https:// this is no longer necessary: Caddy then sets the host to the target itself. I tested the line there, and Caddy reports it as “Unnecessary header_up Host”.
Restrict access by IP address
Not everyone should see an admin interface. With a matcher you select requests. A matcher starts with @ and a freely chosen name. Here is one for specific IP addresses:
admin.{{domain}} {
	@internal remote_ip 192.168.0.0/16 10.0.0.0/8 203.0.113.10
	handle @internal {
		reverse_proxy app1:80
	}
	respond "Access denied" 403
}
@internal remote_ip ...defines the matcher@internal: it matches requests that come from these addresses.192.168.0.0/16and10.0.0.0/8are private networks, and the last address is a single machine (replace it with your own, which you can find out via a search engine).handle @internal { ... }runs the reverse proxy only for these requests.respondapplies to all others: they get the text “Access denied” with status403.
I checked this with my server (allowed) and my computer at home (not in the list). From the allowed machine I get 200 with the page, from the other 403 with “Access denied”. In the browser you also see it in the developer tools under “Network”.
Instead of writing the networks yourself, Caddy knows the shortcut private_ranges for all private address ranges. It is handy when a service should be reachable only from your local network:
internal.{{domain}} {
	@blocked not remote_ip private_ranges
	respond @blocked 403
	reverse_proxy app1:80
}
Password protection with basic auth
If you have no fixed IP address, you protect a page with a username and password. Caddy stores the password as a hash. You generate it with the command in the container:
docker exec caddy caddy hash-password --plaintext 'YourStrongPassword'$2a$14$FTDGpmbYqg5.K…You copy the printed hash into the Caddyfile:
auth.{{domain}} {
	basic_auth {
		admin $2a$14$FTDGpmbYqg5.K…
	}
	reverse_proxy app1:80
}
Without credentials the page answers with 401 Unauthorized, with admin and the right password with 200. The password is not in plain text anywhere, but the command ends up in your terminal history. If you put a space in front of the command, Bash normally does not save it.
Redirects and rewrites
From www to the main domain
If you run a website, you should decide between www.domain.com and domain.com and redirect the other variant. That also matters for search engines, so they do not see two versions of the same page:
www.{{domain}} {
	redir https://{{domain}}{uri} permanent
}
The {uri} at the end is important: it appends the path and parameters of the original request. Then www.domain.com/hello lands at domain.com/hello. Without {uri}, all visitors would arrive at the home page.
The word permanent is important too. Without it, Caddy sends the status code 302 (temporary). With permanent it is a 301 (permanent), and search engines adopt the new address. I checked this:
HTTP/2 301
location: https://domain.com/hello
Rewrite paths
With rewrite you change the path without the visitor noticing. That is handy when you migrate an old application and old addresses should keep working. All requests to /old then go to /new:
app1.{{domain}} {
	rewrite /old /new
	reverse_proxy app1:80
}
The address in the browser stays /old, but the container sees GET /new. A redir, in contrast, sends the browser to a new address, and the visitor sees it in the address bar.
Snippets: reusable building blocks
If you have several sites with the same settings, you write them once as a snippet. The name goes in parentheses. You include the snippet with import:
(old-new) {
	rewrite /old /new
}

app1.{{domain}} {
	import old-new
	reverse_proxy app1:80
}

app2.{{domain}} {
	import old-new
	reverse_proxy app2:80
}
For a one-liner that is not worth it. But for a block of security headers, compression and logging that you need on ten services, you save a lot and later change it in one place.
Logging
Caddy can log every request. With log in a site block you write the log to a file. I use the JSON format because tools like Fail2ban can evaluate it easily:
(log-json) {
	log {
		output file /data/access.log
		format json
	}
}

app1.{{domain}} {
	import log-json
	reverse_proxy app1:80
}
The file lies in the folder data that we mounted into the container, so on the server at ~/caddy/data/access.log. It belongs to the user root, so you can read it only with sudo:
sudo tail -n 1 ~/caddy/data/access.log{"level":"info","ts":1793880253.2,"logger":"http.log.access.log0","msg":"handled request","request":{"remote_ip":"203.0.113.10","client_ip":"203.0.113.10","proto":"HTTP/2.0","method":"GET","host":"app1.domain.com","uri":"/new", …},"status":200, …}Each request is one line with time (ts), visitor IP (client_ip), domain (host), path (uri) and status code (status). In the example you can also see that uri is already the rewritten path. More options (rotation, filters) are described in the documentation for log. In this mode Caddy rotates log files from 100 MB by default and keeps 10 files.
Fail2ban: block attackers automatically
With the logs you can block attackers. Fail2ban reads the log, detects repeated failed attempts (for example wrong passwords with basic auth, that is 401) and blocks the IP address in the firewall for a while. On a server that is connected to the internet, that is useful. In the test I saw that after a few minutes foreign scanners were already in the ban list.
Install Fail2ban on the server (not in the container):
sudo apt install -y fail2banThe filter says which lines count as a failed attempt. It looks in the JSON line for the client IP and a status of 401 or 403. Create /etc/fail2ban/filter.d/caddy-status.conf:
[Definition]
failregex = ^.*"client_ip":"<HOST>".*"status":(?:401|403).*$
datepattern = "ts":{EPOCH}
Then the jail, which connects filter, log file and ban duration. File /etc/fail2ban/jail.d/caddy.local:
[caddy-status]
enabled = true
port = http,https
filter = caddy-status
logpath = /home/{{username}}/caddy/data/access.log
maxretry = 5
findtime = 10m
bantime = 1h
banaction = iptables-multiport
chain = DOCKER-USERmaxretry,findtime,bantime: anyone who makes 5 failed attempts within 10 minutes is blocked for an hour.chain = DOCKER-USERis important. Fail2ban’s default rules apply in theINPUTchain. Requests to Docker containers bypass that chain, though. A block inINPUTwould therefore have no effect on Caddy. TheDOCKER-USERchain is passed through for Docker traffic before Docker’s own rules, and the block takes effect there.- Behind a proxy: Fail2ban blocks in the firewall. If another proxy sits in front of Caddy (for example Cloudflare), the firewall only sees its address. If the log contains the proxy’s address, you block all visitors. If it contains the real visitor IP, the block has no effect.
Then restart Fail2ban and check:
sudo systemctl restart fail2ban
sudo fail2ban-client status caddy-status
With sudo fail2ban-regex ~/caddy/data/access.log /etc/fail2ban/filter.d/caddy-status.conf you check whether your filter recognizes the lines. For me the filter matched 42 of 52 lines; the others were lines with other status codes.
What it looks like when it works: I sent wrong credentials seven times from my computer to auth.domain.com. The first six requests got 401, the seventh ran into a timeout, and my address was in the ban list:
Chain DOCKER-USER (1 references)
target            prot opt source     destination
f2b-caddy-status  tcp  --  0.0.0.0/0  0.0.0.0/0   multiport dports 80,443
With sudo fail2ban-client set caddy-status unbanip YOUR-IP you lift a ban again.
Rate limiting: limit requests per IP
Fail2ban reacts to failed attempts. A bot that floods an interface with valid requests goes unnoticed there. A rate limit helps: Caddy lets only a set number of requests per IP address through in a time window and answers with 429 Too Many Requests after that.
Caddy has no rate limit built in. You need the plugin caddy-ratelimit and therefore your own image, just like for the wildcard certificate further down. The Dockerfile in ~/caddy:
FROM caddy:2.11-builder AS builder
RUN xcaddy build --with github.com/mholt/caddy-ratelimit

FROM caddy:2.11
COPY --from=builder /usr/bin/caddy /usr/bin/caddy
In compose.yaml you now build the image yourself instead of pulling the official one:
services:
  caddy:
    build: .
    image: caddy-ratelimit:2.11
    image: caddy:2.11
Then build and start. Compiling takes a few minutes:
cd ~/caddy
docker compose build
docker compose up -d
You write the limit in the Caddyfile. As an example I limit POST requests under /api/ to three per minute and IP address:
api.{{domain}} {
	route {
		rate_limit {
			zone per_ip {
				match {
					method POST
					path /api/*
				}
				key {remote_host}
				events 3
				window 1m
			}
		}
		reverse_proxy app1:80
	}
}route: Plugin directives have no fixed position in Caddy’s order. Inside arouteblock everything runs in the order you write it, so the limit runs beforereverse_proxy.zone per_ip: A zone is a named counter. The name is up to you.match: Only requests that fit this matcher are counted. Read requests stay unlimited.key {remote_host}: Every IP address gets its own counter.events 3andwindow 1mallow three requests per minute.
A second zone with key static counts all visitors together. This catches attacks from many different addresses, but during an attack it also hits real visitors:
		zone all {
			match {
				method POST
				path /api/*
			}
			key static
			events 10
			window 1m
		}
To test it, send six requests in a row:
for i in 1 2 3 4 5 6; do curl -s -o /dev/null -w '%{http_code} ' -X POST https://api.{{domain}}/api/test; done; echoThe first requests reach the application, after that Caddy answers with 429.
Custom error pages and static websites
Caddy can not only forward but also serve files. We use that for a maintenance page that appears when a service fails, and for a static website with an API forwarded to a container.
Create a folder webseite in the Caddy directory and mount it in the compose.yaml:
    volumes:
      - ./Caddyfile:/etc/caddy/Caddyfile
      - ./data:/data
      - ./config:/config
      - ./webseite:/webseite
After that you need caddy-down and caddy-up, because the Compose file changed. Create the pages:
<!doctype html>
<html lang="en">
	<head>
		<meta charset="utf-8" />
		<title>Maintenance</title>
	</head>
	<body>
		<h1>An error occurred. We will be back soon.</h1>
	</body>
</html><!doctype html>
<html lang="en">
<head>
<meta charset="utf-8" />
<title>Home</title>
</head>
<body>
<h1>Home</h1>
<p>This is a static website.</p>
</body>
</html>Error page on outage
With handle_errors you determine what happens on an error. Here we serve the maintenance page instead of the error message:
error.{{domain}} {
	reverse_proxy app1:80
	handle_errors {
		rewrite * /wartungsarbeiten.html
		root * /webseite
		file_server
	}
}
rewrite * /wartungsarbeiten.htmlrewrites every path to the maintenance page.root * /webseitedefines which folder Caddy looks in.file_serverenables serving static files.
While app1 is running you see the application. If I stop the container (docker stop app1), I see my page with “An error occurred” instead. The status code stays 502, which is right for search engines and monitoring.
Combine a static page and an API
The nice thing about Caddy: you can mix both on one domain. Everything under /api/ goes to a container, everything else Caddy serves from your folder webseite:
hybrid.{{domain}} {
	handle /api/* {
		reverse_proxy app2:80
	}
	handle {
		root * /webseite
		try_files {path} /index.html
		file_server
	}
}
handle /api/*forwards requests under/api/toapp2(unlikehandle_path, the prefix is kept, so the API sees/api/test).- The second
handleblock without a path applies to everything else. try_files {path} /index.htmllooks for the requested file and, if it is missing, serves theindex.html. That is the usual pattern for websites that control their own pages in the browser (single-page apps).
The result: hybrid.domain.com/anything shows the home page, and hybrid.domain.com/api/test lands at app2 (GET /api/test). That gives you a static page in the frontend, and in the background you can address more services.
If a domain should simply show a website, two lines are enough:
{{domain}} {
	root * /webseite
	file_server
}
Wildcard certificate via DNS challenge (optional)
So far Caddy fetches its own certificate for every subdomain via the HTTP challenge. That is enough for almost everyone. You need a wildcard certificate (*.domain.com) if subdomains should not appear in the public certificate register (Certificate Transparency) or the server is not reachable from the internet (for example a home server). For that, Let’s Encrypt requires the DNS challenge: Caddy creates a record via your DNS provider’s API. That is not built into the standard version of Caddy. You need your own image with your provider’s plugin. You build it with xcaddy in a Dockerfile. Example for Netcup:
FROM caddy:2.11-builder AS builder
RUN xcaddy build --with github.com/caddy-dns/netcup

FROM caddy:2.11
COPY --from=builder /usr/bin/caddy /usr/bin/caddydocker build -t caddy-netcup:2.11 ~/caddy
docker run --rm caddy-netcup:2.11 caddy list-modules | grep dns.providersdns.providers.netcupSo the image builds, and the plugin is included. In the compose.yaml you replace image: caddy:2.11 with image: caddy-netcup:2.11 and pass the credentials on as environment variables. In the Caddyfile the provider then goes into the global block, and an address with an asterisk applies to all subdomains:
{
	acme_dns netcup {
		customer_number {env.NETCUP_CUSTOMER_NUMBER}
		api_key {env.NETCUP_API_KEY}
		api_password {env.NETCUP_API_PASSWORD}
	}
}

*.{{domain}}, {{domain}} {
	@app1 host app1.{{domain}}
	handle @app1 {
		reverse_proxy app1:80
	}
	handle {
		abort
	}
}
caddy validate confirmed the file as valid. I did not test the issuing of the certificate itself, because that would need real credentials for my Netcup account. For other providers (Cloudflare, Hetzner, IONOS and many more) there are plugins in the caddy-dns repository. The options are in each plugin’s documentation. Test with Let’s Encrypt’s staging server (the option acme_ca https://acme-staging-v02.api.letsencrypt.org/directory in the global block) before you request real certificates.
HTTP/3
Caddy speaks HTTP/3 without further settings when port 443 is reachable via UDP. We took care of that in the Compose file with "443:443/udp". In the response header alt-svc: h3=":443" Caddy announces HTTP/3. I checked it from a second server with a curl container that supports HTTP/3:
docker run --rm ymuski/curl-http3 curl -sI --http3 https://app1.{{domain}}HTTP/3 200
via: 1.1 CaddyIn the browser you see this in the developer tools under “Network” in the “Protocol” column (h3). If you have a firewall, open UDP 443 too, otherwise the browser falls back to HTTP/2. That happens without an error message and costs nothing but a little speed.
Updates and backup
Update Caddy: With caddy:2.11 you stay on the patch versions of the 2.11 series. To update, you pull the image again:
cd ~/caddy
docker compose pull
docker compose up -d
You move to a new major series deliberately by changing the tag. Read the release notes first.
Backup: What matters are the Caddyfile, the compose.yaml and the folder data (certificates and keys). With the file and the folder you have Caddy back after a reinstall within minutes, without requesting new certificates. How to back up Docker data is covered in the post on backups with Duplicati.
Troubleshooting
When something does not work, first look at the log with caddy-logs. The most common cases:
502 Bad Gatewayandno such hostin the log: The container is not in the networkproxyor has a different name. Checkcontainer_name,networksand the name in theCaddyfile.502 Bad Gatewayandconnection refusedin the log: The name is right, but nothing is listening on the port. Check the port the application uses inside the container. The port on the server does not matter here.- No certificate, error in the log: Does the domain already point to the server (
dig +short)? Are ports 80 and 443 open in firewall and router? With Hetzner cloud firewalls you check them in the Cloud Console. Be patient and do not keep retrying, because Let’s Encrypt limits failed attempts. - Reload changes nothing: A tool may have replaced the file, and the container sees the old file (see the note above).
caddy-downandcaddy-upfix it. - Reload reports an error: Caddy keeps the old configuration. The error message names the line. With
caddy validateyou check beforehand. - Page loads, but the application shows wrong links: The application does not know its public address. Many programs have a setting for that (
BASE_URLor similar) and read theX-Forwarded-*headers. - Docker ports are open despite the firewall: Docker bypasses
ufw. Publish ports only for Caddy and leave all other containers withoutports. Then they reach each other only over the network.
Frequently asked questions
What is the difference between Caddy, Nginx Proxy Manager and Traefik?
All three are reverse proxies. Nginx Proxy Manager has a web interface where you enter every site by hand. Caddy gets by with a very short text file and fetches HTTPS certificates automatically, but you enter containers yourself. Traefik reads Docker containers and configures itself via labels. In return Traefik has more terms and a steeper learning curve.
Do I have to request certificates for Caddy myself?
No. As soon as a domain is in the Caddyfile and points to the server, Caddy fetches the certificate from Let's Encrypt and renews it in time. The keys are stored in the folder data. Back it up so you do not have to request everything again after a reinstall.
How do I reload the Caddyfile without restarting the container?
With docker compose exec caddy caddy reload --config /etc/caddy/Caddyfile. The new configuration applies immediately, and existing connections stay up. If the file is faulty, the reload aborts and Caddy keeps running with the old configuration.
Why do I get 502 Bad Gateway?
Caddy cannot reach the target. Usually the container is not in the same Docker network as Caddy, or the port in the Caddyfile is wrong. In the log you see no such host for a wrong network and connection refused for a wrong port.
Can Caddy run without a domain?
For HTTPS with a trusted certificate you need a domain. Let's Encrypt does not issue certificates for bare IP addresses. For tests in your own network you can use Caddy with http:// and an address without a certificate.
How does Caddy work with several servers?
Behind reverse_proxy you can name several targets, including addresses on other servers. With lb_policy you decide how requests are distributed, and with health_uri, health_interval and health_timeout a failed target drops out of the rotation automatically.
How do I block attackers with Caddy and Fail2ban?
Write the requests in JSON format to a file (log with output file and format json), create a Fail2ban filter for the status codes 401 and 403, and use the DOCKER-USER chain in the jail, because Docker traffic bypasses the normal INPUT chain. I show the setup in the Fail2ban section.
Can I use a wildcard certificate with Caddy?
Yes, via the DNS challenge. For that you need a Caddy image with your provider's DNS plugin, which you build with xcaddy, and API credentials for your domain. The standard version of Caddy cannot do this.
Can I use Caddy without Docker?
Yes. Caddy is a single binary and can also be installed from package repositories. With Docker the server stays tidy, and you can manage services and Caddy together with Compose. The Caddyfile syntax is the same in both cases.
Does Caddy work with DS-Lite?
Caddy itself does, but with DS-Lite you lack a public IPv4 address and cannot forward ports. One solution is a tunnel through a small VPS, for example with Pangolin. I cover that in a separate post.
Conclusion
With Caddy you have a reverse proxy with automatic HTTPS in a few minutes. The configuration stays readable even as it grows: one text file in which every site is a block. Load balancing with health checks, headers, IP filter, basic auth, redirects, error pages and a static website with an API forwarded to a container are things you have now tested on a server. With Fail2ban you block attackers who keep trying wrong credentials, and with a rate limit you slow down bots that flood an interface.
Next you can put real services behind Caddy, for example Immich, Vaultwarden, Paperless or Gitea. The Caddyfile generator helps with the syntax. If you would rather have an interface, or want Docker containers detected automatically, my Traefik guide covers the alternative. Feel free to tell me in the comments: which reverse proxy do you use, and did you pick one deliberately?
Changelog
Added a section on rate limiting with the caddy-ratelimit plugin, added a note on Fail2ban behind a proxy, corrected the maxretry description and added a note on choosing the right HTTP method.