Set up server with Traefik as reverse proxy for Docker
Set up your server with Docker and configure Traefik as a reverse proxy using Docker Compose. Get automatic SSL certificates and secure container management.

Table of Contents
CAUTION
Please note that this blog post was originally written in German and has been translated for your convenience. Although every effort has been made to ensure accuracy, there may be translation errors. I apologize for any discrepancies or misunderstandings that may result from the translation and I am grateful for any corrections in the comments or via mail.
Install server
The first step is to get a server. In this guide, I use a server that is not located at my home; this usually offers some advantages, such as
-
Easier accessibility due to a fixed IPv4 address
-
Faster internet speed
-
Better cost forecast possible
-
No wear and tear on my own hardware
-
No electricity costs
-
Lower acquisition costs
-
No noise emissions at home
Of course, you should also be aware of the disadvantages. In any case, these instructions can be followed with any server on which Docker can be installed. I have had problems with virtual servers that were virtualized with OpenVZ instead of KVM.
I will use a VPS S SSD from Contabo here (costs approx. 6 € / month).
In my opinion, the VPS and especially Root-Server (dedicated CPU) from Netcup are also recommended. If you are not yet a customer there, you can get a discount of €5 with the following vouchers, or a VPS or root server for less. I get a commission for new customers. If the coupons have expired, you can contact me for new ones.
Once access to the server has been granted, it can be reinstalled from the customer area. I choose Ubuntu 20.04 as the operating system. Another would also be possible, but I have some experience with Ubuntu and see no reason to change. Furthermore, the end of standard support is not until April 2025, so it will probably not be necessary to upgrade the operating system to the next version for the time being.
After a few minutes, the server should be finished with the installation. Now it is time to connect to the server. This can be done under Windows with the Windows Terminal, PuTTY or a similar program. I use the Windows Terminal.
Then answer the question with “yes” if necessary and enter the password. The password is not displayed while you are entering it. The following message should now appear (or similar):
First, let’s see if there are any updates:
apt update If updates exist, we install them afterwards:
apt upgradeConfirm whether you want to update with Y.
The text editor Nano should already be installed by default, but you can install it like this to be on the safe side:
apt install nanoNext, we rename the server:
nano /etc/hostname
In Nano, exit the file with Ctrl + X. Nano will ask you if you want to save the changes (confirm with Y) and what you want to name the file. As we want to overwrite it, we do not change the name and simply confirm with Enter.
When you restart the server reboot and then reconnect to it ssh admin@{ip-address}, the new hostname is visible.
![]()
Now, it makes sense to create a user who is not root. Without rights restrictions, destroying your system with root is relatively easy.
useradd -m -G sudo namedesneuennutzers
passwd namednewuser
useradd is the command to create a new user. The -m ensures that this user is assigned a home folder. The -G puts the user into a group, and then the group is named. The sudo group can execute commands with sudo. Finally, the name of the new user follows. A password for the user is created with passwd.
If the sudo group does not exist, you must create a group.
groupadd namenewgroupThis group should have the right to execute sudo commands:
EDITOR=nano visudoThe new group must then be mentioned in the file.

Now we set the correct time if required.
dateIf the correct time is not displayed:
tzselectYou can select your time zone using the numbers.
timedatectl set-timezone 'Europe/Berlin'It is time to restart the server and log in as a newly created user.
rebootNext, I install Htop (a monitoring program).
apt install htopNow the server should refuse to run the program and ask if you are root.

So again with Superuser do.
sudo apt install htopYou can now view the server load by entering htop.
This makes it easy to see how much the server’s CPU and RAM are being used. Press F10 or CTRL + C to exit the view.
I would like to have another shell.
sudo apt install git curl
sudo apt install zsh
Now I install zim and change the default shell to zsh.
curl -fsSL https://raw.githubusercontent.com/zimfw/install/master/install.zsh | zsh
chsh -s /bin/zsh
exec bash
Now the shell should (subjectively) look better.
The most important part of the installation are Docker and Docker Compose. Also optional is Lazydocker, for a very easy way to view your Docker containers and their current logs via SSH.
sudo apt install ca-certificates curl gnupg lsb-release
curl -fsSL https://download.docker.com/linux/ubuntu/gpg | sudo gpg --dearmor -o /usr/share/keyrings/docker-archive-keyring.gpg
echo \
  "deb [arch=$(dpkg --print-architecture) signed-by=/usr/share/keyrings/docker-archive-keyring.gpg] https://download.docker.com/linux/ubuntu \
  $(lsb_release -cs) stable" | sudo tee /etc/apt/sources.list.d/docker.list > /dev/null
sudo apt update
sudo apt-get install docker-ce docker-ce-cli containerd.io docker-compose

curl https://raw.githubusercontent.com/jesseduffield/lazydocker/master/scripts/install_update_linux.sh | bash
Now Docker must be activated.
sudo systemctl enable --now dockerIf the following line does not appear, help with CTRL + C. Now assign the created user to the docker group.
sudo gpasswd -a namedesneuennutzers dockerYou should not do this for security reasons. But then you must always write sudo before the Docker commands. Check whether the user has actually ended up in the group.
id namednewuserFinally, we create a folder in the new user’s home directory.
cd ~
mkdir docker
With cd (“change directory”) we move through the folders, where the tilde (~) stands for home. mkdir creates a new folder. You can also delete folders again if required.
mkdir docker2
# creates folder
mkdir -rf docker2
# deletes folder
The following input should now show the newly created folder.
lsWe can also look at the permissions of the folder and the owner.
ls -lOr the hidden folders.
ls -A
# or
ls -Al
We can move to the new folder.
cd docker
# and back again
cd ..
Incidentally, you can save a lot of time with the tabulator key. This key completes commands. The word is automatically completed if you enter cd d in the home folder and press Tab. The last commands can be displayed using the up and down arrow keys. The Arrow key to the right accepts the complete command if one is suggested.
If Lazydocker opens, the setup is complete.
sudo lazydockerWith Q, ESC or CTRL + C, Lazydocker can be closed again. With exit, we leave the server.
exitSetting up a domain
The server only has one IP address, but we may want to set up several services on the server. Option 1 would be to run these via different ports, then you would have to access the services via the port number (123.45.67.89:443, 123.45.67.89:9000, etc.). Firstly, this is difficult to remember, and secondly, there is a problem with the SSL certificates, creating a security risk. It is, therefore, better to switch a proxy manager to ports 80 and 443 (the standard ports for HTTP and HTTPS), which then forwards the requests.
We need (sub)domains for this. For example, the mail program can be reached with the subdomain “mail.domain1.de” and the blog with “blog.domain1.de”. This would also be possible with subdirectories (such as “domain1.de/mail” and “domain1.de/blog”), but I think subdomains are nicer.
There are free domains at DuckDNS for example, but they usually have restrictions. Students can also get a fully-fledged free domain for a year from Github.
The best developer tools, free for students. Get your GitHub Student Developer Pack now.
However, it’s also not that expensive to buy a domain. At Netcup a .de domain permanently costs €5 per year. Any other registrar is also acceptable, as long as the DNS and, preferably, the name servers can be set. Also note that with some providers, it becomes more expensive from the second year onwards, especially if it only costs €1 in the first year.
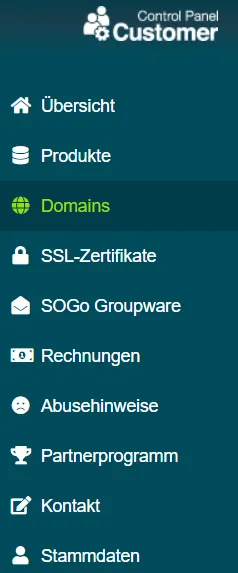
In the CCP of Netcup I call up the menu item Domains:
We are interested in the tab with the DNS settings:
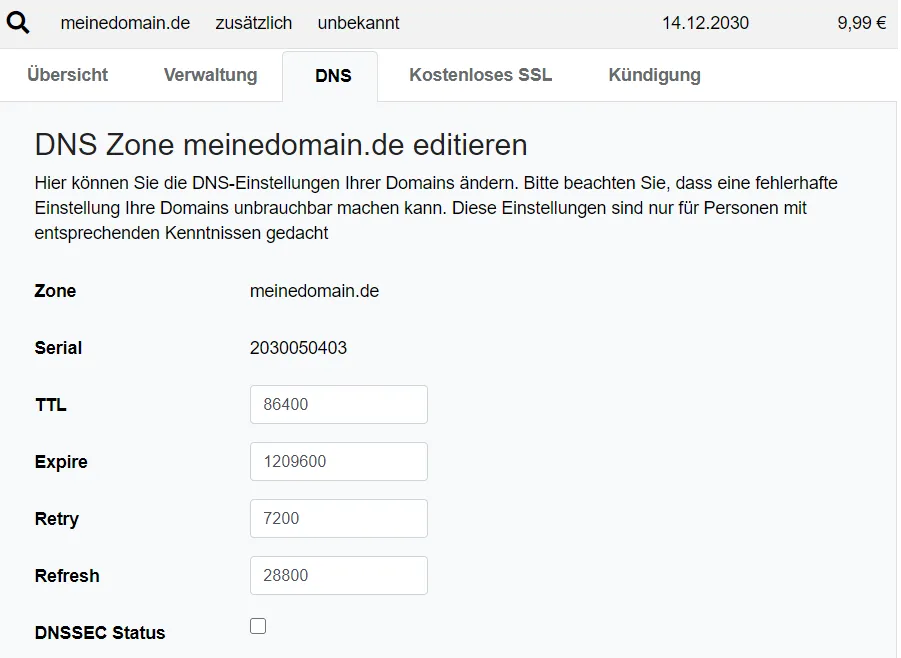
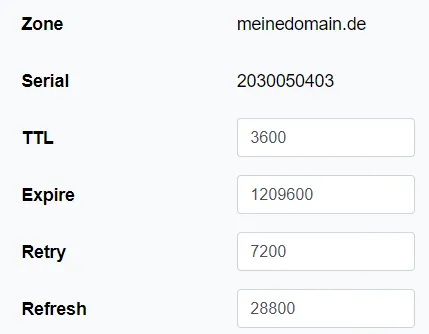
I first reduce the TTL a little (24h is too long for me).
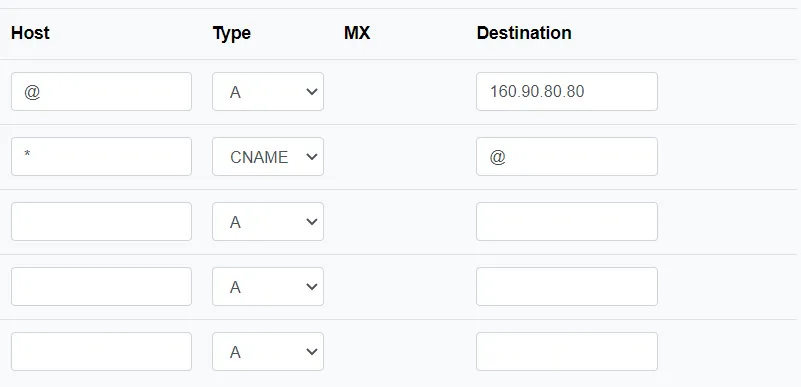
A few entries must then be made. The @ sign means that it is about the root of the zone, i.e. mydomain.com is referred to the IP address 160.90.80.80 (IP address of my server). In addition, all (hence the “_”) subdomains of meinedomain.de are in turn routed to meinedomain.de. Instead of _ you could also make individual entries. This can be useful, for example, if you operate several servers under different IP addresses.
The settings are saved via the button. Now you have to wait. It may take a day for the settings to be applied, in rare cases even two. As a rule, however, it is much quicker.
We test whether it has worked by calling up the terminal and trying to ping the domain.
ping thedomain.comIf the message now appears that the ping request could not find the host, we know the entries have not yet been transferred.
Sometimes it helps to clear the cached DNS in the system.
ipconfig /flushdns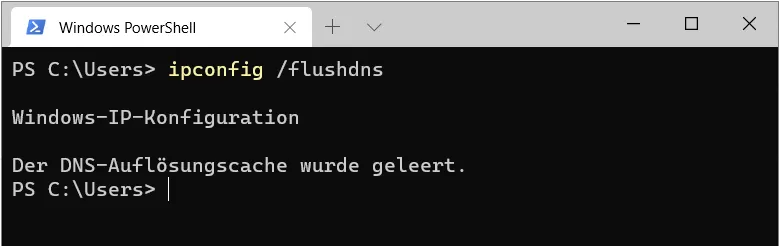
Then try again. If the server’s IP address is displayed, the domain is set up for now.
Setting up Traefik
We need a proxy manager that can now forward the requests depending on the (sub)domain. Even though I have actually made friends with the Nginx Proxy Manager in the past, I would like to use Traefik v2 here.
Traefik is also an open-source reverse proxy, but it is based on Docker. In my opinion, the setup is more complicated, but it is then easier to dynamically start other containers with Traefik. At this point, I would also like to refer you to two further instructions that I used for configuration. One is a blog entry by DigitalOcean and one by Smarthomebeginner.
First, we give the Docker group the necessary rights to the docker folder. To do this, we need ACL.
sudo apt install acl
cd ~
sudo setfacl -Rdm g:docker:rwx docker
sudo setfacl -Rm g:docker:rwx docker
sudo chmod -R 775 docker
getfacl docker
It should now be displayed that the Docker group has read ( read), write (write) and execute (execute) permissions on the docker folder.
We create a file with environment variables. Some say that environment variables should be avoided or not used for sensitive data, but it still seems better to me than using them directly (in my opinion even less secure) or using something like Keywhiz (too much effort for me). Therefore we create the file with the necessary variables. First, we must read our user ID and the group ID from Docker.
id We need to add these two numbers to the environment file.
cd docker
nano .envPUID=1000
PGID=114Now, the time zone, the directory paths, and your domain should be inserted.
pwd
nano .envPUID=1000
PGID=114
TZ=Europe/Berlin
USERDIR=/home/jewgeni
DOCKERDIR=/home/jewgeni/docker
DOMAINNAME=deployn.deWriting things directly to a file using > or >> is also possible in the shell. The command echo repeats the input. Let’s test this.+
cd ~
echo "hello"The word “hello” should now appear.
echo "hello" > test.txt
ls
# We see that there is now a text file in our user's home directory.
# The hash at the beginning of the line stands for a comment.
# This code is not executed.
nano test.txtThe file contains “hello” :) This file can be supplemented with further text.
echo "bye" > test.txt
# This gives an error because the file already exists.
# With >> we insert a text into an existing file as a new line.
echo "tschüss" >> test.txt
nano test.txtIf gray text appears when entering text in the terminal, this can be accepted by pressing the right arrow key. There are now two lines in the text file. We delete them again.
rm test.txt
lsOnly the “docker” folder should still be visible. Now to the rest of the process. Next, we need a way to create hashed passwords. We install the Apache2 utilities and test whether a hashed password is created via htpasswd.
sudo apt install apache2-utils
htpasswd -nb username passwordResult (should look similar):

Now, use the data that should be used for authentication (it is best to create a new password using a password generator).
mkdir ~/docker/shared/
htpasswd -nb username newpassword > ~/docker/shared/.htpasswdNext, we need the data for our certificates. If your domain is not with Netcup, the details must be customized. For Netcup, we need three pieces of information: Customer number, API key and API password.
There is an API menu item in the CCP master data. Here you can generate an API key. However, read the terms of use beforehand. It is possible to make domain purchases with the API key. For this reason alone, the password should be kept secret (as should your password for the CCP).
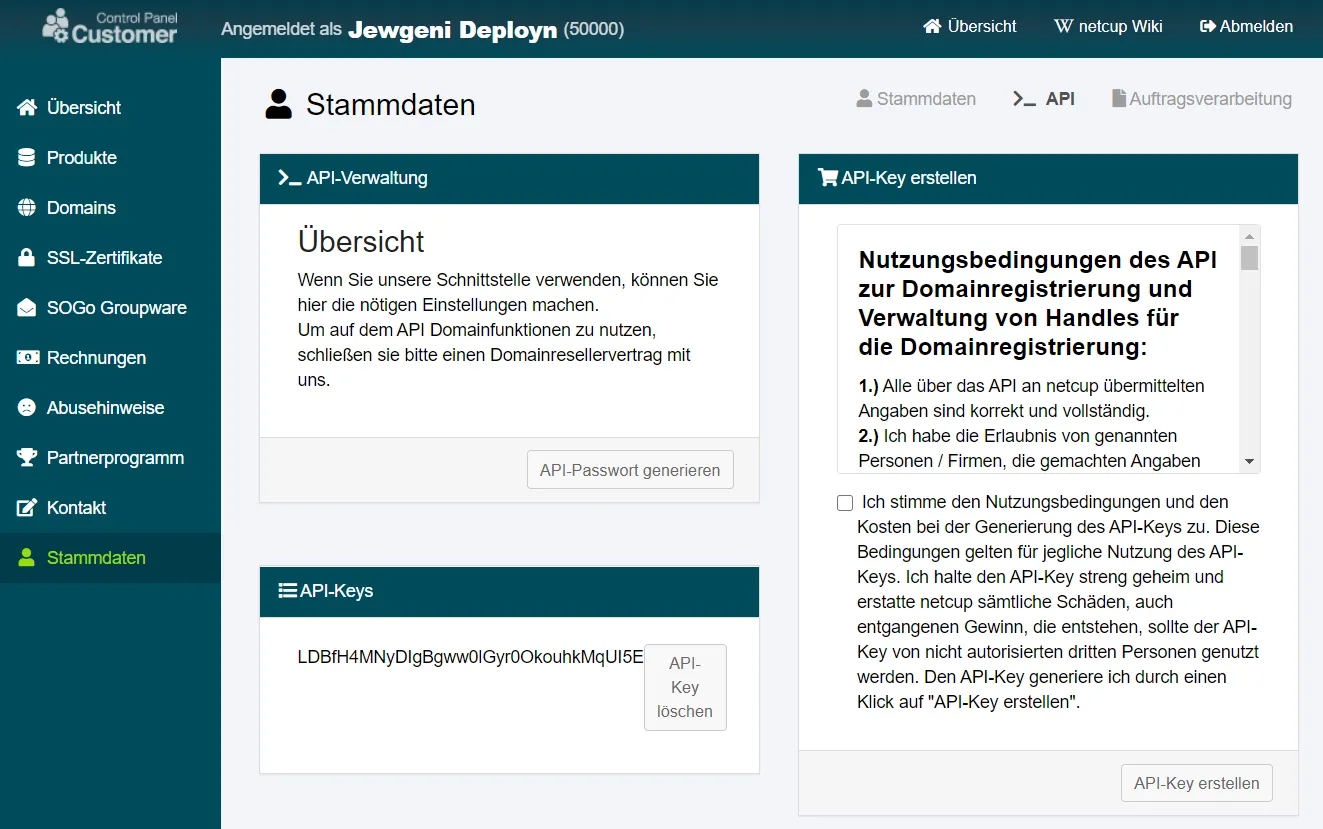
We enter these values in the .env file and a separate e-mail address for the Let’s Encrypt certificates.
nano ~/docker/.envPUID=1000
PGID=114
TZ=Europe/Berlin
USERDIR=/home/jewgeni
DOCKERDIR=/home/jewgeni/docker
DOMAINNAME=adomain.com
NETCUP_CUSTOMER_NUMBER=50000
NETCUP_API_KEY=LDBfH4MNyDlgBgww0lGry0OkouhkMqUI5E
NETCUP_API_PASSWORD=uEzCAzISBUBwGqW9oSEzRJuL3D26Gm1yQFMlnqSB1Lhjjb5Z98
EMAIL_ADDRESS=mail@hallo.deNext, we create a folder for Traefik and our certificates. Also the certificate file and a log file.
mkdir ~/docker/traefik
mkdir ~/docker/traefik/acme
touch ~/docker/traefik/traefik.log
touch ~/docker/traefik/acme/acme.json
chmod 600 ~/docker/traefik/acme/acme.jsonNow we create a new network in Docker.
docker network create web
docker network lsThere are probably four entries (bridge, host, none and web). It’s time to create our main docker-compose file.
nano ~/docker/docker-compose.ymlNow, enter the text.
version: "3.7"
### NETWORKS ###
networks:
web:
external:
name: web
default:
driver: bridge
### SERVICES ###
services:
traefik:
container_name: traefik
image: traefik:latest
restart: unless-stopped
command: --global.checkNewVersion=true
--global.sendAnonymousUsage=false
--entryPoints.http.address=:80
--entryPoints.https.address=:443
--entryPoints.traefik.address=:8080
--api=true
--api.dashboard=true
--log=true
--log.level=DEBUG
--accessLog=true
--accessLog.filepath=/traefik.log
--accessLog.bufferingSize=100
--accessLog.filters.statusCodes=400-499
--providers.docker=true
--providers.docker.endpoint=unix:///var/run/docker.sock
--providers.docker.exposedByDefault=false
--providers.docker.network=web
- providers.docker.swarmMode=false
--providers.file.directory=/rules
--providers.file.watch=true
--certificatesResolvers.dns-netcup.acme.dnsChallenge.provider=netcup
--certificatesResolvers.dns-netcup.acme.caServer=https://acme-staging-v02.api.letsencrypt.org/directory
--certificatesResolvers.dns-netcup.acme.email=$EMAIL_ADDRESS
--certificatesResolvers.dns-netcup.acme.storage=/acme.json
--certificatesResolvers.dns-netcup.acme.dnsChallenge.resolvers=1.1.1.1:53,8.8.8.8:53
--certificatesResolvers.dns-netcup.acme.dnschallenge.delayBeforeCheck=60
networks:
- web
security_opt:
- no-new-privileges:true
ports:
- target: 80
published: 80
protocol: tcp
mode: host
- target: 443
published: 443
protocol: tcp
mode: host
- target: 8080
published: 8080
protocol: tcp
mode: host
volumes:
- $DOCKERDIR/traefik/rules:/rules
- /var/run/docker.sock:/var/run/docker.sock:ro
- $DOCKERDIR/traefik/acme/acme.json:/acme.json
- $DOCKERDIR/traefik/traefik.log:/traefik.log
- $DOCKERDIR/shared:/shared
environment:
- NETCUP_CUSTOMER_NUMBER=$NETCUP_CUSTOMER_NUMBER
- NETCUP_API_KEY=$NETCUP_API_KEY
- NETCUP_API_PASSWORD=$NETCUP_API_PASSWORD
labels:
- "traefik.enable=true"
- "traefik.http.routers.http-catchall.entrypoints=http"
- "traefik.http.routers.http-catchall.rule=HostRegexp(`{host:.+}`)"
- "traefik.http.routers.http-catchall.middlewares=redirect-to-https"
- "traefik.http.middlewares.redirect-to-https.redirectscheme.scheme=https"
- "traefik.http.routers.traefik-rtr.entrypoints=https"
- "traefik.http.routers.traefik-rtr.rule=Host(`traefik.$DOMAINNAME`)"
- "traefik.http.routers.traefik-rtr.tls=true"
- "traefik.http.routers.traefik-rtr.tls.certresolver=dns-netcup"
- "traefik.http.routers.traefik-rtr.tls.domains[0].main=$DOMAINNAME"
- "traefik.http.routers.traefik-rtr.tls.domains[0].sans=*.$DOMAINNAME"
- "traefik.http.routers.traefik-rtr.service=api@internal"
- "traefik.http.routers.traefik-rtr.middlewares=middlewares-basic-auth@file"For the last line to work, we need to configure the middleware. This is done with a file in the folder with all the rules.
mkdir ~/docker/traefik/rules
nano ~/docker/traefik/rules/middlewares.toml
[http.middlewares]
[http.middlewares.middlewares-basic-auth]
[http.middlewares.middlewares-basic-auth.basicAuth]
realm = "Traefik Basic Auth"
usersFile = "/shared/.htpasswd"Now is the time to test everything.
cd ~/docker
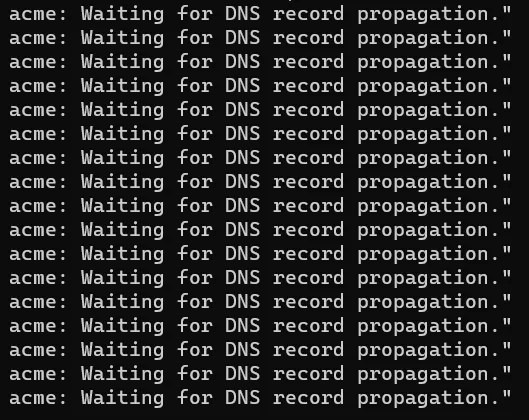
docker-compose up -dWe look at the automatic login to the right-hand window as soon as everything is ready.
lazydockerEverything is correct if the message appears that we are waiting for a DNS record propagation.
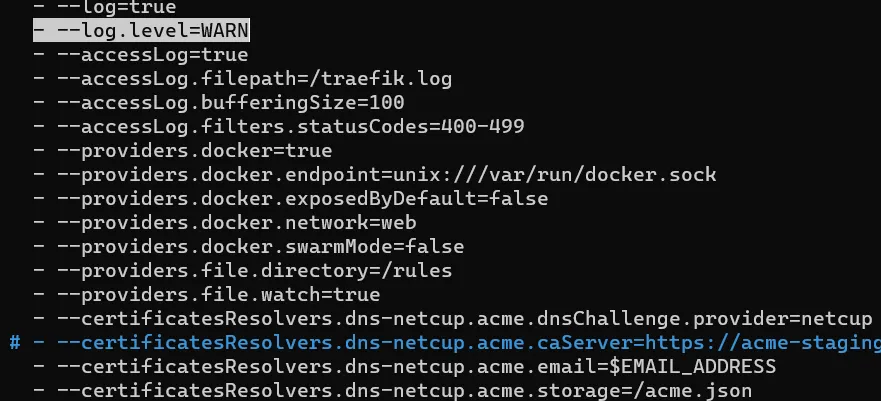
In this case, we reduce the log level to WARN and get real certificates by commenting out the line with --certificatesResolvers.dns-netcup.acme.caServer=https://acme-staging-v02.api.letsencrypt.org/directory.
nano ~/docker/docker-compose.yml
 We then delete the contents of the acme file.
nano ~docker/traefik/acme/acme.jsonDelete the entire contents of this file (including the empty lines). Now restart Traefik.
cd ~/docker
docker-compose down
docker-compose up -dWait (5 minutes), then try to open the dashboard via traefik.dieeigenedomain.de. If it does not work, set the log level to DEBUG again, restart the container and see what the log shows.
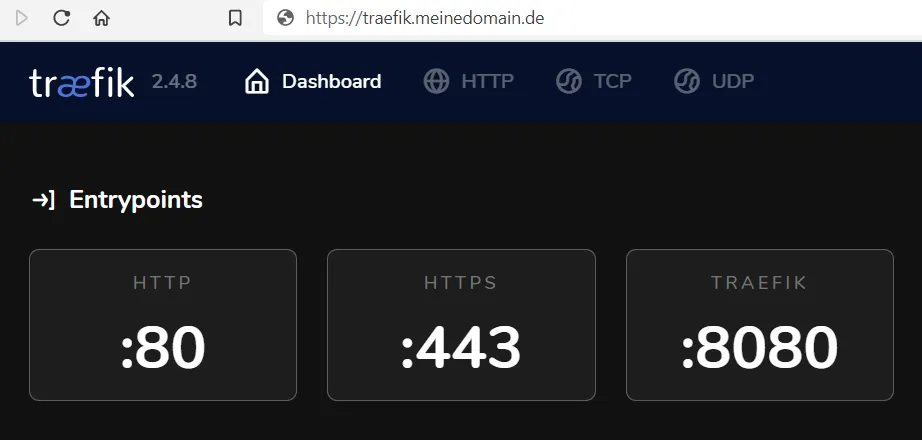
To access the dashboard, enter the user name and the non-hashed password you wrote in the htpasswd file. If everything goes well, we can get Traefik to use a wildcard certificate.
nano ~/docker/docker-compose.yml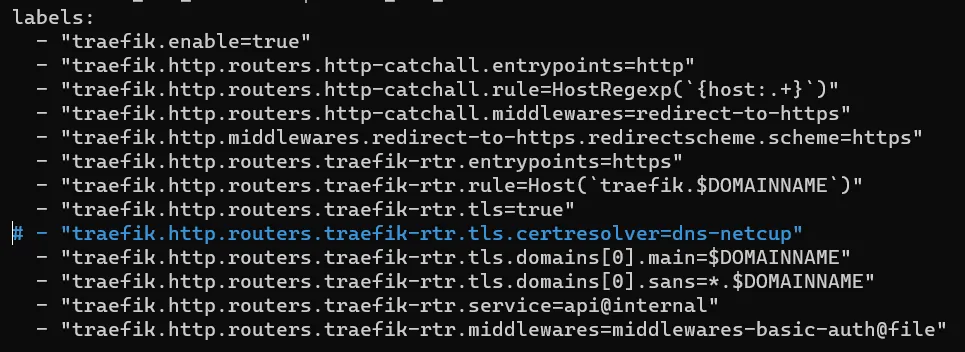
This time the label “traefik.http.routers.traefik-rtr.tls.certresolver=dns-netcup” must be commented out.
cd ~/docker
docker-compose down
docker-compose up -dWe supplement our middleware with a rate limit for login and security headers. Here is one example for more information about security headers.
nano ~/docker/traefik/rules/middlewares.toml[http.middlewares]
[http.middlewares.middlewares-basic-auth]
[http.middlewares.middlewares-basic-auth.basicAuth]
realm = "Traefik Basic Auth"
usersFile = "/shared/.htpasswd"
[http.middlewares.middlewares-rate-limit]
[http.middlewares.middlewares-rate-limit.rateLimit]
average = 100
burst = 50
[http.middlewares.middlewares-secure-headers]
[http.middlewares.middlewares-secure-headers.headers]
accessControlAllowMethods= ["GET", "OPTIONS", "PUT"]
accessControlMaxAge = 100
hostsProxyHeaders = ["X-Forwarded-Host"]
sslRedirect = true
stsSeconds = 63072000
stsIncludeSubdomains = true
stsPreload = true
forceSTSHeader = true
customFrameOptionsValue = "allow-from https:dieeigenedomain.de"
contentTypeNosniff = true
browserXssFilter = true
referrerPolicy = "same-origin"
featurePolicy = "camera 'none'; geolocation 'none'; microphone 'none'; payment 'none'; usb 'none'; vr 'none';"
[http.middlewares.middlewares-secure-headers.headers.customResponseHeaders]
X-Robots-Tag = "none,noarchive,nosnippet,notranslate,noimageindex,"
server = ""We have set up three middlewares:
- Authentication
- rate-limit
- Security headers
To use them, we can enter them individually in the docker-compose file or set up chains with their combinations.
![]()
To create a chain, we create a new file in the rules folder:
nano ~/docker/traefik/rules/middlewares-chains.toml[http.middlewares]
[http.middlewares.chain-no-auth]
[http.middlewares.chain-no-auth.chain]
middlewares = [ "middlewares-rate-limit", "middlewares-secure-headers"]
[http.middlewares.chain-basic-auth]
[http.middlewares.chain-basic-auth.chain]
middlewares = [ "middlewares-rate-limit", "middlewares-secure-headers", "middlewares-basic-auth"]Of course you can also add other combinations, but then it may be easier to use the above line of code and combine the things you want. The chains make it possible to change the three lines shown above into one:
![]()
After this “label” has been entered in the docker-compose file, Traefik must be restarted for the changes to take effect.
cd ~/docker
nano docker-compose
# Customize the file (- insert "traefik.http.routers.traefik-rtr.middlewares=middlewares-chain-basic-auth@file" into the labels)
# Pay attention to the indentation when inserting
docker-compose down
docker-compose up -dNow check in the dashboard whether the middleware is loaded correctly.
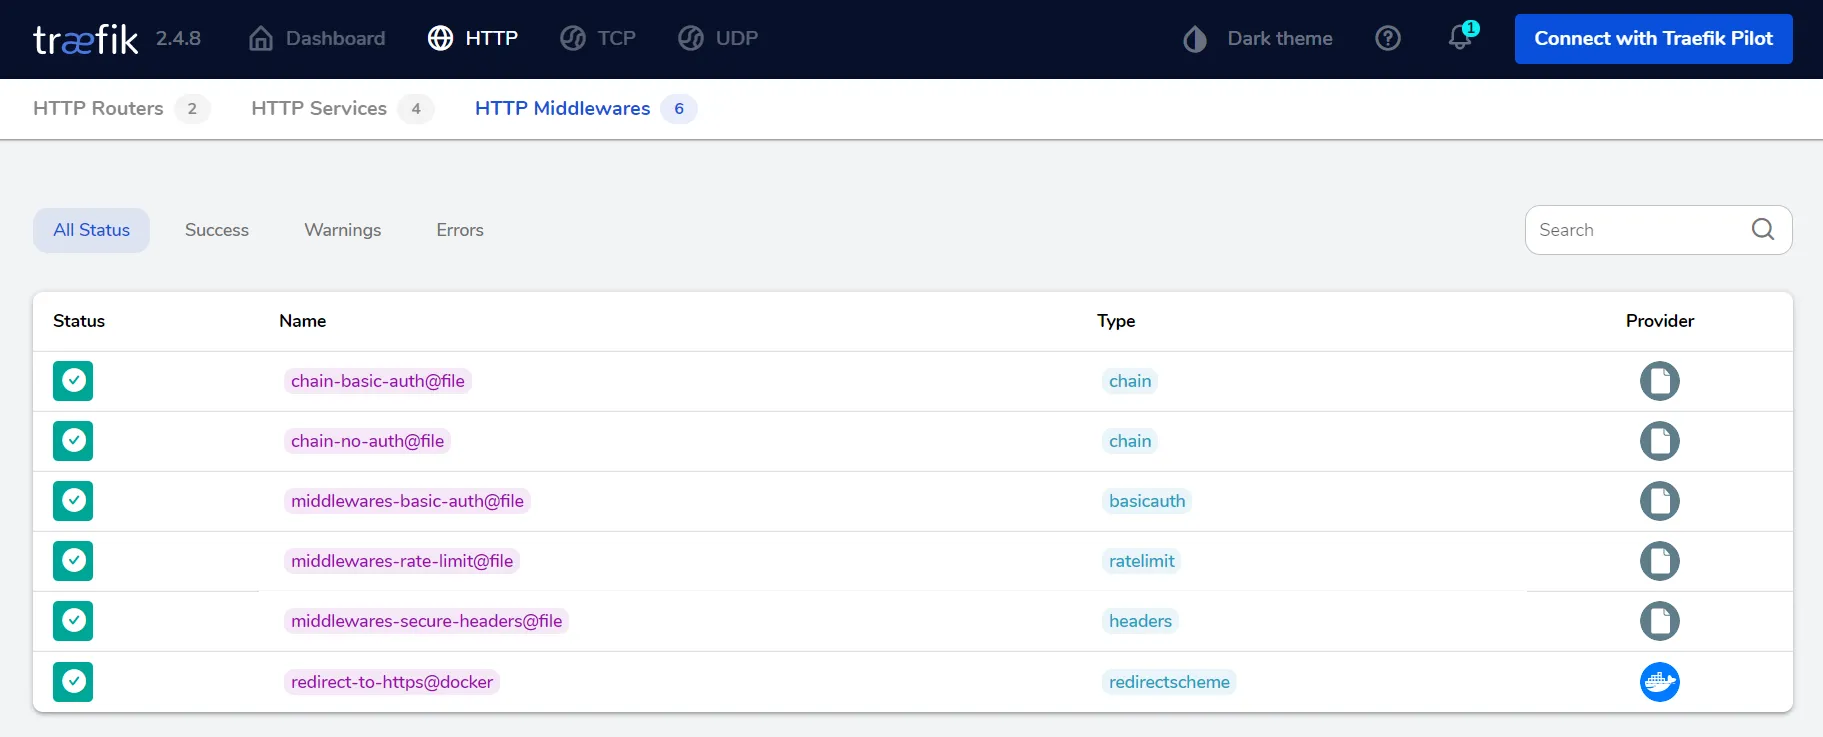
And check whether the chain is loaded as middleware in Traefik’s HTTP router:

Google authentication
The authentication we have already set up provides additional security, but there are authentication methods with more functions. That’s why we’d like to take a look at Google OAuth.
Meet your business challenges head on with cloud computing services from Google, including data management, hybrid & multi-cloud, and AI & ML.
– Cloud Computing Services | Google Cloud
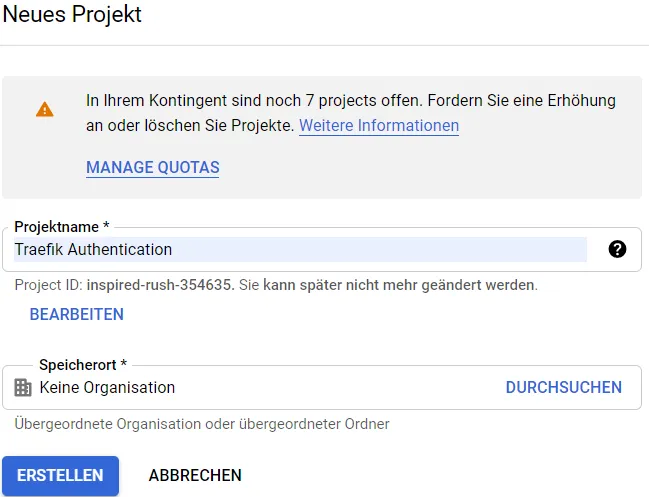
It is necessary to register in the cloud console (free of charge). After a few clicks you get to the dashboard.

Here we create a new project and name it so that we can find it again.
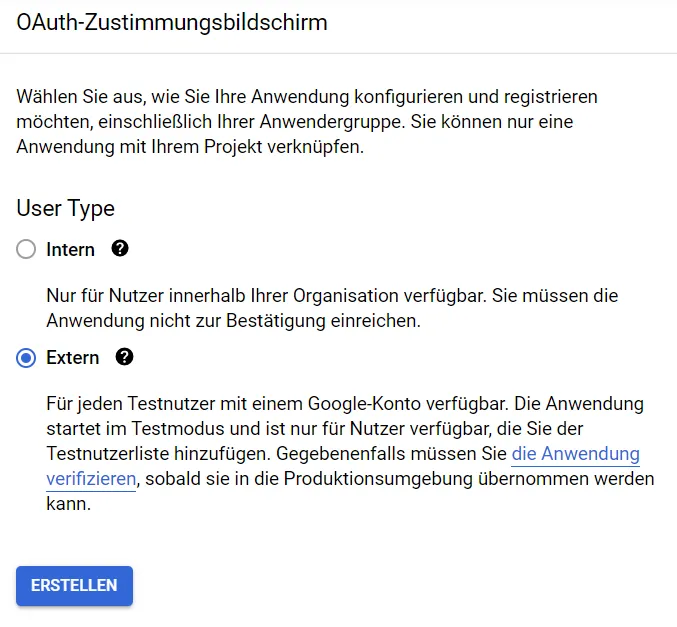
First, a consent screen must be created.
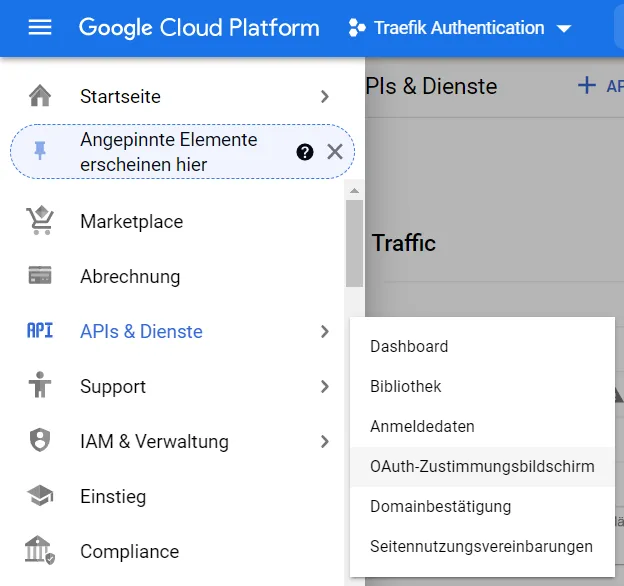
We get there via the menu item APIs & Services.
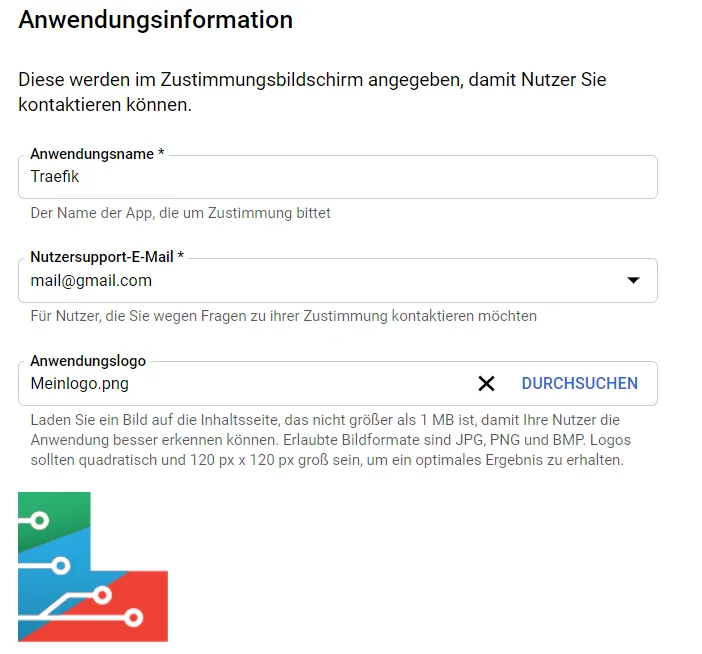
A name must be entered, as well as an e-mail address. Optionally, a logo can also be uploaded.
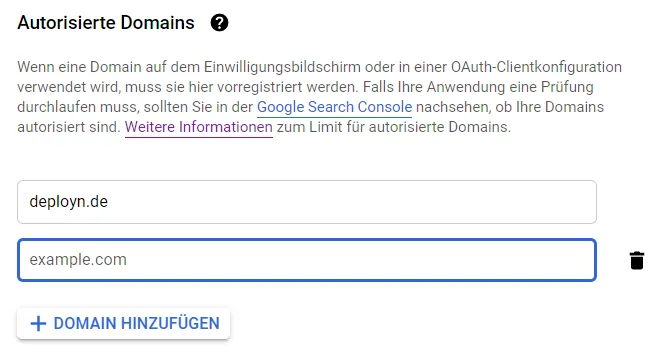
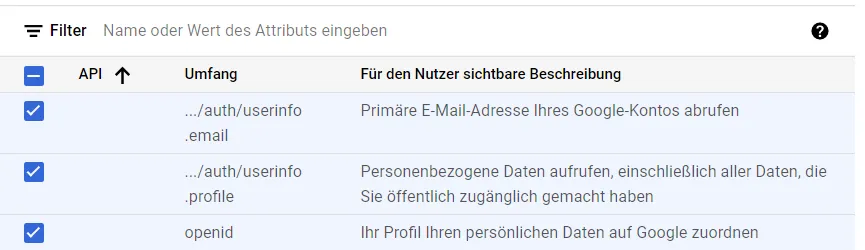
A domain must be authorized. The limit is 10.
For the domains, we select the three non-critical domains. E-mail, profiles and OpenID.
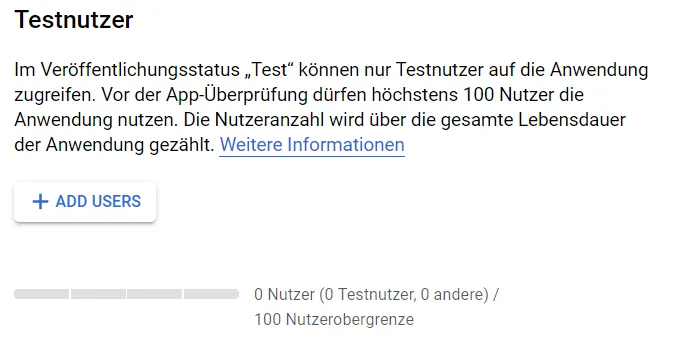
We have an upper limit of 100 test users. These 100 users are allowed to use the application behind it. So it’s best to add yourself, other users can be added later.
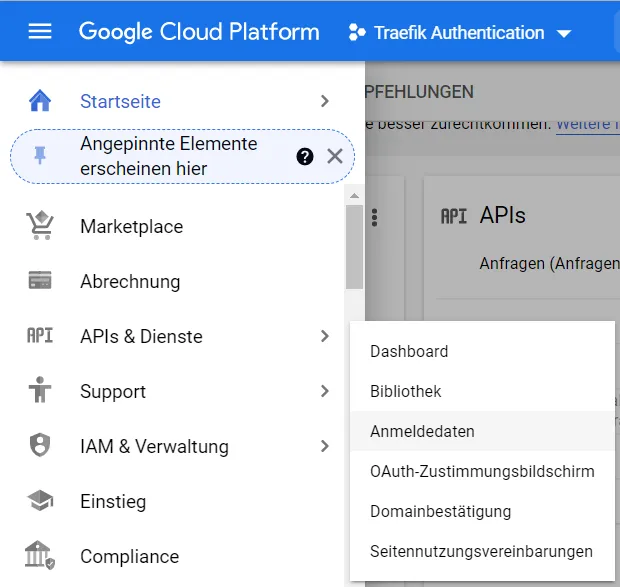
Via APIs & services we select credentials.
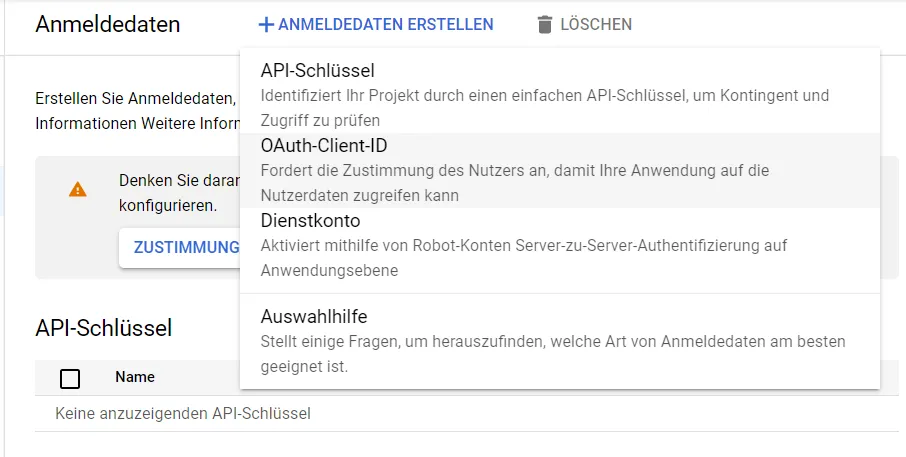
Now we add an OAuth client ID.
We enter an authorized forwarding domain.
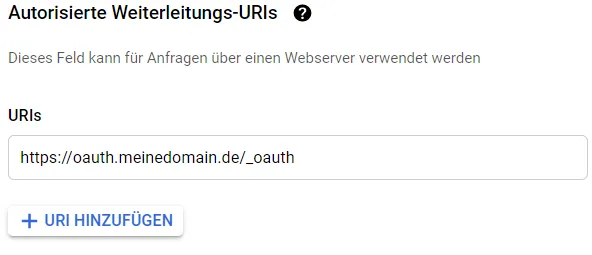
We save the keys that have just been displayed in the .env file.
nano ~/docker/.envWe name the new entries GOOGLE_CLIENT_ID and GOOGLE_CLIENT_SECRET. Then we create a GOOGLE_OAUTH_SECRET.
echo "GOOGLE_OAUTH_SECRET=$(openssl rand -hex 16)" >> ~/docker/.env
nano ~/docker/.envThe file should now look something like this:
PUID=1000
PGID=114
TZ=Europe/Berlin
USERDIR=/home/jewgeni
DOCKERDIR=/home/jewgeni/docker
DOMAINNAME=irgendeinedomain.de
NETCUP_CUSTOMER_NUMBER=50000
NETCUP_API_KEY=lksjfrjgoigKJLKjlhir
NETCUP_API_PASSWORD=SlkjiojKLhiuuzvTFDENgdeu
EMAIL_ADDRESS=mail@gmail.com
GOOGLE_CLIENT_ID=uhrlkiaungopterktdsnf.apps.googleusercontent.com
GOOGLE_CLIENT_SECRET=lkiz537Jkhkr
GOOGLE_OAUTH_SECRET=leaj7GjejmGNow this authentication method must also be added to Traefik. First as middleware.
nano ~/docker/traefik/rules/middlewares.toml[http.middlewares]
[http.middlewares.middlewares-basic-auth]
[http.middlewares.middlewares-basic-auth.basicAuth]
realm = "Traefik Basic Auth"
usersFile = "/shared/.htpasswd"
[http.middlewares.middlewares-oauth]
[http.middlewares.middlewares-oauth.forwardAuth]
address = "http://oauth:4181"
trustForwardHeader = true
authResponseHeaders = ["X-Forwarded-User"]
[http.middlewares.middlewares-rate-limit]
[http.middlewares.middlewares-rate-limit.rateLimit]
average = 100
burst = 50
[http.middlewares.middlewares-secure-headers]
[http.middlewares.middlewares-secure-headers.headers]
accessControlAllowMethods= ["GET", "OPTIONS", "PUT"]
accessControlMaxAge = 100
hostsProxyHeaders = ["X-Forwarded-Host"]
sslRedirect = true
stsSeconds = 63072000
stsIncludeSubdomains = true
stsPreload = true
forceSTSHeader = true
customFrameOptionsValue = "allow-from https:example.com"
contentTypeNosniff = true
browserXssFilter = true
referrerPolicy = "same-origin"
featurePolicy = "camera 'none'; geolocation 'none'; microphone 'none'; payment 'none'; usb 'none'; vr 'none';"
[http.middlewares.middlewares-secure-headers.headers.customResponseHeaders]
X-Robots-Tag = "none,noarchive,nosnippet,notranslate,noimageindex,"
server = ""And then as a chain.
nano ~/docker/traefik/rules/middlewares-chains.toml[http.middlewares]
[http.middlewares.chain-no-auth]
[http.middlewares.chain-no-auth.chain]
middlewares = [ "middlewares-rate-limit", "middlewares-secure-headers"]
[http.middlewares.chain-basic-auth]
[http.middlewares.chain-basic-auth.chain]
middlewares = [ "middlewares-rate-limit", "middlewares-secure-headers", "middlewares-basic-auth"]
[http.middlewares.chain-oauth]
[http.middlewares.chain-oauth.chain]
middlewares = [ "middlewares-rate-limit", "middlewares-secure-headers", "middlewares-oauth"]Before we can test this, however, we need to start the OAuth service in Docker. So we add the docker-compose file.
nano ~/docker/docker-compose.yamlversion: "3.7"
### NETWORKS ###
networks:
web:
external:
name: web
default:
driver: bridge
### SERVICES ###
services:
### TRAFIK - REVERSE PROXY ###
traefik:
container_name: traefik
image: traefik:latest
restart: unless-stopped
command:
--global.checkNewVersion=true
--global.sendAnonymousUsage=false
--entryPoints.http.address=:80
--entryPoints.https.address=:443
--entryPoints.traefik.address=:8080
--api=true
--api.dashboard=true
--log=true
--log.level=WARN
--accessLog=true
--accessLog.filepath=/traefik.log
--accessLog.bufferingSize=100
--accessLog.filters.statusCodes=400-499
--providers.docker=true
--providers.docker.endpoint=unix:///var/run/docker.sock
--providers.docker.exposedByDefault=false
--providers.docker.network=web
- providers.docker.swarmMode=false
--providers.file.directory=/rules
--providers.file.watch=true
--certificatesResolvers.dns-netcup.acme.dnsChallenge.provider=netcup
# - --certificatesResolvers.dns-netcup.acme.caServer=https://acme-staging-v02.api.letsencrypt.org/directory
--certificatesResolvers.dns-netcup.acme.email=$EMAIL_ADDRESS
--certificatesResolvers.dns-netcup.acme.storage=/acme.json
--certificatesResolvers.dns-netcup.acme.dnsChallenge.resolvers=1.1.1.1:53,8.8.8.8:53
--certificatesResolvers.dns-netcup.acme.dnschallenge.delayBeforeCheck=10
networks:
- web
security_opt:
- no-new-privileges:true
ports:
- target: 80
published: 80
protocol: tcp
mode: host
- target: 443
published: 443
protocol: tcp
mode: host
- target: 8080
published: 8080
protocol: tcp
mode: host
volumes:
- $DOCKERDIR/traefik/rules:/rules
- /var/run/docker.sock:/var/run/docker.sock:ro
- $DOCKERDIR/traefik/acme/acme.json:/acme.json
- $DOCKERDIR/traefik/traefik.log:/traefik.log
- $DOCKERDIR/shared:/shared
environment:
- NETCUP_CUSTOMER_NUMBER=$NETCUP_CUSTOMER_NUMBER
- NETCUP_API_KEY=$NETCUP_API_KEY
- NETCUP_API_PASSWORD=$NETCUP_API_PASSWORD
labels:
- "traefik.enable=true"
- "traefik.http.routers.http-catchall.entrypoints=http"
- "traefik.http.routers.http-catchall.rule=HostRegexp(`{host:.+}`)"
- "traefik.http.routers.http-catchall.middlewares=redirect-to-https"
- "traefik.http.middlewares.redirect-to-https.redirectscheme.scheme=https"
- "traefik.http.routers.traefik-rtr.entrypoints=https"
- "traefik.http.routers.traefik-rtr.rule=Host(`traefik.$DOMAINNAME`)"
- "traefik.http.routers.traefik-rtr.tls=true"
# - "traefik.http.routers.traefik-rtr.tls.certresolver=dns-netcup"
- "traefik.http.routers.traefik-rtr.tls.domains[0].main=$DOMAINNAME"
- "traefik.http.routers.traefik-rtr.tls.domains[0].sans=*.$DOMAINNAME"
- "traefik.http.routers.traefik-rtr.service=api@internal"
- "traefik.http.routers.traefik-rtr.middlewares=chain-oauth@file"
### GOOGLE OAUTH ###
oauth:
container_name: oauth
image: thomseddon/traefik-forward-auth:latest
restart: unless-stopped
networks:
- web
security_opt:
- no-new-privileges:true
environment:
- CLIENT_ID=$GOOGLE_CLIENT_ID
- CLIENT_SECRET=$GOOGLE_CLIENT_SECRET
- SECRET=$GOOGLE_OAUTH_SECRET
- COOKIE_DOMAIN=$DOMAINNAME
- INSECURE_COOKIE=false
- AUTH_HOST=oauth.$DOMAINNAME
- URL_PATH=/_oauth
- WHITELIST=$EMAIL_ADDRESS
- LOG_LEVEL=info
- LOG_FORMAT=text
- LIFETIME=2592000
labels:
- "traefik.enable=true"
- "traefik.http.routers.oauth-rtr.entrypoints=https"
- "traefik.http.routers.oauth-rtr.rule=Host(`oauth.$DOMAINNAME`)"
- "traefik.http.routers.oauth-rtr.tls=true"
- "traefik.http.routers.oauth-rtr.service=oauth-svc"
- "traefik.http.services.oauth-svc.loadbalancer.server.port=4181"
- "traefik.http.routers.oauth-rtr.middlewares=chain-oauth@file"If several e-mail addresses are to be allowed to log in, the environment must be extended for WHITELIST. WHITELIST=$EMAIL_ADDRESS, $EMAIL_ADDRESS2, ... These constants must be entered in the .env file and, if necessary, in the Google Cloud Console.
Host website
As a simple example service, I would now like to host a website (it can also be any other service). For this, I use the official Docker image from Nginx.
cd ~/docker
mkdir appdata
mkdir appdata/testpage
cd ~/docker/appdata/testpage
nano index.html
A simple HTML code for testing can now be entered here.
<!doctype html>
<html>
	<head>
		<title>Test page</title>
	</head>
	<body>
		<p>Hello</p>
	</body>
</html>
Then we need a new docker-compose file for the service.
cd ~/docker
nano docker-compose-testsite.ymlversion: "3.7"
### NETWORKS ###
networks:
web:
external:
name: web
default:
driver: bridge
### SERVICE ###
services:
test_page:
container_name: test_page
image: nginx:latest
restart: unless-stopped
networks:
- web
security_opt:
- no-new-privileges:true
volumes:
- $DOCKERDIR/appdata/testpage:/usr/share/nginx/html:ro
labels:
- "traefik.enable=true"
- "traefik.http.routers.testpage-rtr.entrypoints=https"
- "traefik.http.routers.testseite-rtr.rule=Host(`testseite.$DOMAINNAME`)"
- "traefik.http.routers.testseite-rtr.tls=true"
- "traefik.http.routers.testseite-rtr.service=testseite-svc"
- "traefik.http.services.testseite-svc.loadbalancer.server.port=80"
- "traefik.http.routers.testseite-rtr.middlewares=chain-no-auth@file"docker-compose -f docker-compose-testseite.yml up -dThe page should then be accessible a few moments later at testseite.domain.de. But what if you want to have a second site online? Same procedure:
cd ~/docker
mkdir appdata
mkdir appdata/testpage2
cd ~/docker/appdata/testpage2
nano index.html<!doctype html>
<html>
<head>
<title>Test page</title>
</head>
<body>
<p>Hello</p>
<p>This is the second page.</p>
</body>
</html>cd ~/docker
nano docker-compose-testsite2.ymlversion: "3.7"
### NETWORKS ###
networks:
web:
external:
name: web
default:
driver: bridge
### SERVICE ###
services:
test_page2:
container_name: testseite2
image: nginx:latest
restart: unless-stopped
networks:
- web
security_opt:
- no-new-privileges:true
volumes:
- $DOCKERDIR/appdata/testseite2:/usr/share/nginx/html:ro
labels:
- "traefik.enable=true"
- "traefik.http.routers.testseite2-rtr.entrypoints=https"
- "traefik.http.routers.testseite2-rtr.rule=Host(`testseite2.$DOMAINNAME`)"
- "traefik.http.routers.testseite2-rtr.tls=true"
- "traefik.http.routers.testseite2-rtr.service=testseite2-svc"
- "traefik.http.services.testseite2-svc.loadbalancer.server.port=80"
- "traefik.http.routers.testseite2-rtr.middlewares=chain-basic-auth@file"docker-compose -f docker-compose-testseite2.yml up -d
lazydockerBoth services should now be visible in Lazydocker.
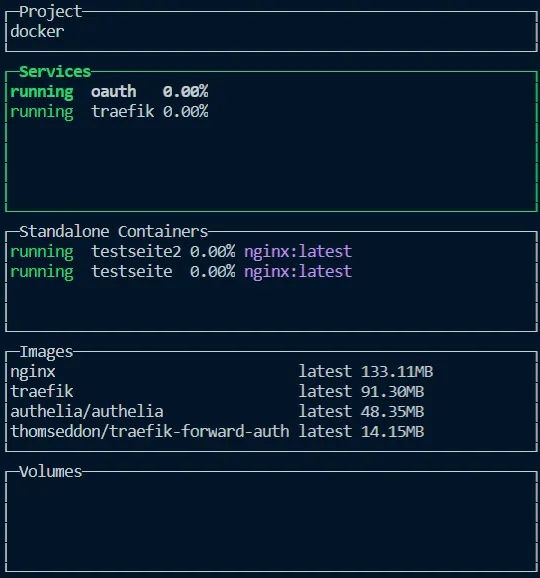
The two pages are accessible via testseite.domain.de and testseite2.domain.de; port shares did not have to be created. If the settings of my Docker-Compose files are applied, the login window with simple authentication appears on testpage2. The containers can now be stopped again.
cd ~/docker
docker-compose -f docker-compose-testseite.yml down
docker-compose -f docker-compose-testsite2.yml down
The setup is now complete 😃
Related Articles
Set Up Ghost CMS with Docker & Traefik: Full Guide
Run Ghost CMS with Docker behind a Traefik reverse proxy. A step-by-step guide for building your own blog system with SSL and a custom domain – get started now!
Setting up n8n automation with Docker behind Traefik
Automate workflows efficiently with n8n. Set it up with Docker and Traefik as a reverse proxy, including SSL and practical examples – save time automating!
Self-Host Calibre with Docker and Traefik Reverse Proxy
Set up a self-hosted e-book manager with Calibre and Calibre-Web as GUI behind Traefik reverse proxy. Manage your e-books privately on your own server.
Self-Host Commento++ with Docker and Traefik Reverse Proxy
Replace Disqus with Commento++, a privacy-friendly commenting system. Self-host it with Docker and Traefik reverse proxy for full data control on your blog.