



Komodo with Traefik: Manage Docker Servers from a Web Interface
Install Komodo behind Traefik with HTTPS, deploy stacks from the interface and from Git, set up backups and auto-updates, and connect a second server. With screenshots, for beginners.
Contents
Komodo 2.3.4Traefik 3.7MongoDB 8Docker 29.9Debian 13Komodo is a web interface for managing Docker containers on one or several servers. You start Compose stacks with a click, look at logs and statistics, pull stacks from a Git repository, apply updates automatically and get notified when something goes down. In this guide I install Komodo behind Traefik on a Debian server, deploy my first stacks and walk through some of its features.
What is Komodo?
Komodo is an interface for Docker, like Portainer, which I once wrote a guide for. Among the well-known alternatives the situation has shifted:
- In September 2026 Portainer announced version 3.0. New development is Kubernetes-first and closed source. The Community Edition stays on 2.45 LTS.
- In September 2026 Dockhand rewrote its BSL 1.1 license. Using it in production at a company now requires a paid license. For now, it stays free for personal use.
- What remains are free projects: Arcane is BSD-3-Clause, Komodo is GPL-3.0.
Komodo thinks in stacks, Git repositories and workflows:
- A stack is a Compose file that you write in the interface, read from the server or pull from Git.
- Procedures chain actions, for example “update stack A, then stack B”, and run on a schedule.
- You create variables and secrets once and use them in many stacks.
- The configuration can be exported as TOML and versioned in a Git repository.
In return Komodo is a bit bigger: a MongoDB runs next to the interface. It also takes longer to learn.
Glossary
| Term | Description |
|---|---|
| Core | The central service with the web interface and API. It runs once. |
| Periphery | A small agent on every server that Komodo manages. It runs Docker commands. |
| Server | A machine with Docker and a Periphery agent that is connected to the Core. |
| Stack | A Docker Compose file plus settings that Komodo starts on a server. |
| Procedure | A sequence of actions that you start by hand or on a schedule. |
| Variable | A named value that you insert into stacks. Marked as a secret, it is hidden in the interface. |
| Alerter | A target for notifications, such as Discord, Slack or ntfy. |
| Traefik | The reverse proxy that fetches HTTPS certificates and forwards requests to the right containers. |
Requirements
- A server with Docker. I used a small VPS with 2 vCPU and 4 GB RAM. After installing Traefik, Komodo and two example stacks, the system used about 1 GB of RAM. With less than 2 GB it gets tight, because MongoDB alone takes about 275 MB.
- A domain or subdomain whose A record points to your server’s IP. I use
{{domain}}here. - Open ports: 80 and 443.
- Traefik or another reverse proxy. If you do not have one yet, I set it up in short form in the next step. The detailed version with middlewares and authentication is in the Traefik guide.
Check beforehand that the DNS record is correct:
dig +short {{domain}}The output must be your server’s IP. If you have no SSH basics yet, my post on VPS basics helps.
Step 1: Install Docker
Running everything as root is a bad habit: one typo or one compromised service then has full access to the machine. I only use root for the first login to create a normal user. If your provider already gave you a user with sudo, skip the first block.
apt update && apt upgrade -y
apt install -y sudo
adduser deploy
usermod -aG sudo deploy
Log out and log back in as deploy (ssh deploy@{{domain}}). If you use SSH keys, copy yours to the new user first with ssh-copy-id deploy@{{domain}}. From here on, no command in this guide needs a root login. Now I install Docker from Docker’s official apt repository, as the Docker documentation describes for Debian. That way Docker gets its updates through apt upgrade later:
sudo apt install -y ca-certificates curl dnsutils git
sudo install -m 0755 -d /etc/apt/keyrings
sudo curl -fsSL https://download.docker.com/linux/debian/gpg -o /etc/apt/keyrings/docker.asc
sudo chmod a+r /etc/apt/keyrings/docker.asc
sudo tee /etc/apt/sources.list.d/docker.sources <<EOF
Types: deb
URIs: https://download.docker.com/linux/debian
Suites: $(. /etc/os-release && echo "$VERSION_CODENAME")
Components: stable
Signed-By: /etc/apt/keyrings/docker.asc
EOF
sudo apt update
sudo apt install -y docker-ce docker-ce-cli containerd.io docker-buildx-plugin docker-compose-plugin
sudo usermod -aG docker $USER
The last command lets your user talk to Docker without sudo. Log out and in again so the group applies. Keep in mind that membership in the docker group is effectively root access, so only add users you trust.
To check:
docker --version
docker compose versionDocker version 29.9.3, build 5457199
Docker Compose version v5.7.0Step 2: Set up Traefik
I keep all Docker projects under ~/docker. Traefik gets its own directory, and every service it should serve joins the shared Docker network web.
mkdir -p ~/docker/traefik/acme
cd ~/docker
touch traefik/acme/acme.json
chmod 600 traefik/acme/acme.json
The file acme.json stores the certificates. It must have permissions 600, otherwise Traefik refuses to start. Now the static configuration ~/docker/traefik/traefik.yml:
global:
    checkNewVersion: true
    sendAnonymousUsage: false
    aliasHeadersStrategy: delete

api:
    dashboard: true

ping: {}

log:
    level: INFO

entryPoints:
    http:
        address: ":80"
        http:
            redirections:
                entryPoint:
                    to: https
                    scheme: https
    https:
        address: ":443"
        http:
            tls:
                certResolver: letsencrypt

providers:
    docker:
        exposedByDefault: false
        network: web

certificatesResolvers:
    letsencrypt:
        acme:
            email: you@example.com
            storage: /acme.json
            httpChallenge:
                entryPoint: http
Replace you@example.com with your address. The options in detail:
exposedByDefault: falsemakes Traefik serve only containers that explicitly carrytraefik.enable=true.- The entry point
httpredirects everything tohttps. - Traefik fetches the certificates with the HTTP challenge, so port 80 must be open.
The Compose file ~/docker/docker-compose.yml:
networks:
    web:
        name: web

services:
    traefik:
        image: traefik:v3.7
        container_name: traefik
        restart: unless-stopped
        security_opt:
            - no-new-privileges:true
        ports:
            - "80:80"
            - "443:443"
        volumes:
            - /var/run/docker.sock:/var/run/docker.sock:ro
            - ./traefik/traefik.yml:/etc/traefik/traefik.yml:ro
            - ./traefik/acme/acme.json:/acme.json
        networks:
            - web
        healthcheck:
            test: ["CMD", "traefik", "healthcheck", "--ping"]
            interval: 30s
            timeout: 5s
retries: 3cd ~/docker
docker compose up -d
docker compose psIt takes a few seconds until the status shows healthy.
Step 3: Start Komodo with Docker Compose
Komodo consists of three containers:
- mongo stores the entire configuration.
- core is the web interface and the API.
- periphery runs Docker commands on the server where Komodo itself runs.
The directory for it:
mkdir -p ~/docker/komodo
cd ~/docker/komodo
The .env file
The .env holds passwords and settings. I deliberately name it .env, because Docker Compose reads this file automatically and you will not get warnings like “variable is not set” later. I generate the secrets directly on the server:
cat > .env <<EOF
COMPOSE_KOMODO_IMAGE_TAG=2
COMPOSE_KOMODO_BACKUPS_PATH=/etc/komodo/backups

KOMODO_DATABASE_USERNAME=komodo
KOMODO_DATABASE_PASSWORD=$(openssl rand -hex 16)

TZ=Europe/Berlin
KOMODO_HOST=https://{{domain}}
KOMODO_TITLE=Komodo
KOMODO_PERIPHERY_PUBLIC_KEY=file:/config/keys/periphery.pub
KOMODO_LOCAL_AUTH=true
KOMODO_FIRST_SERVER_NAME=Local
KOMODO_WEBHOOK_SECRET=$(openssl rand -hex 16)
KOMODO_JWT_SECRET=$(openssl rand -hex 32)

PERIPHERY_CORE_ADDRESS=ws://core:9120
PERIPHERY_CONNECT_AS=Local
PERIPHERY_CORE_PUBLIC_KEYS=file:/config/keys/core.pub
PERIPHERY_ROOT_DIRECTORY=/etc/komodo
PERIPHERY_INCLUDE_DISK_MOUNTS=/etc/hostname
EOF
chmod 600 .env
The most important entries:
| Variable | Meaning |
|---|---|
KOMODO_HOST |
The public URL of Komodo. It is needed for webhooks and links. |
KOMODO_LOCAL_AUTH |
Allows login with username and password. Without it you need an OAuth provider. |
KOMODO_JWT_SECRET |
Key for login sessions. Keep it random and secret. |
KOMODO_WEBHOOK_SECRET |
Secret that Git providers use to sign webhooks sent to Komodo. |
PERIPHERY_CORE_ADDRESS |
Where the agent connects to. The agent calls the Core, not the other way around. |
PERIPHERY_ROOT_DIRECTORY |
The folder where Komodo keeps stacks, repos and backups. |
KOMODO_PERIPHERY_PUBLIC_KEY |
Public key of the agent. Core and Periphery recognise each other through key pairs, not passwords. |
The compose.yaml file
networks:
    web:
        external: true

services:
    mongo:
        image: mongo:8
        restart: unless-stopped
        labels:
            komodo.skip:
        command: --quiet --wiredTigerCacheSizeGB 0.25
        volumes:
            - mongo-data:/data/db
            - mongo-config:/data/configdb
        environment:
            MONGO_INITDB_ROOT_USERNAME: ${KOMODO_DATABASE_USERNAME}
            MONGO_INITDB_ROOT_PASSWORD: ${KOMODO_DATABASE_PASSWORD}

    core:
        image: ghcr.io/moghtech/komodo-core:${COMPOSE_KOMODO_IMAGE_TAG:-2}
        init: true
        restart: unless-stopped
        depends_on:
            - mongo
        env_file: ./.env
        environment:
            KOMODO_DATABASE_ADDRESS: mongo:27017
        volumes:
            - keys:/config/keys
            - ${COMPOSE_KOMODO_BACKUPS_PATH}:/backups
        networks:
            - default
            - web
        labels:
            komodo.skip:
            traefik.enable: "true"
            traefik.http.routers.komodo.rule: Host(`{{domain}}`)
            traefik.http.routers.komodo.entrypoints: https
            traefik.http.services.komodo.loadbalancer.server.port: "9120"

    periphery:
        image: ghcr.io/moghtech/komodo-periphery:${COMPOSE_KOMODO_IMAGE_TAG:-2}
        init: true
        restart: unless-stopped
        depends_on:
            - core
        env_file: ./.env
        volumes:
            - keys:/config/keys
            - /var/run/docker.sock:/var/run/docker.sock
            - /proc:/proc
            - ${PERIPHERY_ROOT_DIRECTORY:-/etc/komodo}:${PERIPHERY_ROOT_DIRECTORY:-/etc/komodo}
        labels:
            komodo.skip:

volumes:
    mongo-data:
    mongo-config:
    keys:
A few points worth understanding:
- The Core joins two networks.
defaultconnects it to MongoDB and the agent,webconnects it to Traefik. - The labels on the Core are the complete Traefik setup: domain, HTTPS and the internal port 9120. You do not have to touch a Traefik file for it.
- The label
komodo.skiptells Komodo that it must not restart or update these containers itself. Otherwise Komodo would pull the rug out from under itself during an update. - Core and agent share the volume
keys. Komodo stores the key pairs there on first start, and both sides use them to recognise each other. --wiredTigerCacheSizeGB 0.25limits MongoDB’s cache, otherwise the database takes a lot of RAM.- The folder
/etc/komodois mounted into the agent under the same path. That matters because the agent’s Docker commands run on the host and need the same paths.
Start and check:
docker compose up -d
docker compose psNAME IMAGE STATUS PORTS
komodo-core-1 ghcr.io/moghtech/komodo-core:2 Up 35 minutes 9120/tcp
komodo-mongo-1 mongo:8 Up 35 minutes 27017/tcp
komodo-periphery-1 ghcr.io/moghtech/komodo-periphery:2 Up 35 minutes 8120/tcpA look at the Core’s log shows that everything worked:
docker compose logs core | tail -5CoreStartup: Komodo Core version: v2.3.4
Writing private key to /config/keys/core.key
Server starting on http://[::]:9120After about a minute Traefik has fetched the certificate. You can check it with:
curl -vI https://{{domain}} 2>&1 | grep -E "issuer|HTTP/"* issuer: C=US; O=Let's Encrypt; CN=YR1
< HTTP/2 200Step 4: First login
Open https://{{domain}} in the browser. On the first visit there is no user yet.
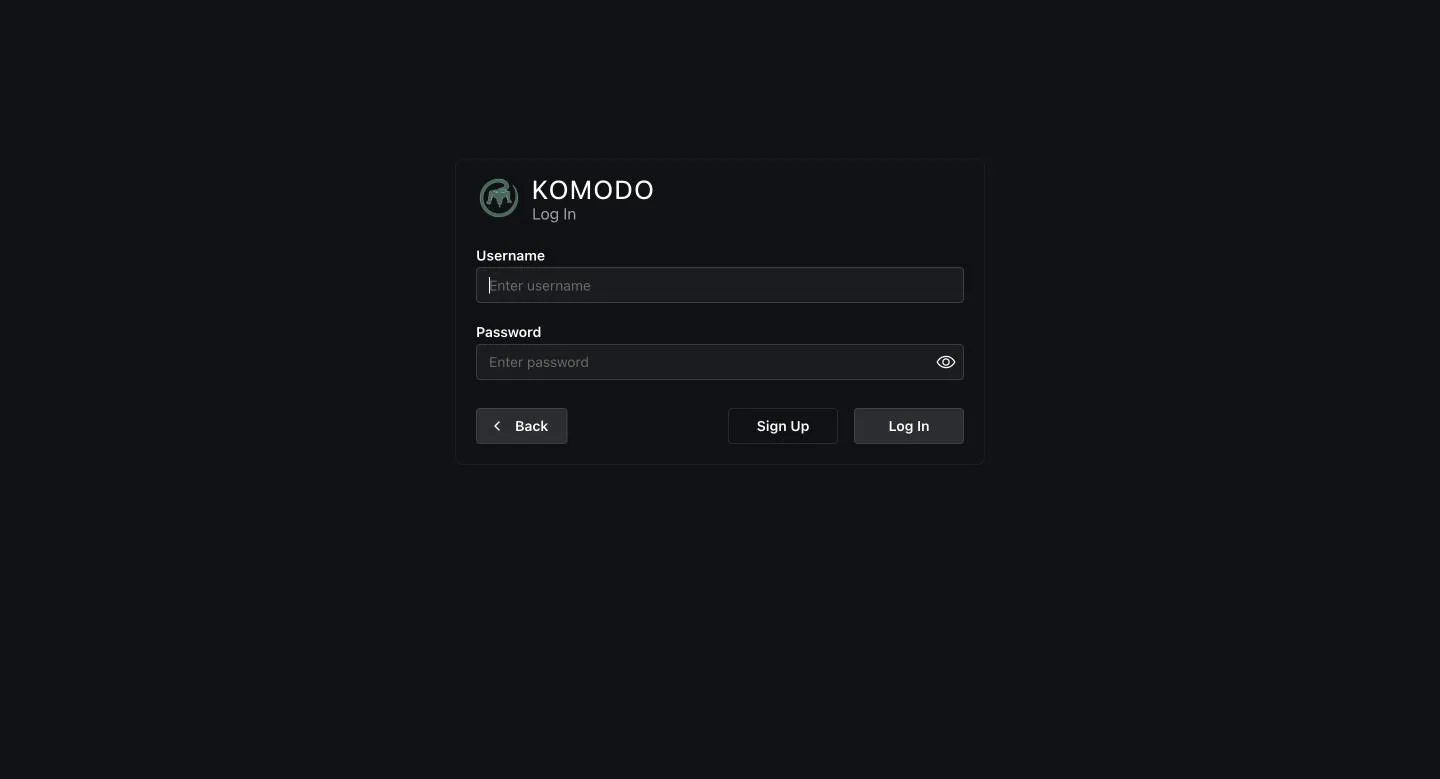
Click “Sign Up” and create a username and password. The first user to register automatically becomes administrator. After that you should not allow more registrations: put KOMODO_DISABLE_USER_REGISTRATION=true into the .env and restart the Core with docker compose up -d. You then create further users yourself in the admin area.
If you prefer to create the admin through configuration, Komodo has the variables KOMODO_INIT_ADMIN_USERNAME and KOMODO_INIT_ADMIN_PASSWORD for that.
The interface at a glance
After login Komodo is no longer empty. The server Local was created by KOMODO_FIRST_SERVER_NAME, and the agent has connected.
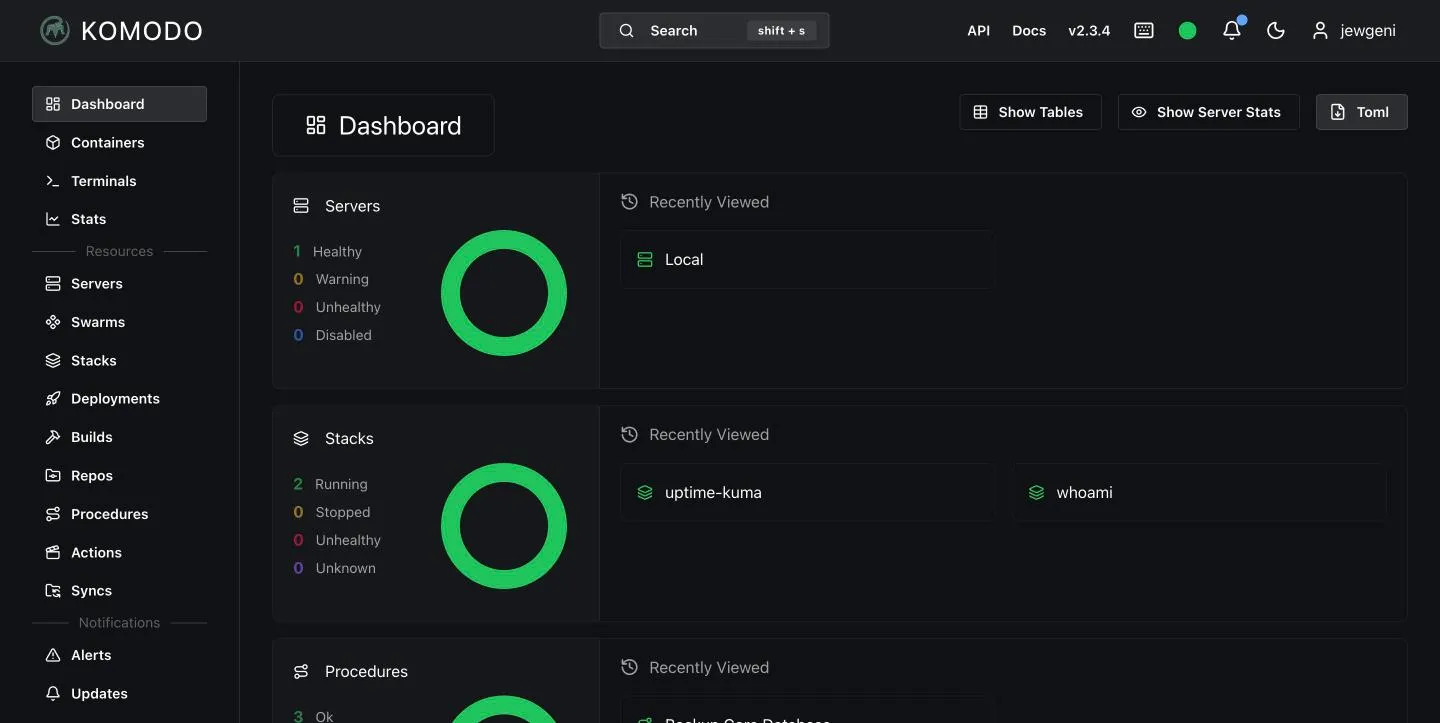
In the sidebar on the left you find:
- Dashboard: summary of all resources.
- Containers: all containers of all servers in one list.
- Terminals: shells in containers and on servers.
- Stats: server load.
- Servers, Swarms, Stacks, Deployments, Builds, Repos, Procedures, Actions, Syncs: the resources Komodo manages. I go through the most important ones below.
- Alerts and Updates: notifications and a log of all changes.
The server list
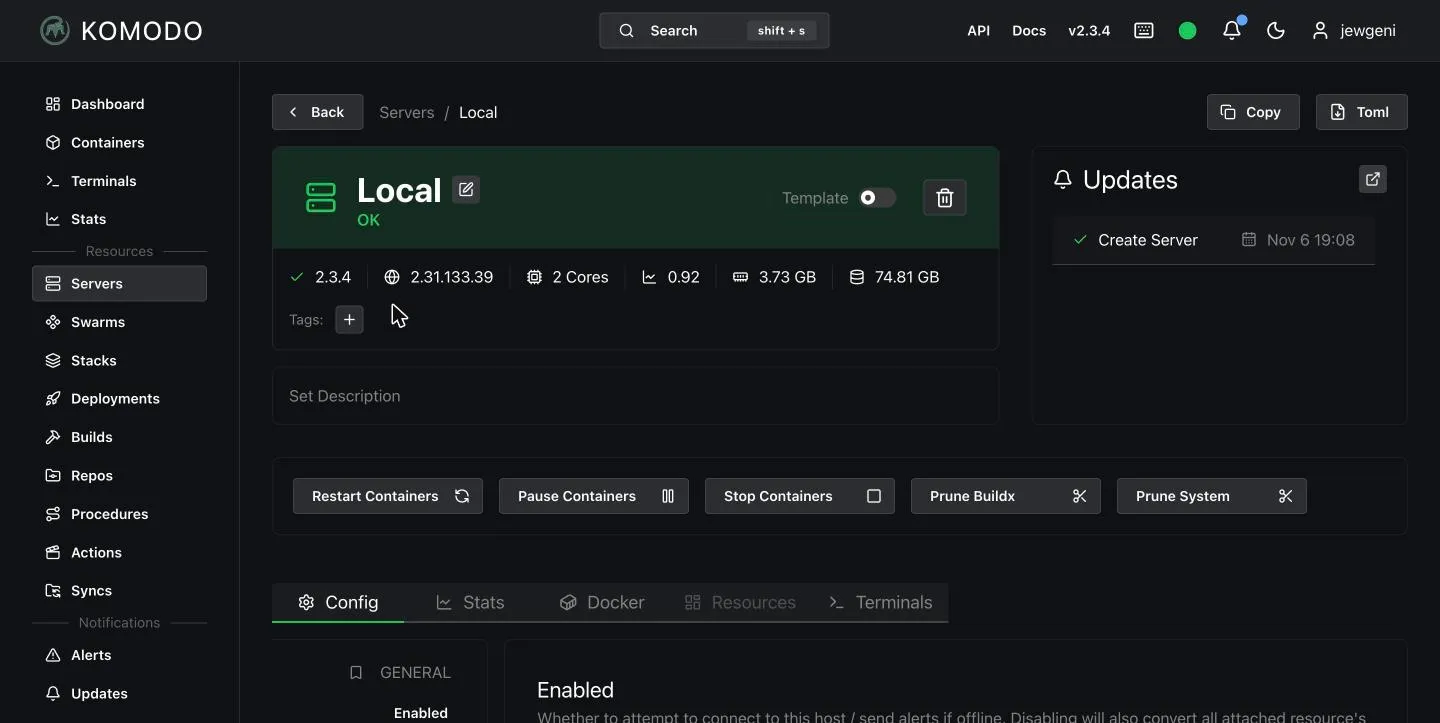
Under “Servers” you see the server Local with the status OK.
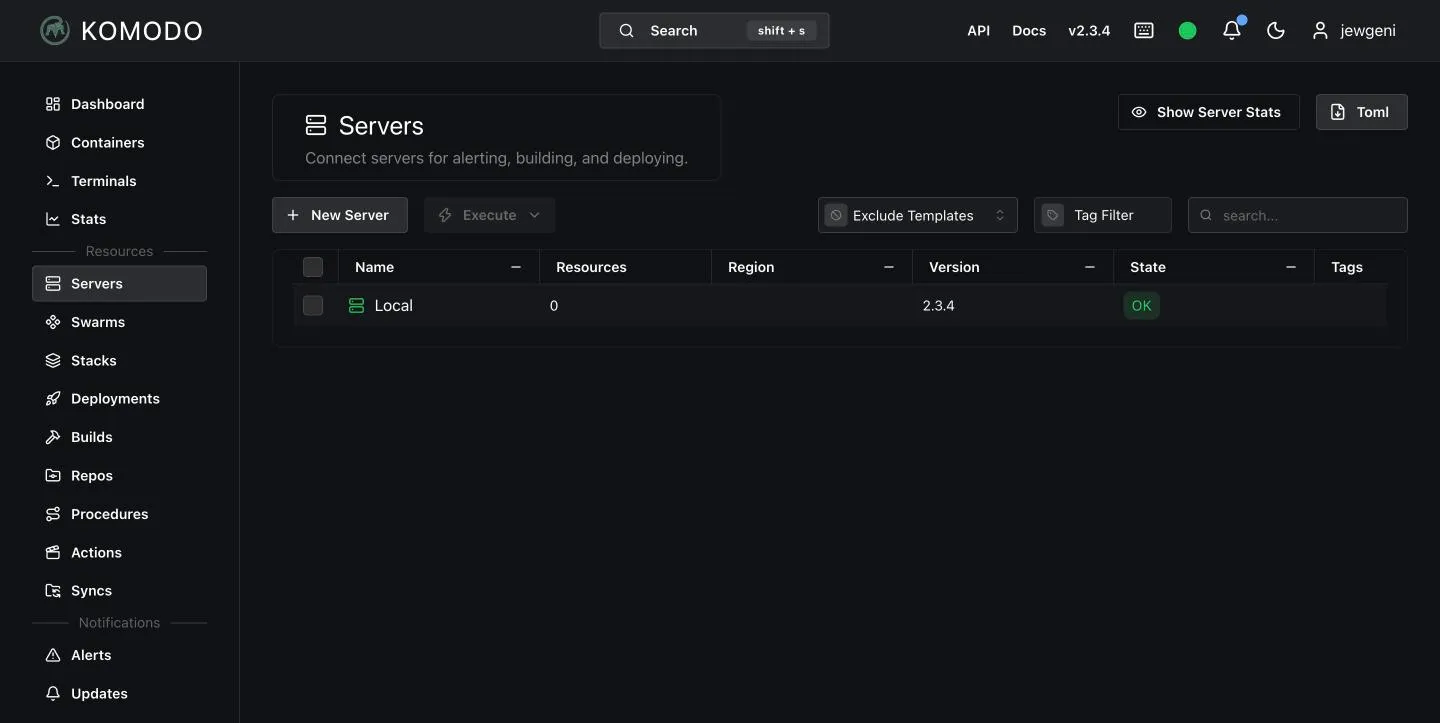
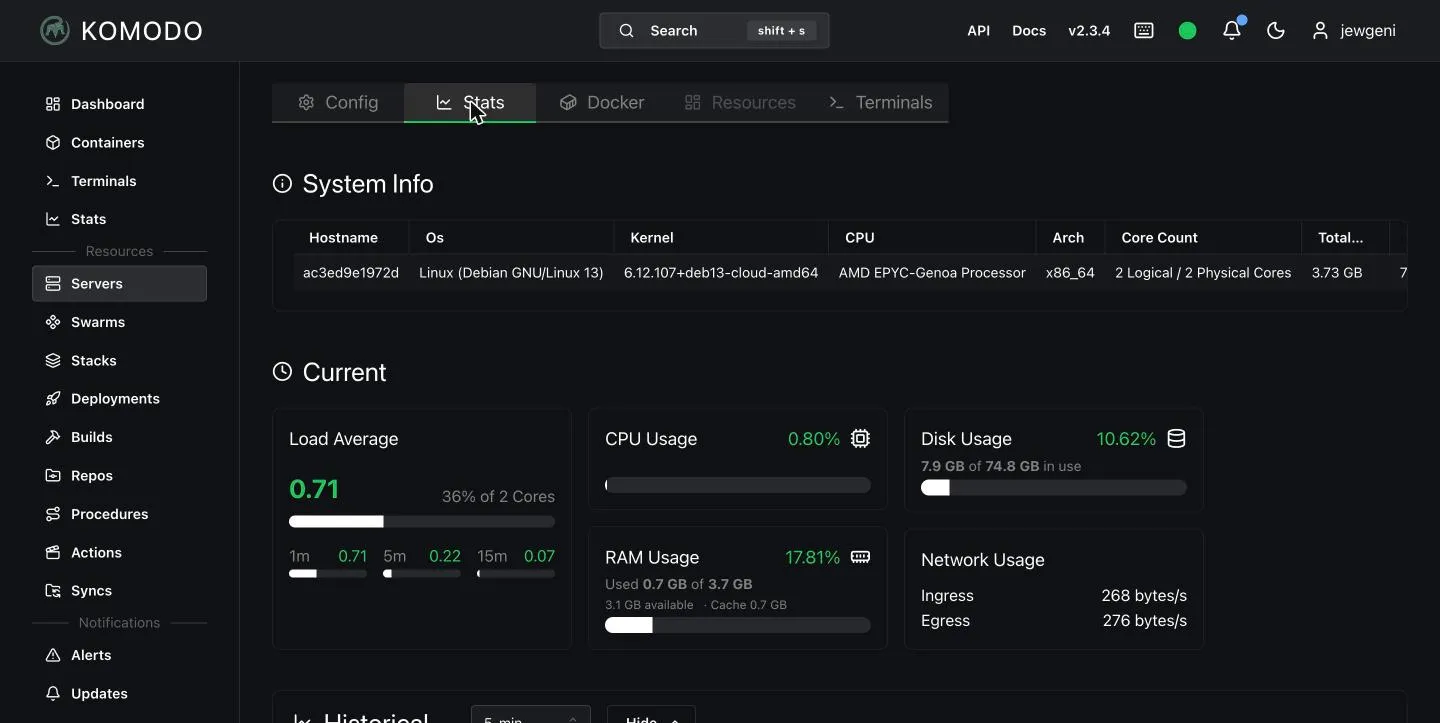
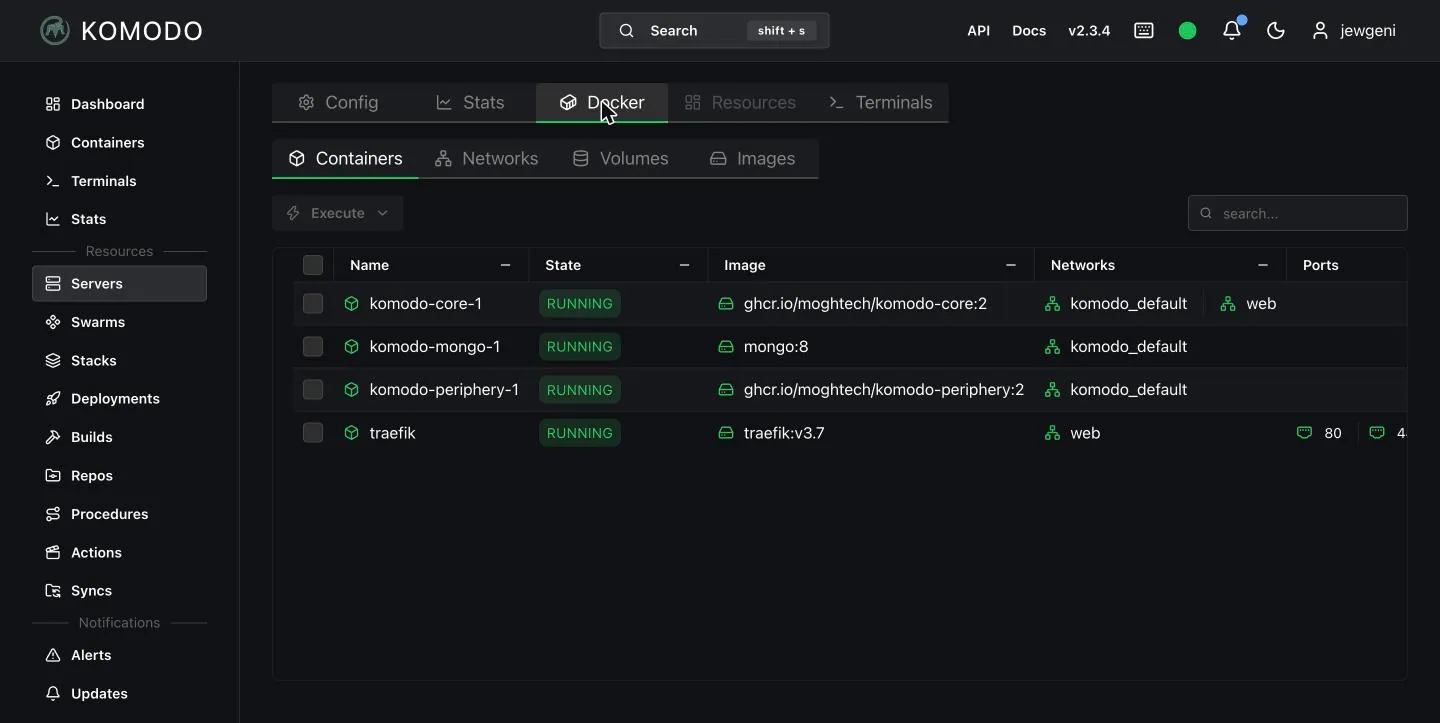
A click on it opens the detail page with configuration, statistics, Docker objects and terminals.
The “Stats” tab shows CPU, RAM and disk over time.
In the “Docker” tab you find all containers, networks, volumes and images of the server.
At the top of the page there are also buttons such as “Prune System” to delete unused images and containers. Be careful with it if you still need stopped containers.
Start the first stack from the interface
A stack is a Compose file. To try things out I use traefik/whoami, a tiny web server that returns information about the request.
Go to “Stacks” and click “New Stack”.
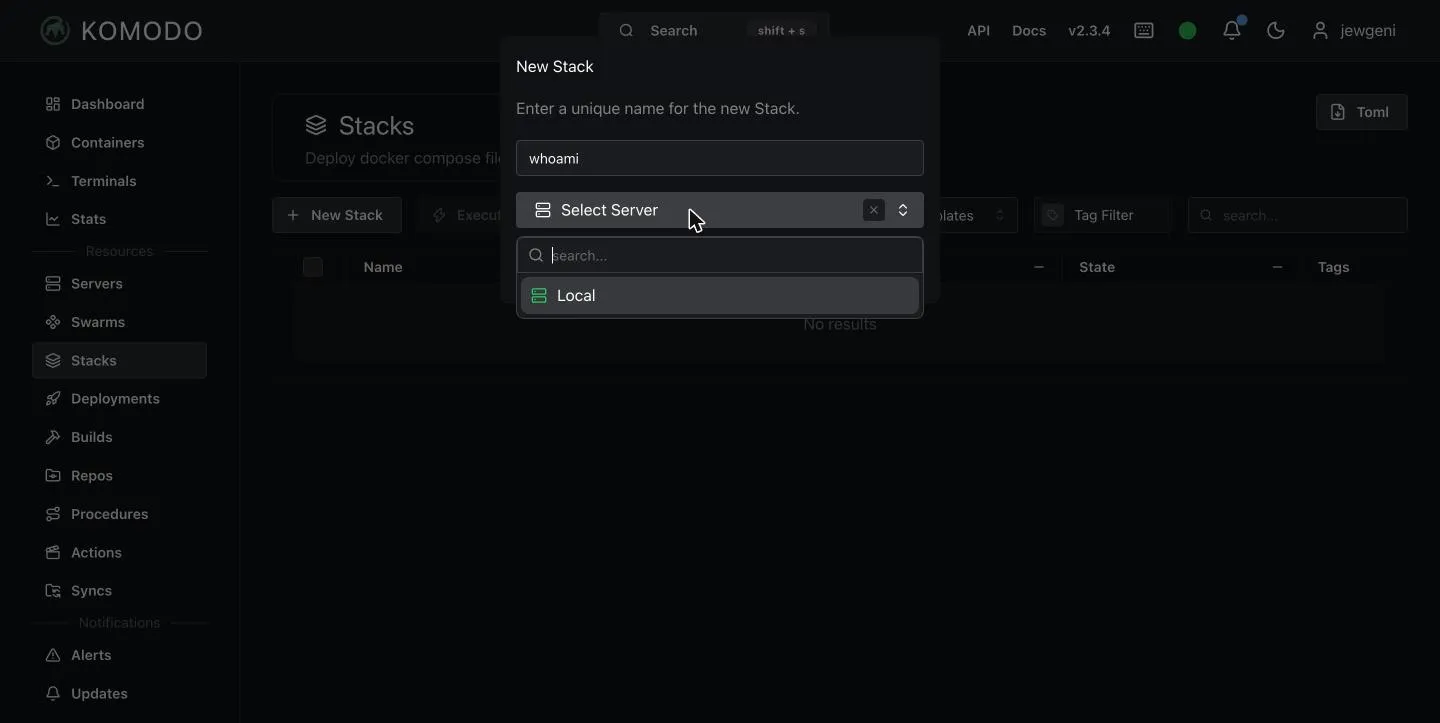
Enter a name, choose the server Local and confirm. The stack is created but still empty.
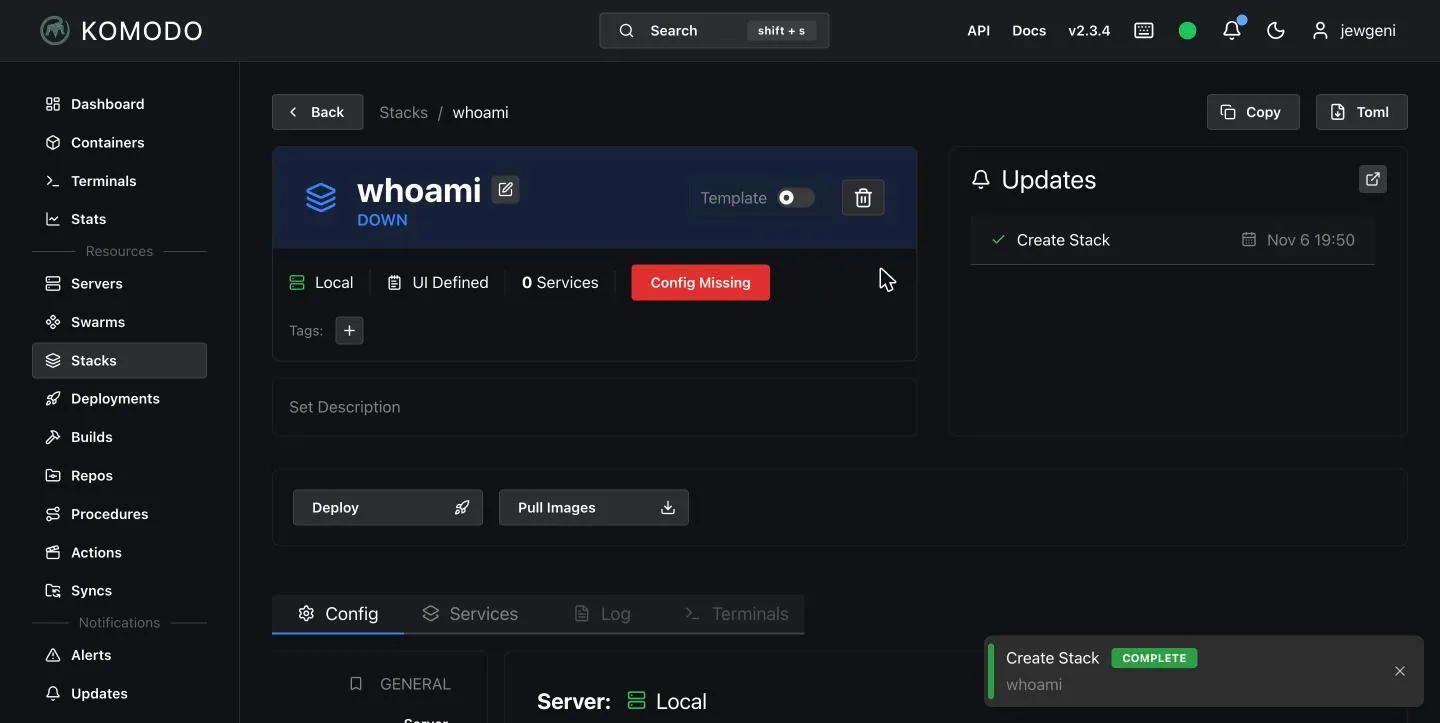
Under “Choose Mode” you decide where the Compose file comes from:
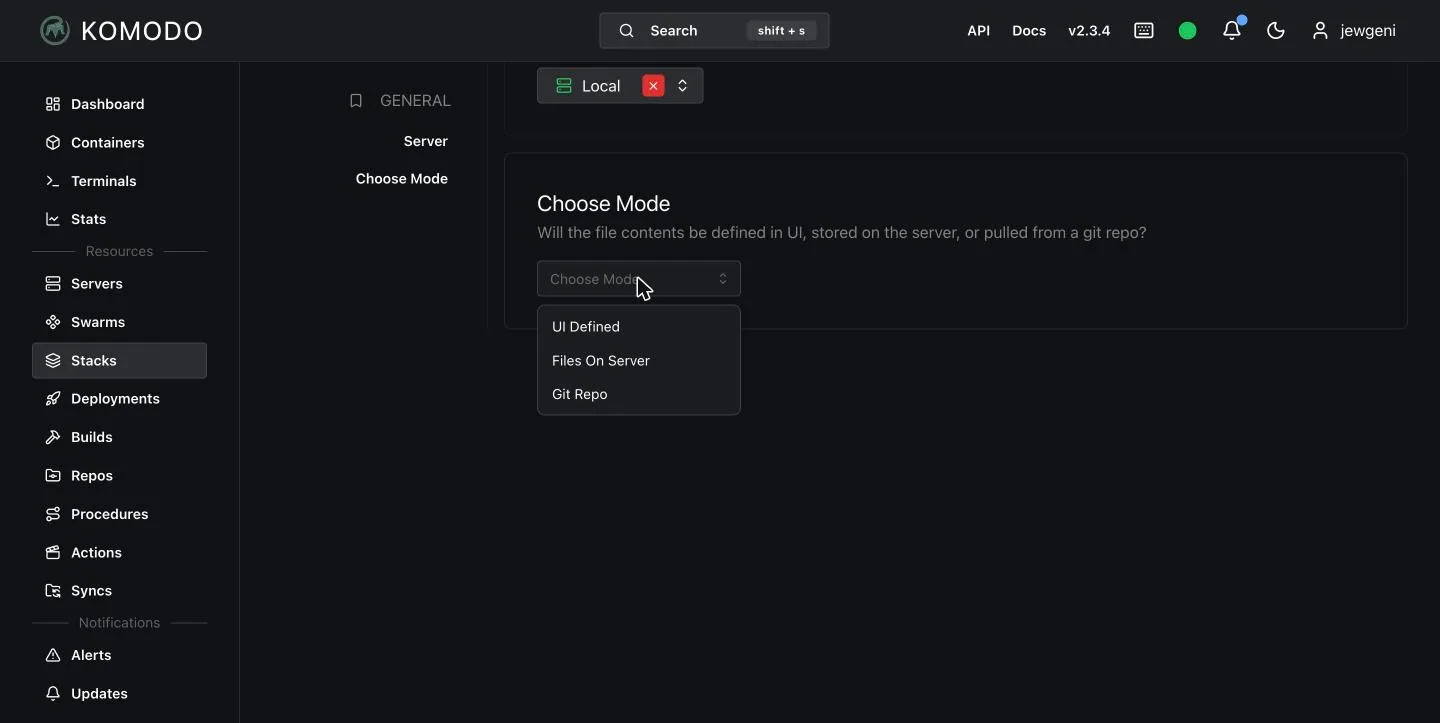
| Mode | Meaning |
|---|---|
| UI Defined | You write the Compose file directly in the interface. Komodo stores it in its database. |
| Files On Server | The file already exists on the server and Komodo reads it. |
| Git Repo | Komodo pulls the file from a Git repository. |
We choose “UI Defined” and paste this Compose file into the editor. Replace whoami.yourdomain.com with a domain that points to your server:
services:
    whoami:
        image: traefik/whoami
        restart: unless-stopped
        networks:
            - web
        labels:
            - "traefik.enable=true"
            - "traefik.http.routers.whoami.rule=Host(`whoami.yourdomain.com`)"
            - "traefik.http.routers.whoami.entrypoints=https"
            - "traefik.http.services.whoami.loadbalancer.server.port=80"

networks:
    web:
        external: true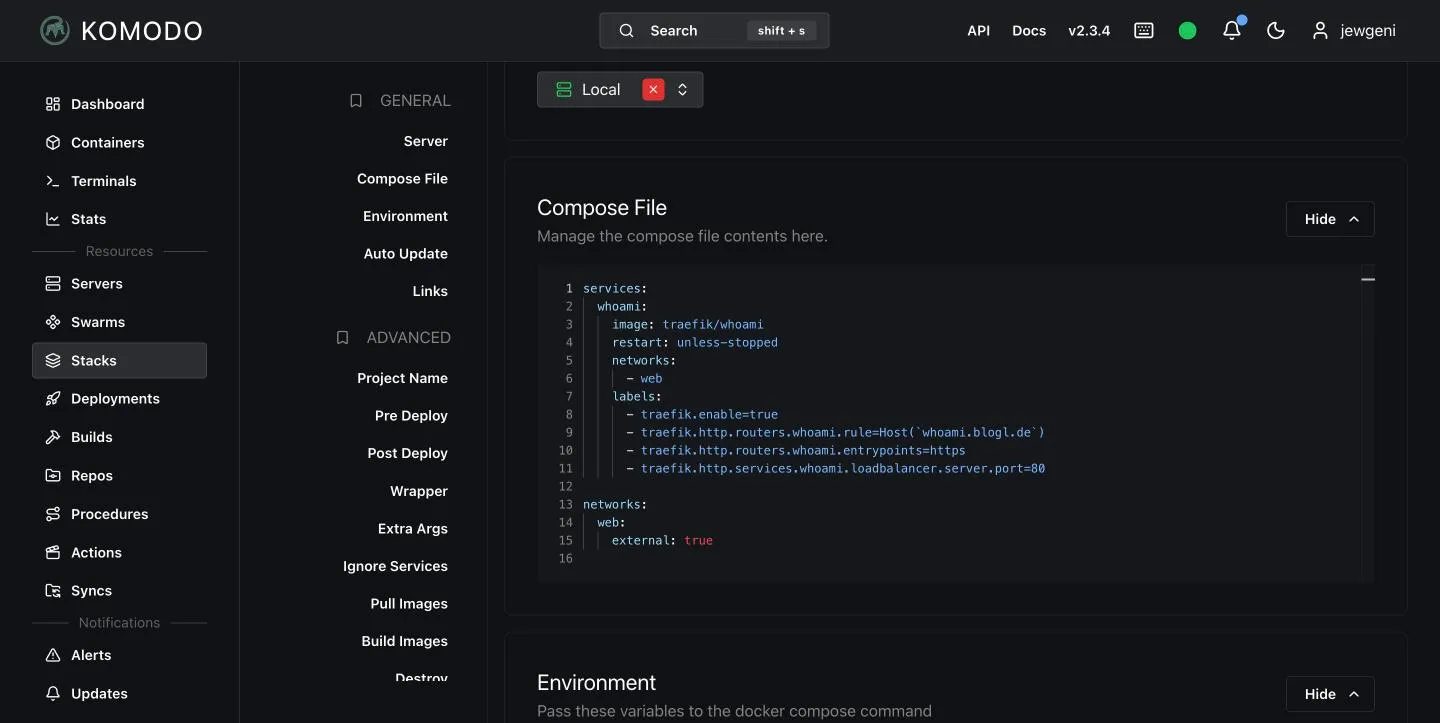
Click “Save”. Beforehand Komodo shows a diff of the change and asks for confirmation.
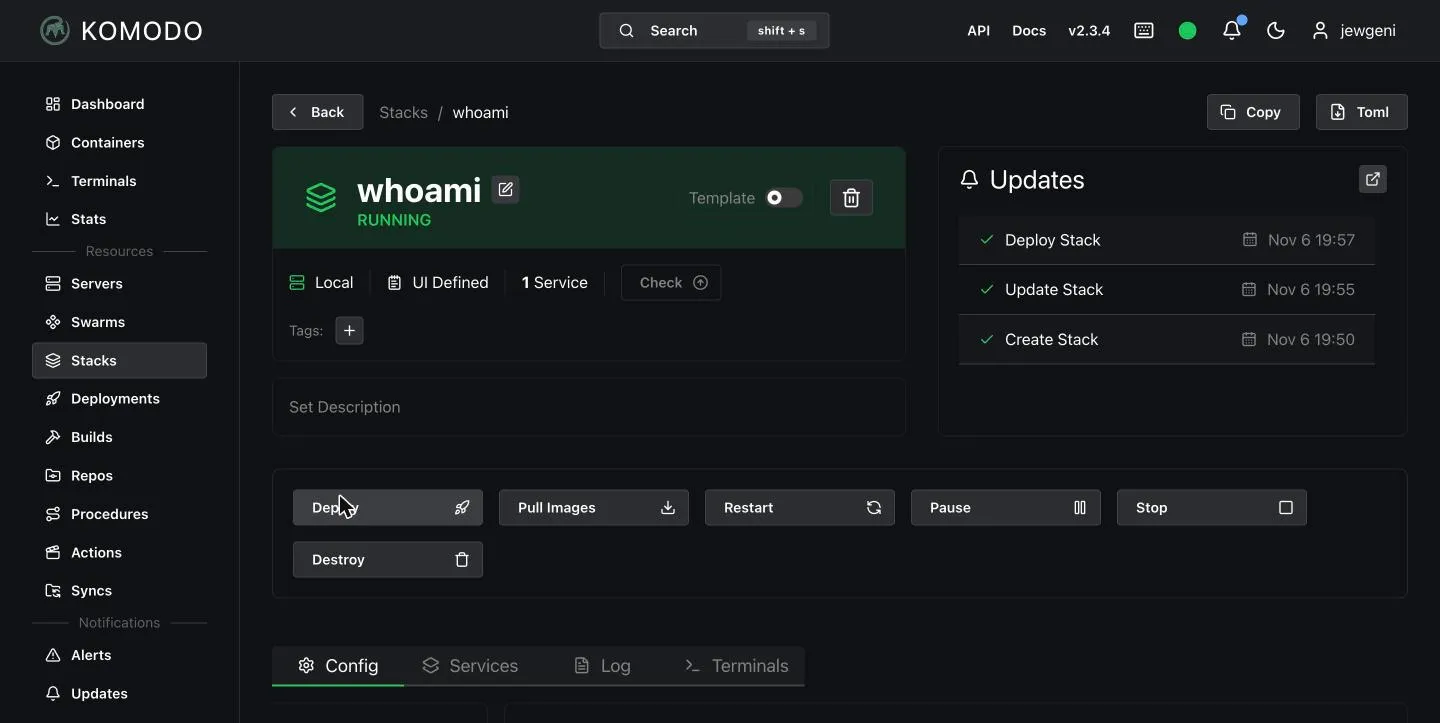
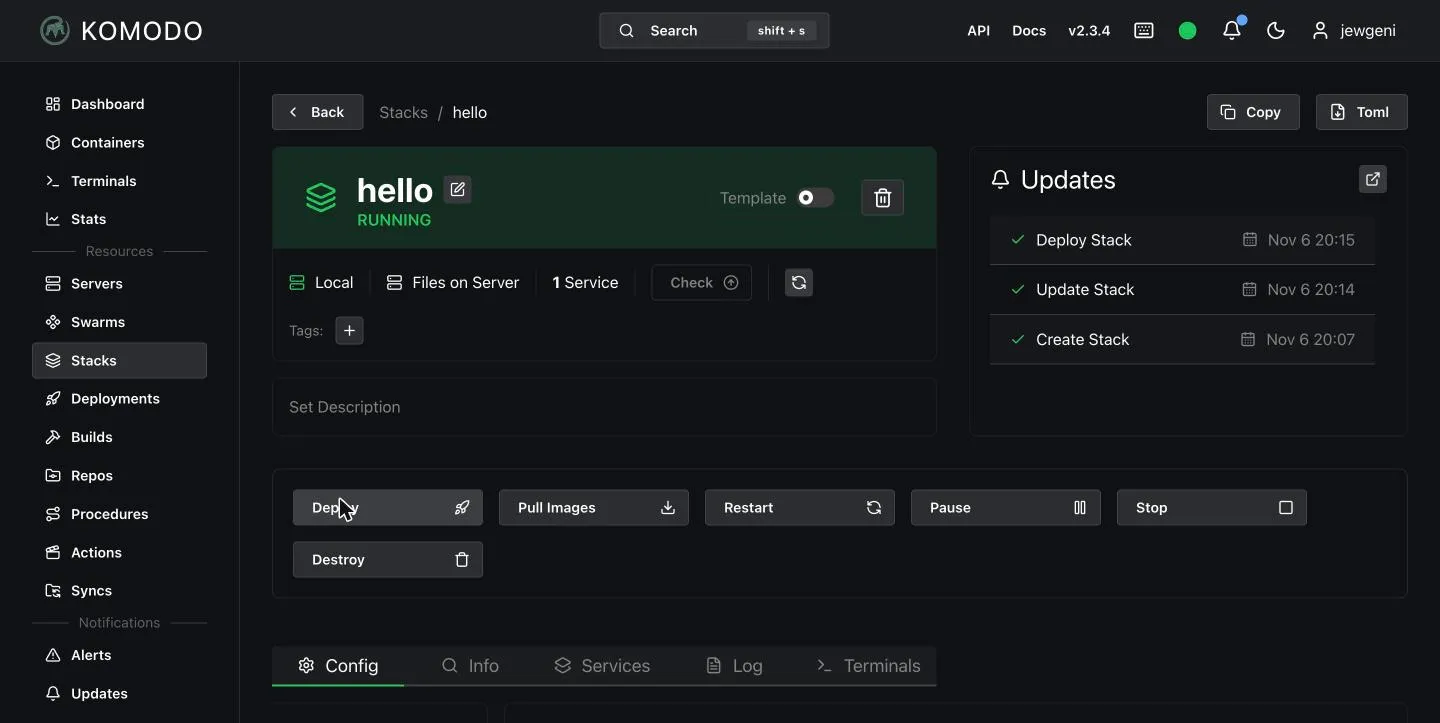
Then click “Deploy”. All executing buttons in Komodo ask for a second click. The stack switches to RUNNING.
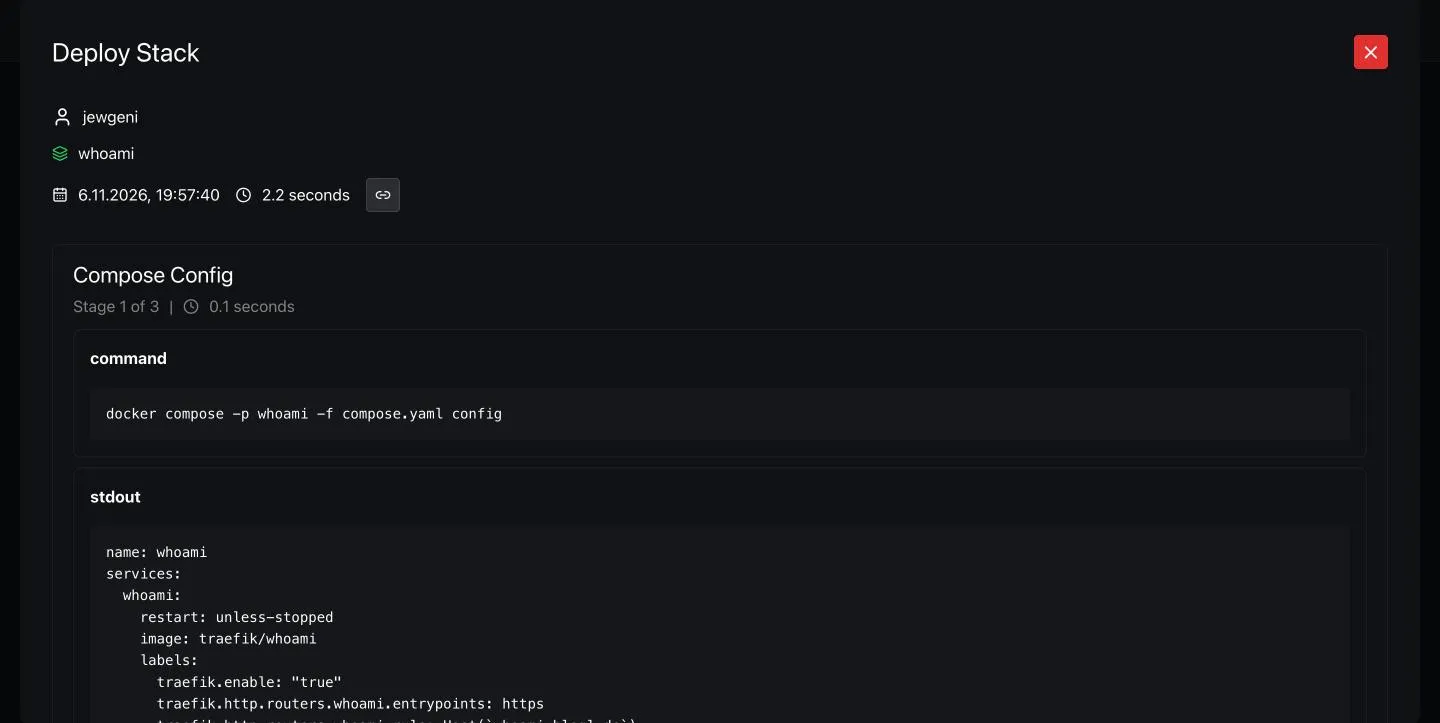
Under “Log” you see what Komodo did during the deploy. That is the output of docker compose up:
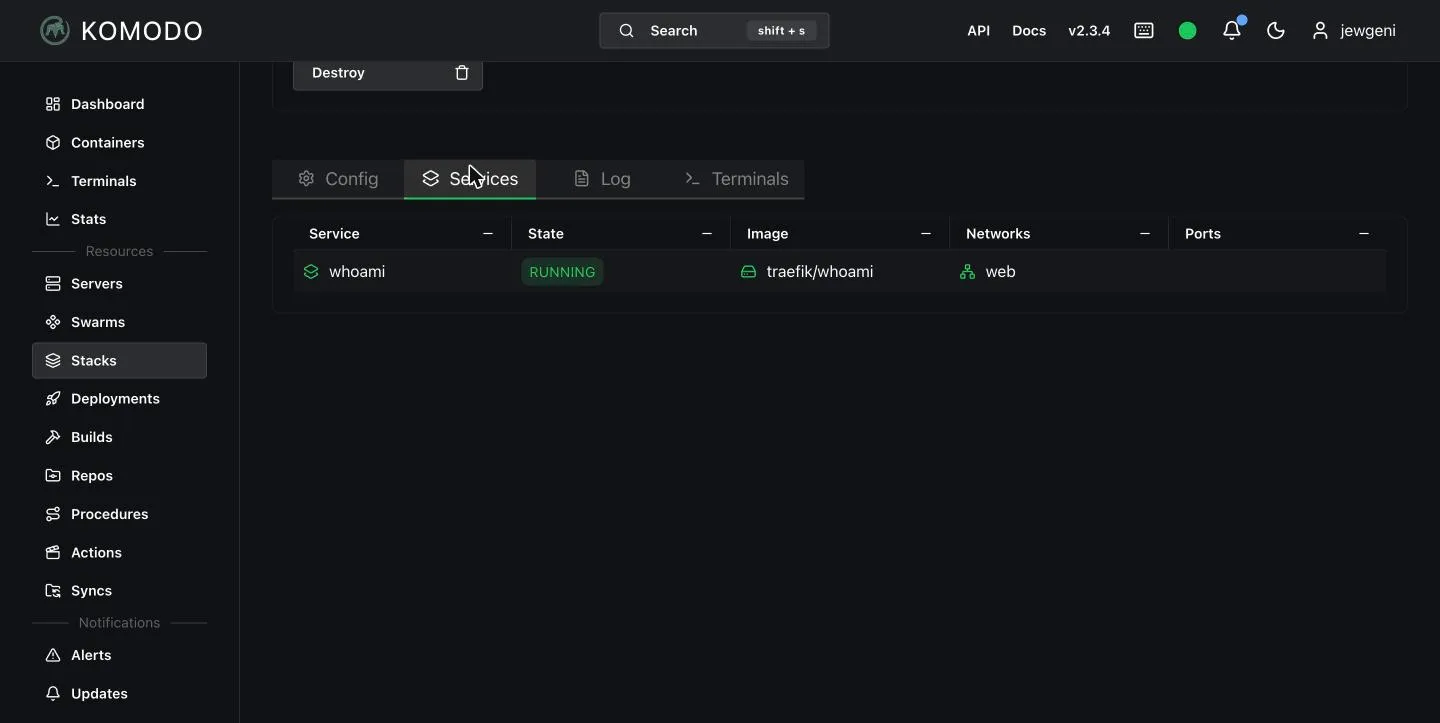
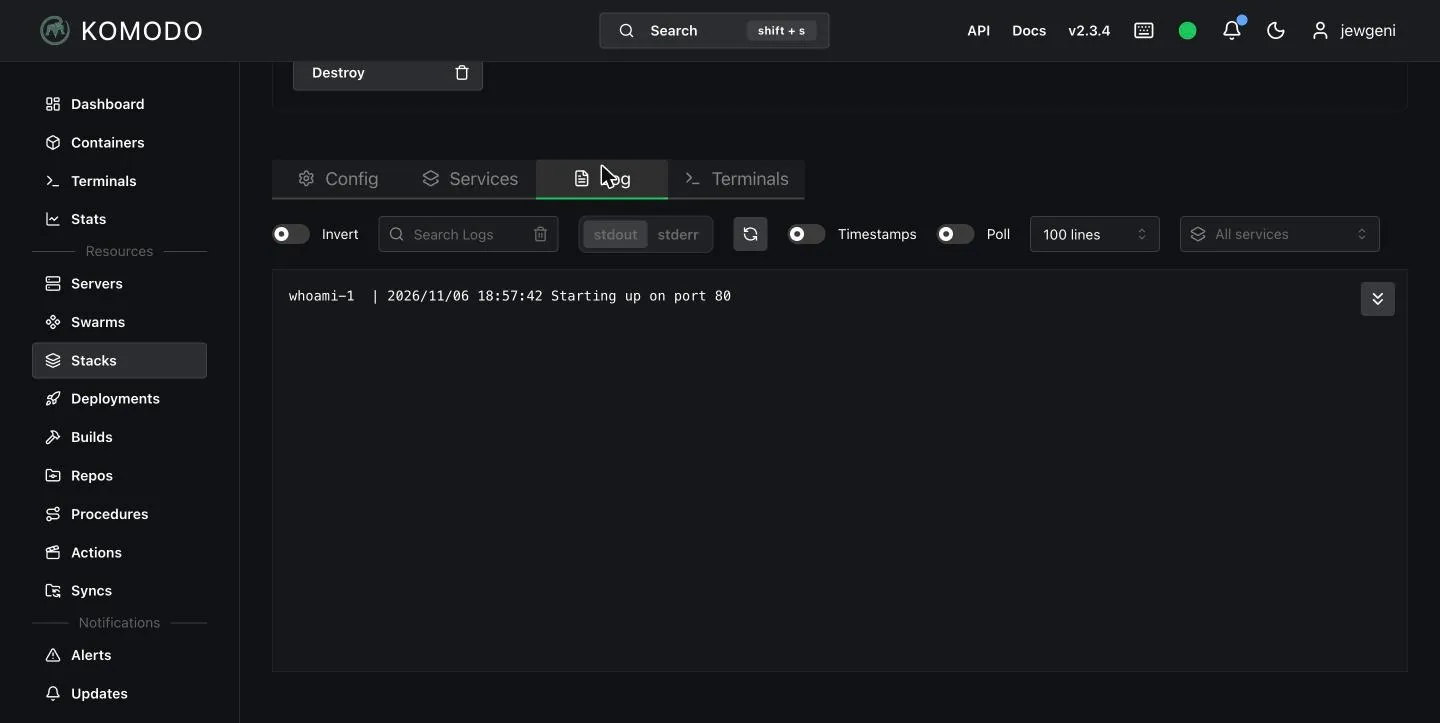
“Services” shows the stack’s containers, and the “Log” tab shows the output of the containers themselves.
A test from outside shows that Traefik forwards the request to the new container:
curl https://whoami.yourdomain.comHostname: be603bb374a5
IP: 127.0.0.1
IP: ::1
IP: 172.18.0.4
RemoteAddr: 172.18.0.2:36224
GET / HTTP/1.1
Host: whoami.yourdomain.com
X-Forwarded-Proto: httpsYou do not need to register the domain in Traefik for this. The container carries its rules as labels, and Traefik reads them through the Docker socket.
Stacks from a Git repository
For stacks you want to version, Git mode is better. The Compose file then lives in a repository, and Komodo fetches it from there. For testing I use the Uptime Kuma repository, which contains a ready-made compose.yaml.
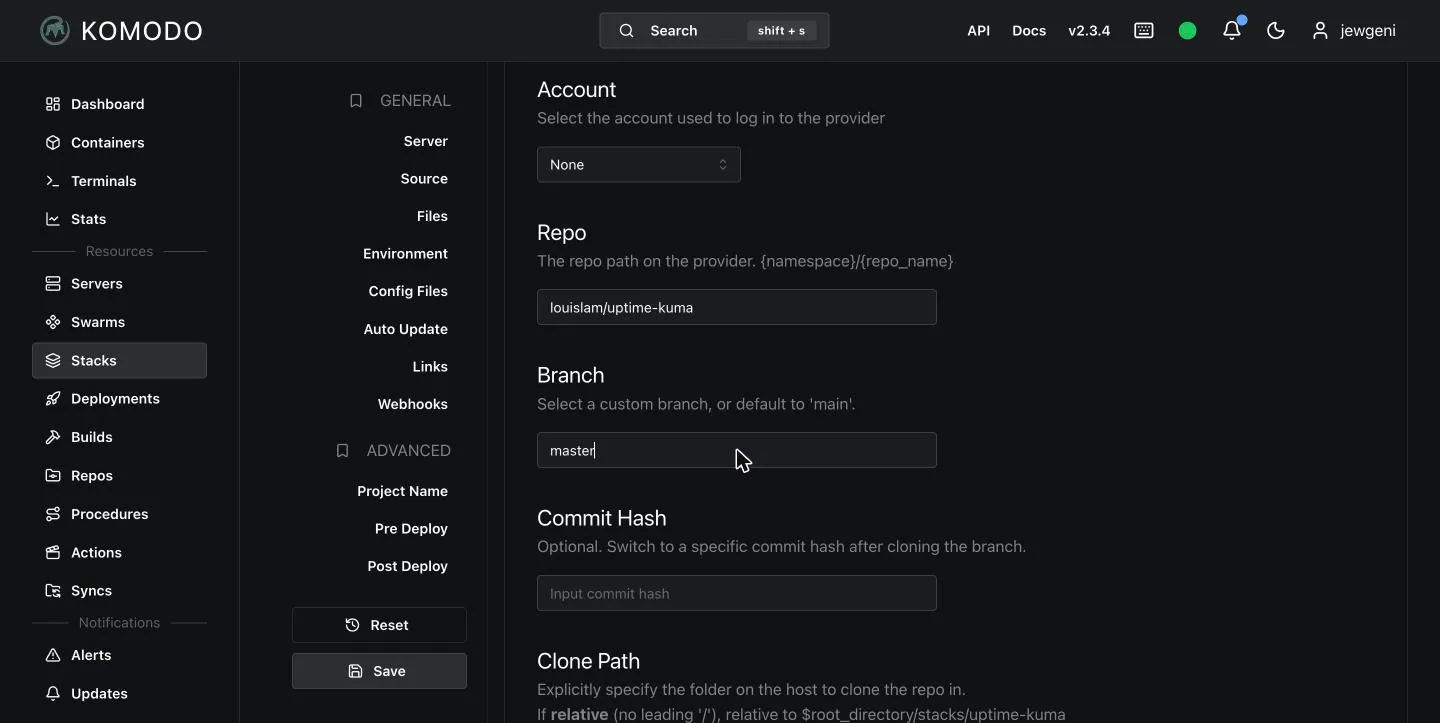
Create a new stack, choose “Git Repo” as the mode and enter:
- Account: empty, public repositories need none.
- Repo:
louislam/uptime-kuma - Branch:
master(Komodo defaults tomain)
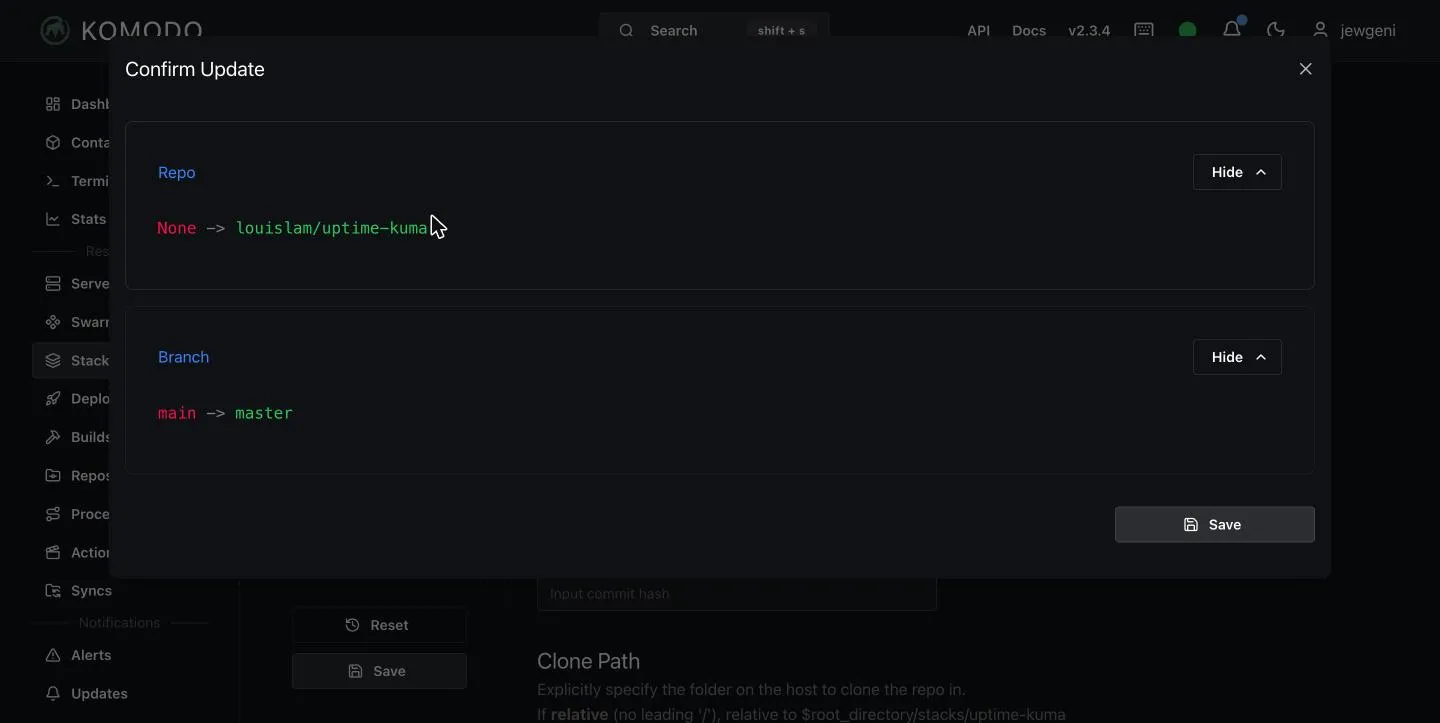
When saving, Komodo shows the diff again.
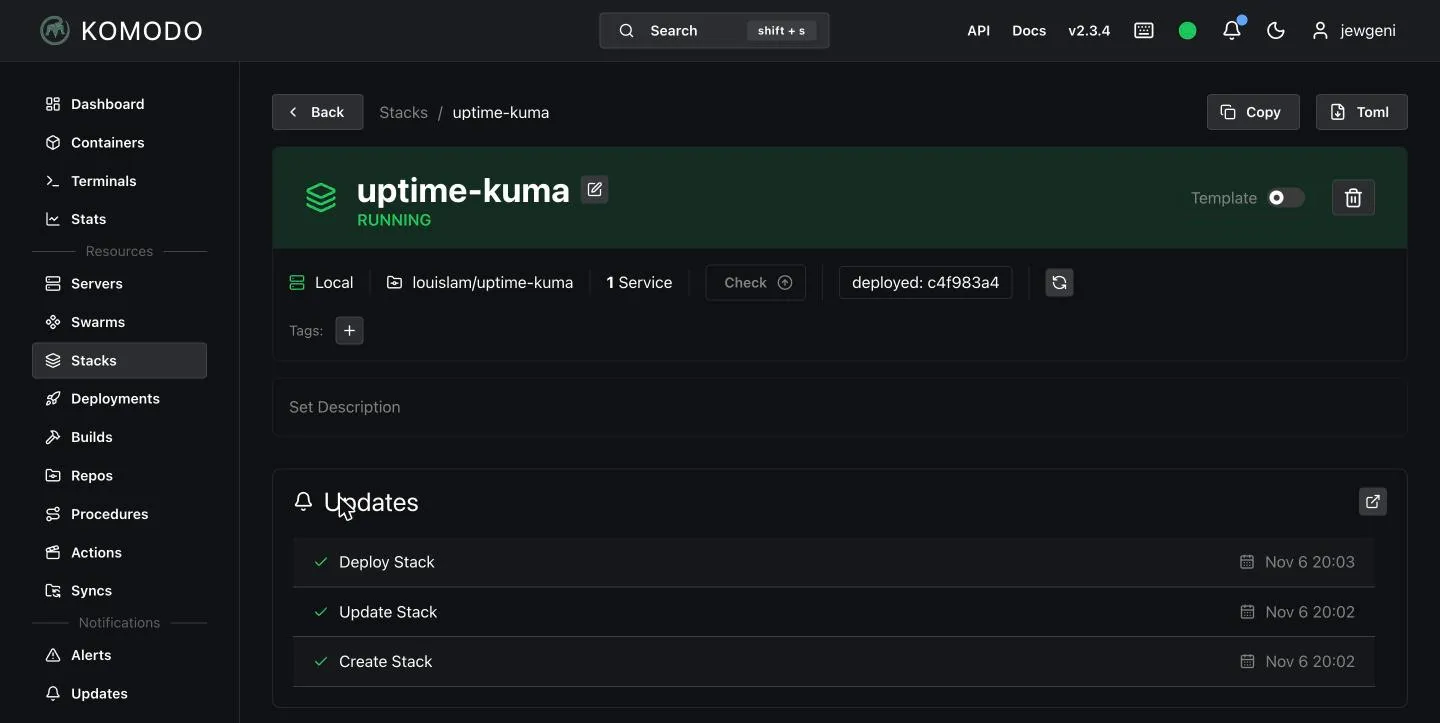
After the deploy, Komodo clones the repository to /etc/komodo/stacks/<stack-name> on the server and starts the Compose file from there.
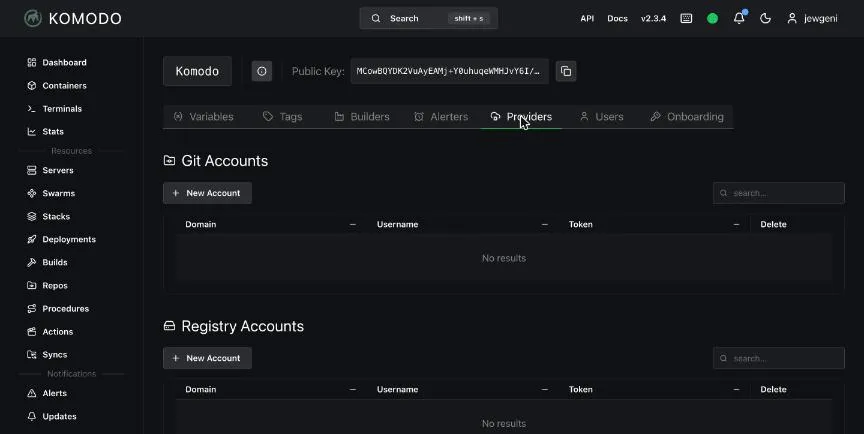
For private repositories you store an account with an access token under Settings → Providers. You then select it in the “Account” field.
Webhooks: deploy on every push
In the stack you find the “Webhooks” section. Komodo shows a URL of the form https://{{domain}}/listener/github/stack/<ID>/deploy there. If you enter this URL as a webhook in GitHub or a compatible Git service (for example Forgejo or Gitea), Komodo deploys the stack on every push.
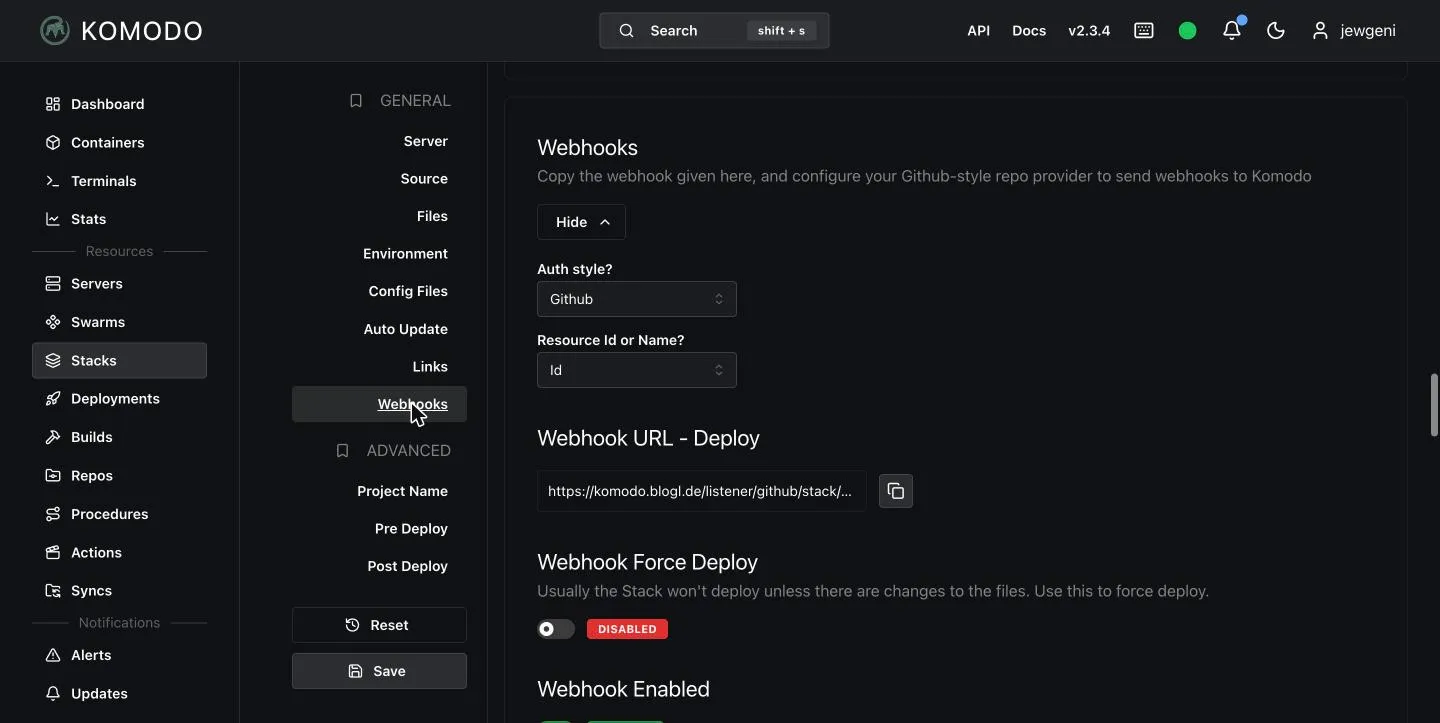
You enter the secret from KOMODO_WEBHOOK_SECRET at the Git service as the “Secret”.
Files that already exist on the server
The mode “Files On Server” reads a Compose file from the directory /etc/komodo/stacks/<stack-name>/. That is useful if you place files there with Ansible or by hand. In the “Run Directory” field you give a path relative to that folder. The file is called compose.yaml by default.
Manage containers
Under “Containers” you see all containers of all servers in one list.
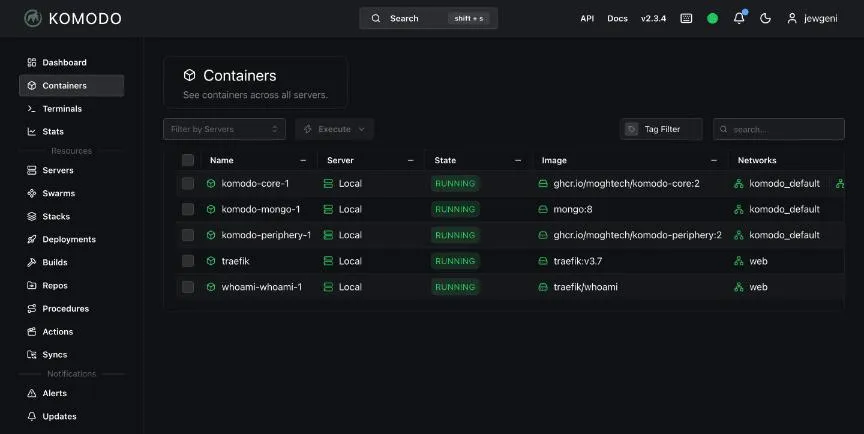
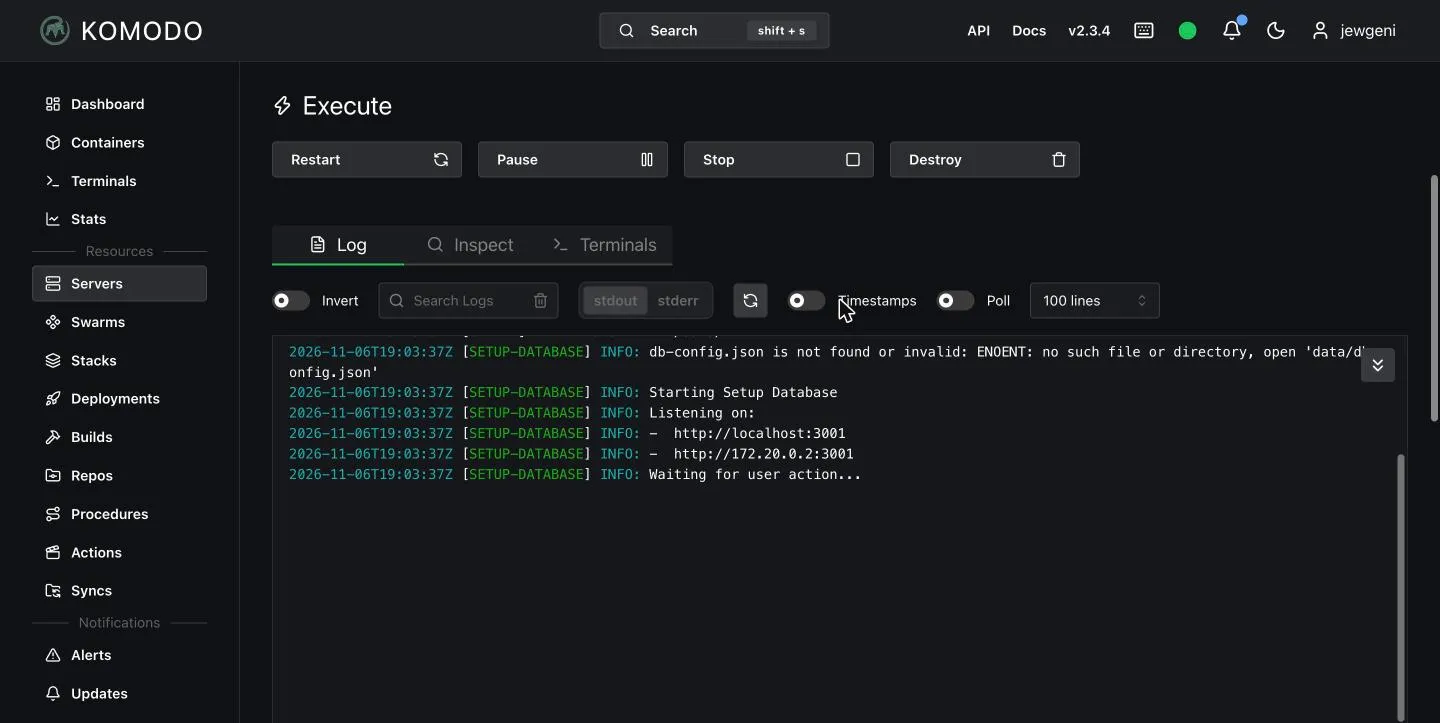
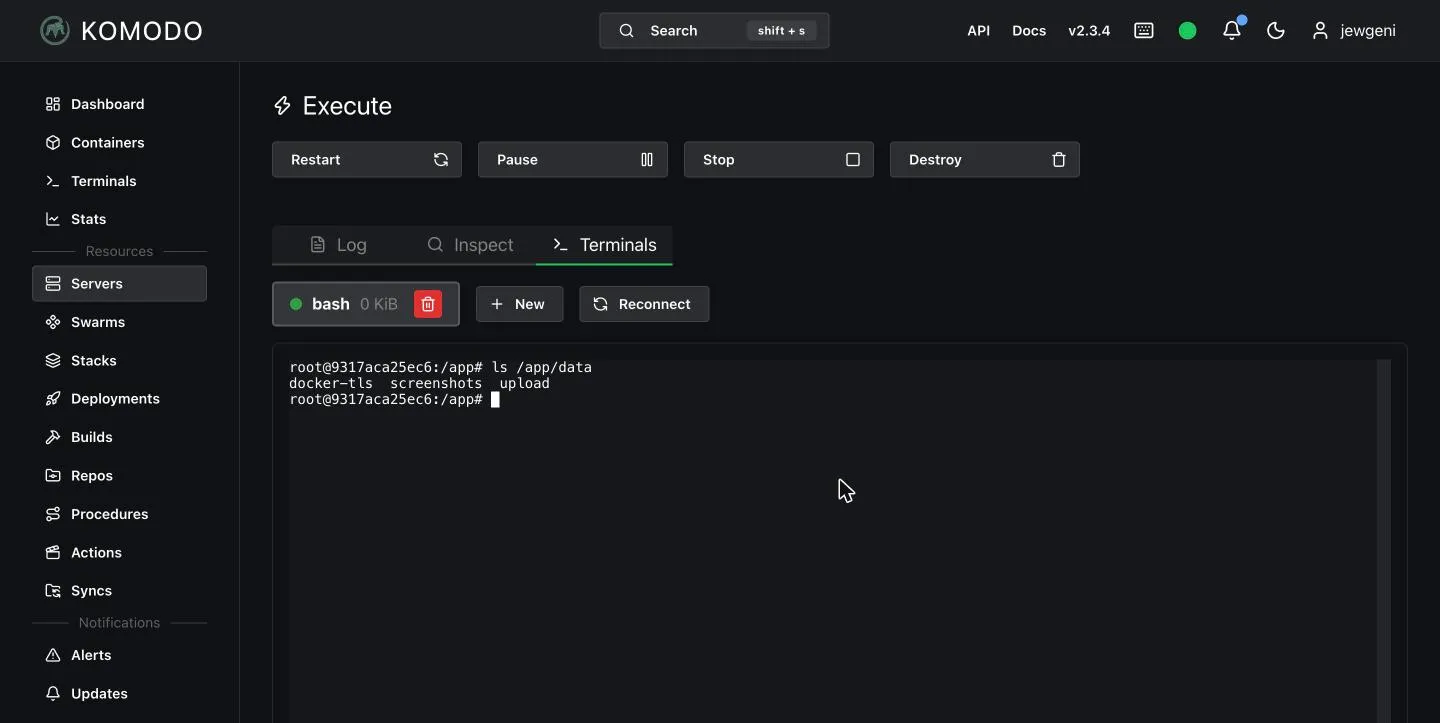
A click on a container opens its page with three tabs:
- Log: the container’s output.
- Inspect: the result of
docker inspect. - Terminals: a shell in the container.
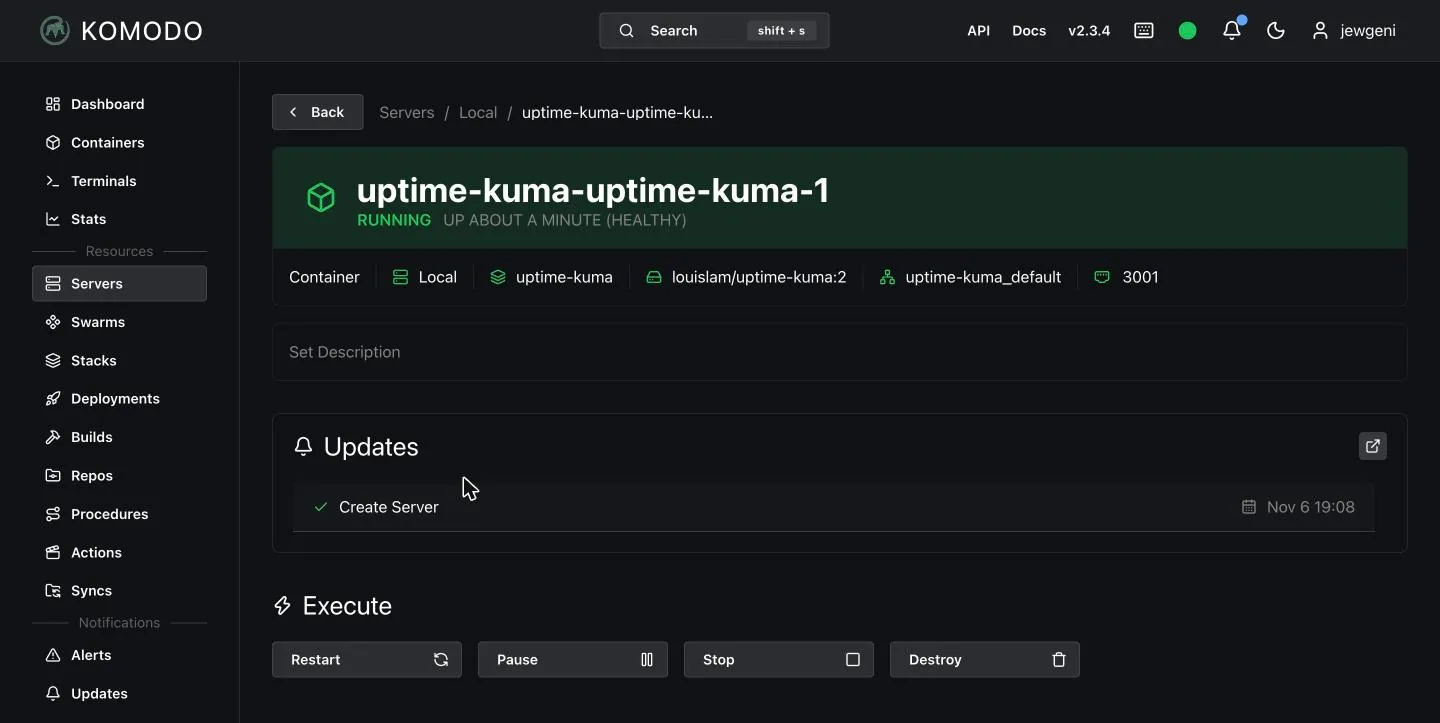
You open the terminal with sh or bash, depending on what the image provides. That is handy when you want to check something quickly on the go, without SSH.
Variables and secrets
Under Settings → Variables you create values that you use in several stacks, for example your domain or a password.
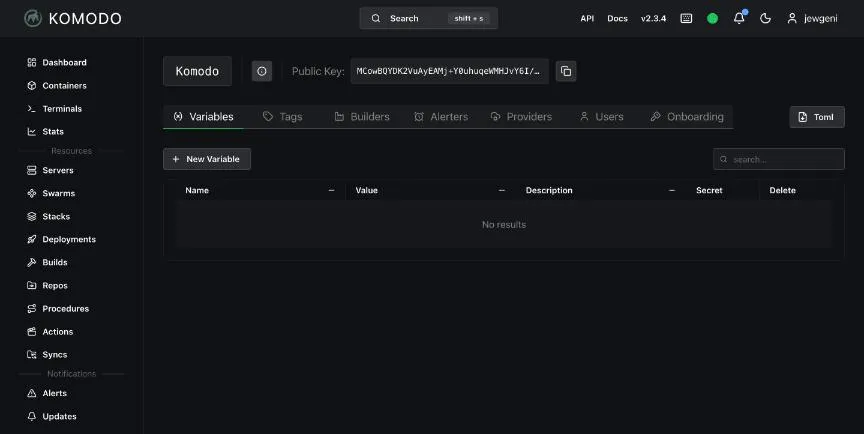
A new variable has a name, a value and a description. With the “Secret” option Komodo hides the value in the interface.
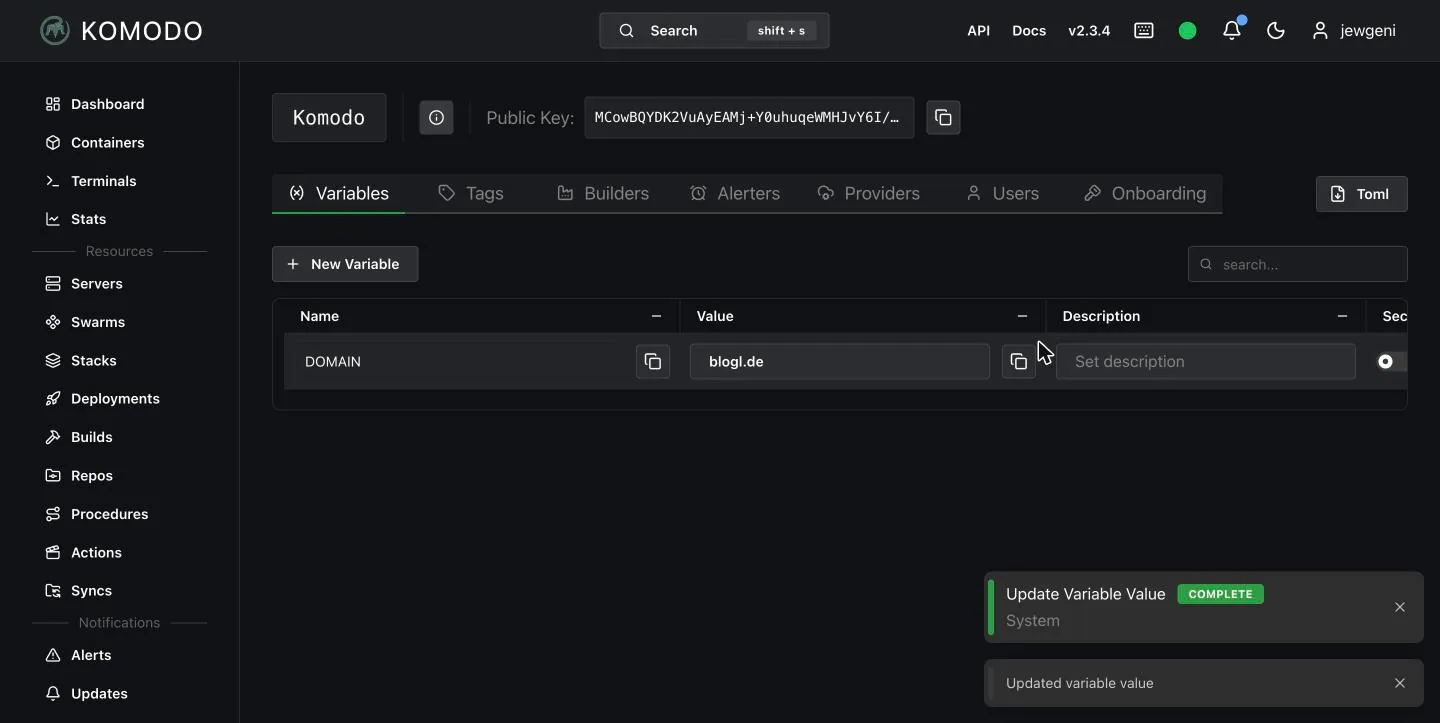
According to the documentation you insert a variable with double square brackets, such as [[DOMAIN]]. I could not verify this end to end in my test, so after the first deploy check with docker inspect that the value was really substituted.
Every stack also has its own “Environment” section. What you enter there in the format NAME=value, Komodo writes into a .env next to the Compose file before the deploy, and Compose reads it as usual.
Procedures and backups
Procedures run actions in a fixed order and can run on a schedule. Komodo already ships three:
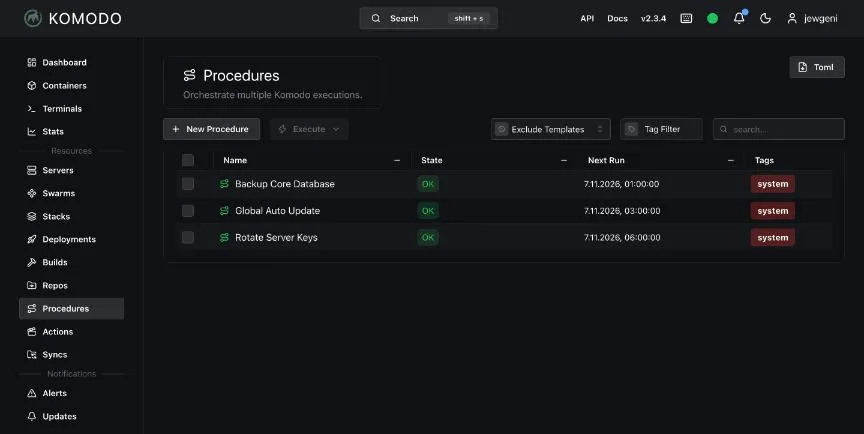
| Procedure | Time | Effect |
|---|---|---|
| Backup Core Database | 01:00 | Backs up the Komodo database to /etc/komodo/backups. |
| Global Auto Update | 03:00 | Updates all stacks and deployments that have auto update switched on. |
| Rotate Server Keys | 06:00 | Renews the servers’ keys. |
You should test the backup by hand once. Open “Backup Core Database”.
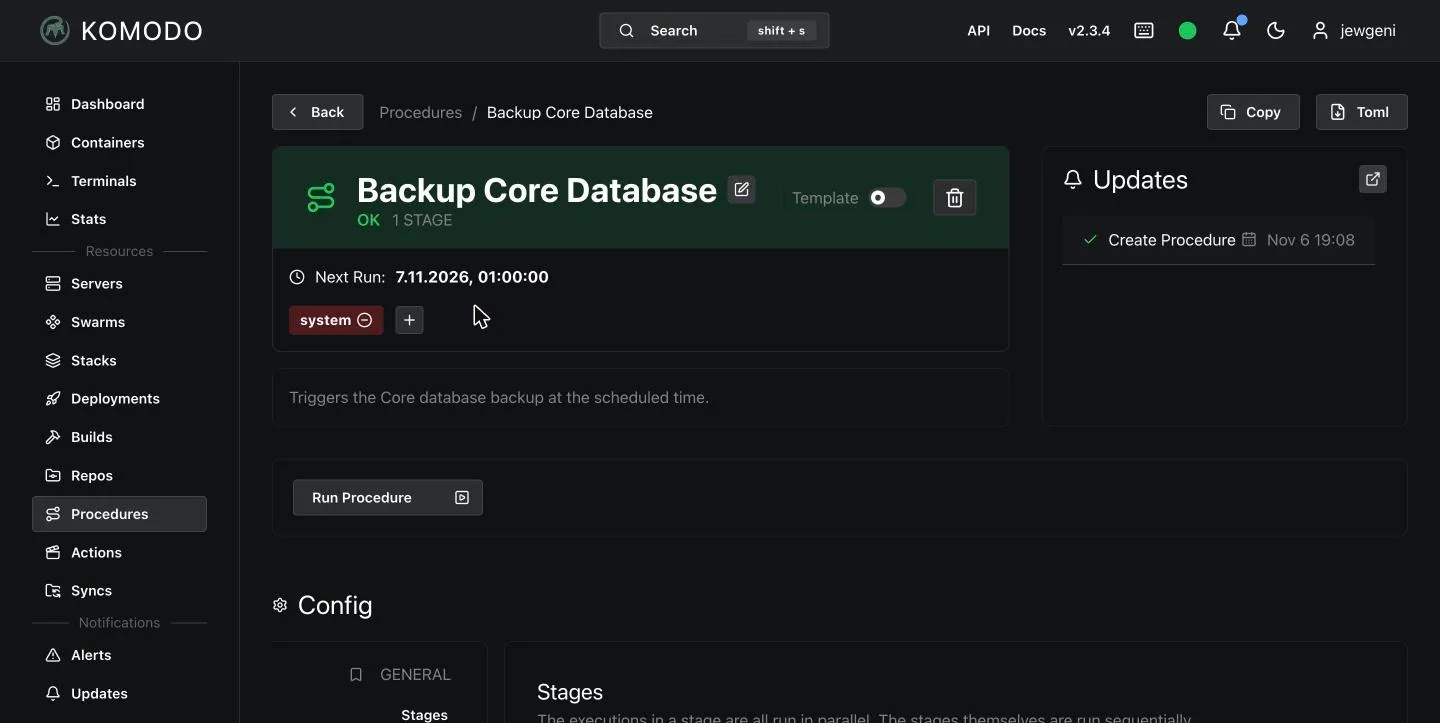
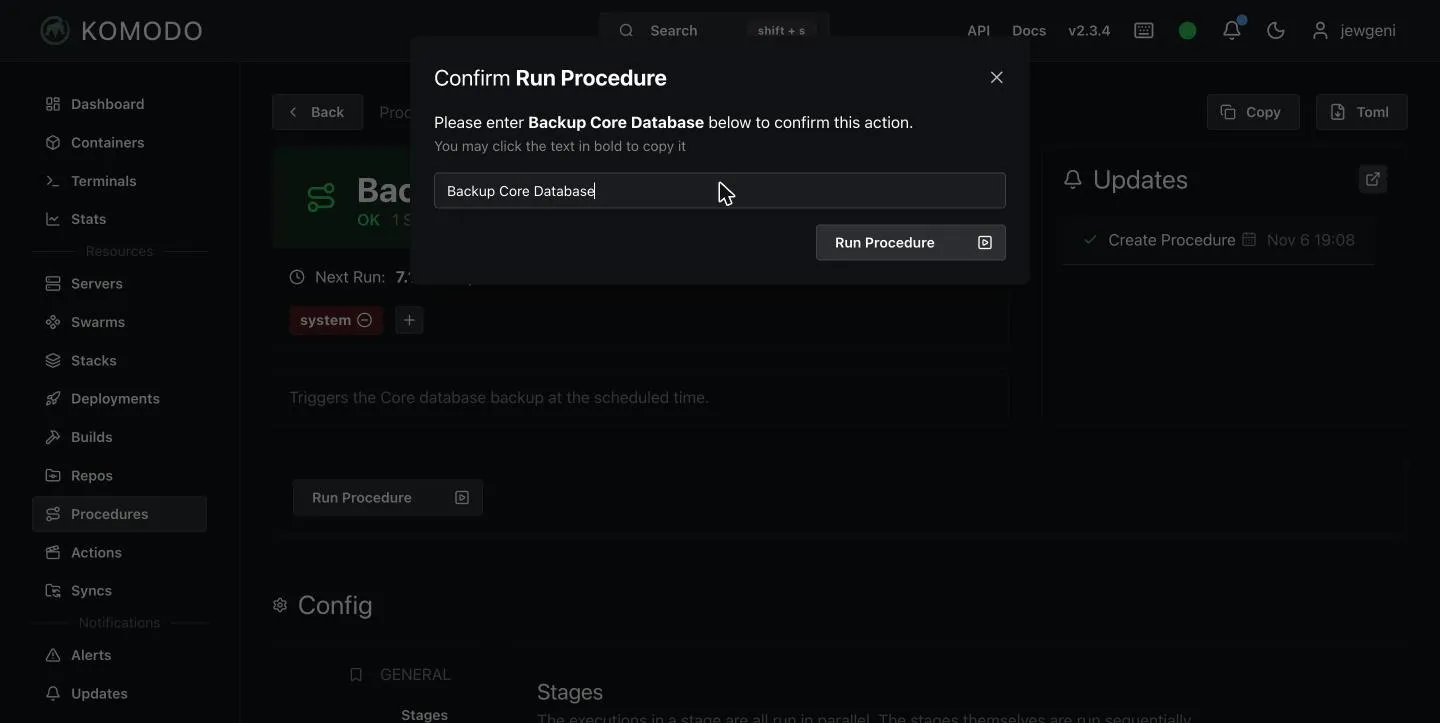
Click “Run”. For procedures, Komodo requires you to type the procedure’s name to confirm.
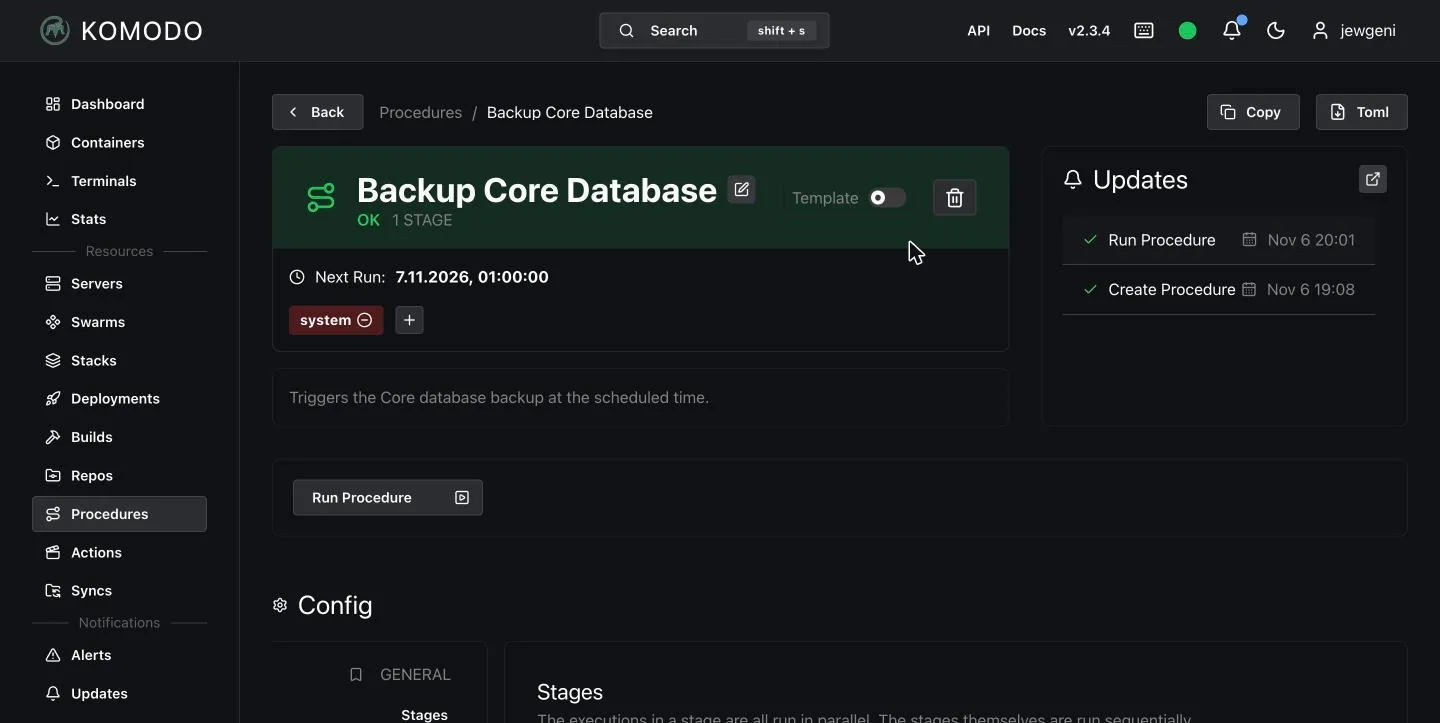
On the server you find a directory with the date, containing one compressed file per type:
sudo ls /etc/komodo/backups/
sudo ls /etc/komodo/backups/2026-11-06_20-01-362026-11-06_20-01-36
Stats.gz Action.gz Alerter.gz Alert.gz ApiKey.gz
Builder.gz Build.gz Deployment.gz Procedure.gz Repo.gz
Server.gz Stack.gz Variable.gz User.gz UserGroup.gz
...The backups contain Komodo’s configuration, meaning stacks, servers and procedures. The data of your containers (volumes) is not included. Copy the folder to another machine regularly, for example with rsync.
Automatic updates
Every stack has an “Auto Update” section. It has three switches:
- Poll for Updates: Komodo regularly checks whether there are new images.
- Auto Update: Komodo deploys when there is a new image.
- Full Stack Auto Update: updates the whole stack, not only the services with a new image.
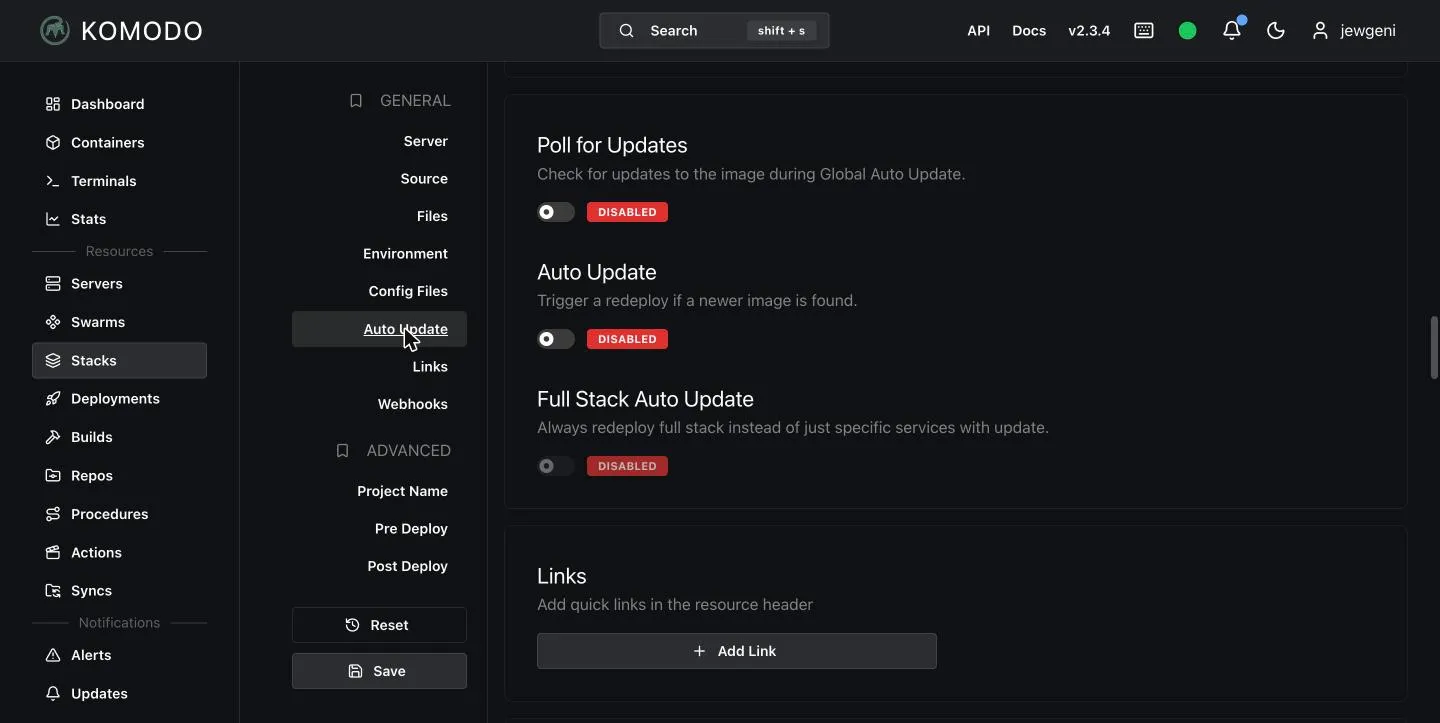
The procedure “Global Auto Update” runs at night and pulls new images if you have switched on auto update. With containers on a fixed tag such as :2 you get new patch versions, with :latest you also get jumps to the next major version. I only switch the feature on for services where an update rarely breaks something.
Notifications with alerters
Under Settings → Alerters you create targets for notifications.
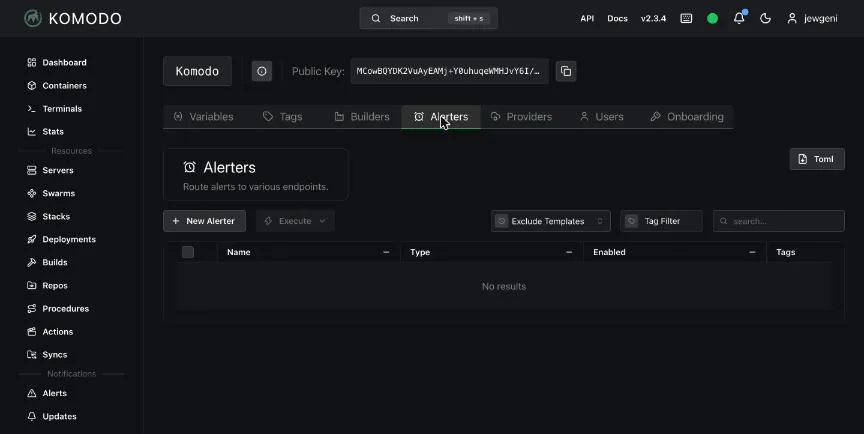
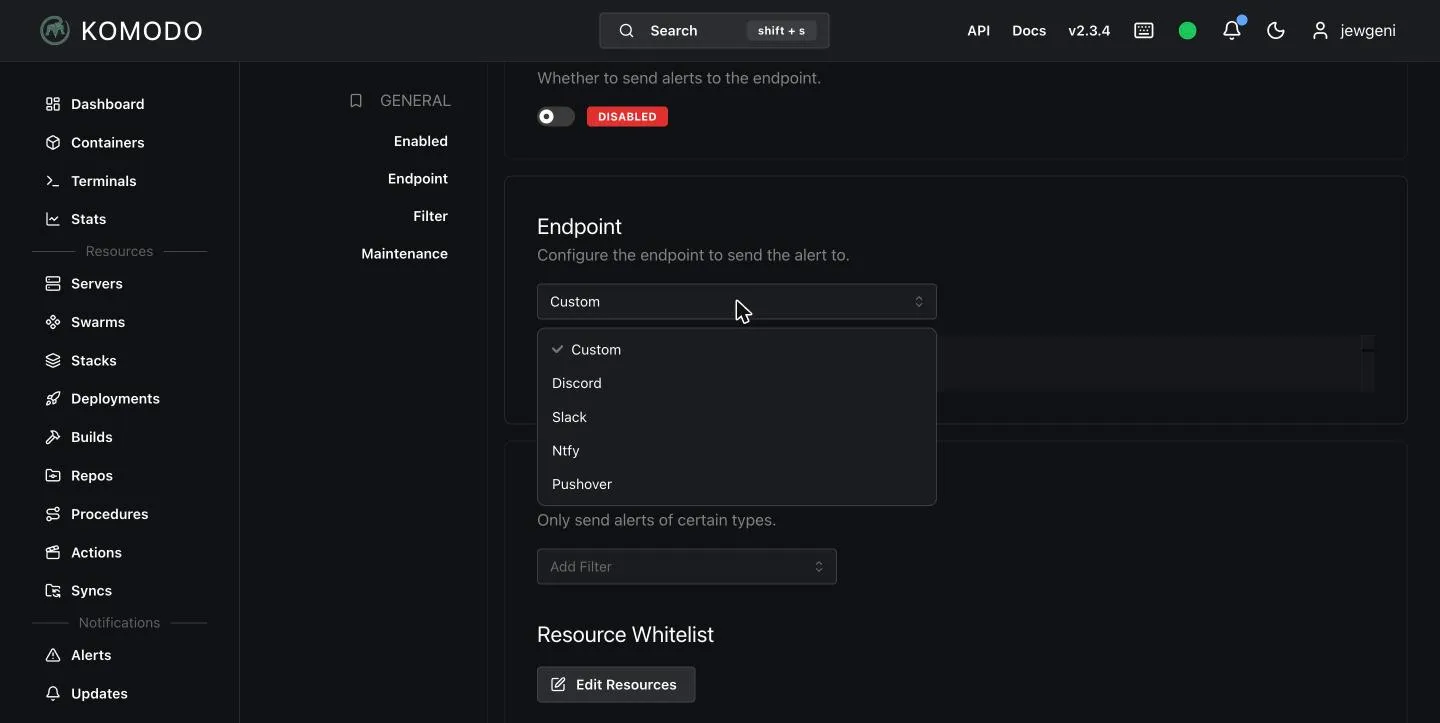
Komodo supports the endpoints Custom, Discord, Slack, Ntfy and Pushover.
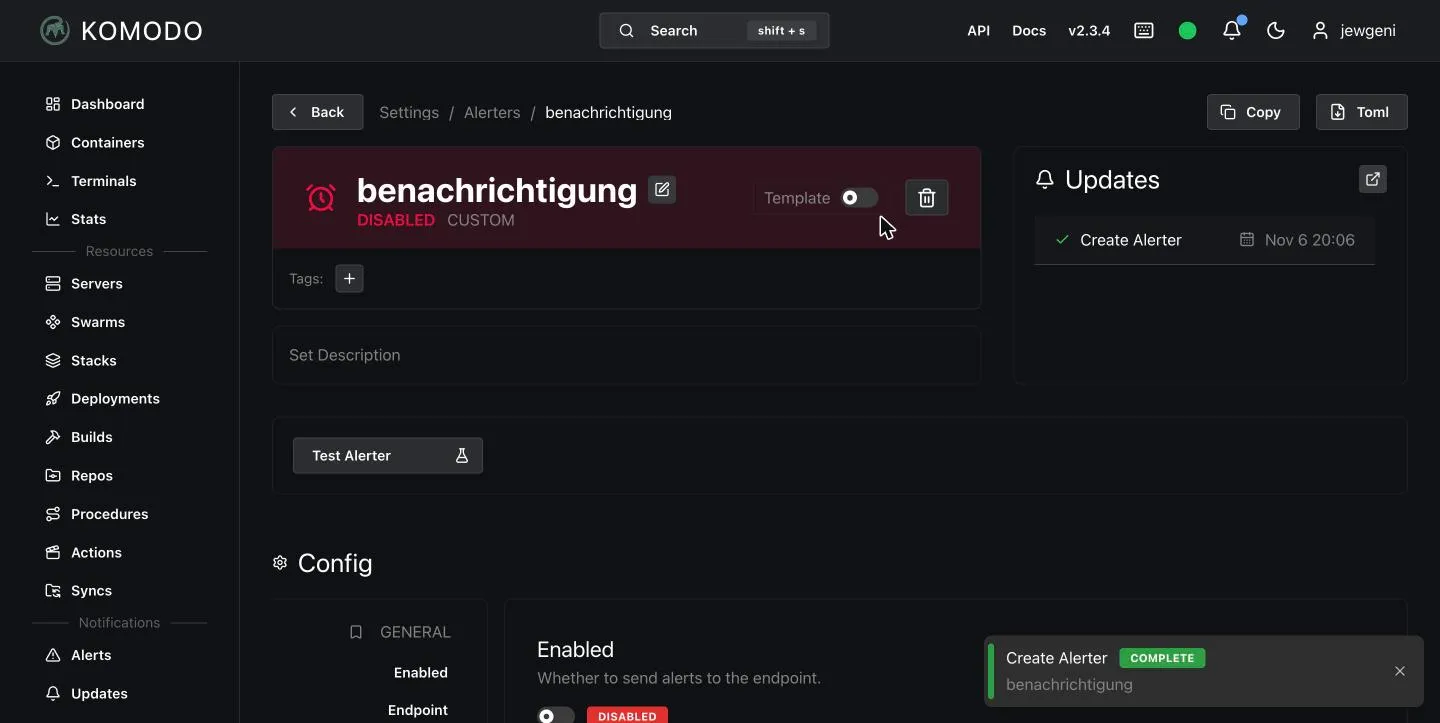
You choose the type and enter the URL. In the configuration you can also decide which events trigger a message, for example when a server is unreachable, a stack fails or the disk fills up.
More features in brief
These areas go beyond stacks.
Builds and builders
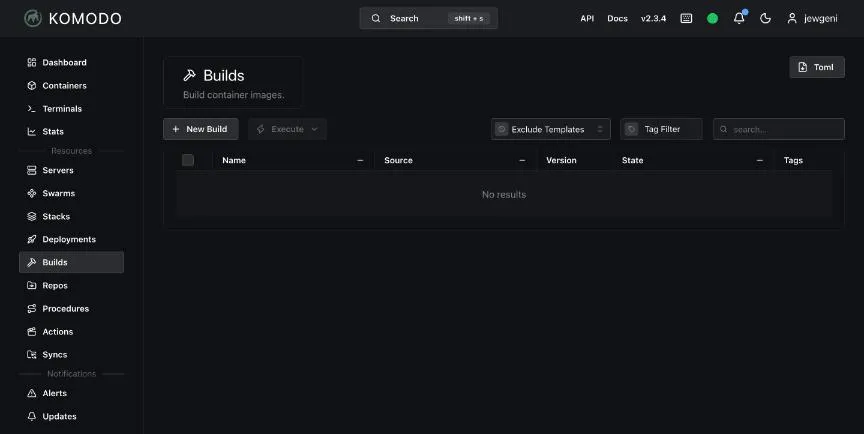
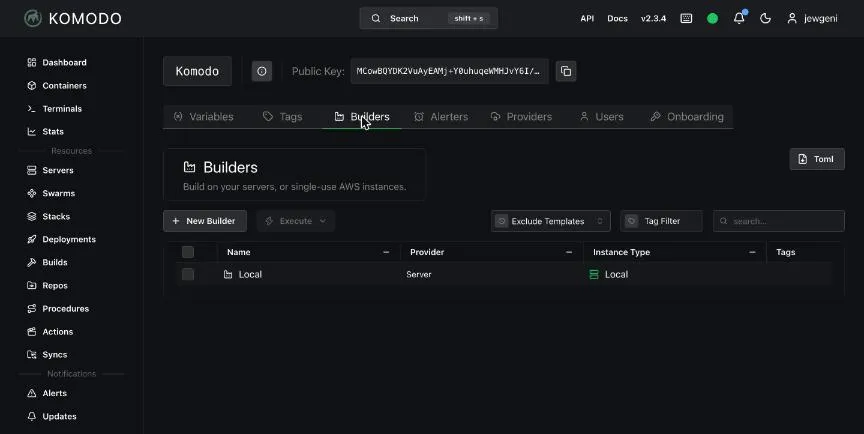
Komodo can build Docker images from a Git repository and push them to a registry. The builder that does the work is your server (“Local”) by default. Under Settings → Builders you can add more.
Actions
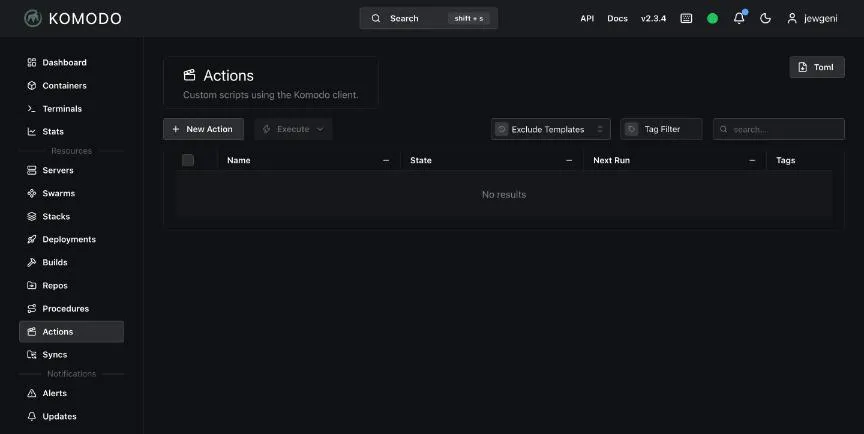
Actions are small TypeScript scripts that run against the Komodo API. You can use them to build workflows that a procedure alone cannot do.
Syncs and the TOML export
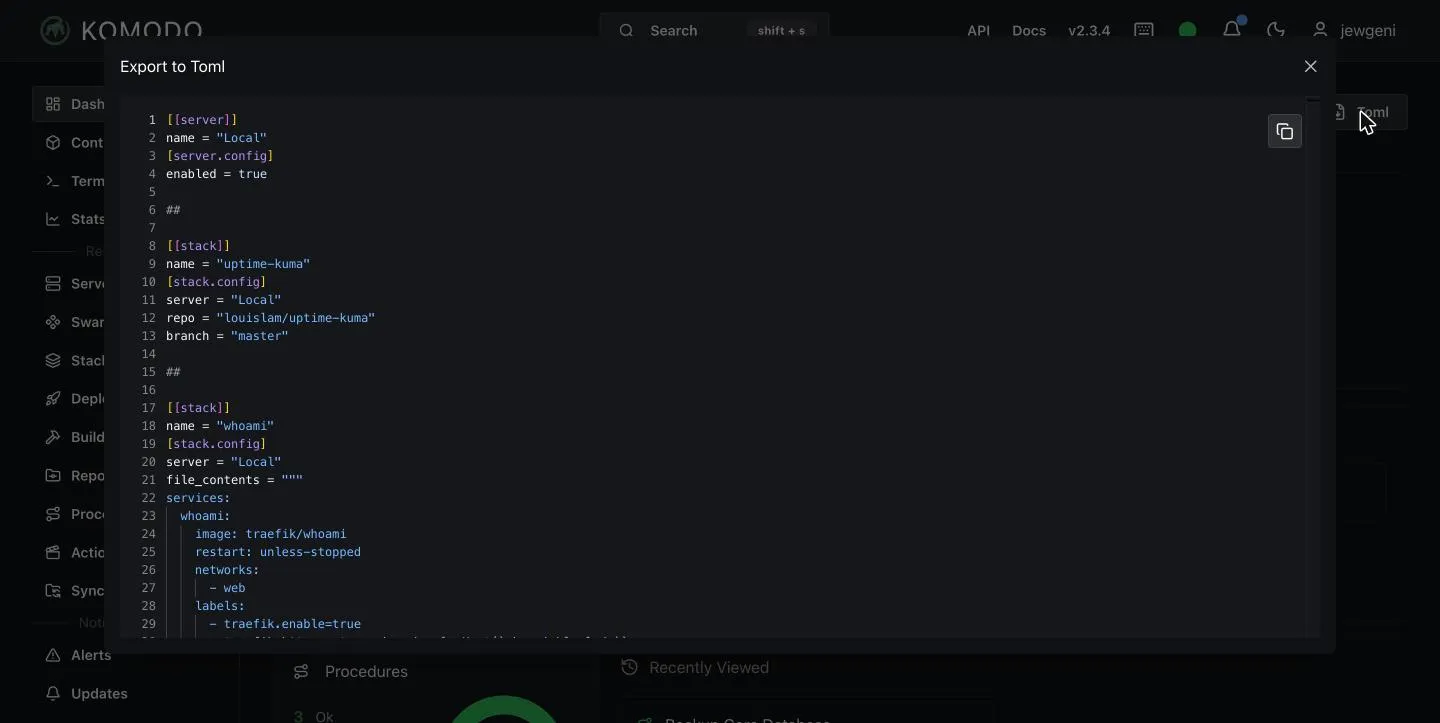
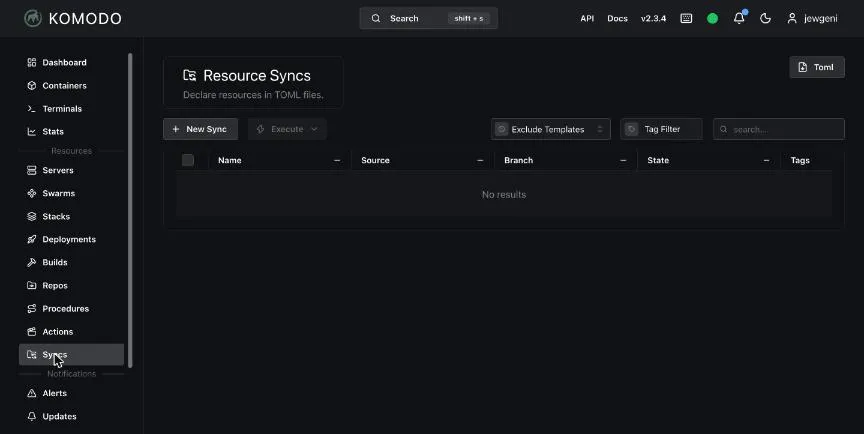
With a Resource Sync you keep Komodo’s configuration in a Git repository. You describe stacks, servers and procedures as a TOML file, and Komodo reconciles it. On many pages there is a “Toml” button at the top right that shows the current configuration as TOML. That gets you a starting file without manual work.
Users and groups
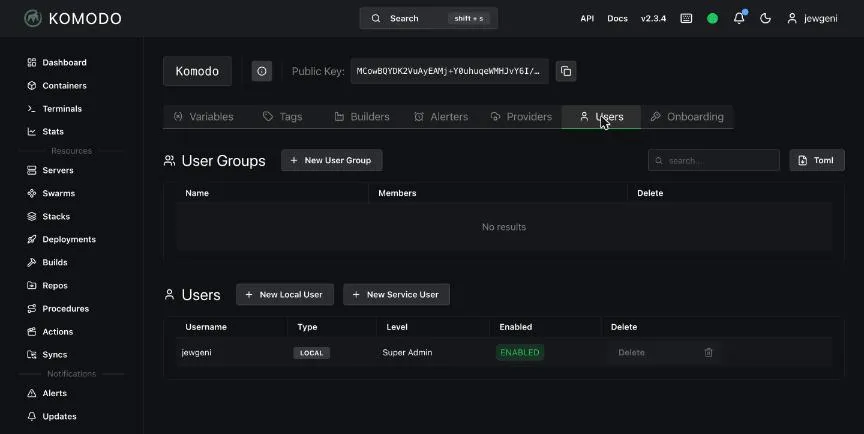
Under Settings → Users you create more users and put them into groups. You assign permissions per resource, so that someone may see only one particular stack, for example.
Connect a second server
One reason for Komodo is controlling several servers from one interface. For that you only install the Periphery agent on the new server. Docker must already be running there (see step 1).
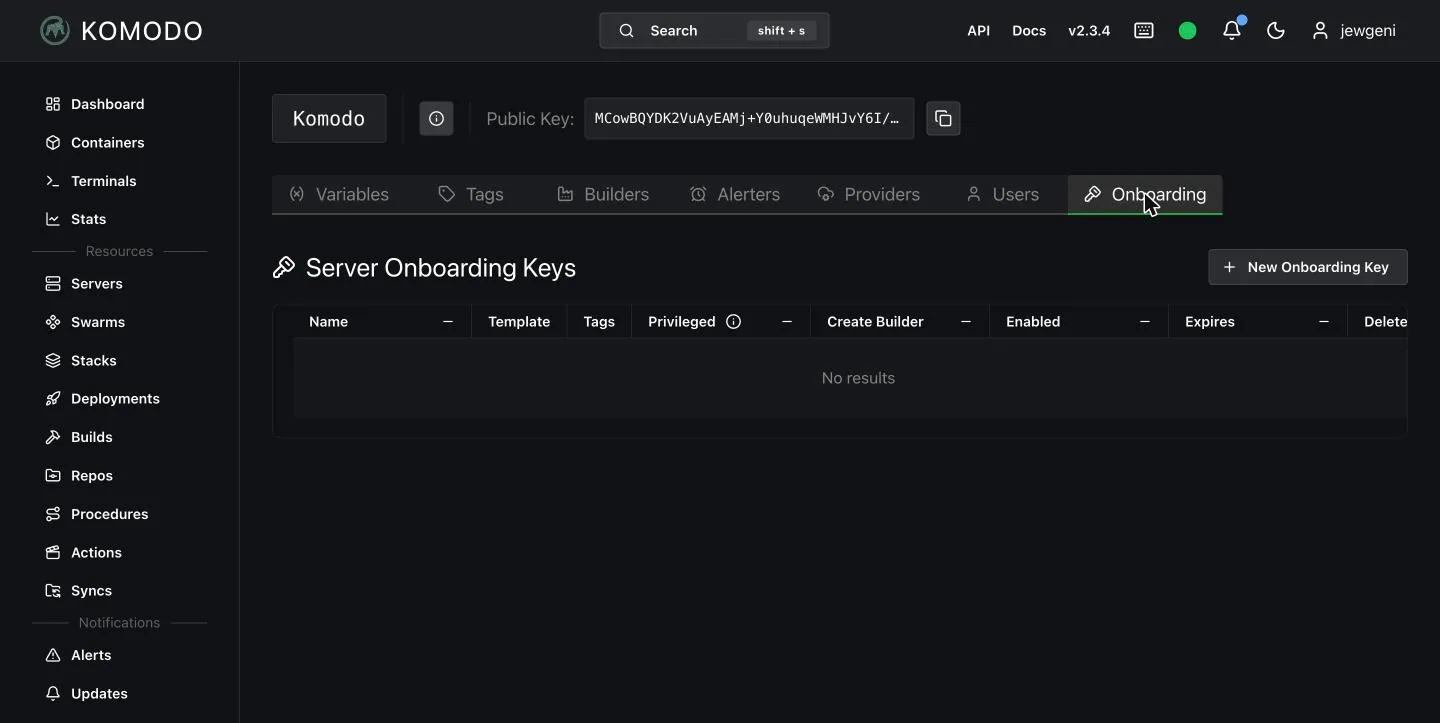
First you create an onboarding key in the Core: Settings → Onboarding → “New Onboarding Key”.
You give the key a name and leave the validity at one day.
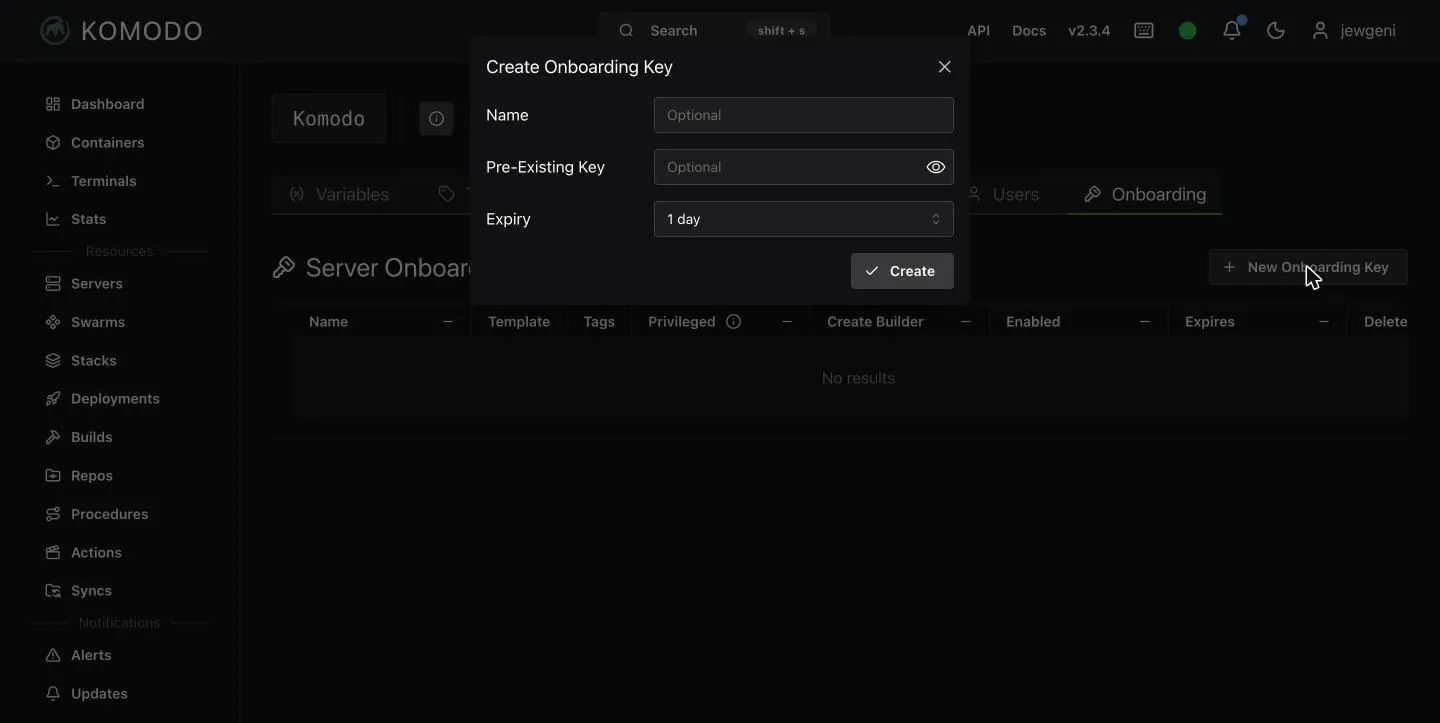
Komodo then shows the key exactly once. Copy it right away. It starts with O_. On the new server you then run the install script:
curl -sSL https://raw.githubusercontent.com/moghtech/komodo/main/scripts/setup-periphery.py | sudo python3 - \
  --core-address="https://{{domain}}" \
  --connect-as="worker" \
  --onboarding-key="O_YOUR_KEY"
The script downloads the agent, writes a configuration to /etc/komodo and sets up a systemd service called periphery. A piped call like the one above runs code from the internet. If you do not want that, download the script first, read it and then run it with sudo python3 setup-periphery.py and the same options.
The service log shows that the connection worked:
sudo journalctl -u periphery --no-pager | tail -3OnboardingFlow: Server onboarding flow for 'worker' successful
Logged in to Komodo Core {{domain}} websocket as Server workerIn the Core the server appears in the list:
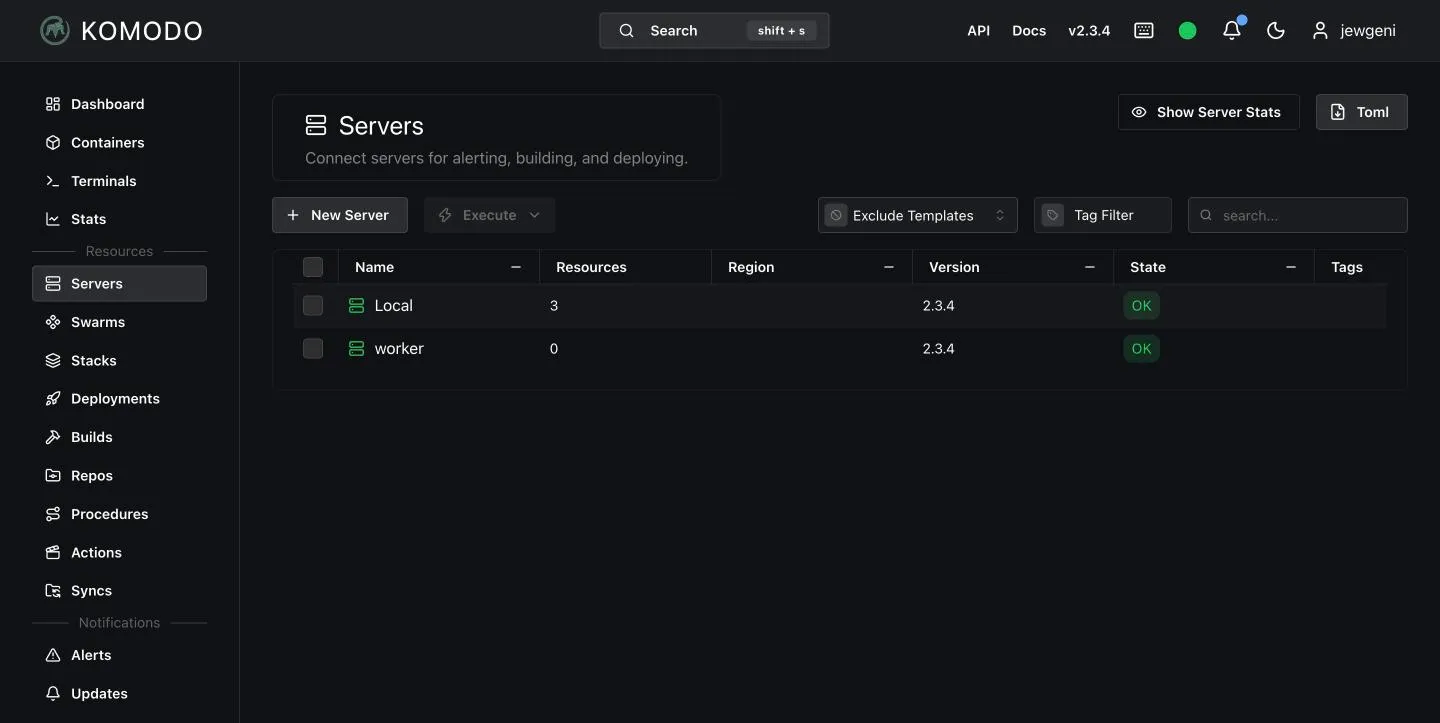
The direction of the connection is notable: the agent calls the Core. You therefore do not have to open a port on the new server. The Core only needs a reachable address, in our case the HTTPS domain behind Traefik.
Now you can create stacks on the second server. I created the Uptime Kuma stack from the Git repository once more, this time with the server worker.
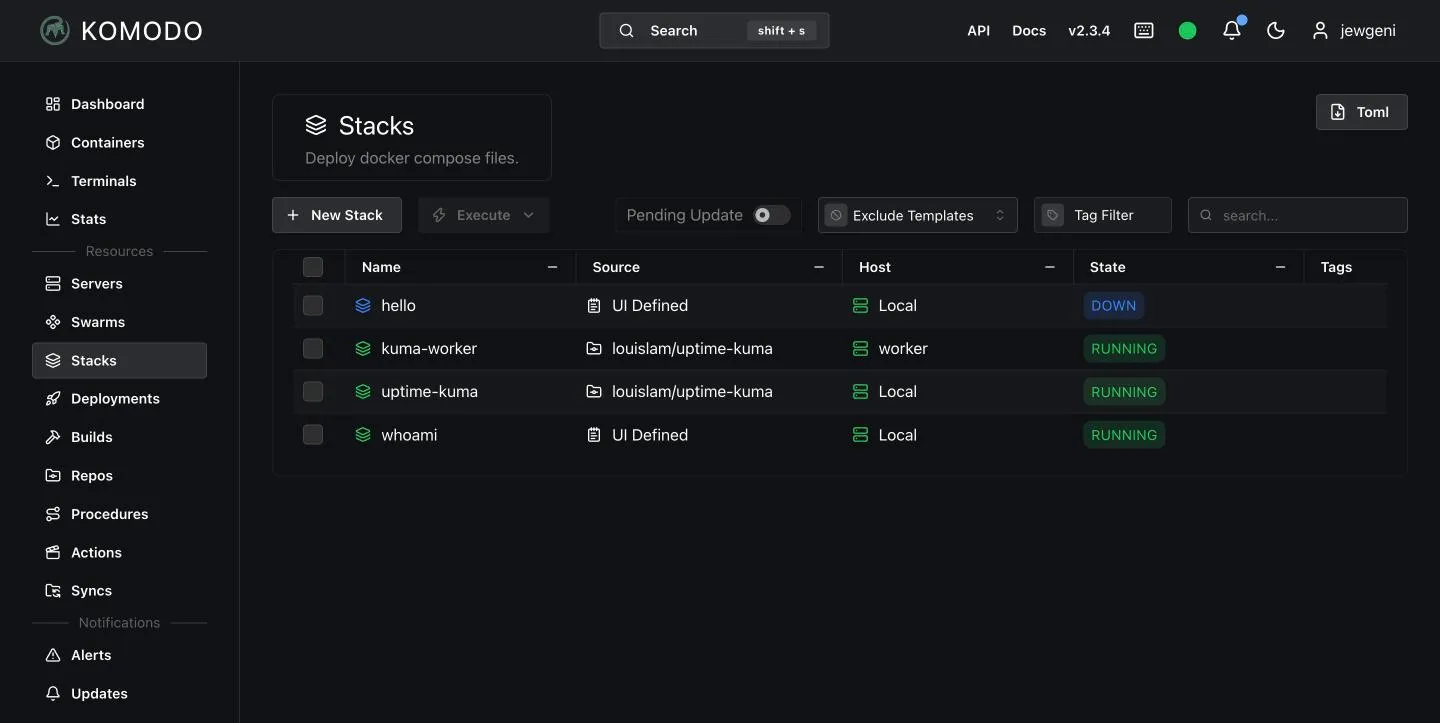
On the worker the container then ran with the status healthy:
kuma-worker-uptime-kuma-1 louislam/uptime-kuma:2 Up 12 seconds (healthy)This stack has no Traefik label because no Traefik runs on the worker. For a service with HTTPS you need a reverse proxy there as well.
Update Komodo
Because I use the image with the tag 2, Komodo stays on major version 2 and gets updates within it:
cd ~/docker/komodo
docker compose pull
docker compose up -d
The data lives in volumes and is not lost in the process. Before a jump to the next major version (from 2 to 3), read the release notes and make a backup. You keep the agent on other servers current with periphery updates. The install script pulls the latest version when you run it again.
How much RAM does Komodo need?
With Traefik, Komodo and two stacks, docker stats returned these values:
| Container | Memory |
|---|---|
| mongo | 275 MiB |
| core | 163 MiB |
| periphery | 162 MiB |
| traefik | 142 MiB |
| uptime-kuma | 115 MiB |
| whoami | 9 MiB |
The whole system used about 1 GB of 3.8 GB. For Komodo and Traefik together I plan with about 750 MB.
Problems and solutions
| Problem | Cause and solution |
|---|---|
variable is not set warnings from docker compose |
The file is not named .env. Rename it or use --env-file. |
Traefik does not start, error about acme.json |
The file needs permissions 600: chmod 600 traefik/acme/acme.json. |
| Certificate is not issued | Port 80 is closed or the DNS record is wrong. Check with dig and docker logs traefik. |
Interface returns 404 page not found |
The Core is not on the network web or the Host(...) rule does not match the domain. |
Server in Komodo shows NOT OK |
The agent is not running or cannot reach the Core. Check docker compose logs periphery or sudo journalctl -u periphery. |
| Onboarding key no longer visible | Komodo shows it only once. Delete the key and create a new one. |
| New stack shows “Config Missing” | It still lacks a mode with content. Choose “Choose Mode” and save. |
| Typing in fields triggers keyboard shortcuts | Komodo has shortcuts that fire when no field has focus. Click into the field first. |
| Stack is not reachable through Traefik | The service must be on the network web and carry traefik.enable=true. |
Conclusion
Komodo does not replace SSH for me, but it takes a lot of manual work off my hands: Compose files live versioned in Git, a push deploys them, a nightly run backs up the configuration, and several servers share one interface.
Do you use Komodo or another interface for Docker? Feel free to tell me in the comments.
FAQ
Frequently asked questions
What is Komodo?
Komodo is an open-source web interface for managing Docker containers, Compose stacks and servers. It consists of the Core with interface and API, a MongoDB and an agent (Periphery) on every managed server.
How much RAM does Komodo need?
In my test the Core used about 163 MiB, Periphery 162 MiB and MongoDB 275 MiB. Together that is a good 600 MB. With Traefik and a few services the server should have at least 2 GB.
Do I need Traefik for Komodo?
No. You can also run Komodo behind Caddy, Nginx or another reverse proxy. What matters is that it forwards requests to port 9120 of the Core and supports WebSockets, because the agents connect through them.
Can I manage several servers with Komodo?
Yes. On every additional server you install the Periphery agent and connect it to the Core with an onboarding key. The agent opens the connection itself, so you do not have to open a port on the new server.
How do I back up Komodo?
The preinstalled procedure Backup Core Database backs up the configuration daily at 01:00 to /etc/komodo/backups. Copy that folder to another machine. It does not back up your containers' data; for that you need your own backup of the volumes.
How do I update Komodo?
Change to the directory with the compose.yaml and run docker compose pull and docker compose up -d. With the tag 2 you stay within major version 2. Before a jump to the next major version, read the release notes and make a backup.
Can I deploy stacks from private Git repositories?
Yes. Under Settings → Providers you store an account with an access token and select it in the stack's Account field.