



Install Excaliself: Excalidraw as a Team Whiteboard on Your Own Server
Install Excaliself on a Debian 13 server with Docker Compose and Caddy and get to know features like live collaboration, folders and invites
Contents
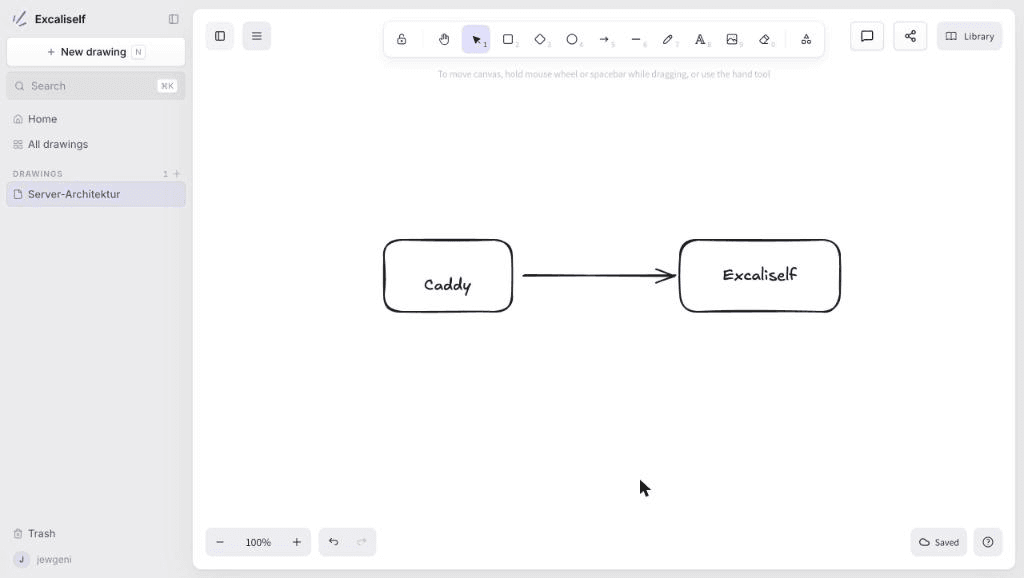
Excaliself 0.11.1Caddy 2.11Docker 29.9Debian 13Excalidraw is a virtual whiteboard where drawings look hand-sketched. Excaliself wraps the Excalidraw editor in a small app for your own server: with user accounts, folders, search, a shared team space and live collaboration. All drawings end up in your own Postgres database. In this guide I install Excaliself with Docker Compose and Caddy on a Debian server and show the most important features.
What is Excaliself?
Excaliself is an open-source project under the MIT license, hosted on GitHub as maciekzygmunt/excaliself. The editor itself is the package @excalidraw/excalidraw, which also powers excalidraw.com. Excaliself adds what is missing there when a team wants to work with it:
- Accounts and invites. You create the first user as admin on the first visit. Everyone else joins through invite links.
- Private space and team space. Every member has their own drawings. Next to that there is a shared team space that everyone can see and edit.
- Live collaboration with the cursors of the other participants, and via link also for guests without an account.
- Folders, favorites, search and trash. Search also finds text inside drawings. Deleted drawings stay in the trash for 30 days.
- Team library with shapes and icons that applies to everyone. Libraries from libraries.excalidraw.com can be imported.
- Single sign-on with Google Workspace, Microsoft Entra ID or any OIDC provider such as Authentik or Keycloak.
- MCP server. AI clients like Claude Code can read and create drawings and propose changes. The instance needs no API key of its own for a language model.
Glossary
| Term | Description |
|---|---|
| Excalidraw | The whiteboard with the hand-drawn look. Excaliself uses its editor. |
| Reverse proxy | A program in front of the app that accepts requests from the internet and passes them on. Here that is Caddy. |
| Caddy | A web server that obtains and renews HTTPS certificates from Let’s Encrypt automatically. |
| Docker Compose | Starts several containers (here the app and the database) with a single file and one command. |
| A record | A DNS entry that points a domain name to an IPv4 address. |
| MCP | Model Context Protocol, an interface through which AI clients can use tools of an application. |
Prerequisites
- A server with Debian 13. I use a VPS from Hetzner with 2 vCPU and 4 GB RAM. The app is frugal: at idle, the app and the database together used about 105 MB. The app image is 362 MB and the Postgres image 424 MB, so plan for some disk space. If you don’t have a server yet, my VPS guide for beginners helps.
- A domain or subdomain whose A record points to your server’s IP. I use
{{domain}}. - Open ports 80 and 443.
Check beforehand that the DNS entry is correct. On your computer:
dig +short {{domain}}The output must be your server’s IP. Then log in via SSH as root:
ssh root@{{domain}}Step 1: Install Docker
You install Docker with the official script:
apt update && apt install -y curl ca-certificates
curl -fsSL https://get.docker.com | sh
To check:
docker --version
docker compose versionDocker version 29.9.3, build 5457199
Docker Compose version v5.7.1Step 2: Install Caddy
Caddy needs to be installed. For example as described in this blog post.
Step 3: Download and configure Excaliself
We create a folder and download the compose file and a template for the settings from the repository:
mkdir -p /opt/excaliself && cd /opt/excaliself
curl -fsSLO https://raw.githubusercontent.com/maciekzygmunt/excaliself/main/docker-compose.yaml
curl -fsSL -o .env https://raw.githubusercontent.com/maciekzygmunt/excaliself/main/.env.example
The docker-compose.yaml starts two containers: the app (ghcr.io/maciekzygmunt/excaliself) and Postgres 17. The image is prebuilt, nothing gets compiled on the server.
Three things are missing in the .env: two secrets and the public address. Generate the secrets first:
openssl rand -hex 24
openssl rand -base64 32
The first output is the database password, the second the key the app uses to sign sessions. The database password has to consist of hex characters because it is built into a connection URL. That is why the command uses -hex. Open the file:
nano .envEnter the values:
POSTGRES_PASSWORD=FIRST-OUTPUT-HERE
BETTER_AUTH_SECRET=SECOND-OUTPUT-HERE
BASE_URL=https://{{domain}}
EXCALISELF_PORT=127.0.0.1:3000
In the template, EXCALISELF_PORT is commented out with a # in front. Remove the #. With 127.0.0.1:3000 the app is only reachable from the server itself. From outside you can only get in through Caddy, and that is intended, because that is where HTTPS lives.
BASE_URL must be exactly the address you type into the browser. The app rejects sign-ins from any other address. Save in nano with Ctrl+O, Enter, Ctrl+X.
Step 4: Set up Caddy for the domain
Caddy’s configuration lives in /etc/caddy/Caddyfile. Replace the content with:
{{domain}} {
    reverse_proxy 127.0.0.1:3000
}
This means: everything that arrives at {{domain}} goes to the app on port 3000. Caddy gets the certificate itself. You reload the configuration and then start Excaliself:
systemctl reload caddy
cd /opt/excaliself
docker compose up -d
The first time, Docker downloads the images, which takes a minute. After that, docker compose ps shows both containers:
docker compose ps --format "{{.Name}} {{.Status}}"excaliself-db-1 Up 10 seconds (healthy)
excaliself-excaliself-1 Up 4 seconds (health: starting)The app reports its state at /api/health. The call returns 200 when it is running and reaches the database:
curl https://{{domain}}/api/health{"status":"ok"}The database migrations run automatically on startup.
Step 5: Create the admin
Open https://{{domain}} in the browser. You land on /setup. There you create the admin account with an email address and a password.
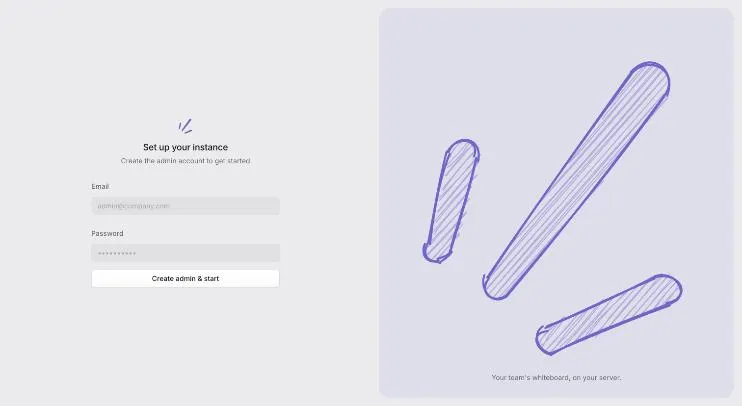
As long as no admin exists, anyone who opens the address can create the first account. So do this step right after
docker compose up -d.
After that, the app guides you through a short tour with three hints: search, creating a drawing and sharing.
The features at a glance
Drawing
With N or the “New drawing” button you create a drawing. You give it a name and the editor opens. It is the regular Excalidraw editor: rectangles (R), arrows (A), text (double-click into a shape), freehand and a library. It saves automatically, and “Saved” shows at the bottom right.
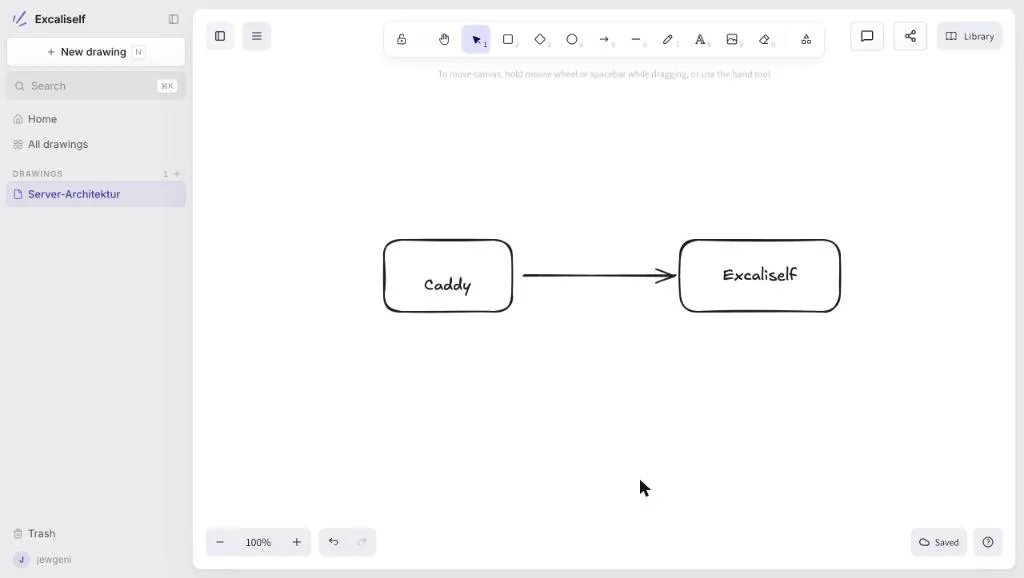
On the left, the sidebar holds the home page, all drawings, the folders and the trash. Under “Drawings” you can create folders and move drawings by drag and drop. With ⌘K or Ctrl+K you open the search, which looks through titles and text in drawings and also runs commands.
Collaborating and sharing
The button with the share icon opens a dialog. There you choose who may use the link:
- Members of this instance: visitors must be signed in.
- Anyone with the link: guests without an account can draw along too and pick a display name.
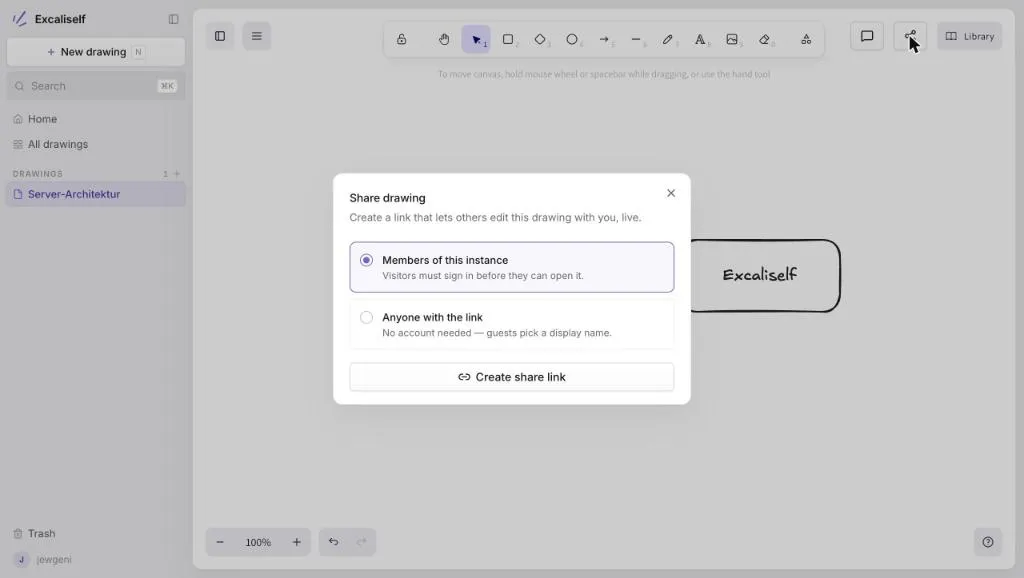
A click on “Create share link” creates the link. Everyone who opens it sees the others’ cursors and the changes immediately. Drawings in the team space are always live.
Inviting members
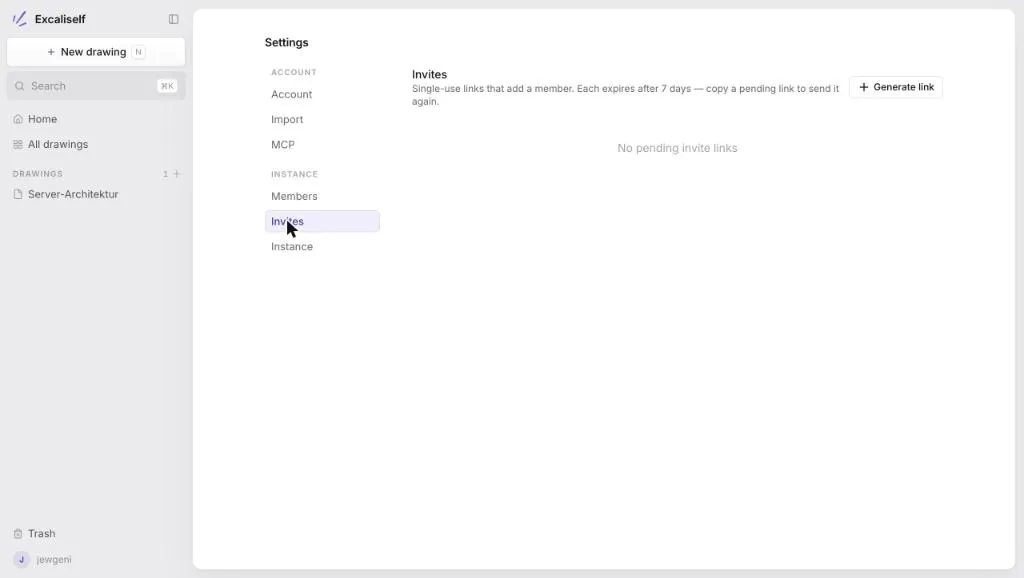
You don’t create further users yourself. Under Settings → Invites you create a link with “Generate link”. The link is valid for one member and expires after seven days. You send it to the person who should join. Under Members you change roles and create links for resetting passwords.
Connecting AI clients via MCP
Under Settings → MCP you create access tokens. With a token, an AI client like Claude Code can search, read and create drawings and propose changes. A change to an existing drawing only happens once you click “Apply” in the editor. The client can’t delete anything permanently, deleted items land in the trash.
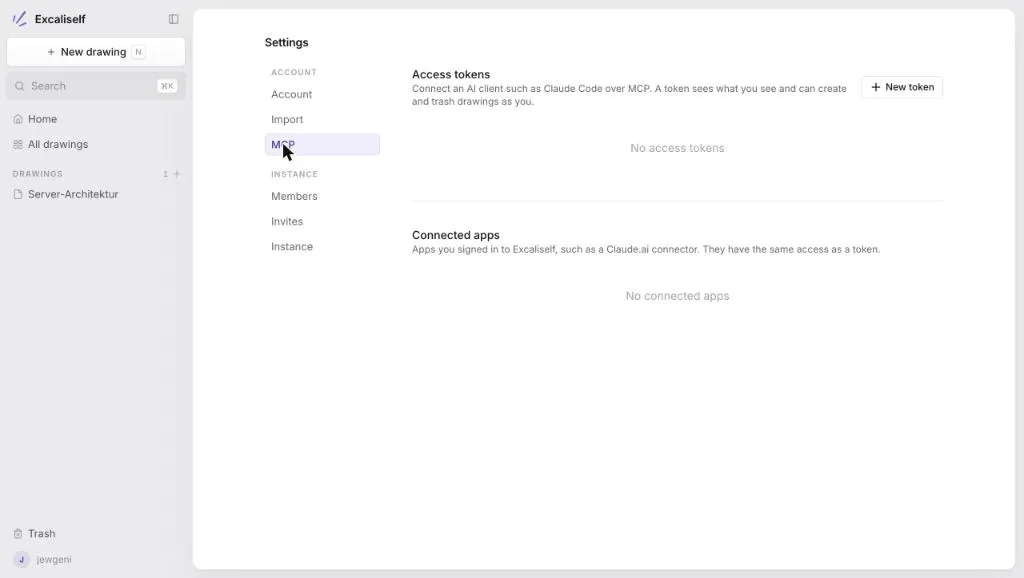
The server listens at https://{{domain}}/api/mcp. In Claude Code you connect it with this command. You only see the token once, when you create it:
claude mcp add --transport http excaliself https://{{domain}}/api/mcp \
  --header "Authorization: Bearer exs_YOUR-TOKEN"
Claude.ai uses OAuth without a token, for which the instance must be reachable from the internet over HTTPS. There you add a custom connector with the same URL under Settings → Connectors.
More features
- Import from Excalidraw+ (beta) under Settings → Import, with an API key from Excalidraw+.
- Dropping in files:
.excalidrawfiles or PNG and SVG exports with an embedded scene can be dragged onto a folder in the sidebar. - Single sign-on you set up through environment variables in the
.env, for exampleOIDC_ISSUER,OIDC_CLIENT_IDandOIDC_CLIENT_SECRET. WithSSO_ALLOWED_DOMAINSyou decide which email domains may sign in without an invite. - Themes: light, dark or following the system setting, optionally with a separate theme for the canvas.
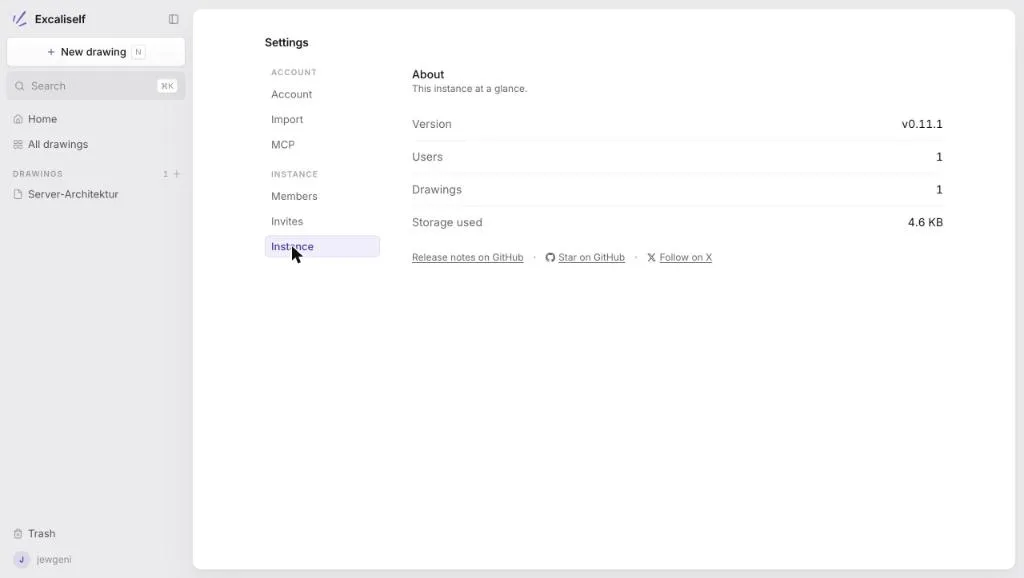
On the Instance page you see the version, the number of users and drawings, and the storage used.
Excaliself under a subdirectory: does it work?
Some people don’t want a separate subdomain for every app and prefer yourdomain.com/draw. That doesn’t work with Excaliself.
The usual way with Caddy is handle_path. It removes the prefix before the request goes to the app:
{{domain}} {
    handle_path /whiteboard/* {
        reverse_proxy 127.0.0.1:3000
    }
}
There are two problems, though.
-
The app writes absolute paths into the HTML. A look at the login page shows that the stylesheet and scripts are loaded from
/assets/…:Terminalbashcurl -s http://127.0.0.1:3000/login | grep -o -E 'href="[^"]+"' | head -3href="/assets/styles-CdofQDSL.css" href="/assets/index-NmK34gBZ.js" href="/assets/rolldown-runtime-Dd_uD5pT.js"The browser requests
{{domain}}/assets/…, not{{domain}}/whiteboard/assets/…. The Caddy configuration has nothing there, so nothing arrives. -
The app’s router doesn’t know a prefix. When you open
/whiteboard/, the client jumps straight to/draw, the app’s home page. In this setup Caddy doesn’t forward that path.
It doesn’t work without stripping the prefix either, that is with handle /whiteboard/* instead of handle_path. The app then receives /whiteboard/login and /whiteboard/api/health and answers with 404, because it doesn’t know these paths.
There is no setting for a base path in the configuration.
Backup
All data lives in the Postgres database: accounts, drawings, images and share links. A dump backs up the whole instance. In the folder with the docker-compose.yaml:
docker compose exec -T db sh -c 'pg_dump -U "$POSTGRES_USER" -Fc "$POSTGRES_DB"' > excaliself-$(date +%F).dumpAlso back up the .env. Without it, the instance can’t be restored. Copy both to another computer. To restore, you stop the app and load the dump:
docker compose stop excaliself
docker compose exec -T db sh -c 'pg_restore -U "$POSTGRES_USER" -d "$POSTGRES_DB" --clean --if-exists' < excaliself-2026-11-11.dump
docker compose start excaliself
This replaces the current data.
Update Excaliself
cd /opt/excaliself
docker compose pull
docker compose up -d
The app applies the database migrations on startup. There are no migrations backwards. So take a dump before every update, because that is the only way back to the older version. If you want to pin a version, set EXCALISELF_VERSION=0.11.1 in the .env. With latest you always get the newest version, main is the unreleased state.
Problems and solutions
| Problem | Cause and solution |
|---|---|
docker compose up aborts with “Set POSTGRES_PASSWORD” |
A required value in the .env is missing. Enter POSTGRES_PASSWORD and BETTER_AUTH_SECRET. |
| Sign-in fails | BASE_URL doesn’t match the address in the browser, for example http instead of https or a different domain. |
| No certificate is issued | The A record doesn’t point to the server, or ports 80 and 443 are blocked. Check the logs with journalctl -u caddy. |
| Live collaboration doesn’t work | The reverse proxy doesn’t pass WebSockets under /ws/ through. Caddy does that without further settings. |
| Images can’t be uploaded behind nginx | The default request limit of 1 MB is too small. Set client_max_body_size 32m; in nginx. |
Conclusion
The installation consists of Docker, Caddy and four values in the .env, and the drawings live on your own server. The editor is the familiar one from excalidraw.com, and the app around it adds accounts, folders, search and live collaboration.
Do you already use a self-hosted whiteboard? Tell me in the comments which one you use.
FAQ
Frequently asked questions
What is the difference between Excaliself and Excalidraw?
Excalidraw is the drawing editor you also find on excalidraw.com. Excaliself uses this editor and adds user accounts, folders, search, a team space, live collaboration and a database on your server that holds all drawings.
Does Excaliself run under a subdirectory like yourdomain.com/draw?
No. The app serves absolute paths like /assets/… and has no setting for a base path. With Caddy and handle_path the page stays blank. Use a subdomain like draw.yourdomain.com.
How much RAM does Excaliself need?
At idle, the app used about 65 MB and Postgres about 40 MB. A server with 2 GB RAM therefore has plenty of room. The app image is 362 MB, the Postgres image 424 MB.
Can I use Excaliself without a domain?
Locally to try it out, yes, with the command from the README: docker run --rm -p 127.0.0.1:3000:3000 -e PREVIEW_MODE=true ghcr.io/maciekzygmunt/excaliself. The data is gone after stopping. For real use you need a domain with HTTPS, because sign-in is only accepted from the address in BASE_URL.
How do I add more users?
Under Settings → Invites you create an invite link. It is valid for one member and expires after seven days. Alternatively, people with an allowed email domain sign in through single sign-on.
Where are the drawings stored and how do I back them up?
Everything is in the Postgres database in the Docker volume pgdata. With pg_dump in the db container you create a backup. Also back up the .env file and copy both to another computer.
Can I use Excaliself with Claude or other AI clients?
Yes. Excaliself has an MCP server at /api/mcp. You connect Claude.ai through OAuth, and Claude Code and other clients with an access token from the settings. The client only proposes changes to drawings, they apply once you click Apply in the editor.