How to Set Up a Ugreen NAS Home Server
Learn how to set up a Ugreen NAS home server with this comprehensive step-by-step guide. From hardware installation to Docker and network configuration.

Table of Contents
Introduction
After publishing guides for setting up a Synology NAS and Asustor NAS, it’s time to dive into setting up a Ugreen NAS. While the basic steps are similar, there are some key differences to consider. This guide is aimed at beginners and walks you through the process of getting your Ugreen NAS up and running, step by step.
Ugreen NAS: An Overview
Ugreen may not be as well-known as Synology or QNAP in the European NAS market, but it offers a compelling mix of price and performance. For instance, the Ugreen 2-Bay NAS DXP2800(Amazon Affiliate) currently costs around €360. It features an Intel N100 processor, 8GB DDR5 RAM (expandable to 16GB), two M.2 NVMe SSD slots, and a 2.5 GbE LAN port. In comparison, the Synology DS224+(Amazon Affiliate) , priced at about €340, comes with an Intel J4125, 2GB DDR4 RAM (expandable to 6GB), no M.2 slots, and a 1 GbE LAN port. If you’re looking purely at hardware specs, Ugreen certainly has an edge.
In this guide, I’ll be using the Ugreen DX4700 NAS, but the steps are similar for most Ugreen models.
Installation and Cabling
Installing the Hard Drives
Before powering on your Ugreen NAS, you’ll need to install the hard drives. Open either the front slots or the maintenance panel at the bottom.
Deciding on RAID Configuration: At this stage, you should decide whether you want to use RAID for data redundancy. While RAID can increase data security, it does reduce the overall storage space. I personally recommend using regular backups on an external device since RAID is not a true backup solution.
Pro Tip: Use the 3-2-1 backup strategy for maximum data safety: Keep three copies of your data, on two different types of media, with one copy stored off-site.
Network Configuration
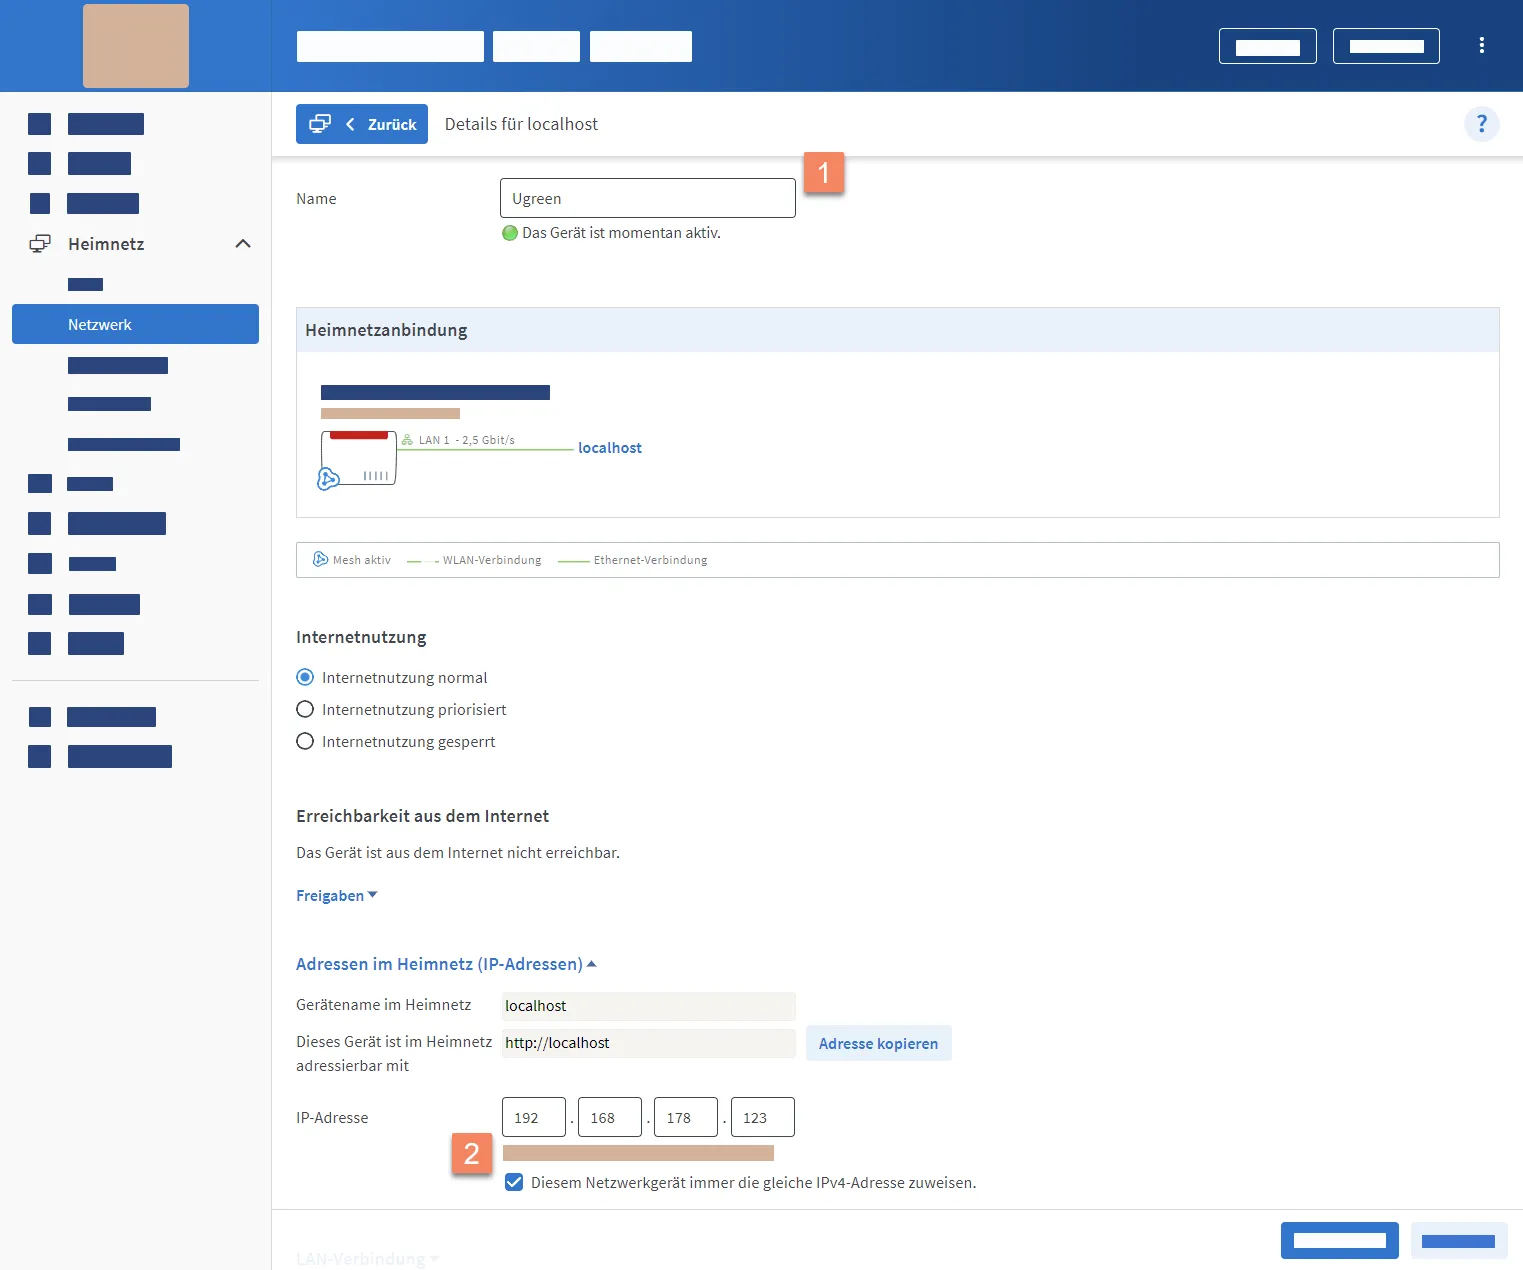
Once you’ve connected the NAS to your router with a network cable and powered it on, check your router’s network overview to find the IP address assigned to the NAS by the DHCP server.
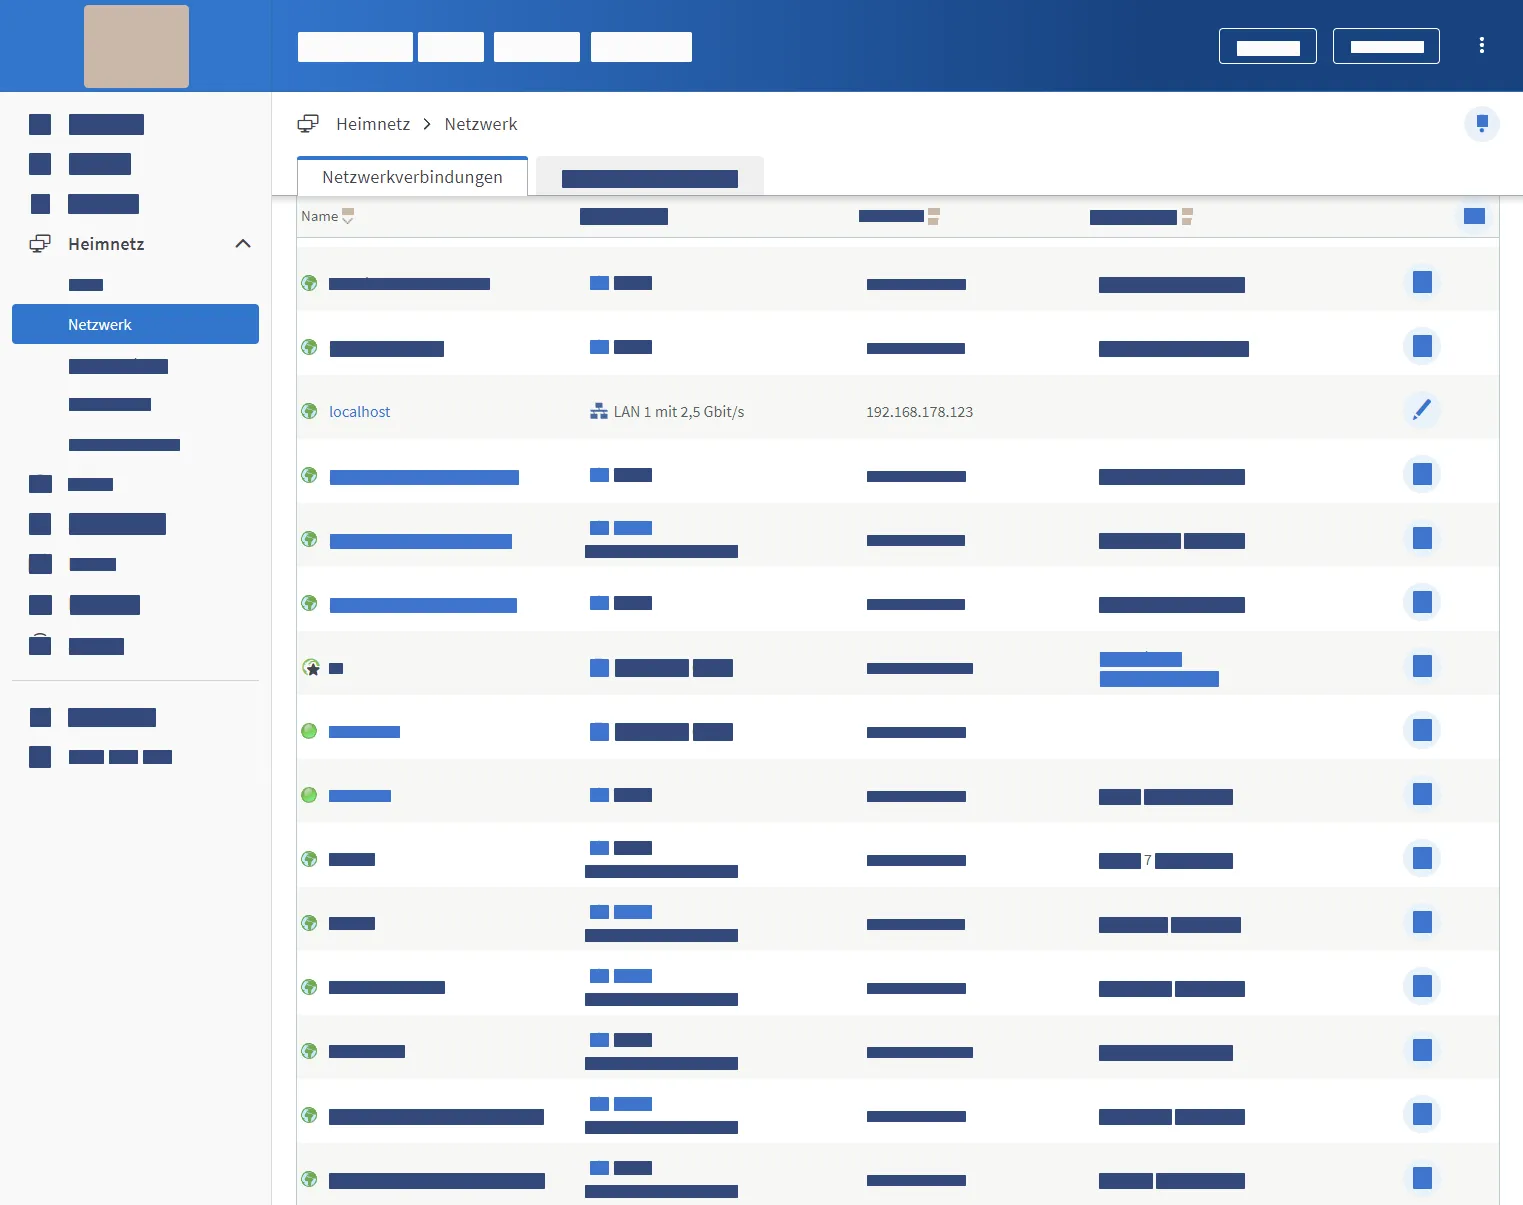
Tip: Assign a unique name to your NAS and ensure it receives the same IP address each time it connects to your network to simplify future access.
Initial NAS Setup
Enter the NAS’s IP address into your web browser to launch the setup wizard.
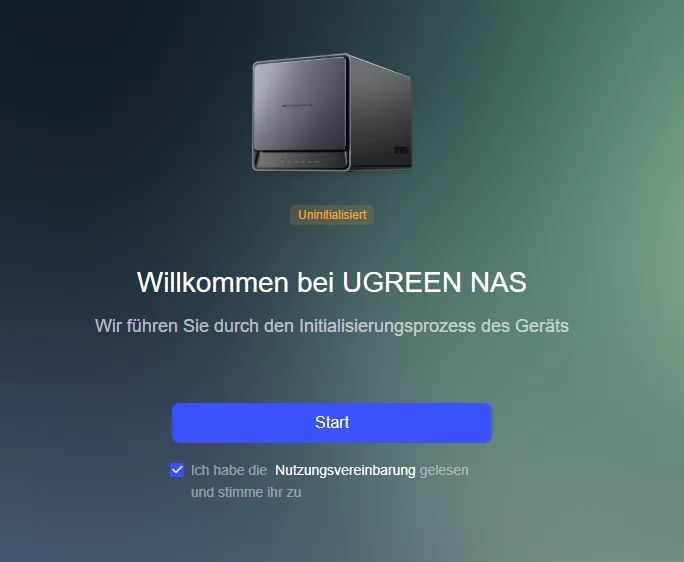
The next screen lets you name your NAS and create an admin account. Make sure to choose a strong password.
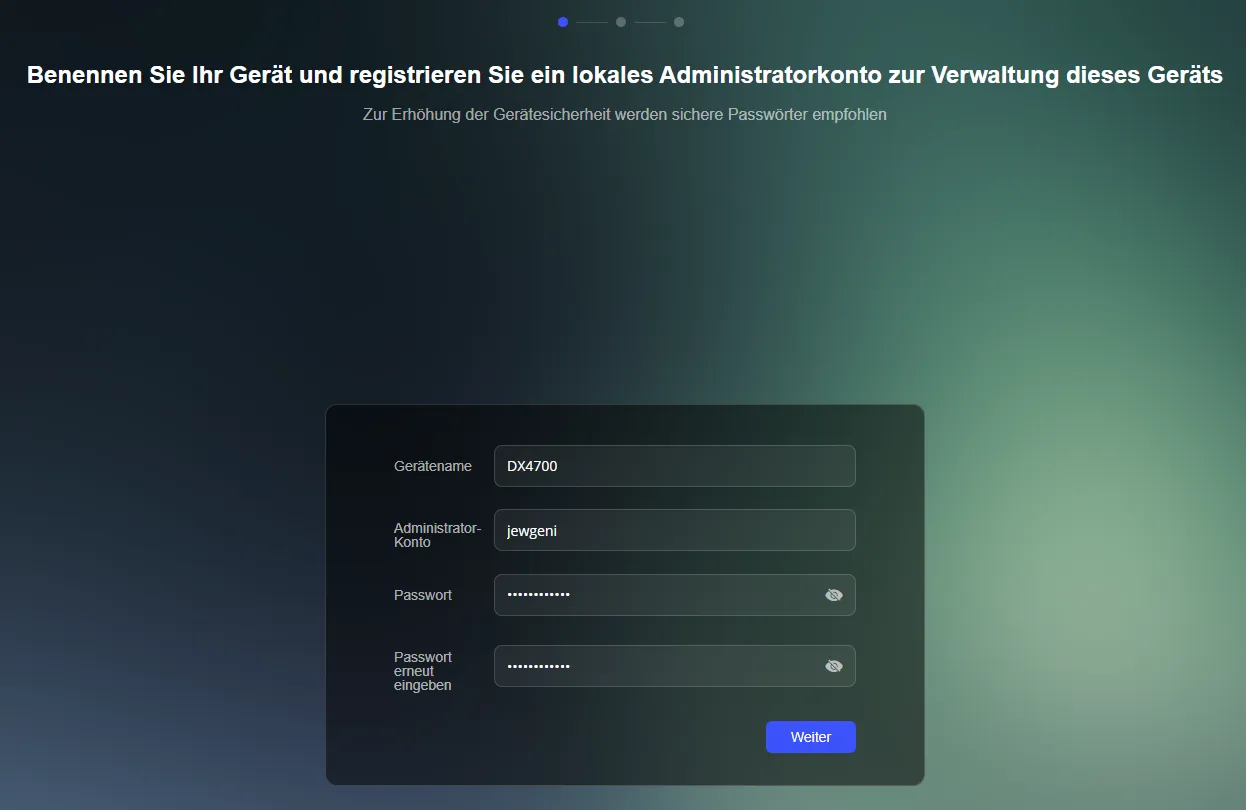
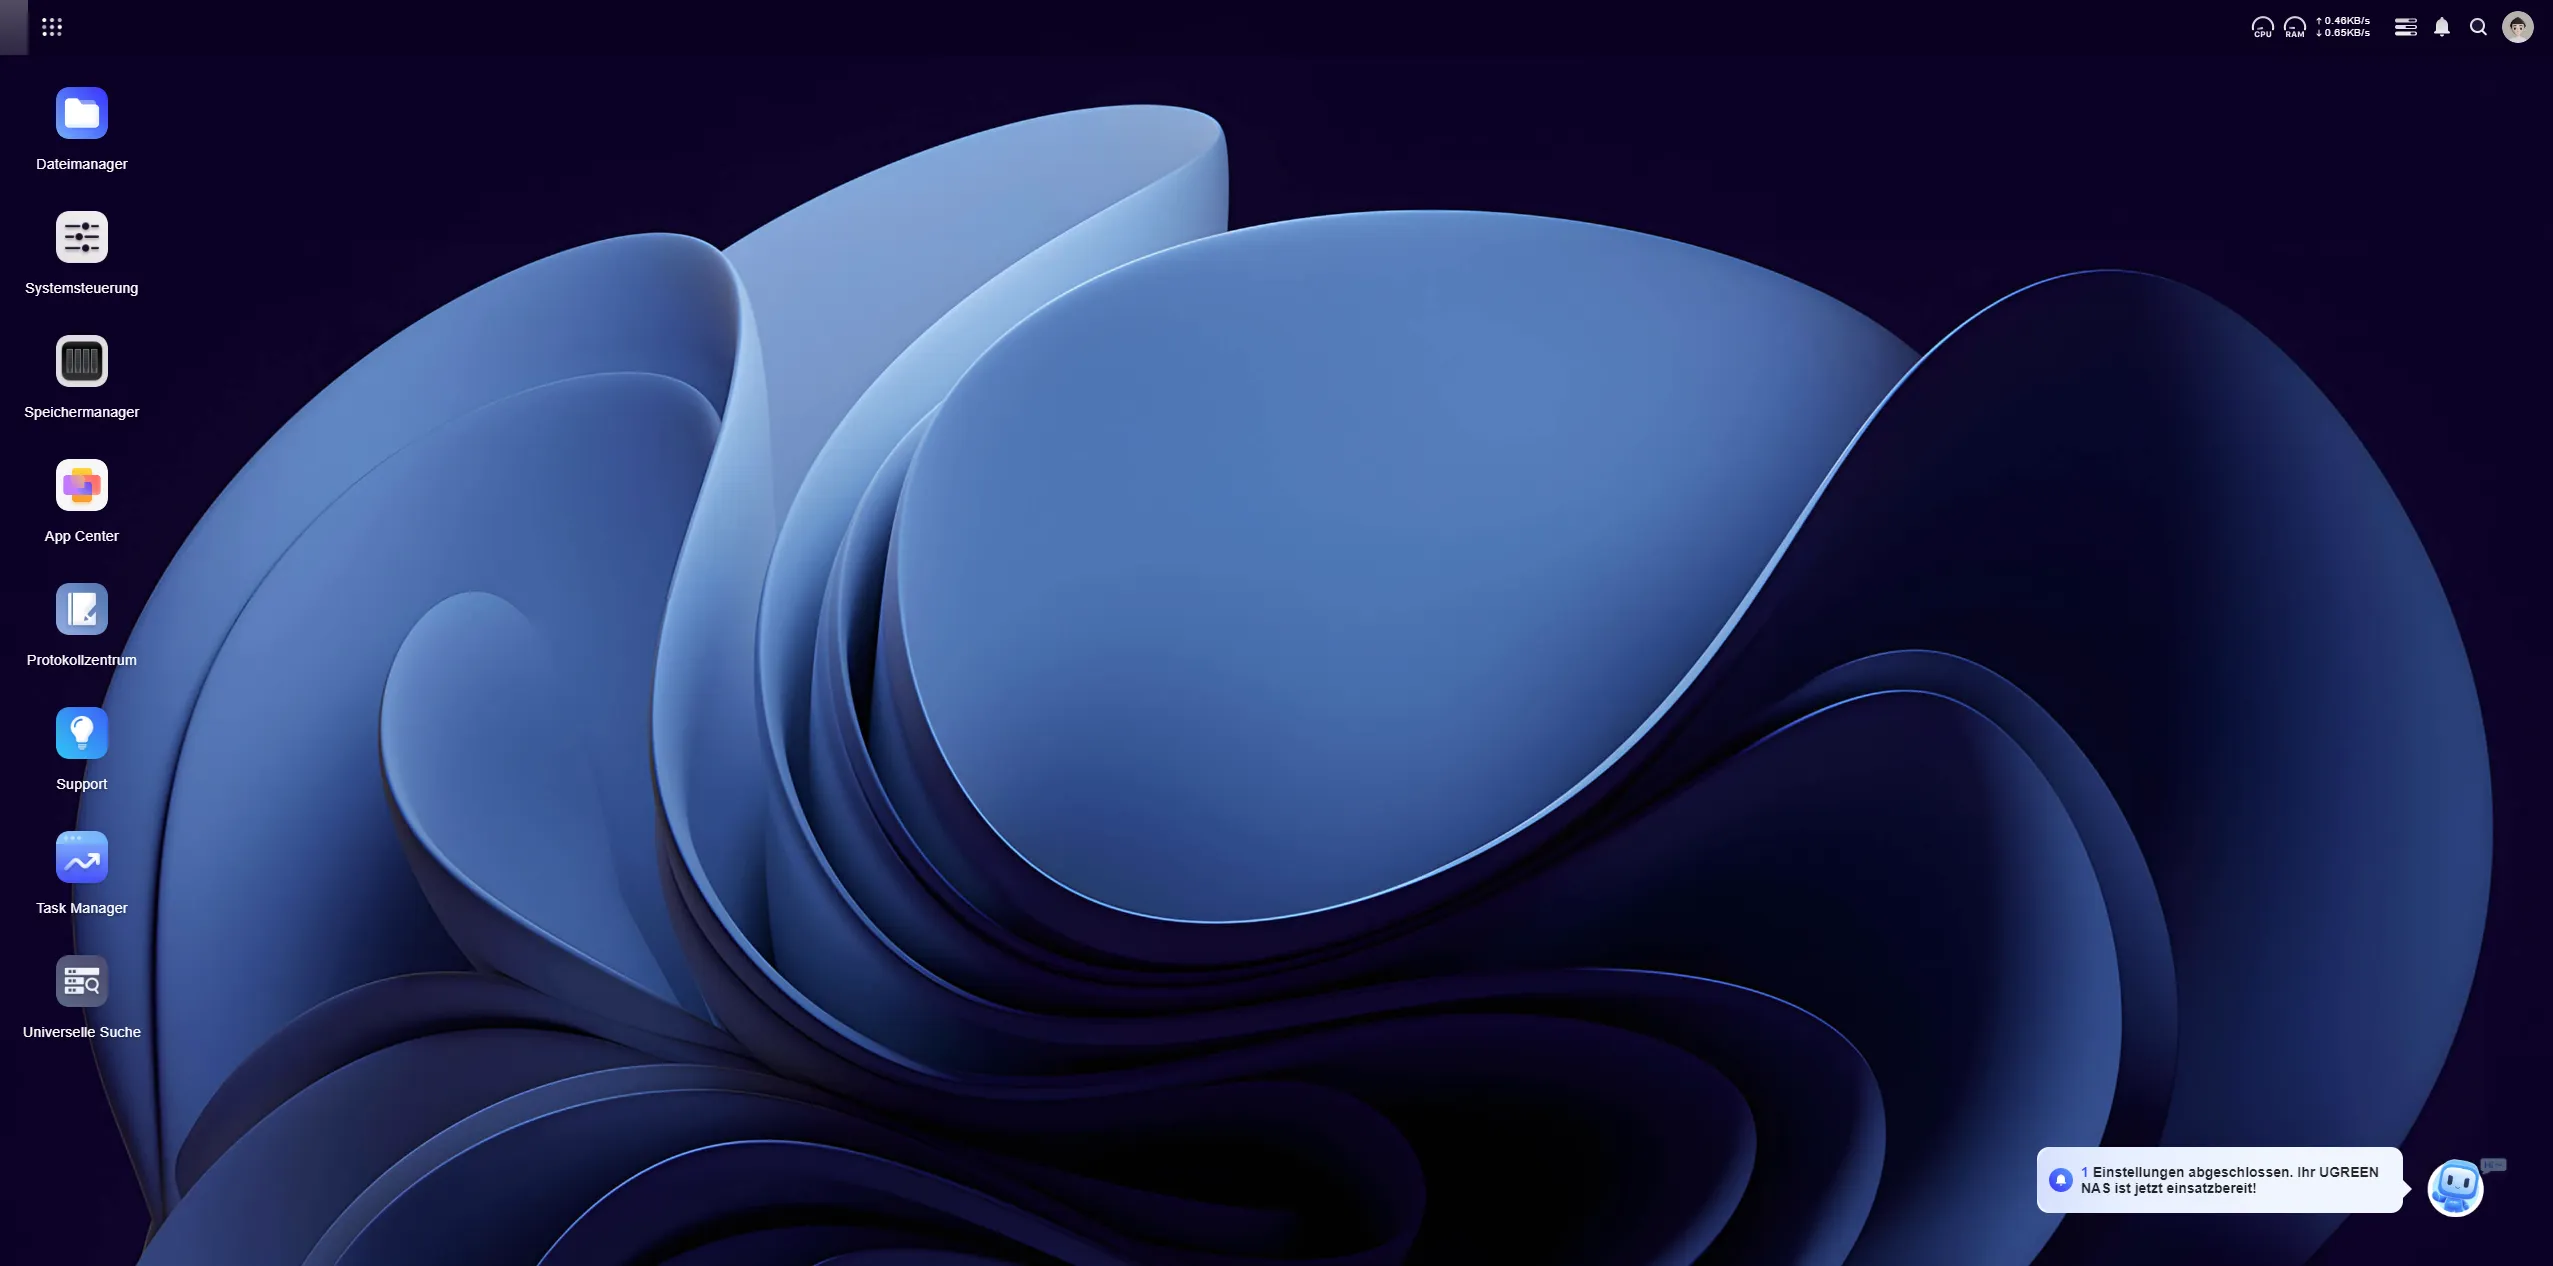
Optional: You can create a Ugreen Cloud account for remote access via Ugreenlink, though I’m skipping this step. Finally, choose whether to allow automatic updates (recommended for most users). After a few minutes, the UGOS interface will load, allowing further configuration.
Network Settings
Head to the network settings next. If your NAS has multiple LAN ports, you can configure link aggregation to increase network speed or create redundancy.
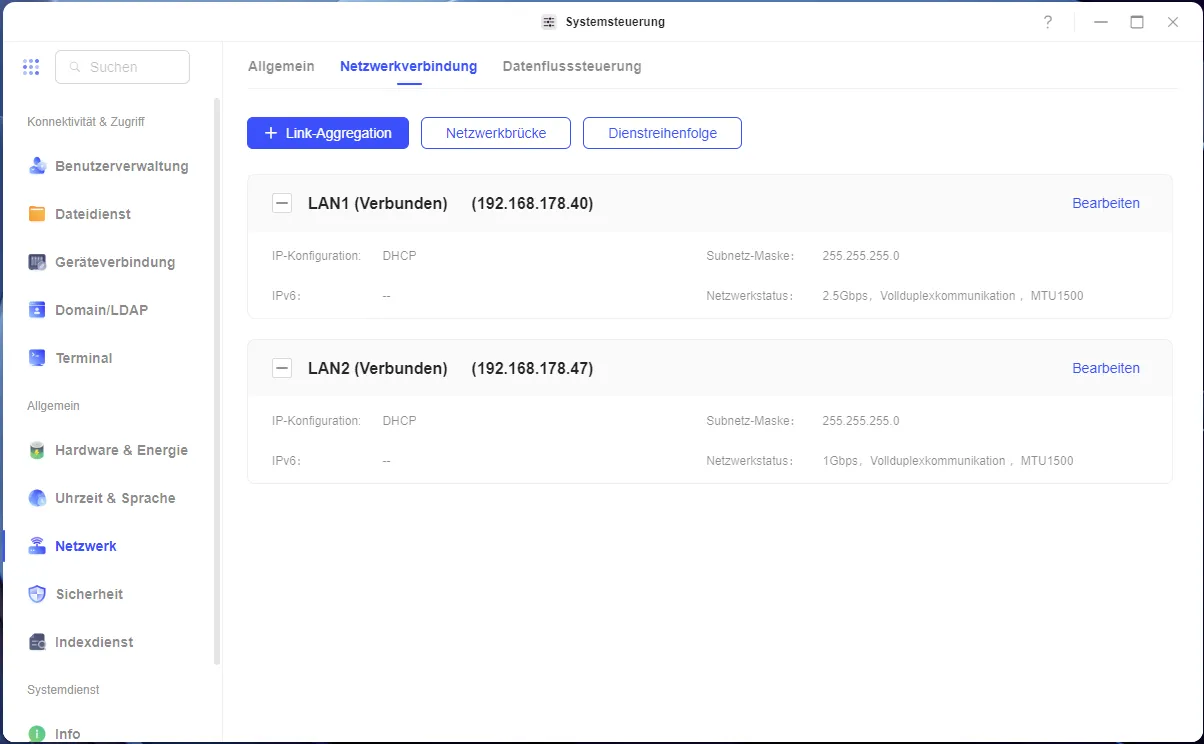
Note: If your router does not support static IP address assignment, you can set it up directly on the NAS.

Security
Adjusting Login Security
In the security settings, I reduce the number of allowed failed login attempts to three (from the default ten) and increase the lockout time to 30 minutes (default is five minutes). This helps prevent brute-force attacks if I decide to make the NAS accessible from the internet later.
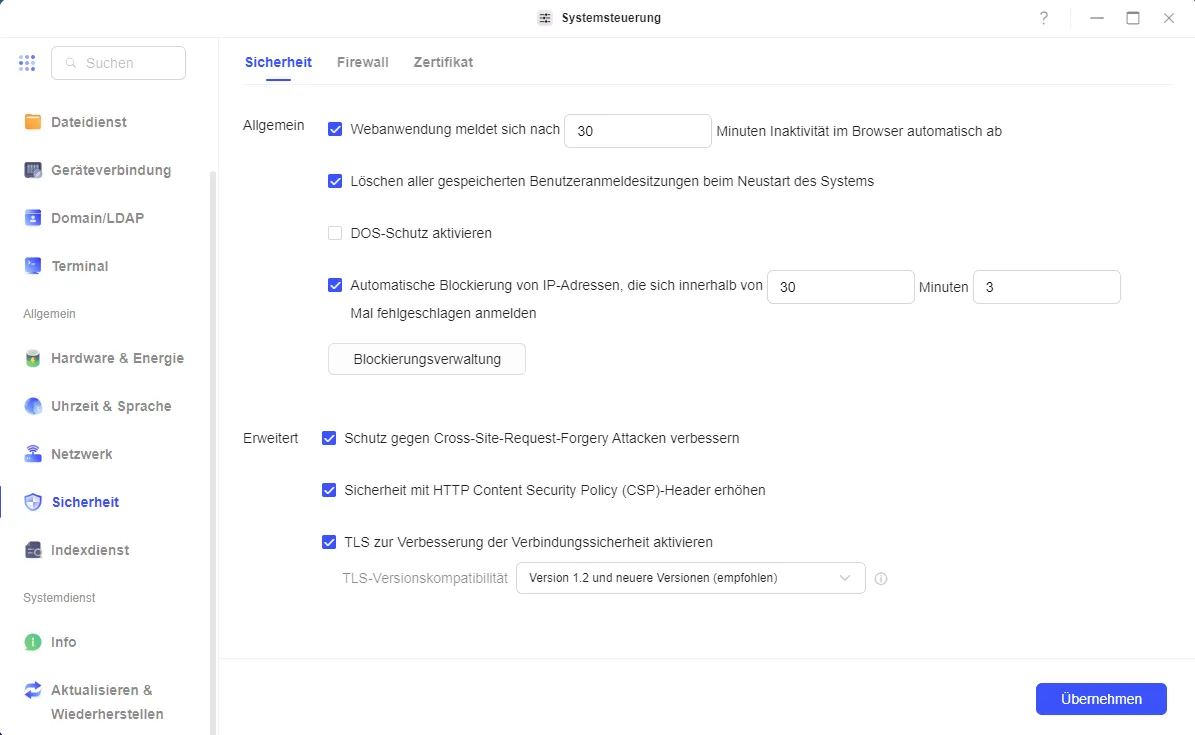
Enabling the Firewall
Activate the firewall and set the following rules:
- IP range 192.168.0.0 - 192.168.255.255: Allow access to all ports
- IP range 10.0.0.0 - 10.255.255.255: Allow access to all ports
- IP range 172.16.0.0 - 172.31.255.255: Allow access to all ports
- IP addresses from Germany: Allow access to port range 80-65535
- All other addresses: Allow access only to ports 80 and 443
- Block all other traffic

Adjust these rules as needed, and remember to disable the firewall temporarily if any issues arise.
Keeping Your NAS Updated
In the “Update & Restore” section, you can check for system updates and install them if necessary.
Using the Task Manager
The Task Manager allows you to monitor the NAS’s resource usage, such as RAM and hard drive activity, as well as the temperature of each component.
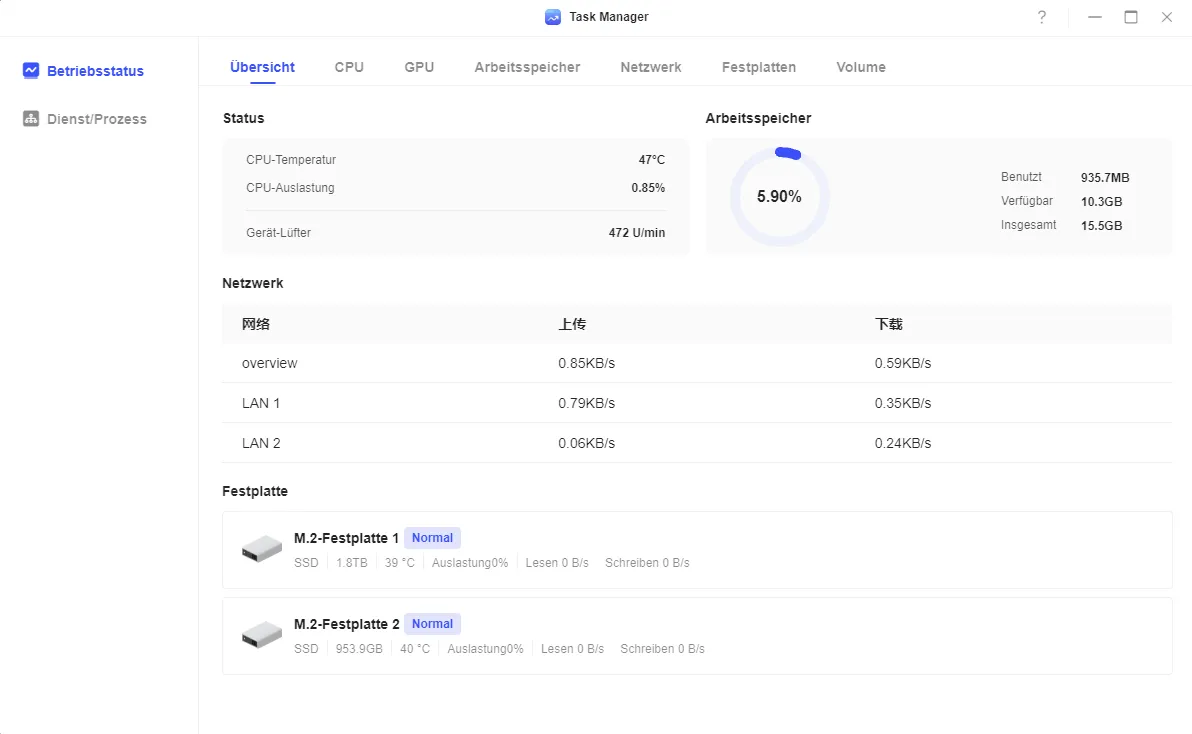
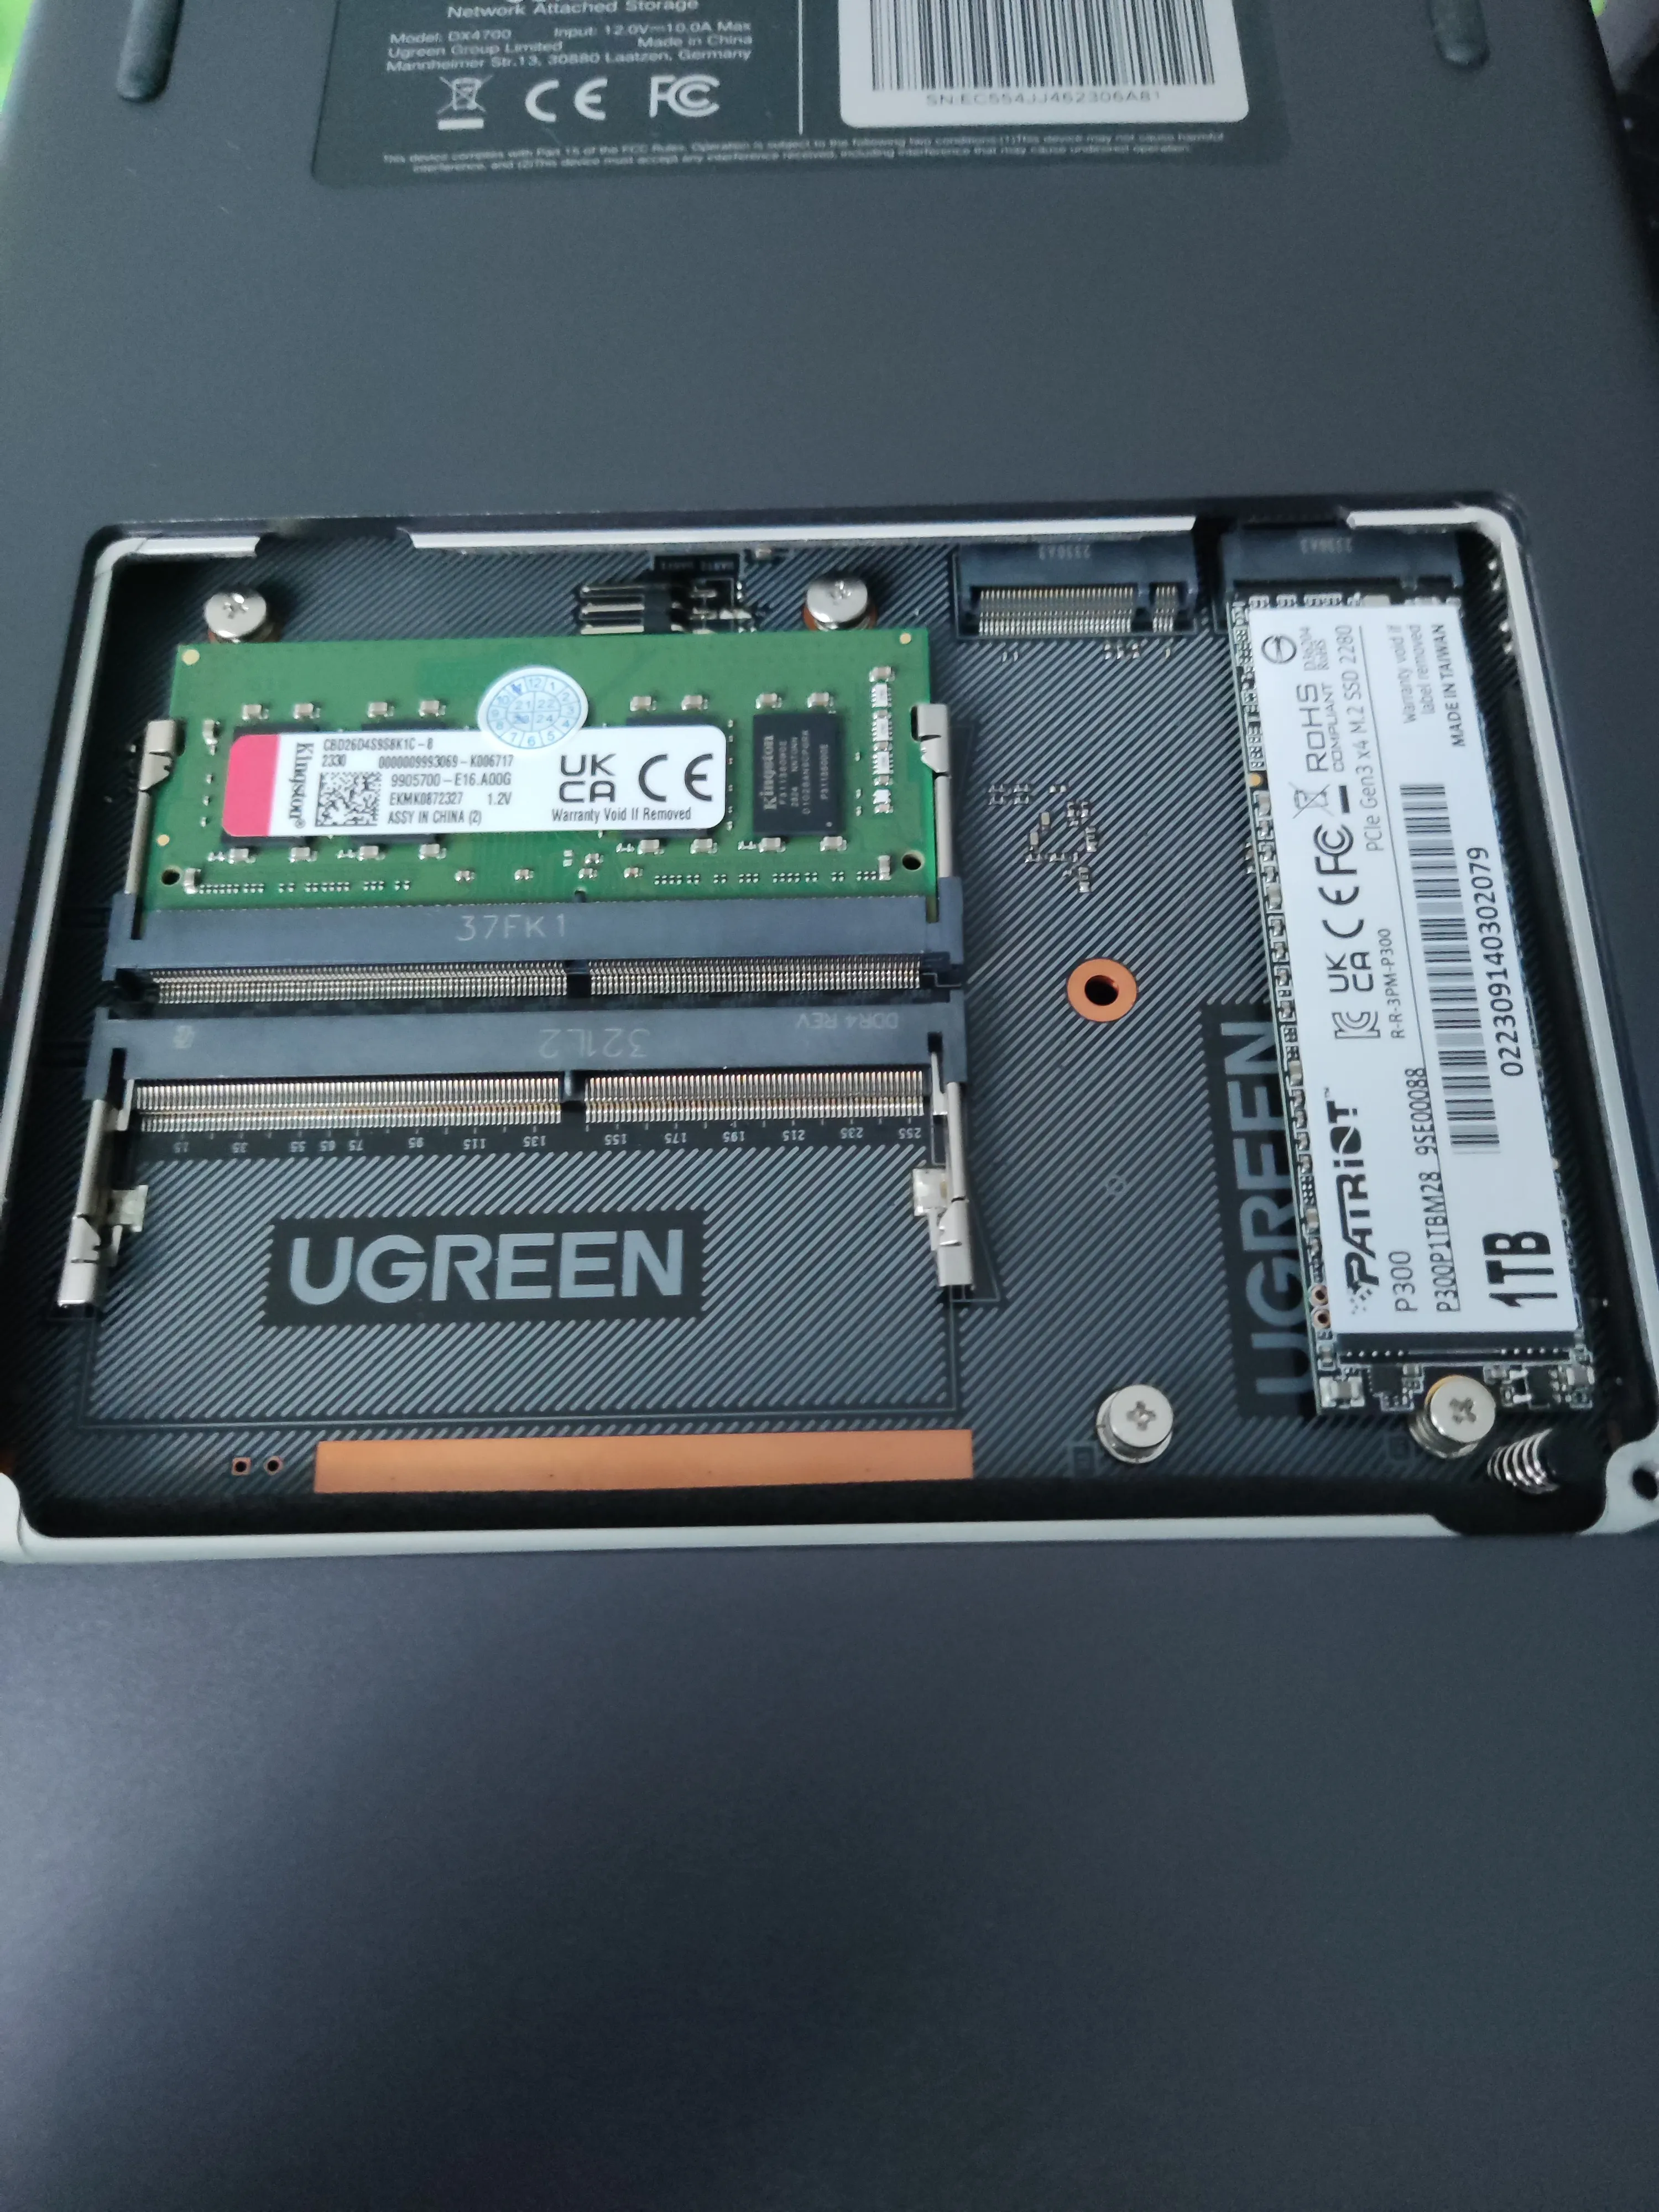
I installed two M.2 SSDs: a Samsung 990 Pro (Amazon Affiliate) and a Patroit P300 (Amazon Affiliate).
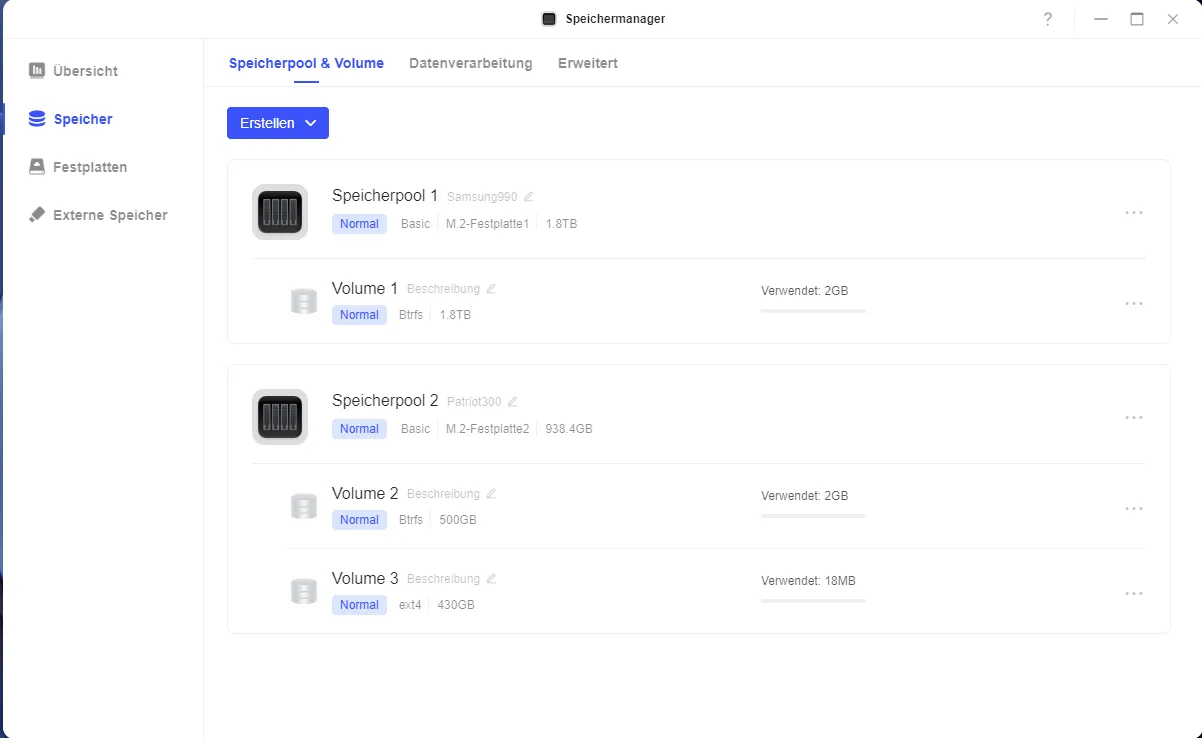
Setting Up Storage
To make the NAS functional, you need to configure the hard drives. Open the Storage Manager and set up a storage pool.
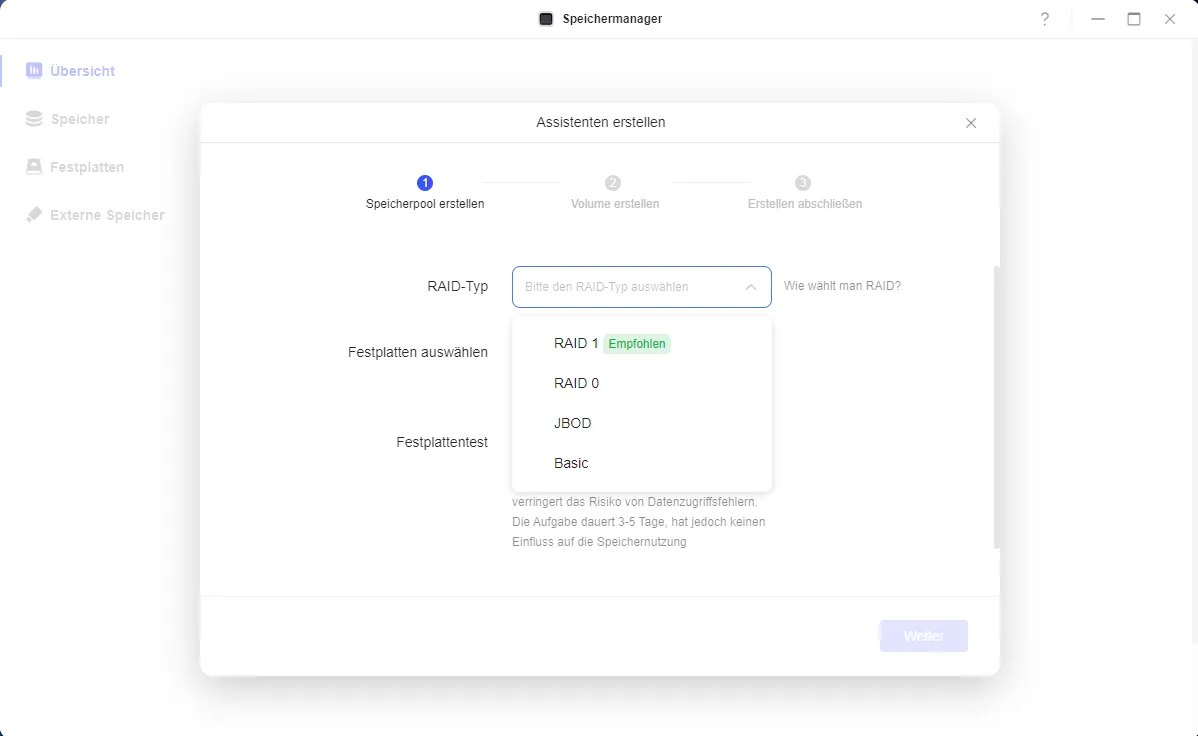
I’m skipping RAID for now (I’d consider it only if using larger drive bays) and selecting “Basic” configuration with Btrfs as the file system. Repeat this for any additional installed drives. You can also create multiple volumes within a storage pool and use different file systems.
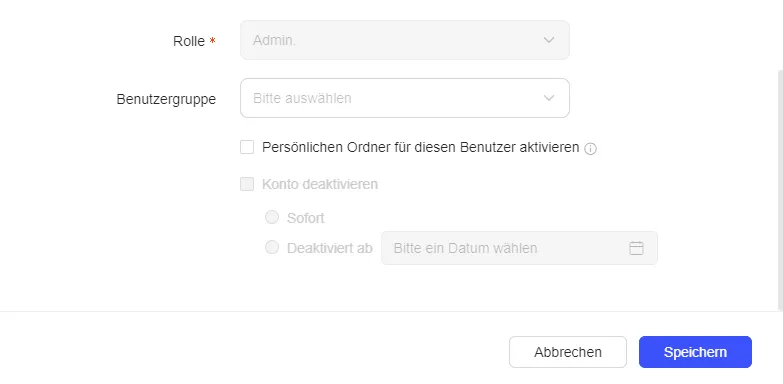
Managing Users and Shared Folders
In the user management section, you can create new user accounts and assign them personal folders.
Installing Applications
You can install additional applications from the App Center. Although the selection is not as extensive as Synology’s, Docker is available. I installed Docker, the Security Manager, Netdisk tools, and a few other programs. You can choose which volume to install the apps on.
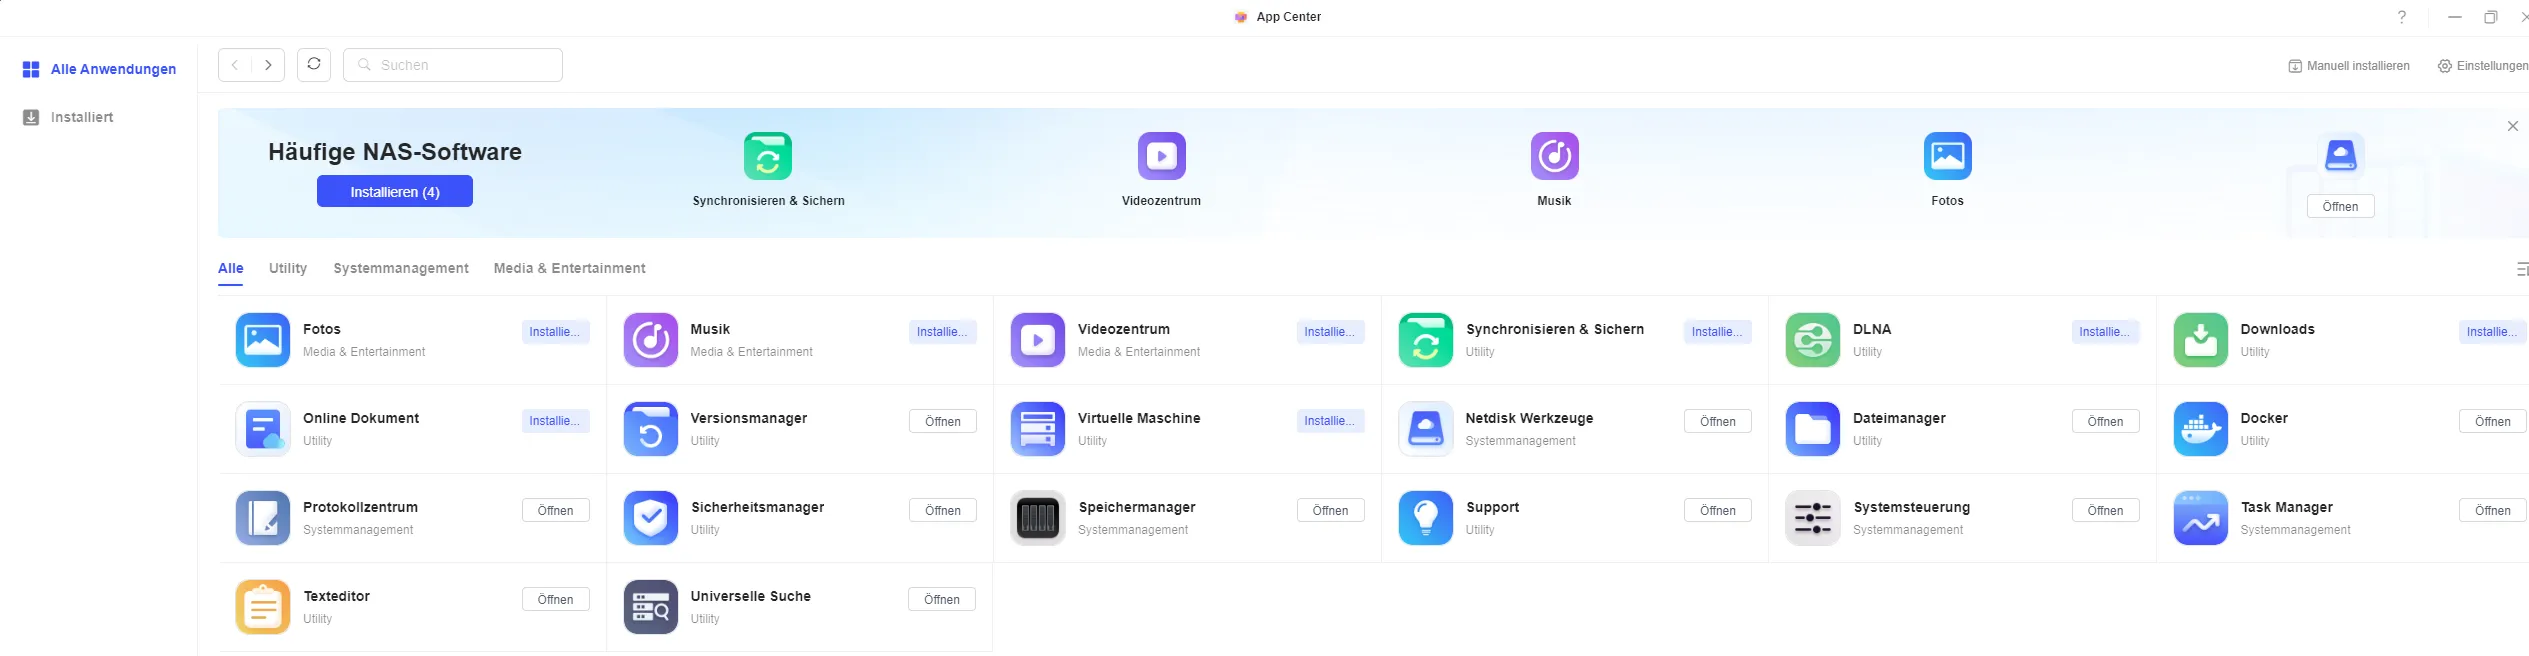
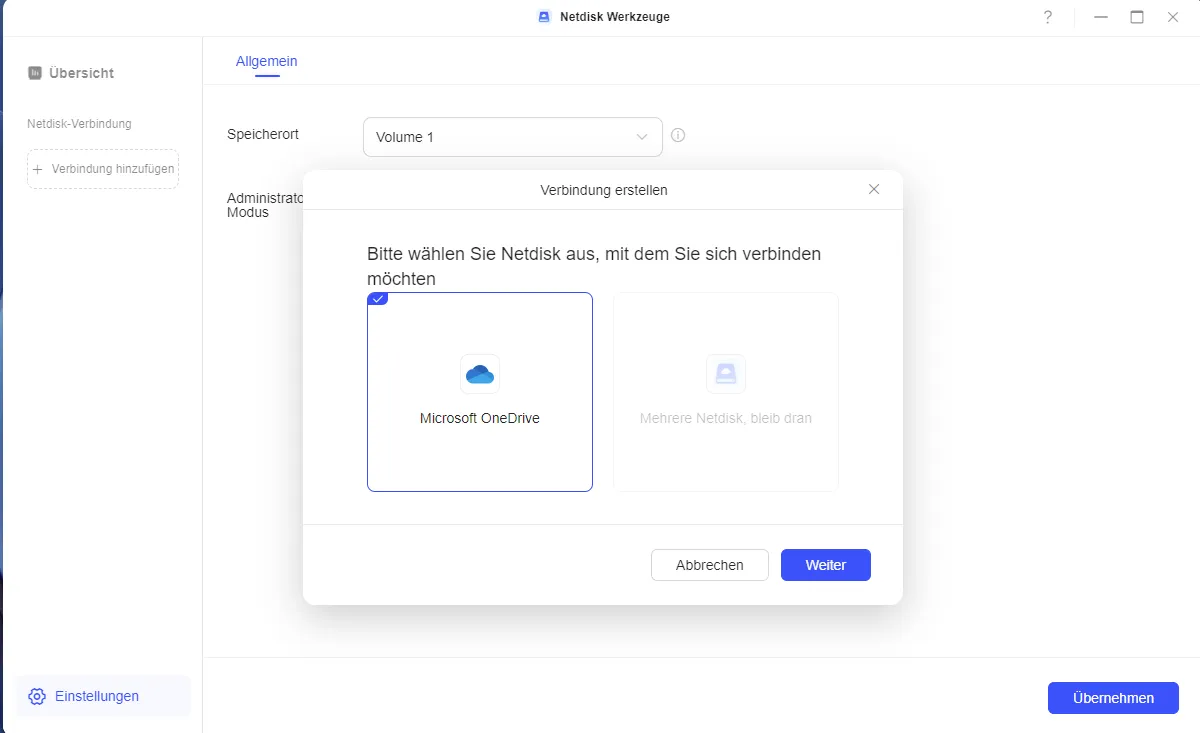
Some apps are still being developed. For instance, the Netdisk tools currently only support connections to Microsoft OneDrive.
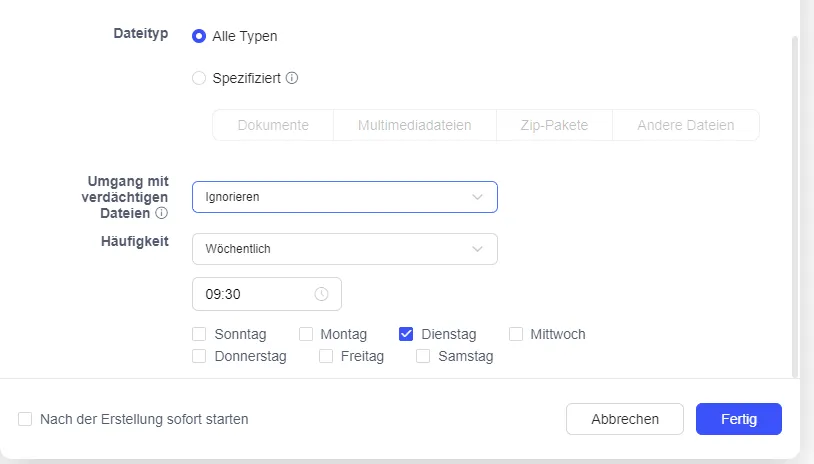
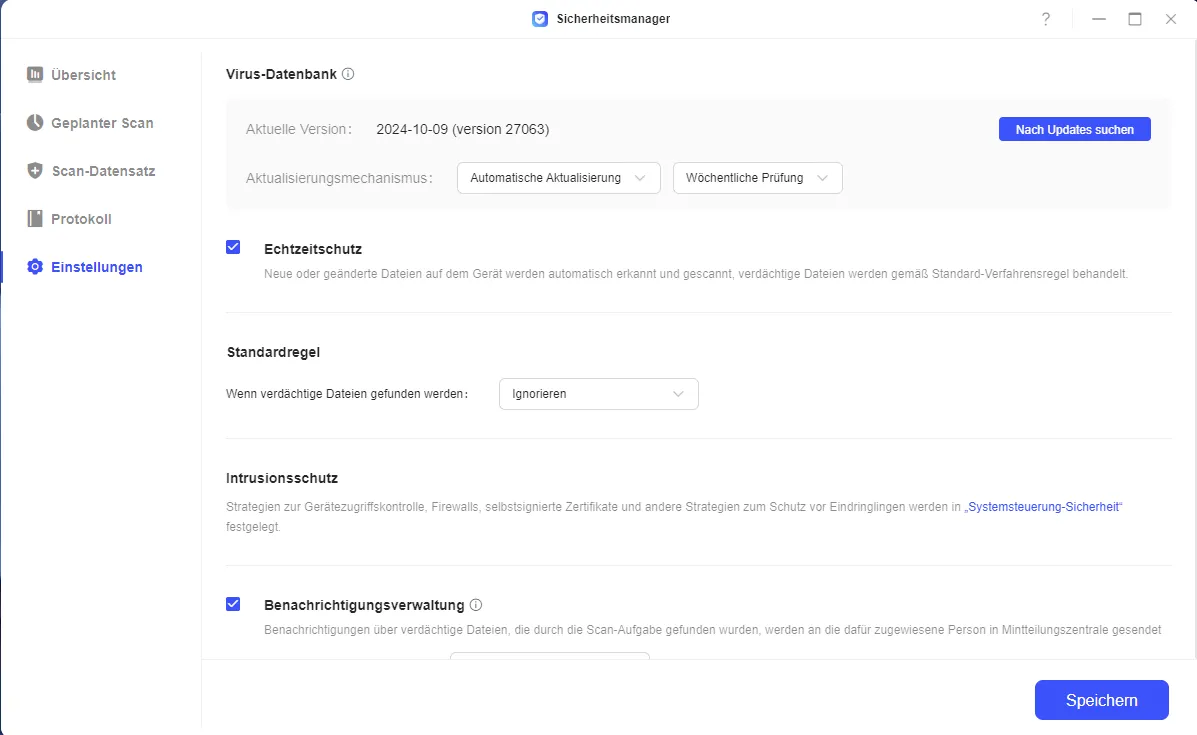
In the Security Manager, I set up a weekly scan. Note that new folders must be added manually. Real-time protection and automatic updates for the virus database should also be enabled.
Setting Up Docker
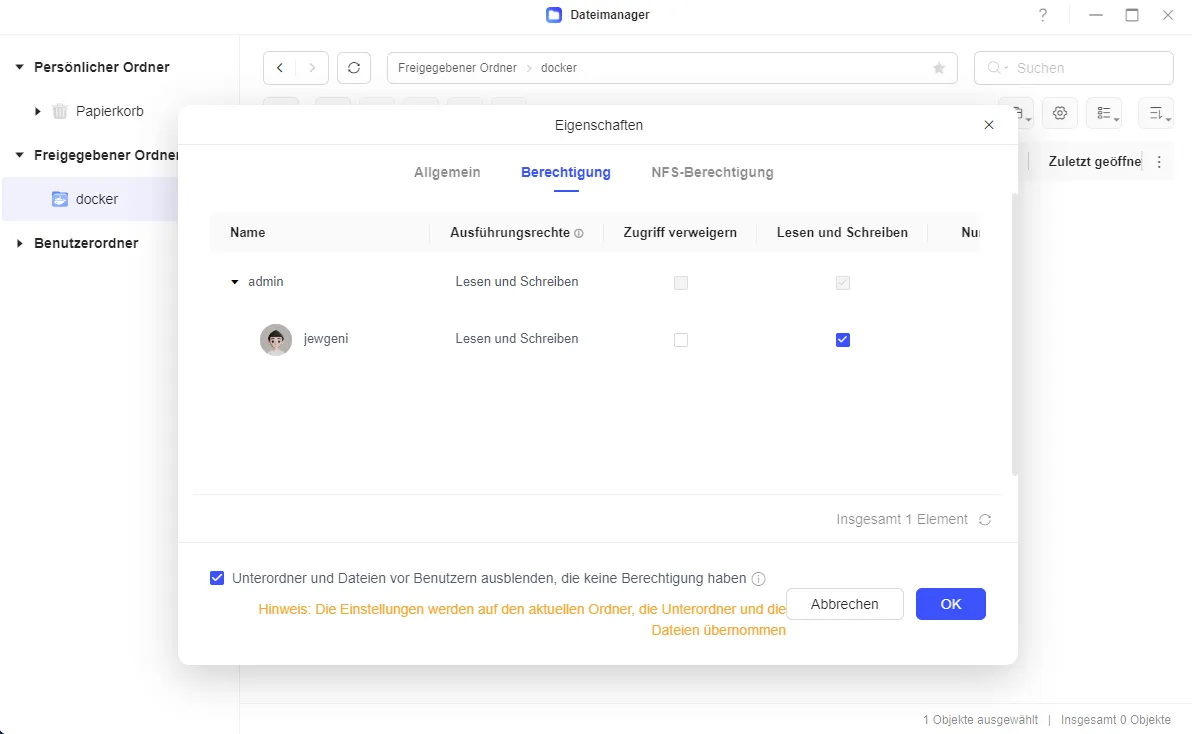
To use Docker, install it from the App Center. A shared folder named “docker” will be created automatically. Make sure you have read and write permissions for this folder.
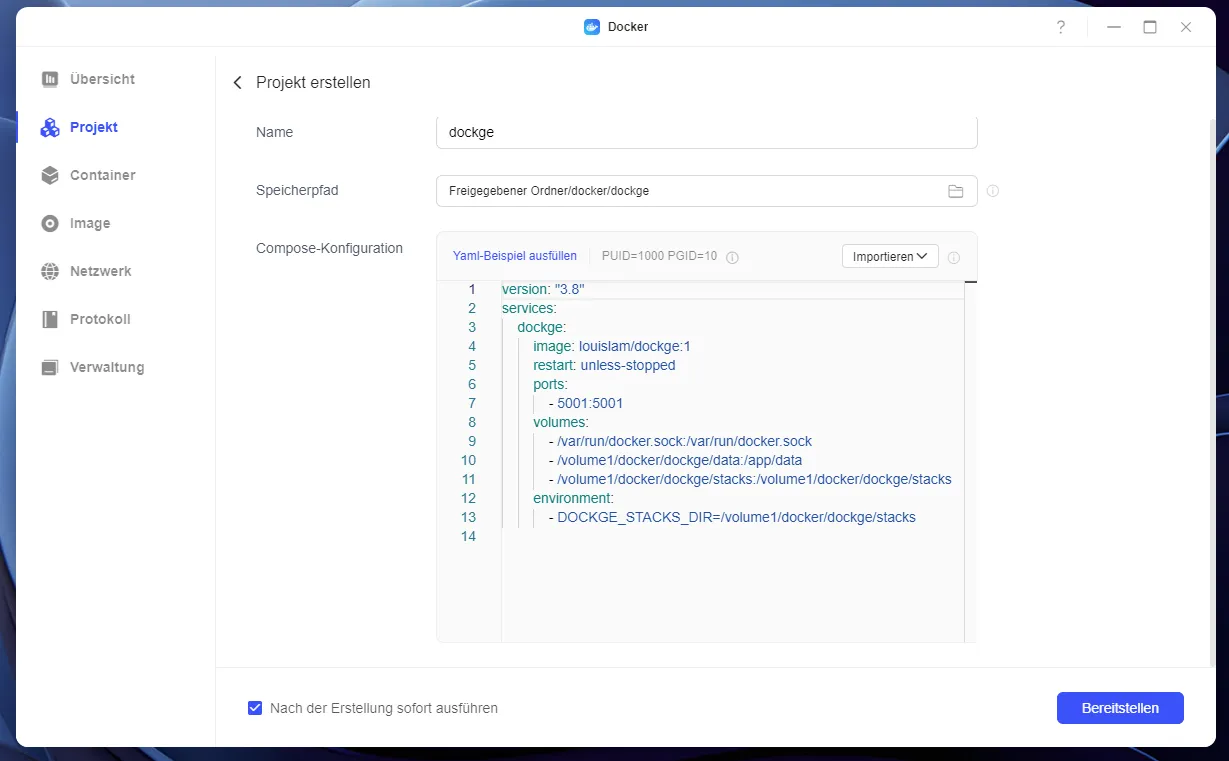
Managing Containers with Dockge
To manage the containers, I’m using Dockge. Create a new subfolder named “dockge” within the “docker” folder and add subfolders “stacks” and “data.” Then, create a “docker-compose.yml” file with the following content:
version: "3.8"
services:
    dockge:
        image: louislam/dockge:1
        restart: unless-stopped
        ports:
            - 5001:5001
        volumes:
            - /var/run/docker.sock:/var/run/docker.sock
            - /volume1/docker/dockge/data:/app/data
            - /volume1/docker/dockge/stacks:/volume1/docker/dockge/stacks
        environment:
            - DOCKGE_STACKS_DIR=/volume1/docker/dockge/stacks
Adjust the paths according to your folder structure. Import the project into the Docker app and start it.
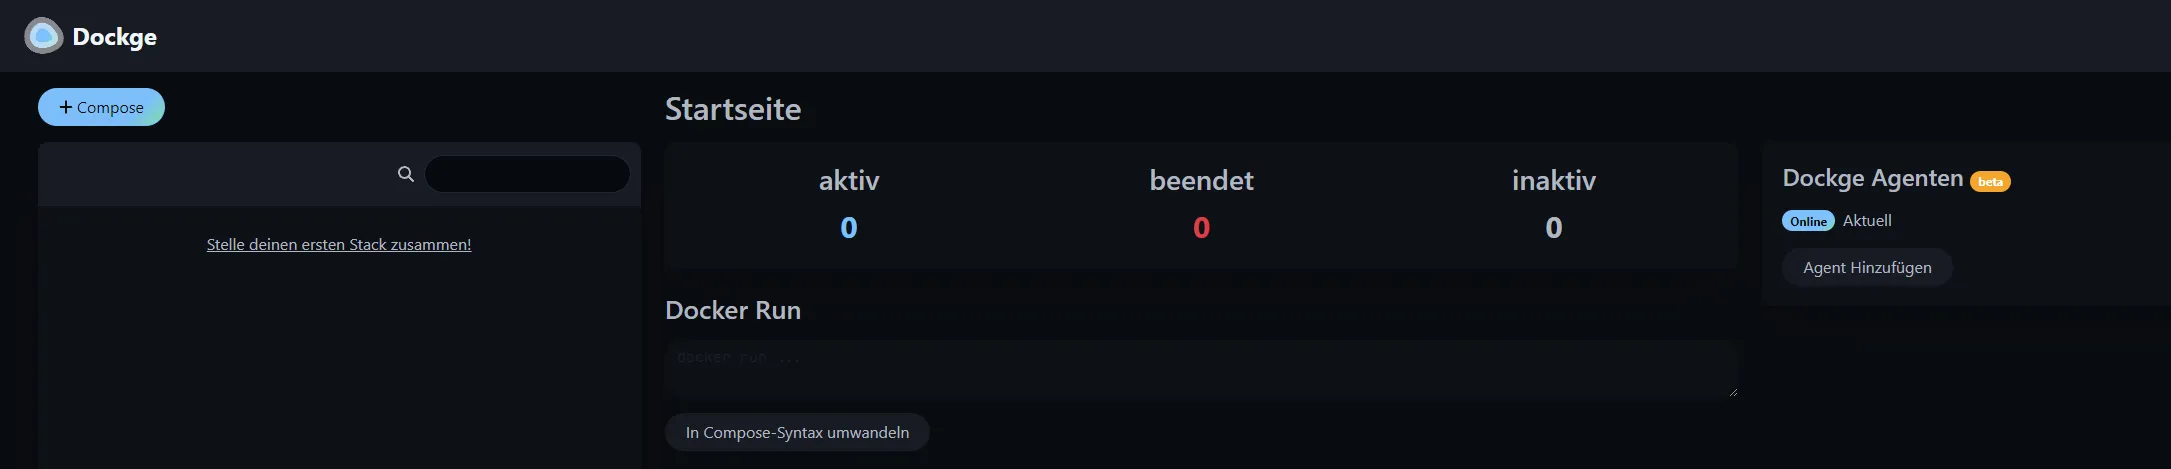
After a few minutes, you can access Dockge at ip-of-nas:5001 and create an admin account.
Installing Ollama
Now, I want to test Ollama. Start by creating subfolders named “ollama,” “root,” and “ui” within the “docker” folder.
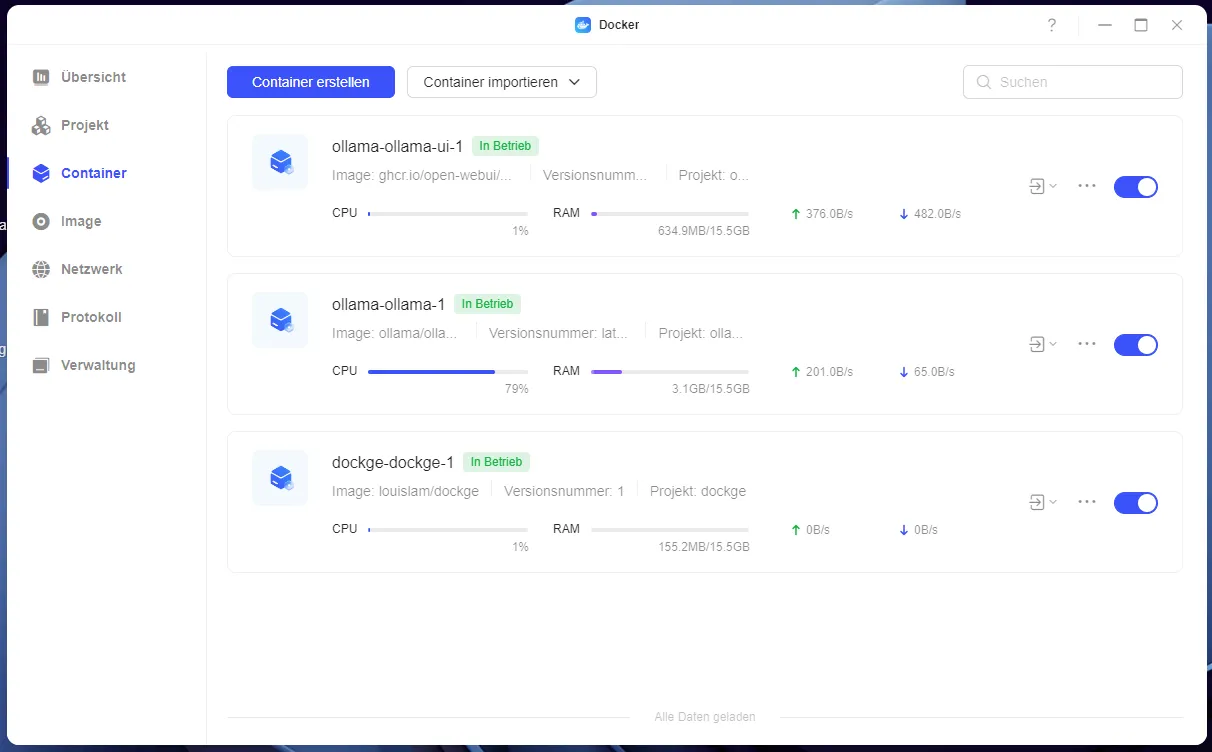
Next, create a new stack in Dockge. Delete the default Nginx container and add two containers: “ollama” and “ollama-ui.”
Here’s what the docker-compose.yml should look like:
version: "3.8"
services:
    ollama:
        restart: unless-stopped
        image: ollama/ollama:latest
        volumes:
            - /volume1/docker/ollama/root:/root/.ollama
        networks:
            - internal
    ollama-ui:
        restart: unless-stopped
        image: ghcr.io/open-webui/open-webui:main
        ports:
            - 8080:8080
        volumes:
            - /volume1/docker/ollama/ui:/app/backend/data
        networks:
            - internal
        depends_on:
            - ollama
        environment:
            - OLLAMA_BASE_URL=http://ollama:11434
networks:
    internal: {}
Start the containers. Since they are relatively large, the process may take some time. Once completed, you can log in to Ollama at ip-of-nas:8080.
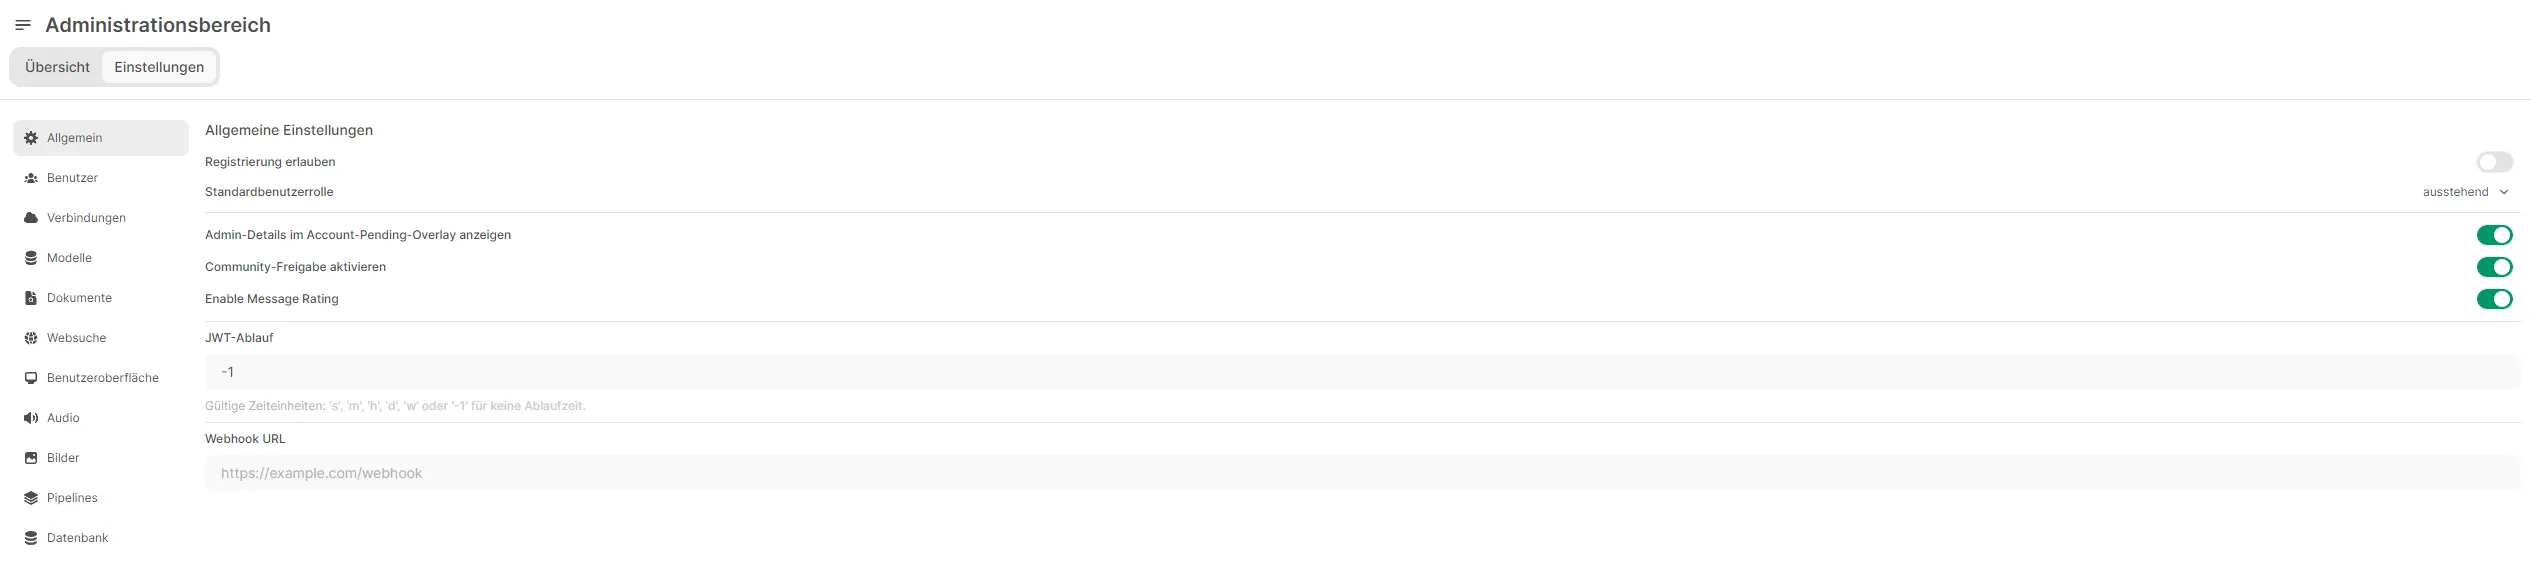
If you don’t want to allow registrations, you can disable this option in the settings.
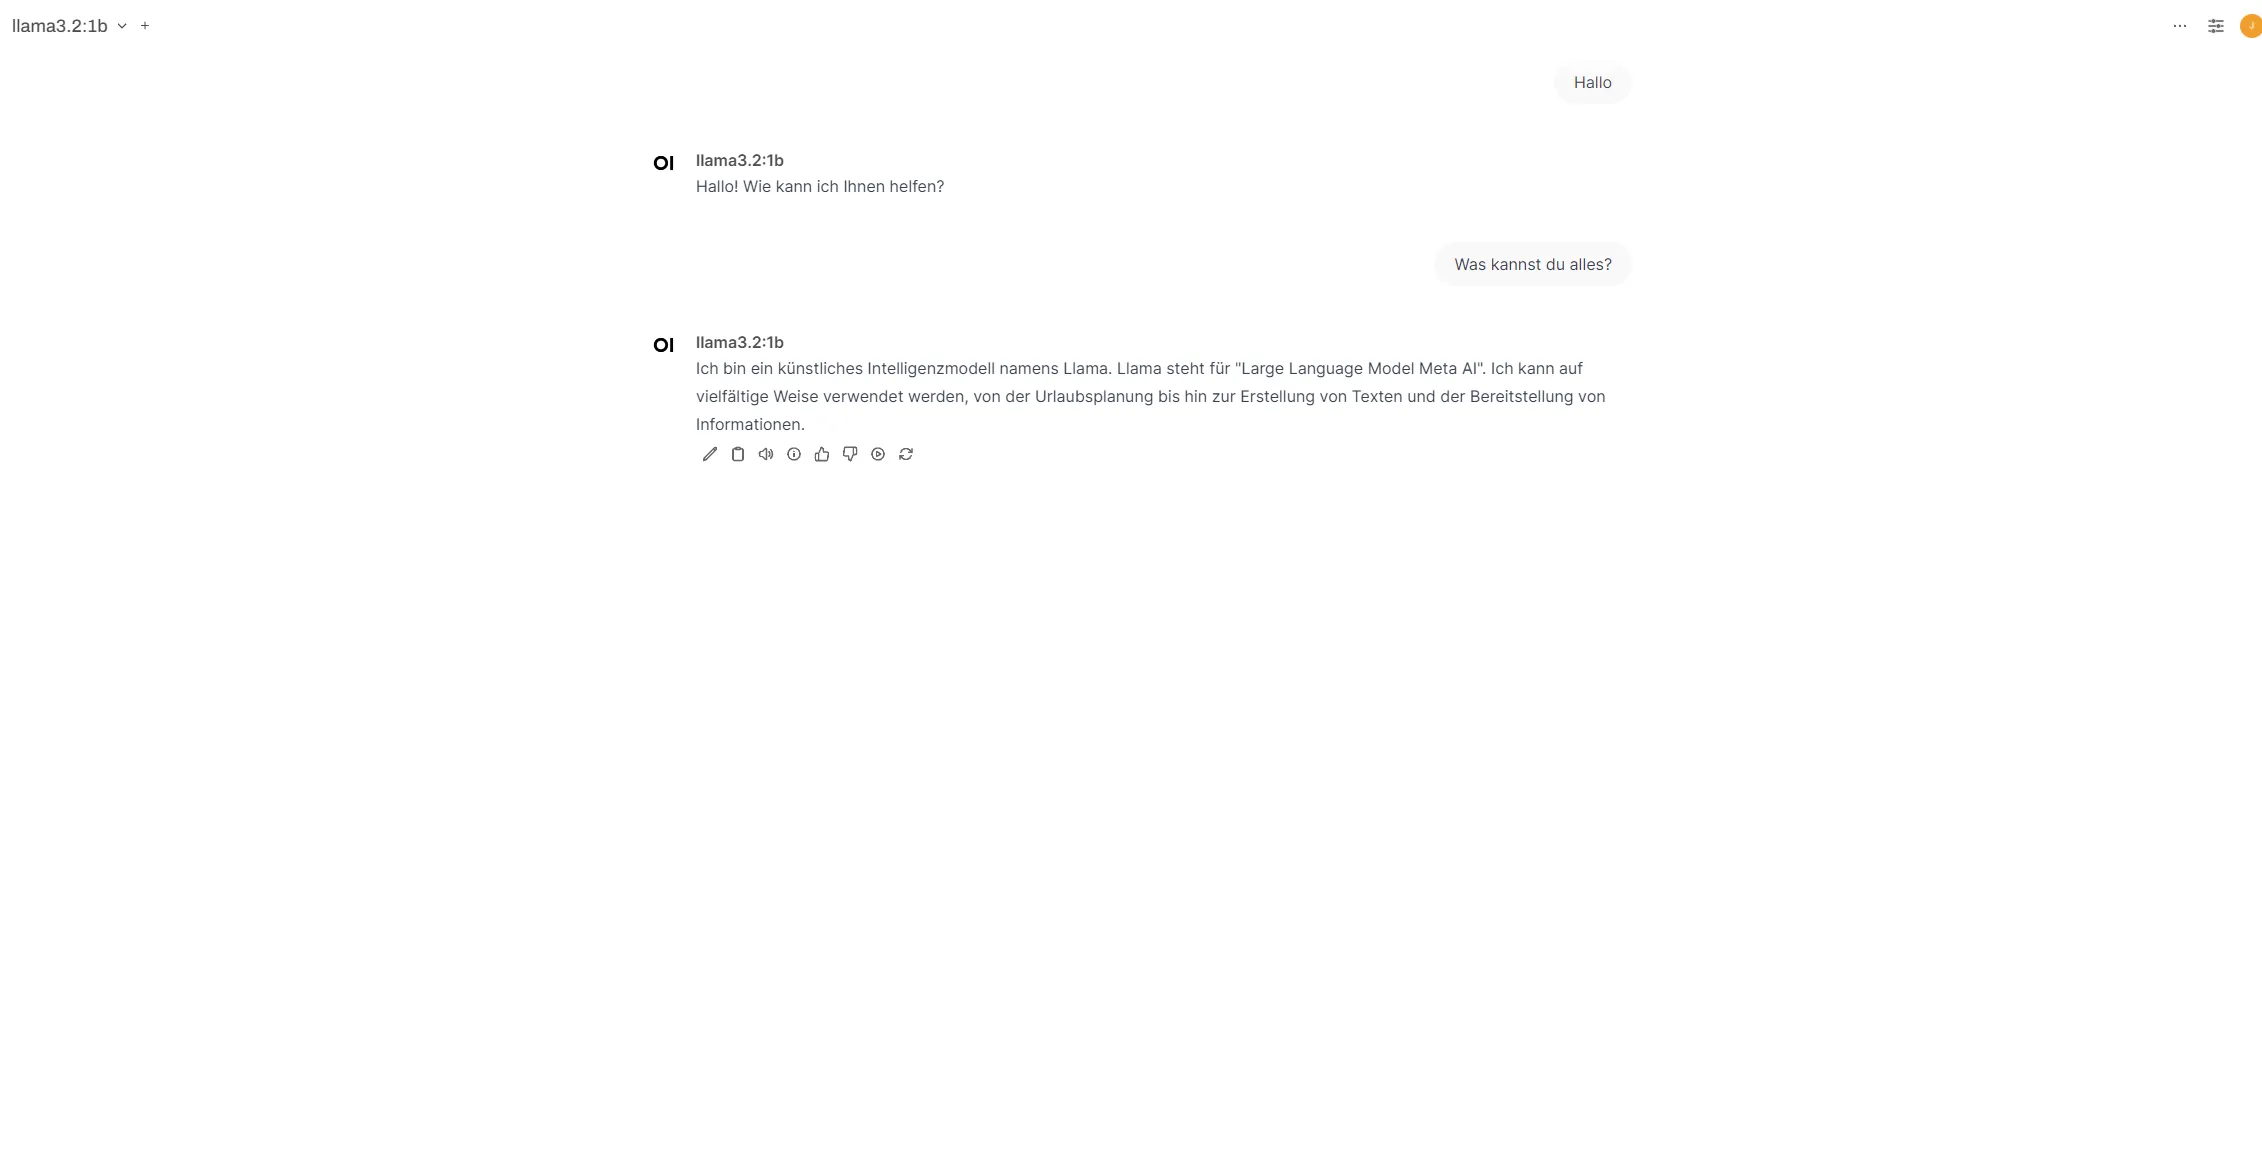
To use a model, add it under “Models,” for example, llama3.2:1b.
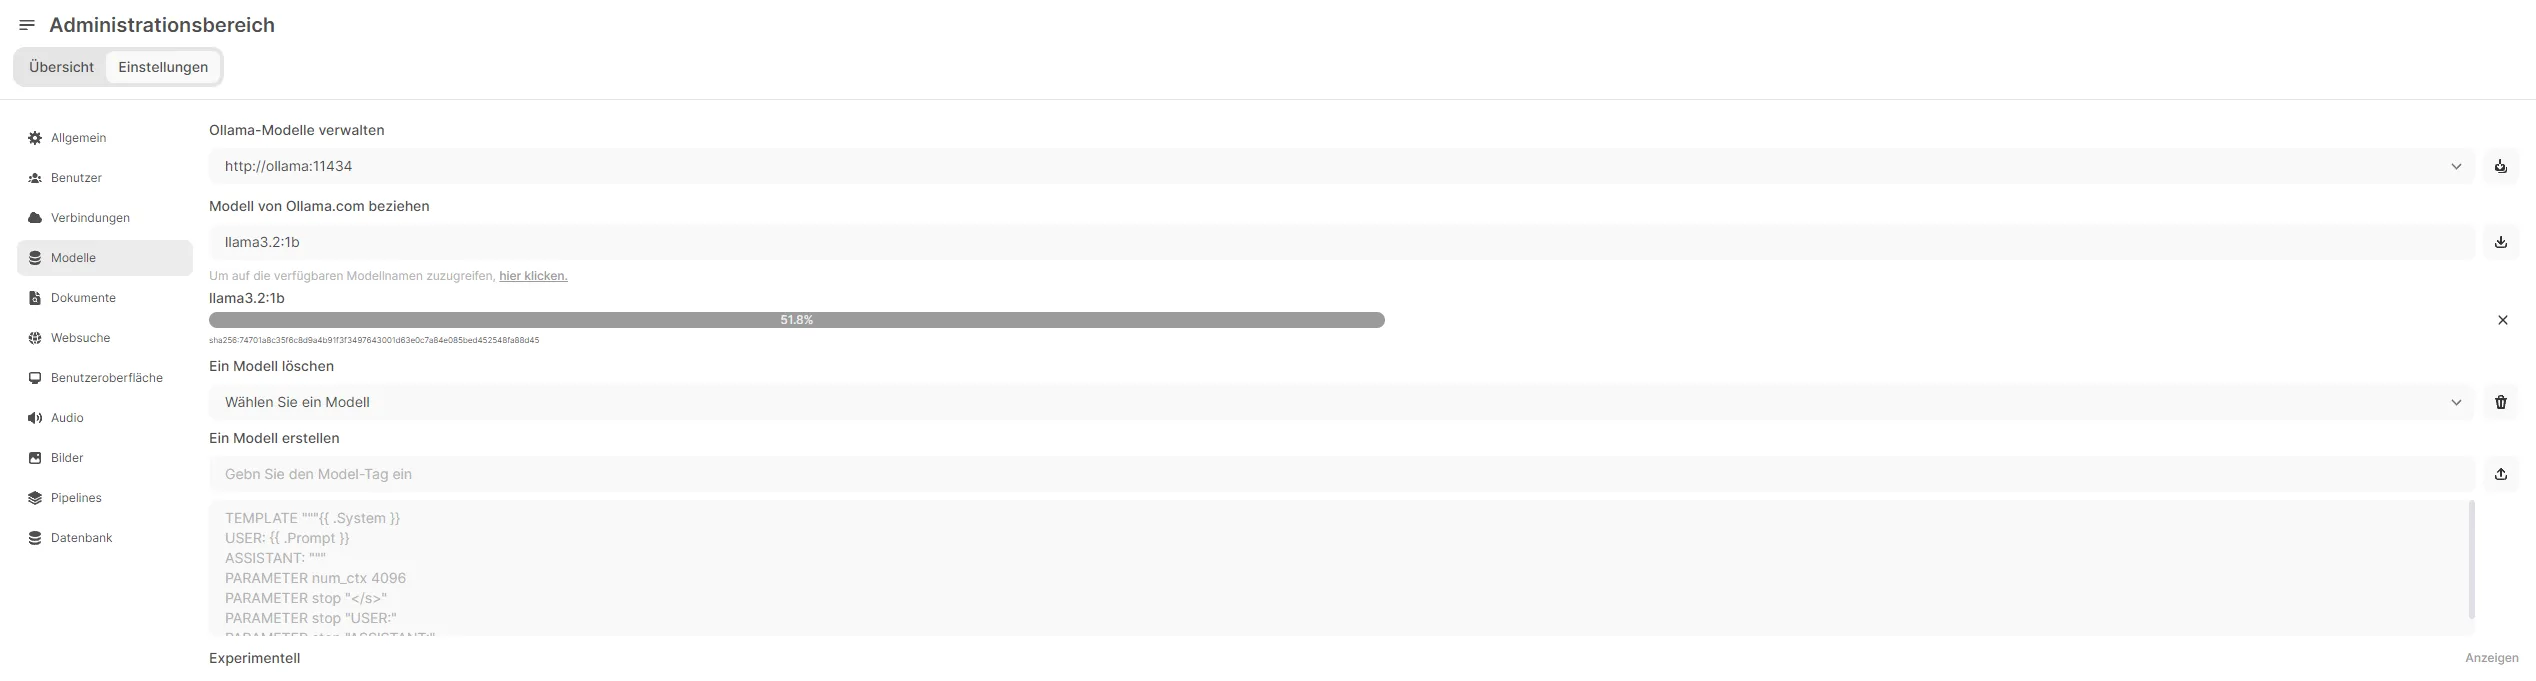
Now, I can use my local LLM model.
Keep in mind that heavy usage can cause high CPU load.
Conclusion
Congratulations! Your Ugreen NAS is now fully set up and ready to go. Whether you’re using it as a home server, a file storage solution, or a platform for Docker apps, your new NAS is versatile and powerful enough for a wide range of tasks.
If you have any questions or need further assistance, feel free to drop a comment below. 😊