FritzBox Setup: Router, VPN & Homeserver Configuration
Set up your new FritzBox from AVM step by step as router and homeserver — including DynDNS, VPN and network storage. The complete configuration guide.
Table of Contents
CAUTION
Please note that this blog post was originally written in German and has been translated for your convenience. Although every effort has been made to ensure accuracy, there may be translation errors. I apologize for any discrepancies or misunderstandings that may result from the translation and I am grateful for any corrections in the comments or via mail.
This guide is about setting up a Fritzbox from AVM for your home server environment. The most critical functions, such as DynDNS, VPN and NAS are presented.
In principle, any other typical router can be used similarly, but the Fritz!Box has a few special functions that I would also like to discuss.
Excursus Vodafone Station
I wrote another article about a VPN with a Raspberry Pi not from home but from another network with a Vodafone station as a modem. After logging into the Vodafone Station, I was surprised at the few setting options in the user interface. Fortunately, I then saw the opportunity to switch to expert mode.

I was looking forward to being able to change more settings as an expert. Unfortunately, my joy was in vain. Change DNS setting? Not possible. Control port sharing specifically? No. But the most remarkable thing is that my Raspberry Pi is no longer assigned an IP address after I reinstalled it. I suspect it concerns the Vodafone station as a DHCP server. I have often read about the problem of Raspberry Pis without an IP address but have not found a simple solution.
The “Vodafone Station” experiment ended with my Fritz!Box used as a router.
Router model
In my case, I use an AVM Fritz!Box 7590 (Amazon affiliate link) and a Fritzbox 6660 (Amazon affiliate link) in the Mesh. If you also want to use the Fritzbox as a modem, you need to make sure you buy the right model, depending on whether you use cable or DSL as your connection type.
The Fritzbox 7590, Fritzbox 7590 ax and Fritzbox 7530 ax, for example, are suitable as a modem for a DSL connection. The Fritzbox 6690 Cable or Fritzbox 6660 (Amazon Affiliate Link), on the other hand, have an integrated cable modem for a cable connection.
I have listed the most critical differences in the features of some models in the following table:
| Feature | 7590 AX | 7590 | 7530 AX | 7530 | 6690 | 6591 | 6660 | | ————— | —–– | —– | —–– | –– | —– | —– | —– | — | | DSL modem | ✅ | ✅ | ✅ | ✅ | ❌ | ❌ | ❌ | ❌ | | Cable modem | ❌ | ❌ | ❌ | ❌ | ❌ | ✅ | ✅ | ✅ | | Wi-Fi 6 | ✅ | ❌ | ✅ | ❌ | ❌ | ✅ | ❌ | ✅ | | 5 GHz Mbit/s | 2,400 | 1,733 | 1,800 | 866 | 4,800 | 1,733 | 2,400 | | 2.4 GHz Mbit/s | 1,200 | 800 | 600 | 400 | 1,200 | 800 | 600 | | 2.5 Gigabit LAN | ❌ | ❌ | ❌ | ❌ | ❌ | ✅ | ❌ | ✅ | | USB 3.0 | 2 | 2 | ❌ | 1 | 2 | 2 | ❌ |
Wi-fi 6
Wi-Fi 6 is a new generation of Wi-Fi technology for wireless local area networks (WLAN). It offers higher bandwidth, lower latency and better efficiency than previous Wi-Fi standards. Wi-Fi 6 has been developed to meet the growing demands of applications such as virtual reality, 4K video and the Internet of Things (IoT).
A key feature of Wi-Fi 6 is support for Orthogonal Frequency Division Multiple Access (OFDMA). This new transmission method allows multiple devices to be connected simultaneously and better use bandwidth. Wi-Fi 6 can also use various frequency bands simultaneously to increase data transfer rates and reduce interference.
Wi-Fi 6 is also more energy efficient than previous Wi-Fi standards, as it can optimize the power consumption of devices connected to the WLAN. This can be particularly important for IoT devices that operate for long periods.
To reap the benefits of Wi-Fi 6, both the Wi-Fi network and the devices connected to it must support Wi-Fi 6. Wi-Fi 6 is gradually becoming more widespread and is expected to become more common in the coming years.
Maximum data transfer rate
The maximum data transfer rate achieved by a Wi-Fi router depends on various factors, such as the Wi-Fi standard, the frequency range, the distance between the router and the device and possible interference.
The maximum data transfer rate for different Wi-Fi standards is as follows:
- Wi-Fi 4 (802.11n): maximum 600 Mbit/s
- Wi-Fi 5 (802.11ac): maximum 1,300 Mbit/s
- Wi-Fi 6 (802.11ax): maximum 9,600 Mbit/s
It is important to note that these values represent the maximum theoretical speed and are not usually achieved in practice. The data transfer rate depends on many factors and can be significantly lower.
To achieve the maximum data transfer rate, the router and the connected device must support the same Wi-Fi standard and be located near the router. The number of connected devices and possible interference can also influence the data transfer rate.
Connecting to the Internet
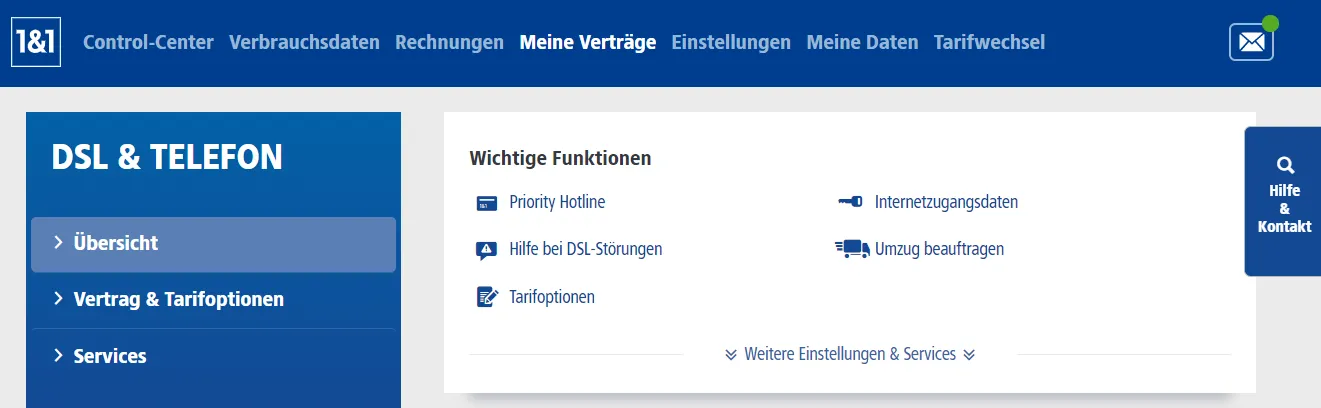
To set up, I need my access data for Internet access. These are provided by the Internet provider. With 1&1, for example, these can be found in the control center under the menu item “My contracts”.
As soon as you have connected the Fritzbox to the power supply (possibly the DSL cable or the cable socket), you must first connect your computer to the Fritz!Box. A network cable, which may be included, is preferable due to the higher stability and speed.
However, you can also connect via WLAN. The factory WLAN password can be found on the underside of the Fritz!Box. You should then be automatically redirected to the fritz.box page. If this does not happen, open a browser and enter the address.
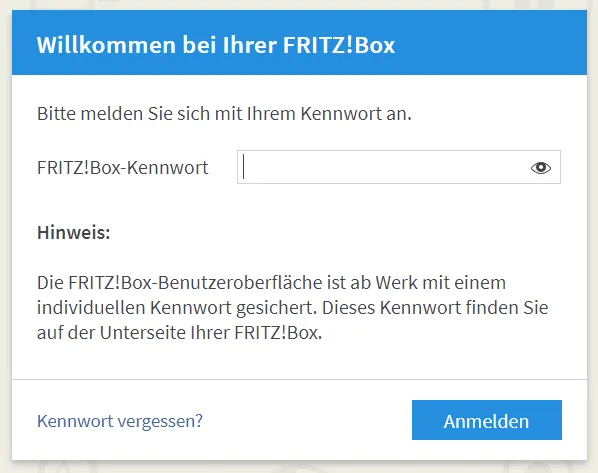
At the welcome screen, you can log in with the password, which can also be found on the back of the FritzBox. A wizard on the user interface should then ask for the Internet access data mentioned above.
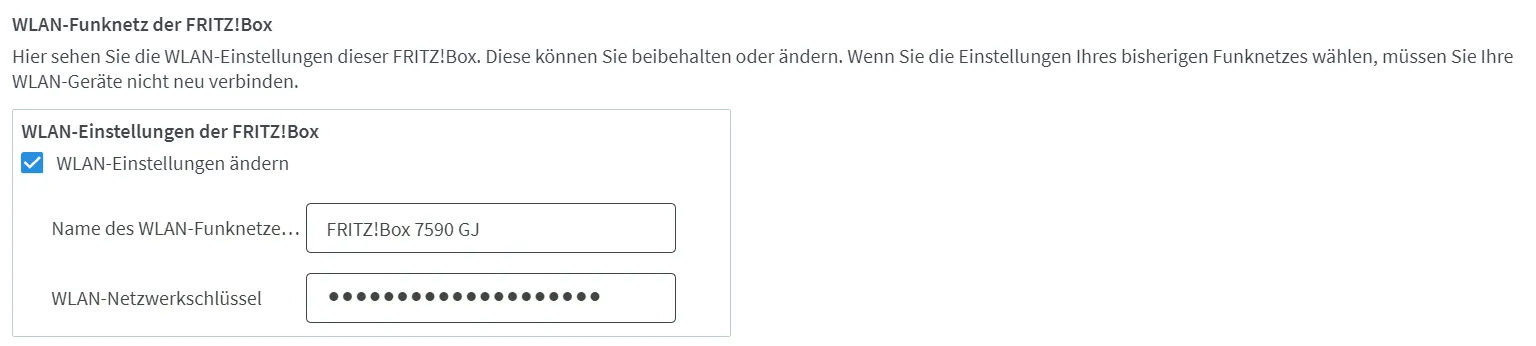
After the welcome wizard has finished, you should change the WLAN settings if necessary.
We are initially interested in the information under the online monitor.
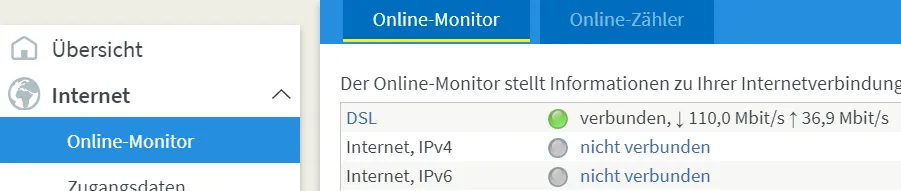
If the Internet is not connected, you may have to wait a little longer or restart the router. Even if you are connected, the information is initially relatively uninteresting.
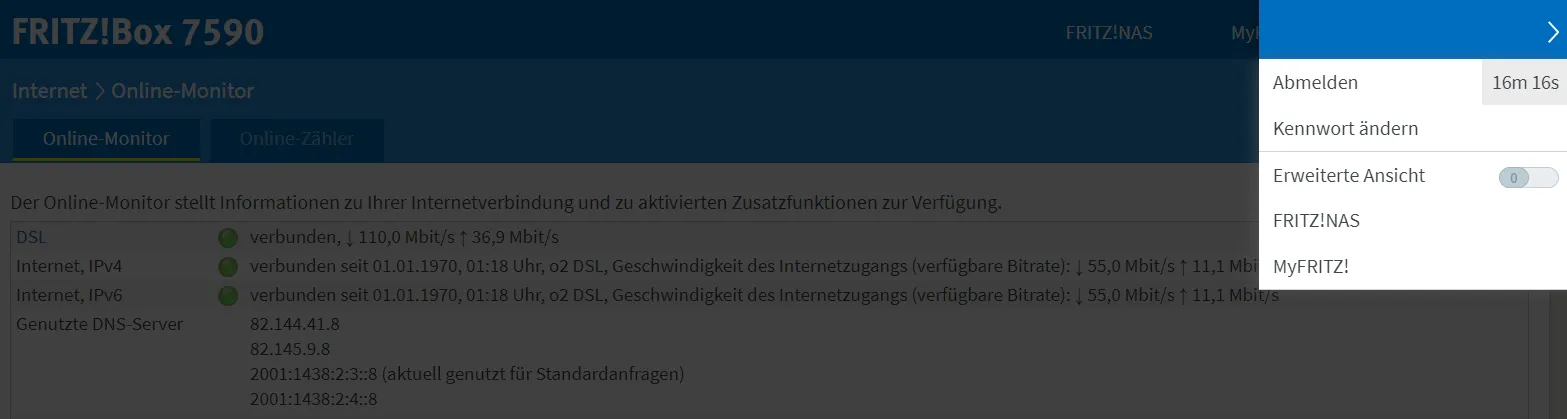
I do not understand why I have supposedly connected since the start of Unix in 1970 (I have not changed this information). For more information, the extended view must be activated.
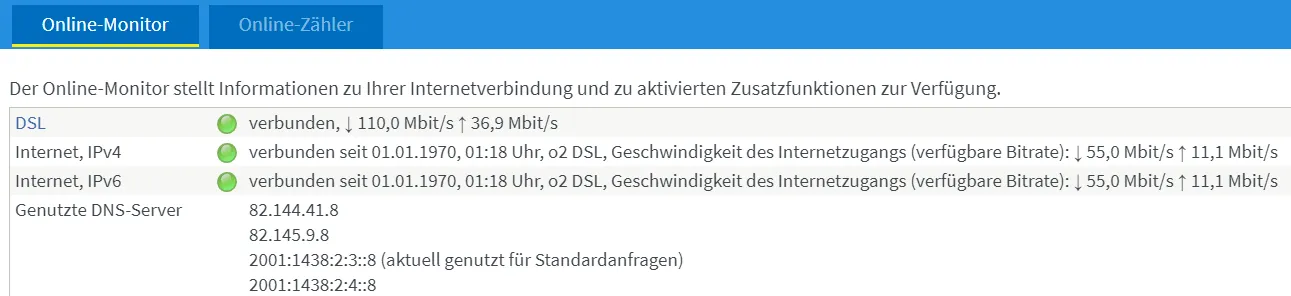
Now you could see something like this:

In this case, everything is fine. But it could also display something like this:
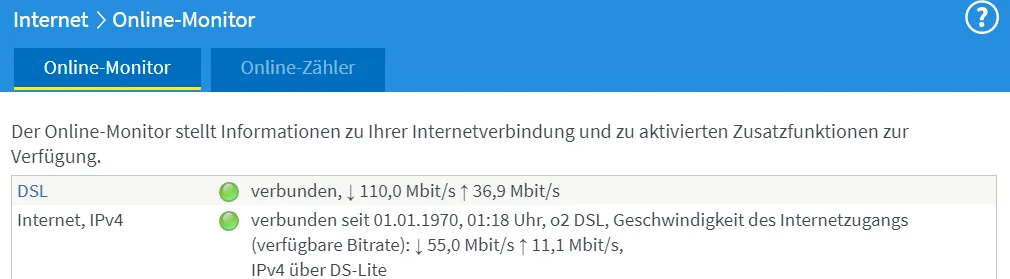
In this case, unfortunately, you have a DS-Lite connection. Simply put, you share a public IPv4 with other people. The consequence is that sharing is more complicated. You have the option of not making your server accessible from outside but only using it in your own network. You can also politely ask your Internet provider if they would be kind enough to change your connection. Otherwise, you can also make the devices accessible via IPv6 or make services accessible via a VPS with a fixed IP address.
I will not explore these options here but assume there is no DS-Lite connection. With a DS-Lite connection, the setup does not work for DynDNS and VPN.
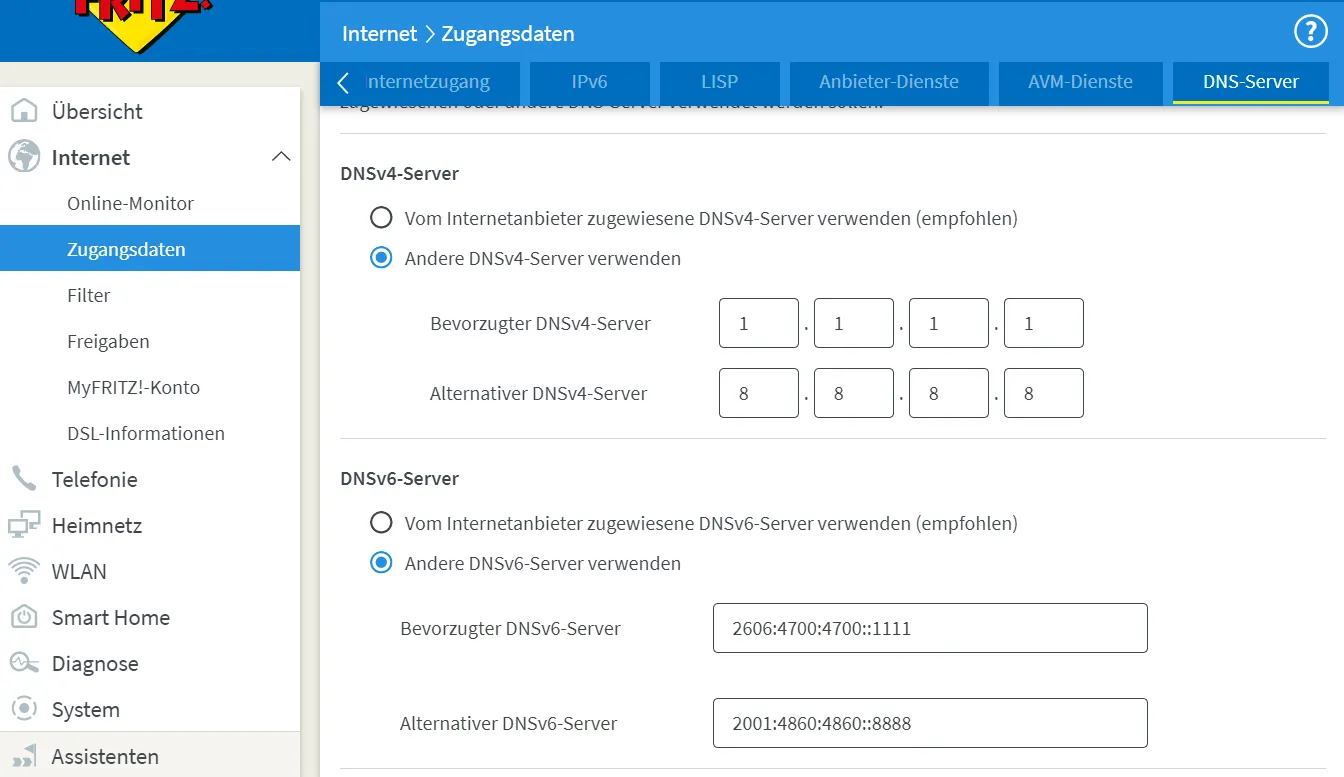
Change DNS server
First, changing the default DNS servers makes sense if you want to. I initially change mine to the DNS servers from Cloudflare (1.1.1.1) and Google as an alternative (8.8.8.8). There are several other DNS servers you could use. Some also have a built-in blocker for known malware or “adult content”. Here is a short list:
| Provider | Primary DNSv4 server | Secondary DNSv4 server | Primary DNSv6 server | Secondary DNS v6 server |
|---|---|---|---|---|
| Cloudflare | 1.1.1.1 | 1.0.0.1 | 2606:4700:4700::1111 | 2606:4700:4700::1001 |
| Cloudflare (Block malware) | 1.1.1.2 | 1.0.0.2 | 2606:4700:4700::1112 | 2606:4700:4700::1002 |
| Cloudflare (Block malware + aduld content) | 1.1.1.3 | 1.0.0.3 | 2606:4700:4700::1113 | 2606:4700:4700::1113 |
| ControID | 76.76.2.0 | |||
| ControID (Block malware) | 76.76.2.1 | |||
| ControID (Block malware + ads) | 76.76.2.2 | |||
| ControID (Block malware + ads+ social) | 76.76.2.3 | |||
| 8.8.8.8 | 8.8.4.4 | 2001:4860:4860::8888 | 2001:4860:4860::8844 | |
| OpenDNS | 208.67.222.222 | 208.67.220.220 | 2620:119:35::35 | 2620:119:53::53 |
| OpenDNS (Block adult content) | 208.67.222.123 | 208.67.220.123 | 2620:119:35::123 | 2620:119:53::123 |
| Quad9 | 9.9.9.9 | 149.112.112.112 | 2620:fe::fe2620:fe::9 |
It is also possible to set up your own DNS server. I have described this for example here for an Ubuntu server and here for a Raspberry Pi.
Network settings
Further useful changes can be made under Network and network settings.
If no WAN port is required, this can be operated as a regular LAN port.
If required, the time server can be changed (List). A test of a time server can be carried out under Windows using PowerShell. To do this, open PowerShell and enter the following:
w32tm /stripchart /computer:0.europe.pool.ntp.orgThe test can be ended with Ctrl + C Further down under IP addresses, we click on “IPv4 settings”. We are particularly interested in three numbers here.
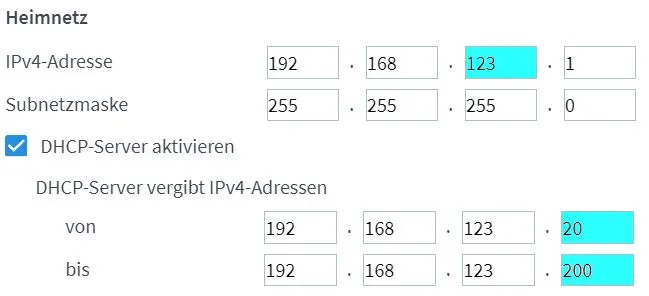
We first select which number should appear in our internal IP address. With the setting shown, my devices would be accessible internally at 192.168.123.xxx. The 20 and 200 indicate the range in which the IP addresses are automatically assigned.
Assign fixed IP addresses
Assigning a fixed IP address to some devices (such as the servers) is helpful. I first connect a Switch (Amazon Affiliate Link) and then look under Network to see which IP address has been assigned.
![]()
After I press the pen, I rename the device and assign it a fixed IP address (in this case 192.168.123.2)

These settings only take effect once I restart the switch.
DynDNS - Own Domain
In contrast to the internal IP address, my public IP address changes daily. Looking at and remembering my new IP address daily to reach the home server takes time and effort. That’s why we need a dynamic DNS. First, I will show you how this would be possible with your domain, followed by a method using a free DynDNS address.
A recommended provider for domains is Netcup. There, a .de domain permanently costs €5 per year (in contrast to some providers where it starts cheaper but becomes significantly more expensive from the second year onwards).
Netcup offers an API that can be used to manage your own domains. However, the Fritz!Box does not support PHP or Python, so a web space or VPS must be available for the dynamic domain project. You can follow my other instructions with a VPS, but this is not a computationally intensive process. Hence, a web space is perfectly adequate.
For example, the Webspace 2000 costs €3/month and includes three .de domains and 75 GB each for emails and websites. Additionally, this is probably the easiest way to host a website (with WordPress if desired). New customers receive the web space for €2.79 / month with the vouchers listed here. I receive a commission for referred Netcup customers.
Once an account has been created, the API must be activated in the master data. The API key and password should be stored securely.
API-Key in CCP](@/assets/images/blog/setup-fritzbox/images/ccp.png)
I would now like to use the domain home.de (this is not my domain, but it only serves as an example) as the address for my home. To do this, I call up the DNS settings for the domain and first change the TTL to 300. This makes a change to an IP address take effect more quickly.
TTL in the DNS settings](@/assets/images/blog/setup-fritzbox/images/ttl.png)
I copy the default IP of my web hosting and add two new ones without changing the previous entries.
I leave my standard entries unchanged](@/assets/images/blog/setup-fritzbox/images/standard-dns.png)

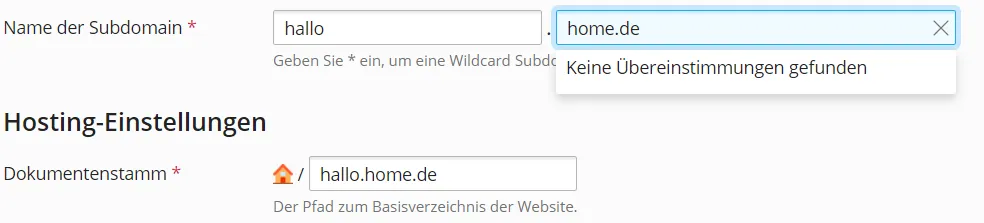
I used this to create a subdomain that I can use to update my other domain settings. In my case, the domain is called “hello.home.com”.
I save the settings and go to the Plesk overview via the “Products” menu item.
Plesk](@/assets/images/blog/setup-fritzbox/images/plesk.png)
Once there, I select Add subdomain.

I create a new subdomain.
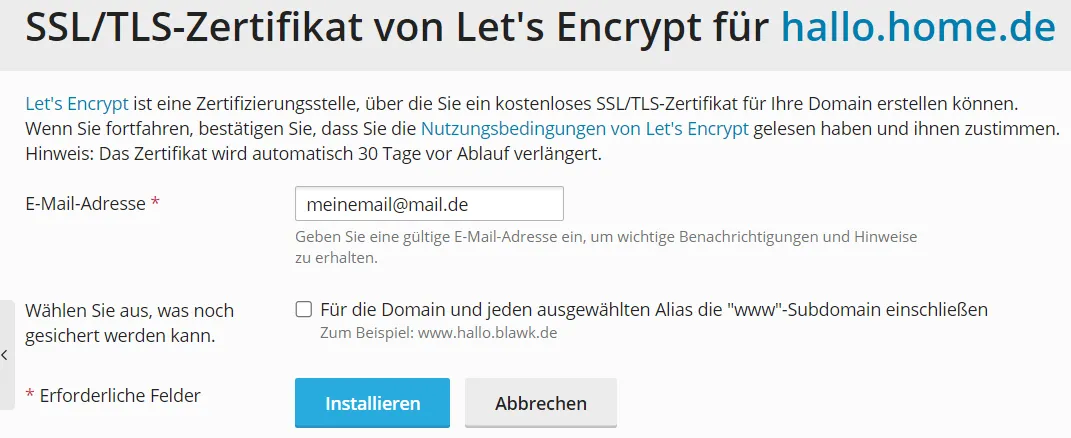
I then select the subdomain’s Let’s Encrypt menu item.
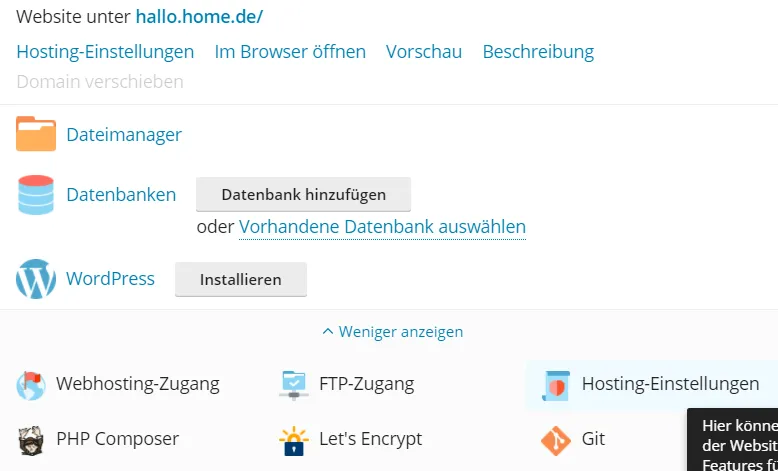
This gives me the option to create a free certificate.
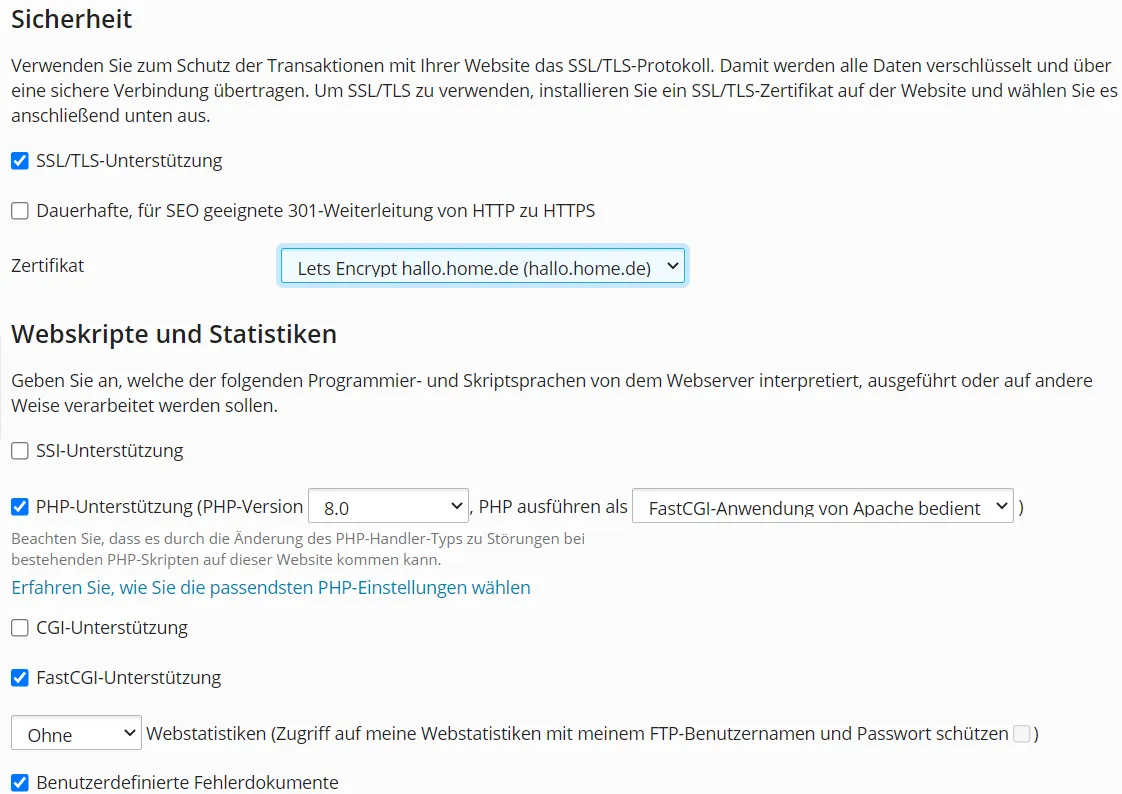
I then select the hosting settings in the menu and change a few security settings.
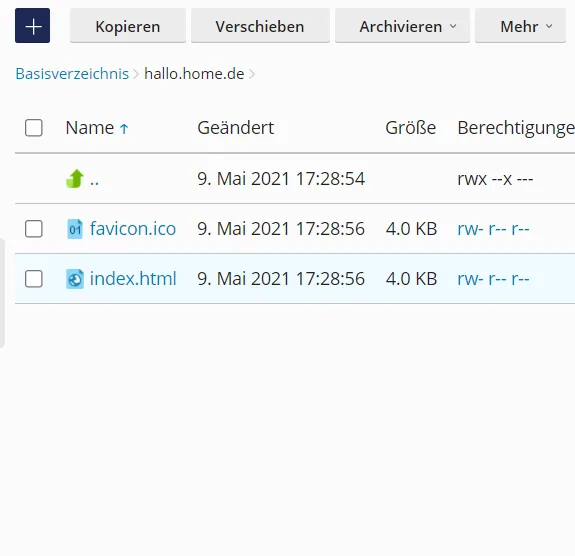
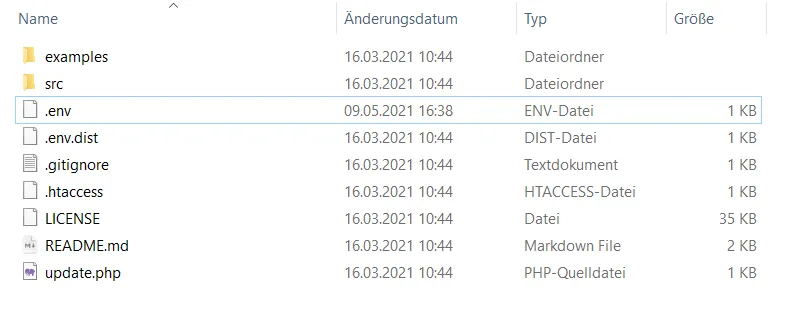
The folder with the subdomain should be relatively empty in the file manager.
We fill this with a script from Fernwerker (Felix Kretschmer). First download the code and unpack it.
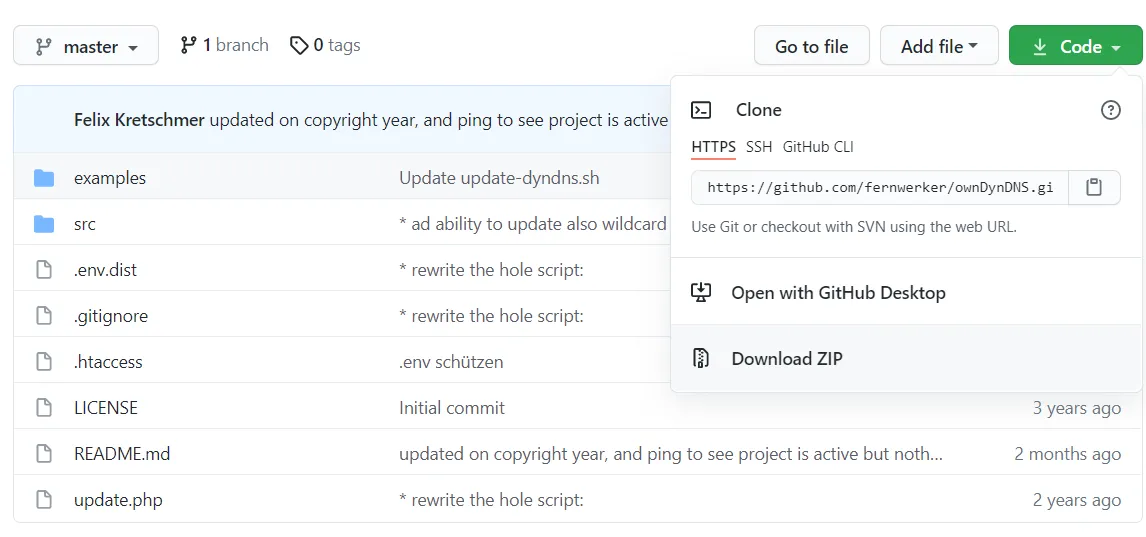
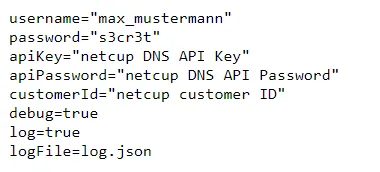
Then create a copy of .env.dist and save it as .env. This .env file must be filled with real data. The username and password are not the username and password of your Netcup account but are freely chosen data.
Then drag the entire content into the webspace.
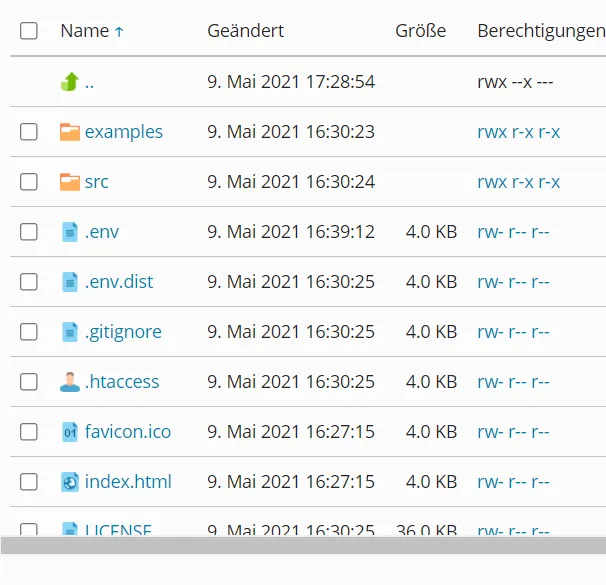
Now we try to call the domain hello.home/.env.dist in the browser. This works.
However, if we call hello.home/.env, access should be denied.
Suppose the actual data is displayed here instead of the error 403. In that case, the .env file must immediately be deleted from the web space. You can then check in the .htaccess whether everything has been set correctly](@/assets/images/blog/setup-fritzbox/images/ownDynDNS-htaccess.png).
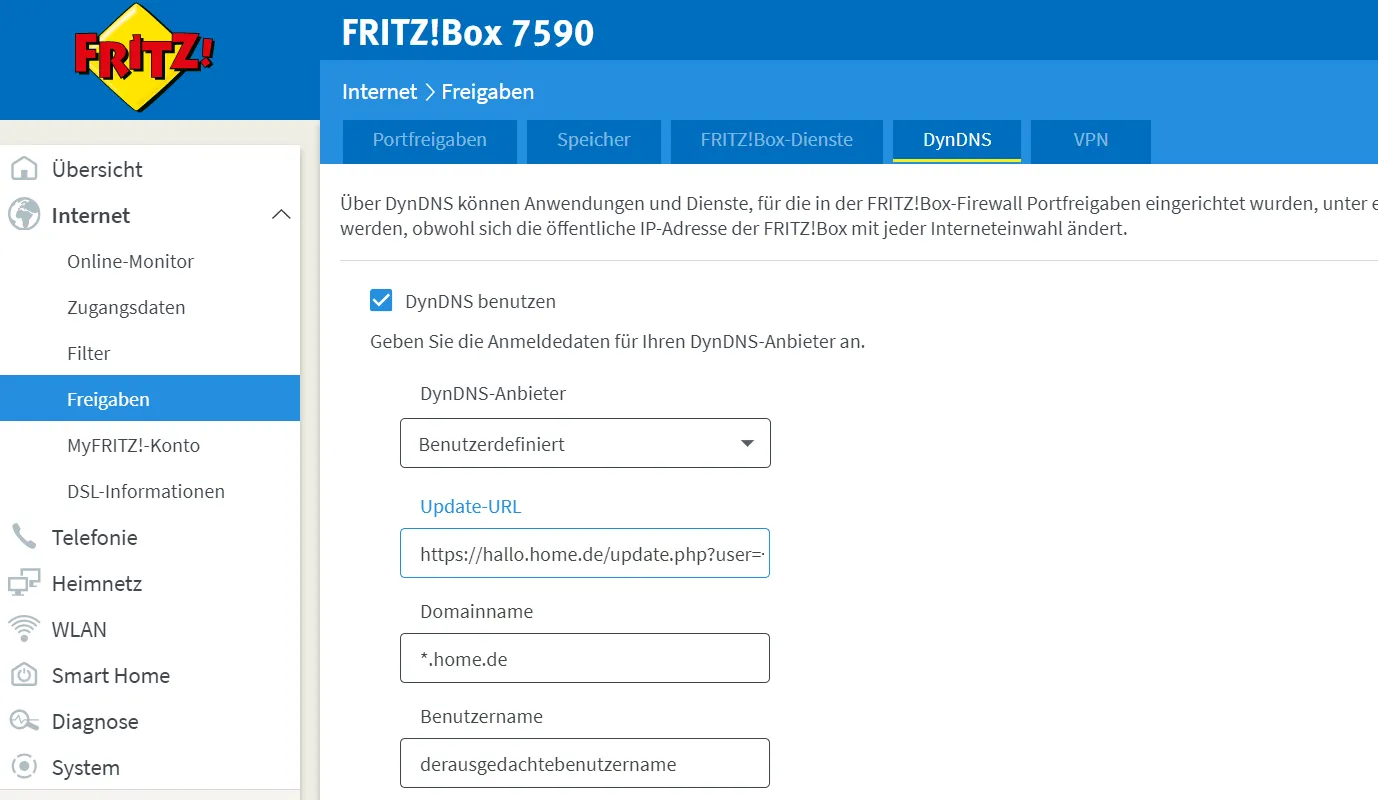
Back in the Fritz!Box under the shares is the DynDNS tab. Set the provider there to User-defined. The username and password are the values written to the .env file. I set the domain name to *.home.de, meaning every possible subdomain (e.g. deployn.home.de) should receive my public IP address. Exceptions are the root domain (i.e. home.de) and the hello subdomain (because we have defined them specifically in the Netcup DNS settings).
The update URL is as follows (the domain should be adjusted, the rest not).
https://hallo.home.de/update.php?user=<username>&password=<pass>&ipv4=<ipaddr>&ipv6=<ip6addr>&domain=<domain>
As soon as you press “Apply”, the Fritz!Box tries to access the domain and changes the DNS settings. The online monitor should now show that DynDNS has been successfully activated.
![]()
We can also try to ping the domain by calling the terminal.
ping -4 hello.home.com
# Here the IP address of the Netcup webhosting should be displayed as output.
ping -4 home.de
# Here also
ping -4 a.home.de
# The same IP address should be displayed here that can be seen in the Fritz!Box online monitor
ping -4 aubomain.home.de
# It should also be here
This gives us many subdomains that point to our network that we can use for other services later.
Alternatively, there are also DynDNS providers where you can get a free subdomain. One such provider is DuckDNS.
This article describes how to set this up in more detail.
Remote access
Fritz!Box VPN
If a public IPv4 address is available (see above), remote access can be set up. First I activate a MyFRITZ! account (also useful to receive notifications).
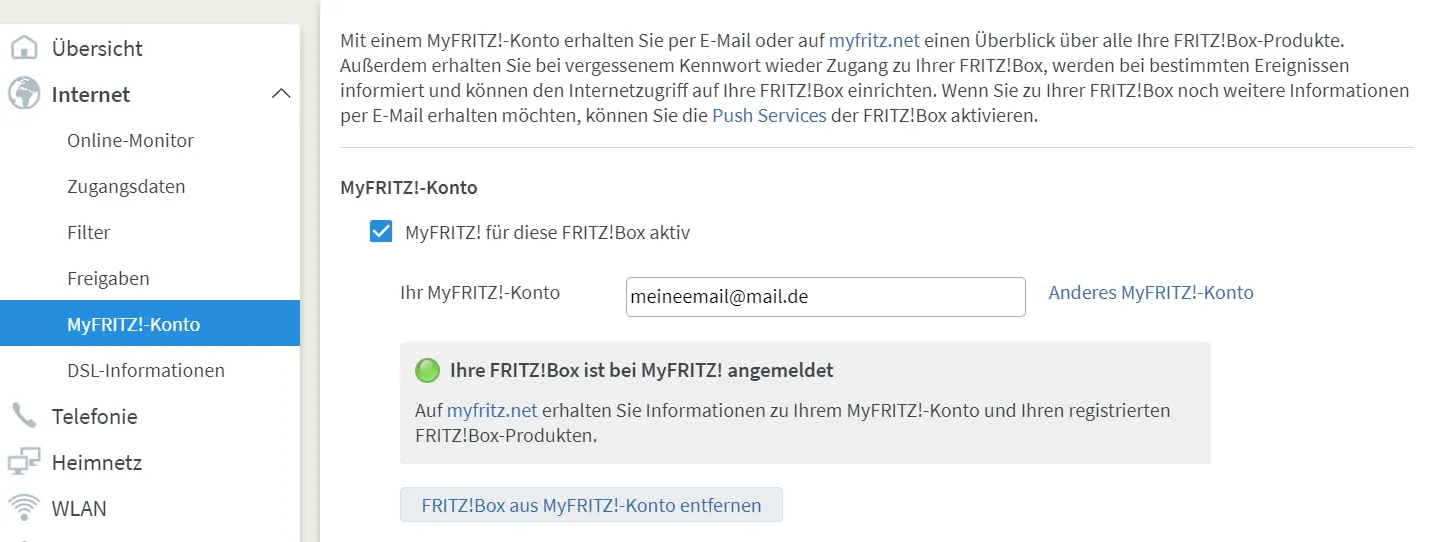
Then I create a new Fritz!Box user.
In addition to a user name and password, you can also set some authorizations.
MyFRITZ! authorizations](@/assets/images/blog/setup-fritzbox/images/myfritz-access.png)
A window will then appear with the configuration for the VPN, making it possible to log into the network when you are not at home. It can also be called up again later under Shares/VPN.
VPN connection](@/assets/images/blog/setup-fritzbox/images/myfritz-vpn.png)
This way you can set up a virtual private network with little effort.
In a forum a good year ago, someone compared the speed between a WireGuard host and the Fritzbox VPN. The conclusion was that it would make a difference. However, the Fritz!Box is much easier to set up.
Wireguard
Update from February 2022:
Some Fritzboxes have received an experimental software update with an implemented WireGuard protocol. To do this, you must activate the experimental updates under System > Update and install it. It is also possible to switch back at any time afterwards. I am currently using OS 07.39-x BETA and it has been running stably for over a month.
Connection with smartphone
The first thing I want to do is establish a Wireguard connection with my (Android) smartphone. To do this, I press the “Add VPN connection” button in the Internet > Shares menu item.
The selection options for Wireguard can now be found further down. I select “Set up a Wireguard connection for a laptop/PC”.
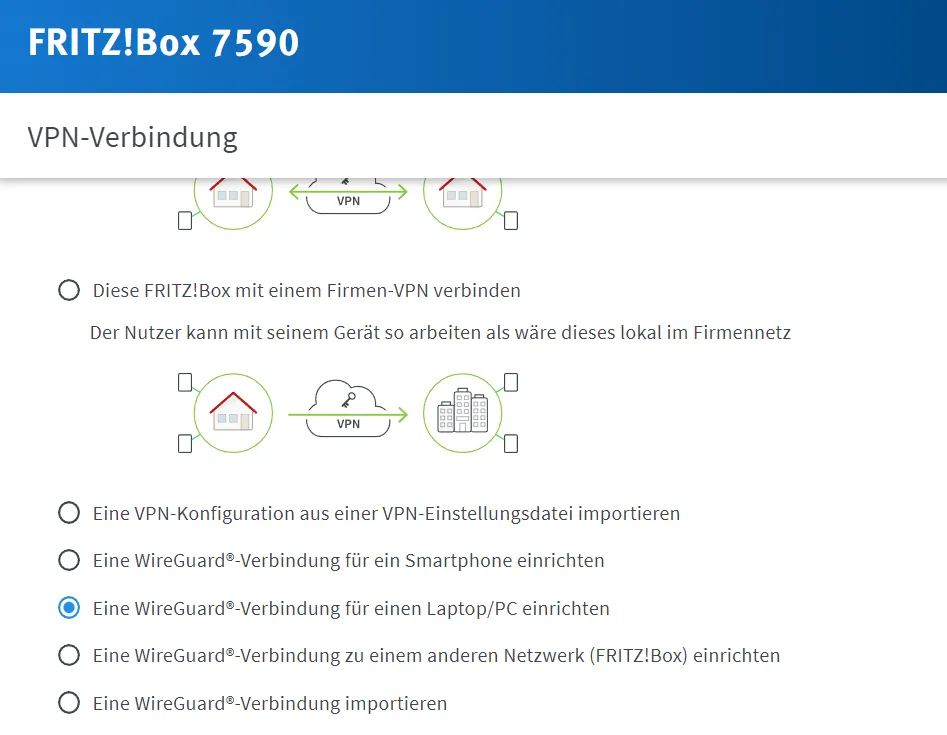
Why do I choose this option instead of the one for smartphone? Because only a QR code is displayed under Smartphone. This does not allow you to change the settings. Some need to be applied correctly. The domain needs to be corrected. It may be an error in the Android app or the Fritz!Box.
Next, I select any name for the connection and click on “Create connection configuration”. Settings are now shown that need to be transferred to Wireguard. They are only displayed now, not later. You should therefore save them somewhere or set them up immediately in the app.
Example:
[Interface]
PrivateKey = 3WotkR+Ers35izhIQmhfRwfvdrc6y0syIAKr3M=
Address = 192.168.123.201/32
DNS = 192.168.123.1
DNS = fritz.box

[Peer]
PublicKey = E9Ew3O0s/9NBP88p3I1kHWzwarerZiT3+QiZoKO+3U=
PresharedKey = deplWDJFGbAZ/nvUSd7LWq02I8nnzGHWirJJM2GO/ME=
AllowedIPs = 192.168.123.0/24,0.0.0.0/0
Endpoint = m3x5ykereritwwye90.myfritz.net:51921
PersistentKeepalive = 25
Accordingly, the Wireguard app must be downloaded. For iOS it can be found here.
I create a new tunnel in the app via “Create new”. If you don’t want to manually enter the keys, you should transfer them to your phone. It’s best not to send them by email. Anyone who has this data has access to the network.
Enter a name of your choice in “Name”. The key under Interface.PrivateKey from the Fritz!box must be entered in “Private key”. The IP address from Interface.Address is entered under Addresses. Under “Nameserver”, either the IP address of the Fritz!Box or another name server in the network is entered. In my case it is a different server, as described in other instructions.
Now a counterpart must be added. Enter the key from Peer.Publickey under “Public key”. Under “Pre-shared key”, enter the code from Peer.PresharedKey. Enter 25 seconds under “Permanent preservation”. Under “Endpoint”, enter a domain that was set up in the previous point, including port 51921, e.g. “vpm.home.de:51921”. Under “Allowed IPs”, copy the entry from Peer.AllowedIPs.
As soon as the connection is activated, the amount of data received and the amount sent should be displayed under Transfer. In this case, it works as expected. Otherwise, the details should be rechecked.
Screenshot from smartphone](@/assets/images/blog/setup-fritzbox/images/screenshot_android.jpg)
Connection with PC
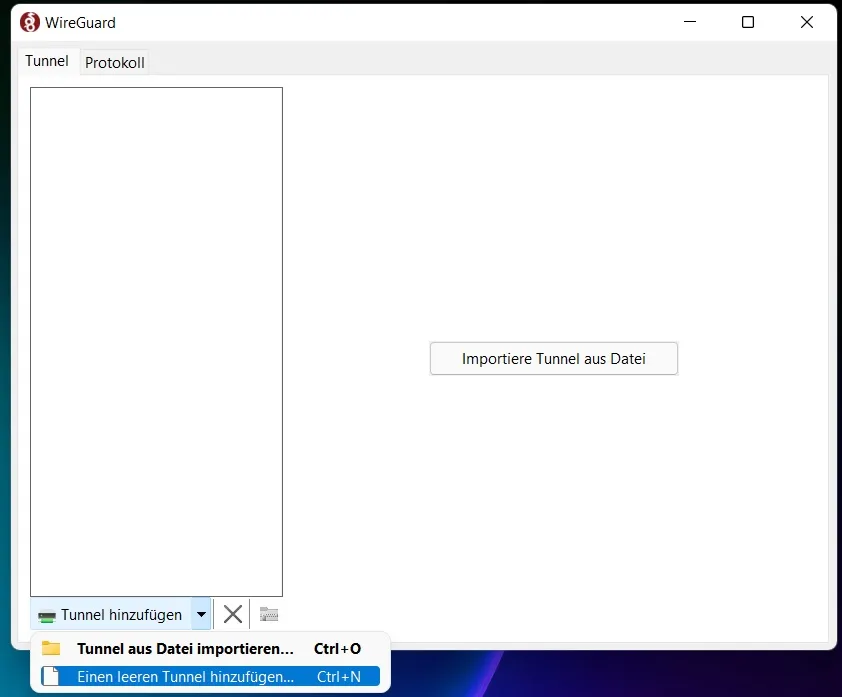
The process is very similar for a computer. Wireguard must be downloaded and installed.
An empty tunnel can be created under “Add tunnel”.
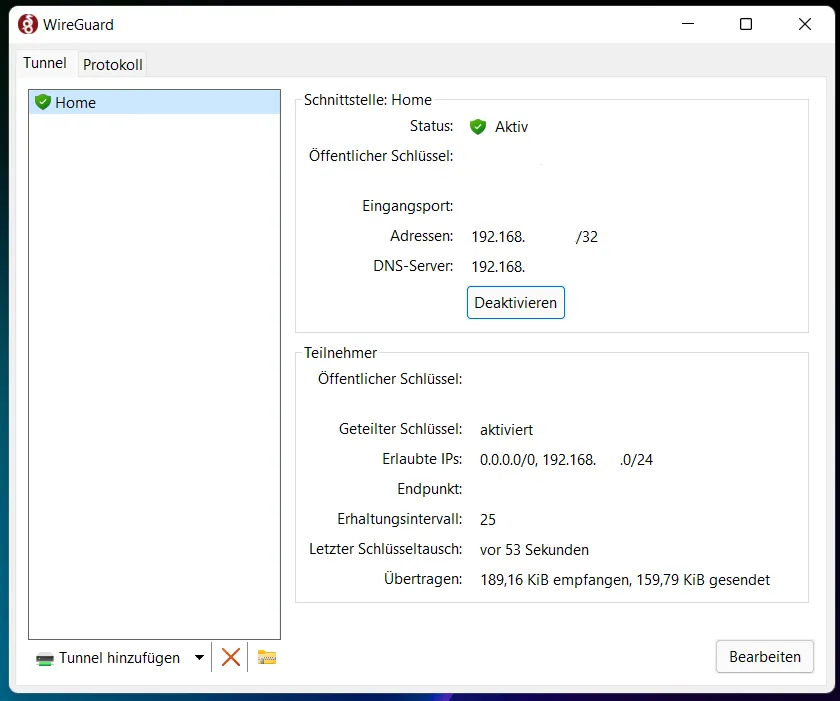
I then create new data in the Fritz!Box for another VPN connection and add it to the window instead of the standard entry.
Then, I change the entry for DNS (if I use a different device for DNS) and the endpoint (if I have my own domain connected to my network).
After activation, I can also see that I am receiving and sending data.
Network storage
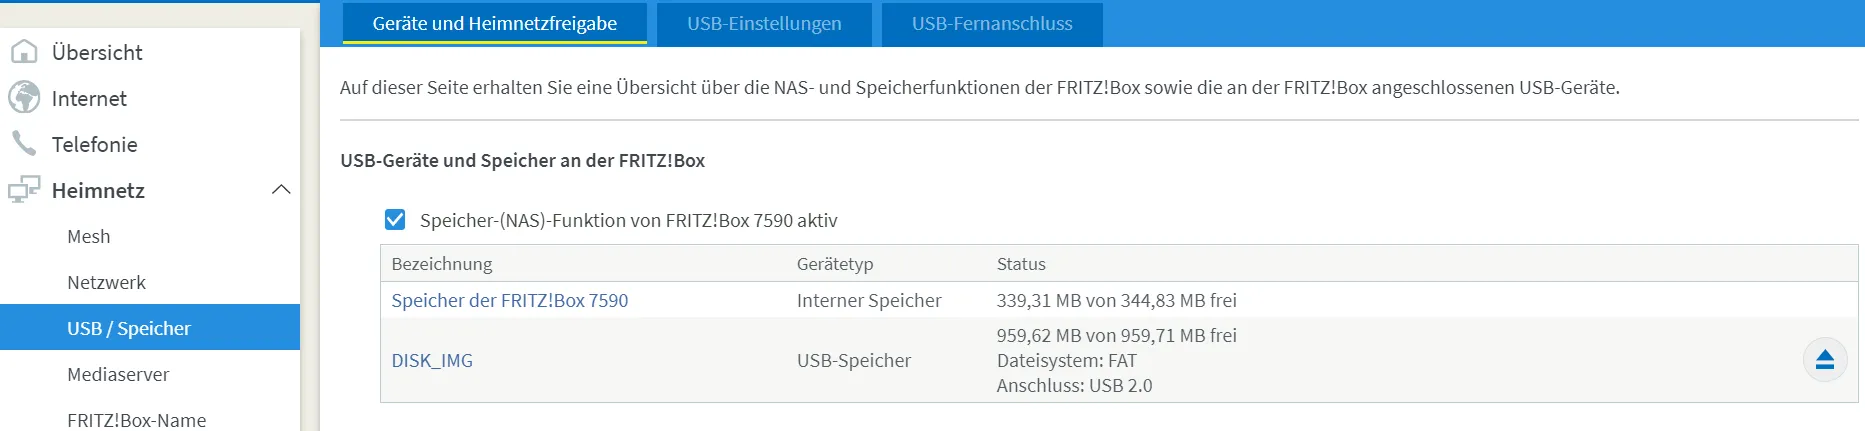
The last function I would like to write about here is network storage. Although I use other devices for this, this function is helpful if you only want to share a few files on the network or have a network scanner that requires a local storage location.
To do this, simply insert a USB stick into the Fritz!Box, which must not be write-protected. Under Home network and USB / Storage, I can see whether the USB stick has been recognized.
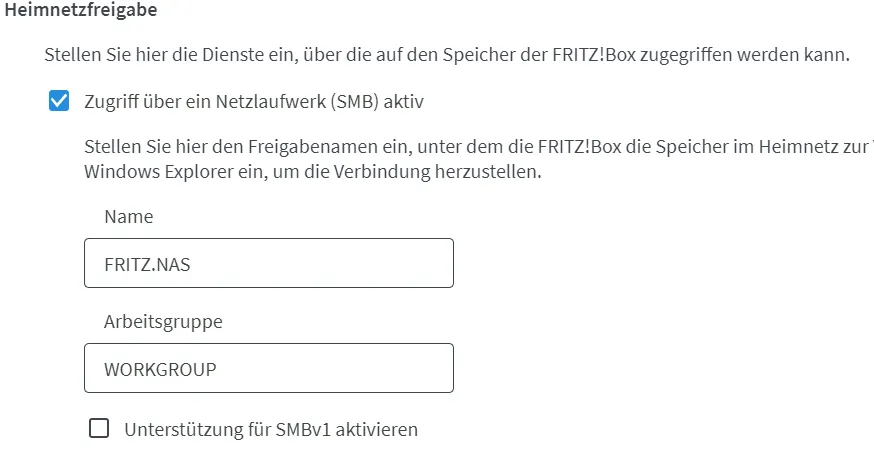
Now you can activate network sharing.
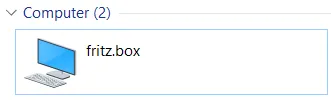
In Windows, I can see in Explorer that the Fritz!Box is on the network as a computer.
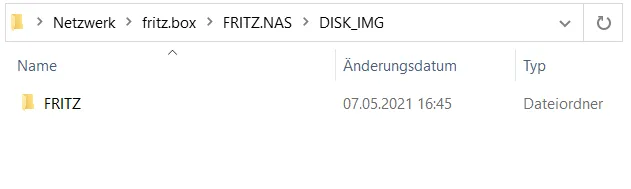
As soon as I select it and log in, I can access the storage.
On Android I use the app CX File Explorer.
I add a new SMB drive under the Network tab.
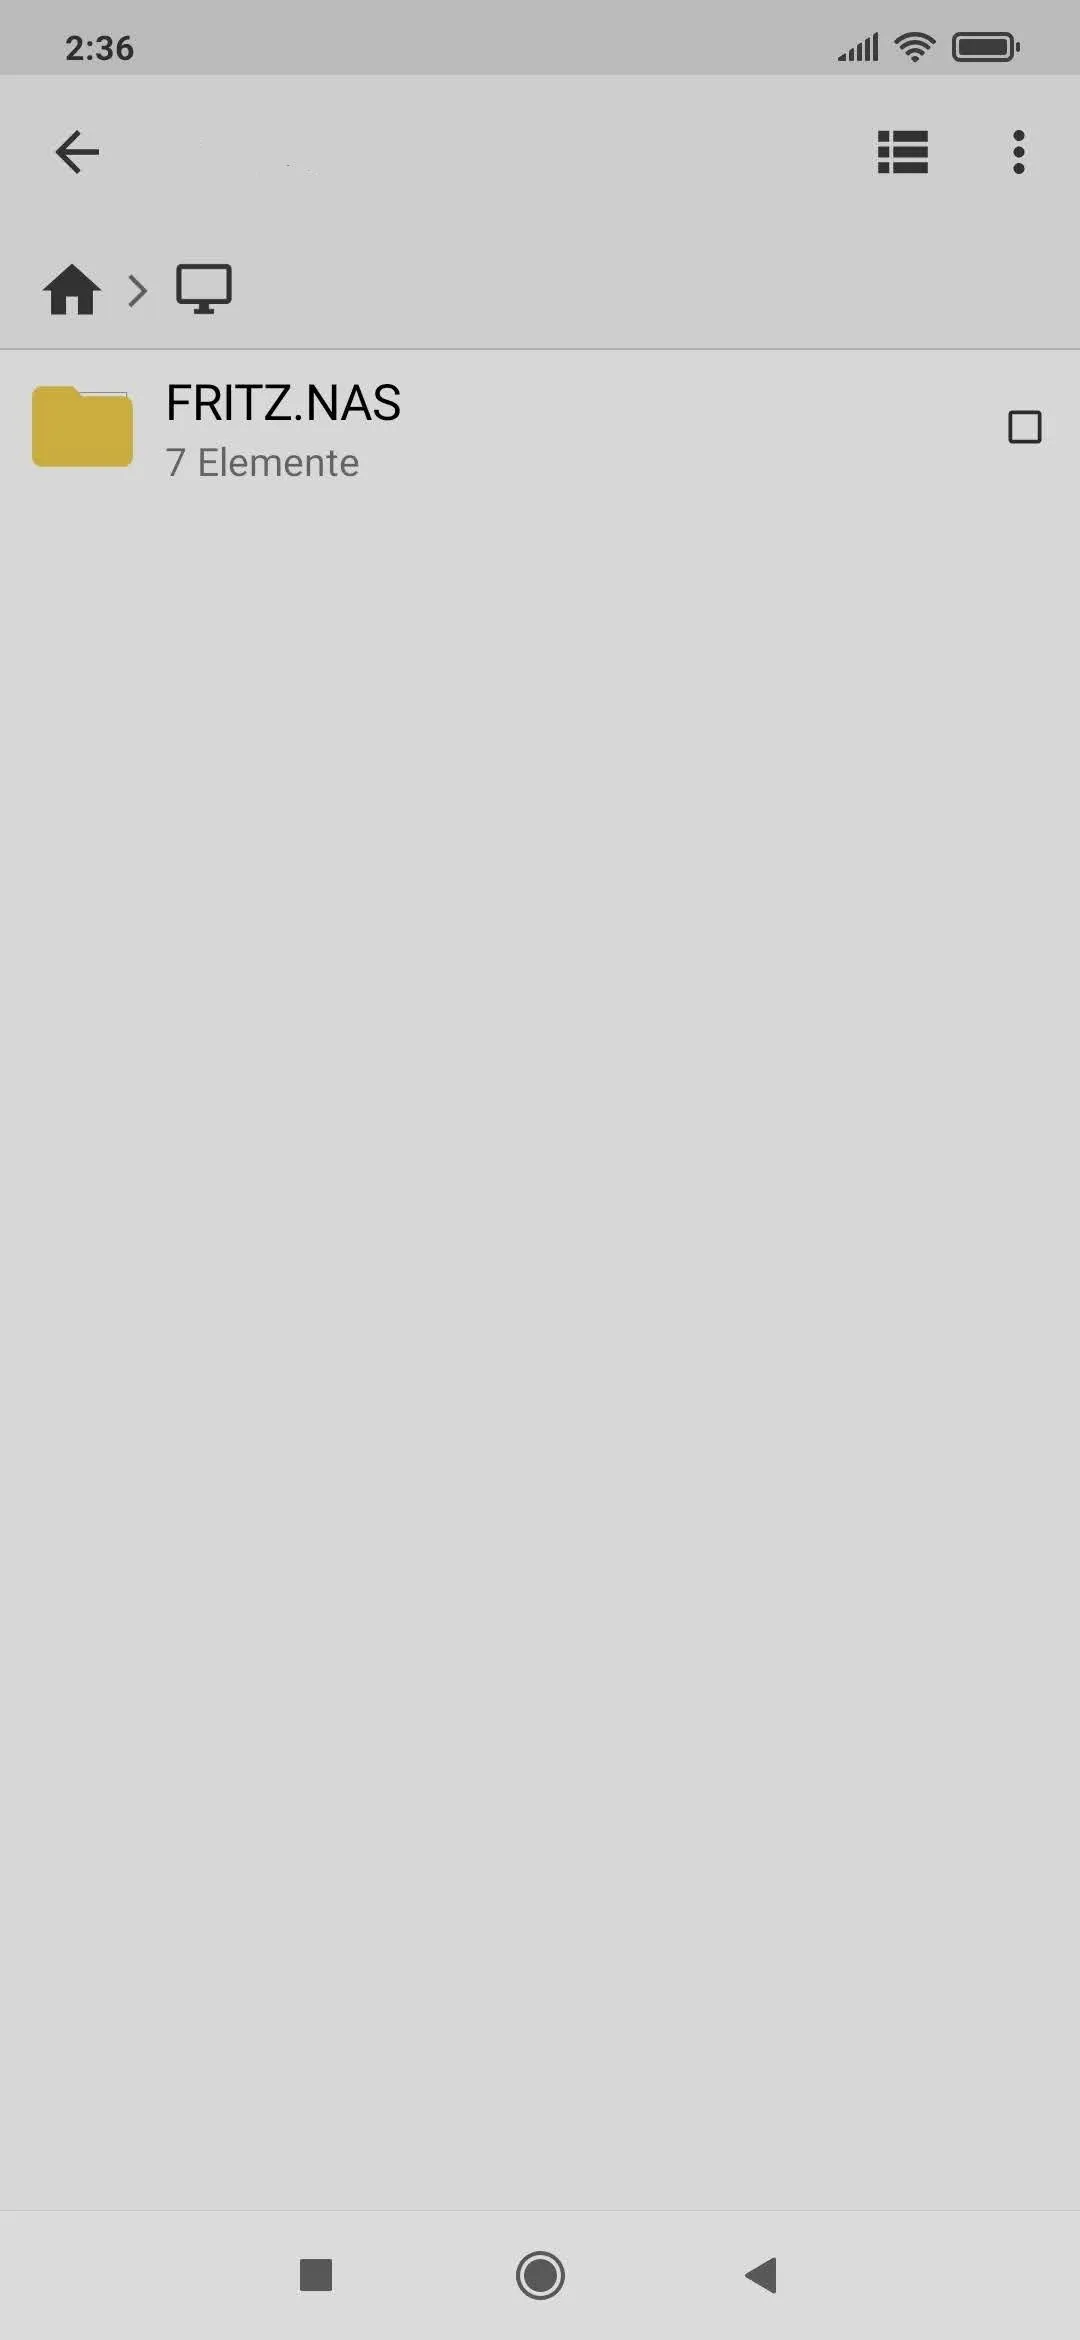
Then I enter the IP address of the Fritz!Box, as well as my user name and the password I set up earlier.
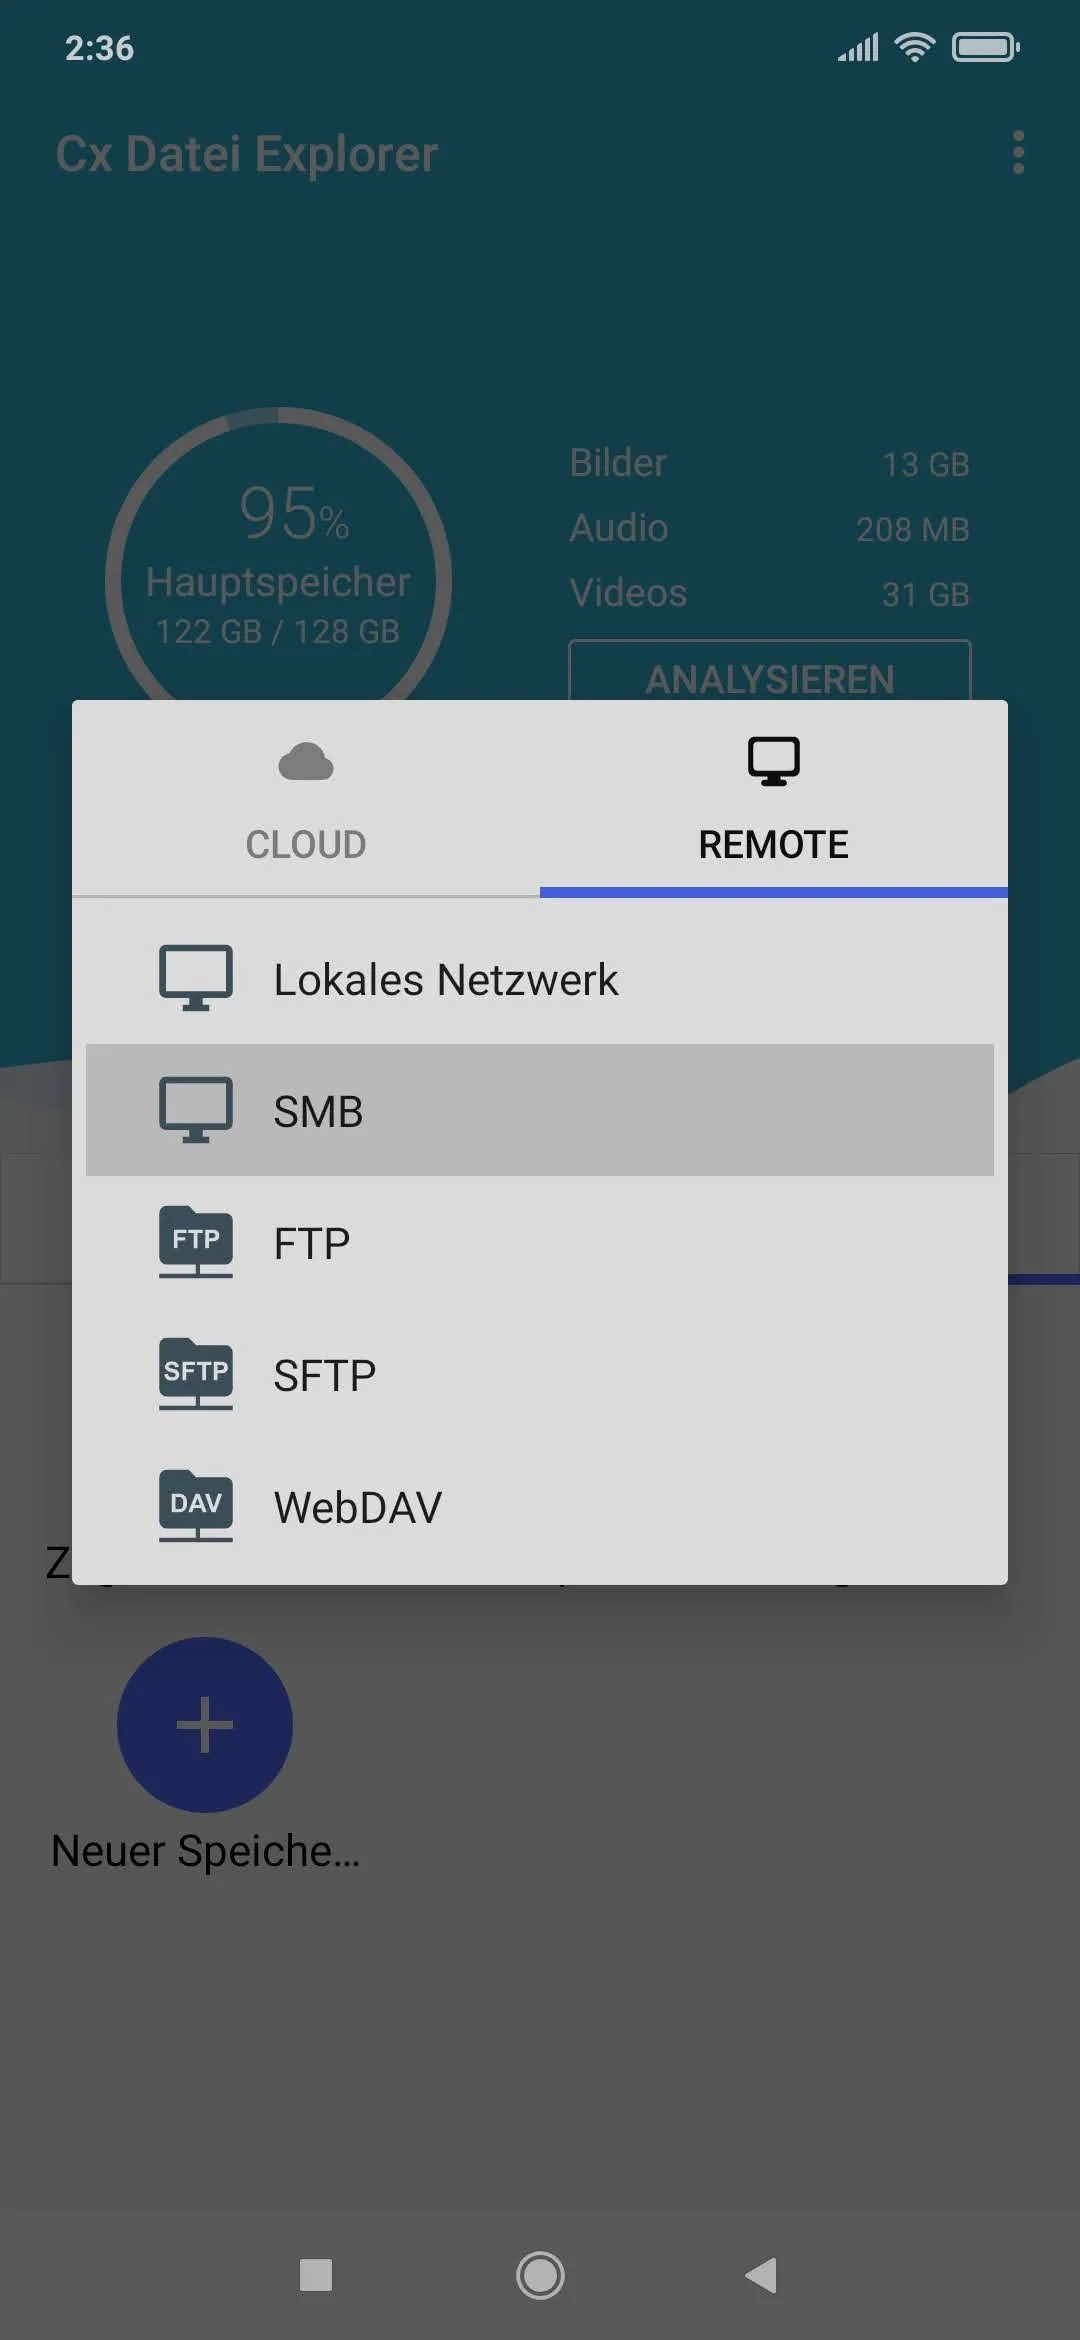
It is now possible to access the network storage.
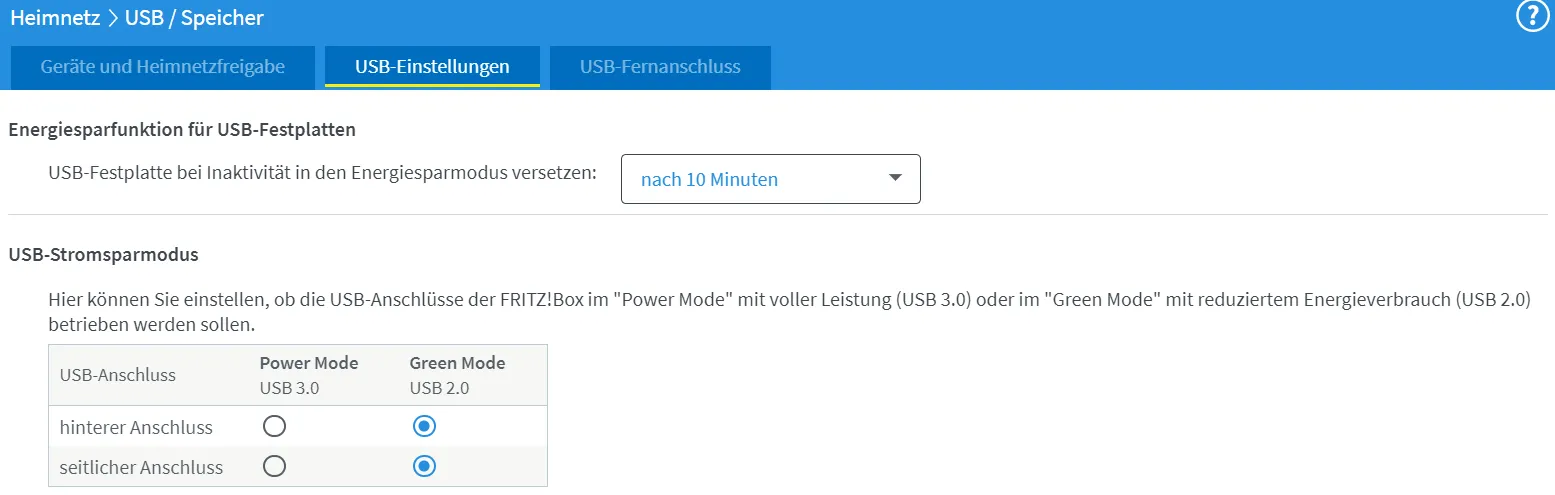
You can also speed up the USB ports in the USB settings a little. They are set to 2.0 instead of 3.0 by default.
The Fritz!Box is now set up.
Related Articles
Synology NAS Setup: Your First Homeserver Step-by-Step
Set up your Synology DiskStation from scratch: VPN, DDNS, Firewall, Docker, and Nginx Proxy Manager. The complete NAS homeserver setup guide for beginners.
Setting up Ubuntu Homeserver with Docker (Intel-Nuc)
Set up your Ubuntu homeserver step-by-step: from base configuration to your first Docker containers. The complete guide for beginners. Start building today.
How to Configure DuckDNS on Your Fritzbox for Remote Access
Set up DuckDNS on your Fritzbox and access your home network from anywhere via DynDNS. Step-by-step guide with all the settings you need to configure.
Asustor NAS Homeserver Setup with Docker: VPN, Gitea & Calibre
Set up your Asustor NAS as a homeserver step by step: VPN, firewall, reverse proxy, Gitea and Calibre with Docker. The complete NAS homeserver guide.