Raspberry Pi Home Server: Docker, AdGuard & Traefik
Set up a Raspberry Pi as an energy-efficient home server with Docker, AdGuard Home, Traefik and UFW firewall. Step-by-step guide with power cost calculator.

Table of Contents
- Prerequisites and Hardware Recommendations
- OS Installation: Headless Setup with Raspberry Pi OS
- Connecting the Raspberry Pi to Your Network
- Configuring Raspberry Pi OS
- Installing Docker and Docker Compose
- Setting Up AdGuard Home as a Network-Wide Ad Blocker
- Setting Up Traefik as a Reverse Proxy
- Setting Up Heimdall as a Dashboard
- Configuring the Firewall with UFW
- Automatic Updates and Maintenance
- Public Access to Your Services (Optional)
- Conclusion
A Raspberry Pi makes an excellent energy-efficient home server. In this guide, I’ll walk you through setting up a Raspberry Pi with Docker, AdGuard Home (ad blocker), Traefik (reverse proxy), Heimdall (dashboard), and a UFW firewall - step by step, from OS installation to production-ready operation.
Prefer watching in German? A guide is also available as a YouTube video.
Key Takeaways
- A Raspberry Pi 4 or 5 consumes only 3-10 watts and is ideal as a 24/7 home server
- Docker with AdGuard Home blocks ads network-wide at the DNS level
- Traefik v3 as reverse proxy manages domains and SSL certificates automatically
- UFW firewall protects the server but needs special configuration for Docker
- Total cost: approximately 10-17 EUR per year in electricity for continuous operation
Prerequisites and Hardware Recommendations
For a reliable home server, you don’t necessarily need the latest Raspberry Pi. At minimum, I recommend a Raspberry Pi 4 with at least 4GB RAM - more memory pays off when running multiple services in parallel. This guide also works on other devices running Debian-based operating systems, such as mini PCs.
Stay away from SD cards as system storage! SD cards are unsuitable for continuous server operation due to their limited write cycles. They tend to fail unexpectedly under intensive use. Instead, I strongly recommend an external SSD connected via USB 3.0. The advantages: higher speed, longer lifespan, and lower risk of data loss.

A major advantage of the Raspberry Pi remains its low power consumption. A Raspberry Pi 5 requires about 4-5 watts at idle and up to 10 watts under full load. Compared to a full-sized server or an old laptop, that’s still very economical. At an electricity price of 40 cents/kWh, each watt costs approximately 3.50 EUR per year. Running a device 24 hours a day, 365 days a year, electricity costs increase by approximately 17 EUR per year.
Calculate your approximate annual electricity costs here:
Ergebnis
OS Installation: Headless Setup with Raspberry Pi OS
The Raspberry Pi Imager has become much more user-friendly and allows many pre-configurations directly when creating the boot media.
- Download and install the current Raspberry Pi Imager from the official website.
- Select your Raspberry Pi model.
- Select “Raspberry Pi OS Lite (64-bit)” as the operating system (under “Raspberry Pi OS (other)”). The 64-bit version is now the standard recommendation. The Lite version runs without a desktop and saves valuable system resources.
- Select your connected external SSD as the storage medium.
- Click “Next” and then “Edit Settings”. Here you make important pre-configurations:
- Hostname: Give your Pi a name (e.g.,
raspberrypi.local). - Username and Password: Set a secure username and strong password. Avoid the old default “pi”.
- WiFi: Enter your WiFi credentials if you’re not using a LAN cable. LAN is recommended for server operation.
- Locale settings: Set language and keyboard layout (e.g.,
us,Europe/Berlin). - Services: Enable SSH! Select “Use password authentication.” Without SSH, you’ll need a monitor and keyboard.
- Hostname: Give your Pi a name (e.g.,
- Save the settings and click “Yes” or “Write” to start the process.
After completion, connect the SSD to your Raspberry Pi (use a blue USB 3.0 port!) and power it on.
Connecting the Raspberry Pi to Your Network
After the first boot, connect to your Pi via SSH. You can find the IP address in your router’s admin interface. On Windows, macOS, or Linux, open a terminal:
ssh your_username@ip-address-of-pi
# Example: ssh pi-admin@192.168.178.50
Confirm the fingerprint with yes on first connection.
Fixed IP Assignment
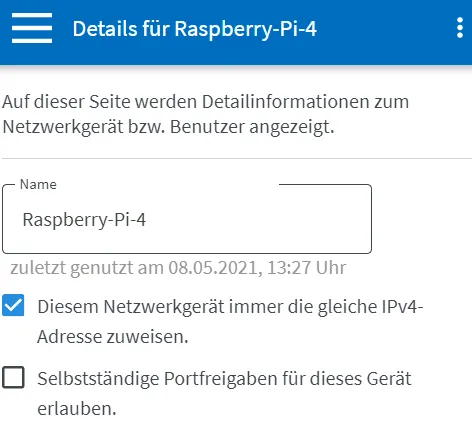
I recommend assigning a permanent IP address to your Raspberry Pi in your router settings. On most routers, this is straightforward. In a Fritz!Box, go to Home Network > Network > Network Settings and click on the device details.
Problem: Vodafone Station
After reinstalling, my Raspberry Pi didn’t get an IP address from the Vodafone Station. I suspect it’s related to the Vodafone Station’s DHCP server. If you encounter the same issue, try manually assigning a fixed IP to the Pi’s MAC address in your router settings.
Configuring Raspberry Pi OS
After a successful SSH connection, update the system first:
sudo apt update -y
sudo apt upgrade -y
sudo apt autoremove -y
This may take some time. Afterward, check basic system settings:
# Check timezone (should be correct from Imager)
date

# If needed, set timezone manually:
# sudo timedatectl set-timezone 'Europe/Berlin'

# Monitor system load (exit with Ctrl+C)
htop

# Monitor CPU temperature
cat /sys/class/thermal/thermal_zone0/temp
The last command shows the CPU temperature in millidegrees Celsius. Divide the value by 1000 (e.g., 52123 = 52.123 °C). For extended use under load, especially with the Raspberry Pi 5, adequate cooling (passive or active) is essential to prevent thermal throttling.
Install ZSH shell as an alternative to Bash
I prefer ZSH with auto-completion. If you’d like that too:
sudo apt install zsh
curl -fsSL https://raw.githubusercontent.com/zimfw/install/master/install.zsh | zsh
chsh -s /usr/bin/zsh
exec bash
Auto-complete Docker commands:
mkdir -p ~/.zsh/completion
curl -L https://raw.githubusercontent.com/docker/compose/1.29.1/contrib/completion/zsh/_docker-compose -o ~/.zsh/completion/_docker-compose
Add this line to ~/.zshrc:
fpath=(~/.zsh/completion $fpath)
autoload -Uz compinit && compinit -i
Then restart:
sudo rebootInstalling Docker and Docker Compose
Docker is the de-facto standard for application containerization. It lets us run services in isolated containers without worrying about dependency conflicts. Install via the official Docker repositories:
# 1. Install required packages
sudo apt update
sudo apt install -y ca-certificates curl gnupg

# 2. Add Docker's official GPG key
sudo install -m 0755 -d /etc/apt/keyrings
curl -fsSL https://download.docker.com/linux/debian/gpg | sudo gpg --dearmor -o /etc/apt/keyrings/docker.gpg
sudo chmod a+r /etc/apt/keyrings/docker.gpg

# 3. Add Docker repository
echo \
  "deb [arch=$(dpkg --print-architecture) signed-by=/etc/apt/keyrings/docker.gpg] https://download.docker.com/linux/debian \
  $(. /etc/os-release && echo "$VERSION_CODENAME") stable" | \
  sudo tee /etc/apt/sources.list.d/docker.list > /dev/null

# 4. Install Docker Engine, CLI, Containerd, and Compose plugin
sudo apt update
sudo apt install -y docker-ce docker-ce-cli containerd.io docker-buildx-plugin docker-compose-plugin
Docker Compose is now integrated as a plugin in Docker and doesn’t need separate installation.
Verify the installation:
docker --version
docker compose version
Create a base directory for Docker configurations:
mkdir -p ~/docker
cd ~/docker
Setting Up AdGuard Home as a Network-Wide Ad Blocker
Instead of Blocky or Pi-hole, we use AdGuard Home. It blocks ads and trackers at the DNS level for your entire network, offers a modern web interface, and is actively maintained.
-
Create directories:
mkdir -p ~/docker/adguard/{work,conf} cd ~/docker/adguard -
Create Docker Compose file:
nano docker-compose.ymlInsert the following configuration:
# ~/docker/adguard/docker-compose.yml services: adguard: image: adguard/adguardhome:latest container_name: adguard-home restart: unless-stopped ports: - "53:53/tcp" - "53:53/udp" - "3000:3000/tcp" volumes: - ./work:/opt/adguardhome/work - ./conf:/opt/adguardhome/conf environment: TZ: Europe/Berlin networks: - proxy labels: - "traefik.enable=true" - "traefik.http.routers.adguard-http.rule=Host(`adguard.home`)" - "traefik.http.routers.adguard-http.entrypoints=web" - "traefik.http.services.adguard.loadbalancer.server.port=80" networks: proxy: external: true -
Create shared Docker network:
sudo docker network create proxy -
Start AdGuard Home:
sudo docker compose up -d -
Initial setup: Open
http://<Pi-IP-address>:3000in your browser. Select port 80 for the web interface and port 53 for the DNS server. Create an admin username and password. -
Configure router: Enter your Raspberry Pi’s IP address as the primary DNS server in your router’s DHCP settings. On a Fritz!Box, go to Home Network > Network > Network Settings > IPv4 Addresses.
-
Configure filter lists: In the AdGuard dashboard under Filters > DNS Blocklists, add the “AdGuard DNS filter” list. Supplement with this whitelist to avoid false positives:
https://raw.githubusercontent.com/deployn/adguardhomelist/main/whitelist.txt -
DNS rewrite for local domains: For domains like
traefik.homeorheimdall.hometo work, add a rule in AdGuard under Filters > DNS Rewrites:- Domain:
*.home - IP Address: Your Raspberry Pi’s IP address (e.g.,
192.168.178.50)
- Domain:
Alternative: Blocky as DNS ad blocker
If you prefer Blocky instead:
cd ~/docker
mkdir blocky && cd blocky
mkdir whitelists blacklists logs
docker network create blocky_net
nano docker-compose.ymlservices:
blocky:
container_name: blocky
image: spx01/blocky
restart: unless-stopped
networks:
- blocky_net
ports:
- "53:53/tcp"
- "53:53/udp"
- "4000:4000/tcp"
environment:
- TZ=Europe/Berlin
volumes:
- ./config.yml:/app/config.yml
- logs:/logs
- ./blacklists:/app/blacklists/
- ./whitelists:/app/whitelists/Create the config.yml with filter lists as described in the Blocky documentation. Then configure your router as described above.
Setting Up Traefik as a Reverse Proxy
A reverse proxy like Traefik receives network requests and routes them to the correct internal service. This saves us from exposing a separate port for each service. We use Traefik v3 for its excellent Docker integration.
-
Create directory:
mkdir -p ~/docker/traefik cd ~/docker/traefik -
Create Docker Compose file:
nano docker-compose.yml# ~/docker/traefik/docker-compose.yml services: traefik: image: traefik:v3.0 container_name: traefik restart: unless-stopped ports: - "80:80" - "443:443" volumes: - /var/run/docker.sock:/var/run/docker.sock:ro - ./traefik.yml:/etc/traefik/traefik.yml:ro - ./acme.json:/acme.json networks: - proxy labels: - "traefik.enable=true" - "traefik.http.routers.traefik-http.rule=Host(`traefik.home`)" - "traefik.http.routers.traefik-http.entrypoints=web" - "traefik.http.services.traefik.loadbalancer.server.port=8080" networks: proxy: external: true -
Create Traefik configuration file:
nano traefik.yml# ~/docker/traefik/traefik.yml entryPoints: web: address: ":80" websecure: address: ":443" api: dashboard: true insecure: true providers: docker: endpoint: "unix:///var/run/docker.sock" exposedByDefault: false network: proxy log: level: INFO -
Create empty file for SSL certificates:
touch acme.json chmod 600 acme.json -
Start Traefik:
sudo docker compose up -d
The Traefik Dashboard should now be accessible at http://traefik.home.
Alternative: Nginx Proxy Manager (NPM)
If you prefer a GUI to manage your proxy hosts, the Nginx Proxy Manager is a solid alternative. It provides a dashboard for easy management of proxy hosts, SSL certificates, and access lists.
cd ~/docker
mkdir nginx-proxy-manager && cd nginx-proxy-manager
mkdir data/mysql -p
mkdir letsencrypt
docker network create npm_net
nano docker-compose.ymlservices:
nginx-proxy-manager:
container_name: nginx-proxy-manager
image: jc21/nginx-proxy-manager
restart: always
networks:
- npm_net
- internal
ports:
- "80:80"
- "443:443"
- "81:81"
environment:
DB_MYSQL_HOST: npm_db
DB_MYSQL_PORT: 3306
DB_MYSQL_USER: npm
DB_MYSQL_PASSWORD: your_database_password
DB_MYSQL_NAME: npm
volumes:
- ./data:/data
- ./letsencrypt:/etc/letsencrypt
depends_on:
- npm_db
npm_db:
container_name: npm_db
image: yobasystems/alpine-mariadb
restart: always
networks:
- internal
environment:
MYSQL_ROOT_PASSWORD: your_root_password
MYSQL_DATABASE: npm
MYSQL_USER: npm
MYSQL_PASSWORD: your_database_password
volumes:
- ./data/mysql:/var/lib/mysqlAccess the NPM dashboard at {IP-address}:81. Default login: admin@example.com / changeme.
Setting Up Heimdall as a Dashboard
To keep track of your growing number of services, install Heimdall as a central dashboard with tiles for all your applications.
-
Create directory:
mkdir -p ~/docker/heimdall/config cd ~/docker/heimdall -
Create Docker Compose file:
nano docker-compose.ymlReplace
1000forPUID/PGIDwith your values (id -uandid -g):# ~/docker/heimdall/docker-compose.yml services: heimdall: image: linuxserver/heimdall:latest container_name: heimdall restart: unless-stopped volumes: - ./config:/config environment: - PUID=1000 - PGID=1000 - TZ=Europe/Berlin networks: - proxy labels: - "traefik.enable=true" - "traefik.http.routers.heimdall.rule=Host(`heimdall.home`)" - "traefik.http.routers.heimdall.entrypoints=web" - "traefik.http.services.heimdall.loadbalancer.server.port=80" networks: proxy: external: true -
Start Heimdall:
sudo docker compose up -d
Heimdall is now accessible at http://heimdall.home. Click “Add Application” or the gear icon to add tiles for AdGuard, Traefik, and other services.
Alternative: Homer as a lightweight dashboard
Homer is a lighter alternative to Heimdall. It uses a static YAML file for configuration and needs no backend.
cd ~/docker
mkdir homer && cd homer
mkdir assets
nano docker-compose.ymlservices:
homer:
container_name: homer
image: b4bz/homer
restart: unless-stopped
ports:
- 8080:8080
environment:
- UID=1000
- GID=1000
volumes:
- ./config.yml:/www/config.yml
- ./assets/:/www/assetsConfiguration is done via a simple YAML file. See the Homer documentation for details.
Configuring the Firewall with UFW
Now we need a firewall. The uncomplicated firewall (UFW) is the best choice for our home server.
sudo apt install ufw
sudo ufw allow 80/tcp
sudo ufw allow 443/tcp
sudo ufw allow 22/tcp
sudo ufw logging medium
sudo ufw default deny incoming
sudo ufw enable
Docker and UFW: An Important Caveat
Docker modifies iptables rules on its own whenever a port is exposed in a Docker Compose file. This means Docker bypasses the UFW firewall - a well-known security concern. Test this by trying to access {IP-address}:3000 (AdGuard setup port) in your browser after a reboot. Surprise: it works despite the firewall.
The best solution is the chaifeng/ufw-docker repository. Open the file:
sudo nano /etc/ufw/after.rulesAppend this code at the end:
# BEGIN UFW AND DOCKER
*filter
:ufw-user-forward - [0:0]
:ufw-docker-logging-deny - [0:0]
:DOCKER-USER - [0:0]
-A DOCKER-USER -j ufw-user-forward

-A DOCKER-USER -j RETURN -s 10.0.0.0/8
-A DOCKER-USER -j RETURN -s 172.16.0.0/12
-A DOCKER-USER -j RETURN -s 192.168.0.0/16

-A DOCKER-USER -p udp -m udp --sport 53 --dport 1024:65535 -j RETURN

-A DOCKER-USER -j ufw-docker-logging-deny -p tcp -m tcp --tcp-flags FIN,SYN,RST,ACK SYN -d 192.168.0.0/16
-A DOCKER-USER -j ufw-docker-logging-deny -p tcp -m tcp --tcp-flags FIN,SYN,RST,ACK SYN -d 10.0.0.0/8
-A DOCKER-USER -j ufw-docker-logging-deny -p tcp -m tcp --tcp-flags FIN,SYN,RST,ACK SYN -d 172.16.0.0/12
-A DOCKER-USER -j ufw-docker-logging-deny -p udp -m udp --dport 0:32767 -d 192.168.0.0/16
-A DOCKER-USER -j ufw-docker-logging-deny -p udp -m udp --dport 0:32767 -d 10.0.0.0/8
-A DOCKER-USER -j ufw-docker-logging-deny -p udp -m udp --dport 0:32767 -d 172.16.0.0/12

-A DOCKER-USER -j RETURN

-A ufw-docker-logging-deny -m limit --limit 3/min --limit-burst 10 -j LOG --log-prefix "[UFW DOCKER BLOCK] "
-A ufw-docker-logging-deny -j DROP

COMMIT
# END UFW AND DOCKER
Then restart your Raspberry Pi:
sudo rebootThese rules allow access to Docker services from the local network (192.168.0.0/16, 10.0.0.0/8, 172.16.0.0/12) but block external access. Since ports 80 and 443 need to be open for the proxy, add:
sudo ufw route allow 80/tcp
sudo ufw route allow 443/tcp
sudo ufw reload
Your firewall is now fully configured and your server is secured.
Automatic Updates and Maintenance
A home server requires regular maintenance.
Operating system updates:
sudo apt update && sudo apt upgrade -y && sudo apt autoremove -yUpdate Docker containers (per service):
cd ~/docker/adguard
sudo docker compose pull
sudo docker compose up -d --remove-orphans
Repeat for Traefik and Heimdall in their respective directories.
Docker system cleanup:
sudo docker system prune -afThis removes all stopped containers, unused networks, images, and build cache.
Public Access to Your Services (Optional)
Want to access services like Heimdall securely from outside your home network?
- Dynamic DNS: Since your public IP address may change, you need a DynDNS service (e.g., DuckDNS, No-IP, Cloudflare DDNS).
- Port forwarding: Forward ports 80 and 443 to your Raspberry Pi’s IP address in your router. Warning: opening ports carries security risks.
- SSL with Let’s Encrypt & Traefik: Edit
~/docker/traefik/traefik.ymland uncomment thecertificatesResolverssection. Enter your email address and restart Traefik. For each service that should be publicly accessible, update the labels in itsdocker-compose.yml.
Alternative without public IP/port forwarding: Services like Pangolin allow access via a secure tunnel without opening ports. I cover this in a dedicated YouTube video.
Conclusion
You now have a modern, efficient, and secured home server based on a Raspberry Pi. The combination of Docker for flexibility, AdGuard Home for an ad-free network, Traefik for centralized access control, Heimdall as an overview dashboard, and UFW as a firewall provides a solid foundation. From here, you can add more services like Portainer, Paperless, or Home Assistant.
Which Raspberry Pi do I need for a home server?
How much does it cost to run a Raspberry Pi as a home server?
AdGuard Home vs. Pi-hole vs. Blocky - which should I choose?
How do I secure my Raspberry Pi against internet attacks?
Can I use this guide with a device other than a Raspberry Pi?
Changelog
Merged both Raspberry Pi posts. Removed outdated content, added firewall section.
Docker via repository, AdGuard Home, Traefik v3, Heimdall.
Related Articles
Setting up Ubuntu Homeserver with Docker (Intel-Nuc)
Set up your Ubuntu homeserver step-by-step: from base configuration to your first Docker containers. The complete guide for beginners. Start building today.
Install Karakeep: Self-Hosted Bookmark Manager with Docker
Install Karakeep as your self-hosted bookmark manager with Docker. Includes Caddy reverse proxy and optional AI integration – full control over your bookmarks!
Asustor NAS Homeserver Setup with Docker: VPN, Gitea & Calibre
Set up your Asustor NAS as a homeserver step by step: VPN, firewall, reverse proxy, Gitea and Calibre with Docker. The complete NAS homeserver guide.
Synology NAS Setup: Your First Homeserver Step-by-Step
Set up your Synology DiskStation from scratch: VPN, DDNS, Firewall, Docker, and Nginx Proxy Manager. The complete NAS homeserver setup guide for beginners.