Asustor NAS Homeserver Setup with Docker: VPN, Gitea & Calibre
Set up your Asustor NAS as a homeserver step by step: VPN, firewall, reverse proxy, Gitea and Calibre with Docker. The complete NAS homeserver guide.
Table of Contents
CAUTION
Please note that this blog post was originally written in German and has been translated for your convenience. Although every effort has been made to ensure accuracy, there may be translation errors. I apologize for any discrepancies or misunderstandings that may result from the translation and I am grateful for any corrections in the comments or via mail.
More than three years ago, I bought my first private NAS. One of the cheap options with 2 GB RAM and an Intel CPU was an Asustor AS3102T. This guide describes the most essential steps for setting it up. However, there is not much discussion about the potential of using it as a media center.
Why a ready-made NAS?
First of all, you might ask yourself why you should buy an already assembled NAS at all. Similar hardware is generally cheaper, but the software makes these devices interesting. In contrast to a self-built solution or a Raspberry Pi, you don’t have to deal with the operating system. Many services, such as network storage, VPN, proxy, media server, etc., are already integrated into the software to run with just a few clicks. You don’t need SSH and CLI but can use the graphical user interface.
All you need to do is buy the hardware and the hard disk(s) and connect them to the network. I suggest considering Synology, QNAP, or Asustor as reliable manufacturers when purchasing. A guide similar to this one for a Synology NAS will follow.
Asustor vs Synology
Basically, the devices from both manufacturers are very similar. There is a difference in the software. In my case, the Synology NAS handled Btrfs better, and the graphical user interface looks a little more modern. However, Asustor has more third-party software in its own app store. There is more news about Synology than Asustor on the internet.
Fortunately, both (including QNAP) offer the option of running Docker containers. This is one of the best features if you want to use your NAS for more than just network storage.
Buying tips
What to look out for when buying?
Maximum number of hard disks
Firstly, the number of hard disk slots is essential. There are 1-bay NAS that only allow a single hard disk and 30-bay NASs that can integrate 30 hard disks. You need at least two slots if you want to use RAID (more on this later).
CPU
The CPU is also crucial. In my opinion, you should pay attention to the number or speed of the processor cores and whether it is an ARM or x64 CPU. The problem with ARM is that the processor architecture is incompatible with many Docker images. However, the development of Docker images for ARM has increased (at least, it feels that way).
RAM
It would be desirable for RAM to be expandable. Unfortunately, this option is often not found in cheaper devices. I would only buy a machine with 1 GB RAM or less to use mainly as network storage with a few additional functions. Even 1 GB RAM can quickly become scarce if you run a few services on the NAS.
Hard disks
The hard disks must be installed before I connect the NAS to the network. My NAS has two slots, I use a 4 TB Ironwolf (Amazon Affilate-Link) Seagate hard disk and a small 64 GB SSD. Now, some people might cry out.
RAID
Why not a RAID? Of course, you need to have a basic understanding of what RAID actually is. Two different RAID types could be used for two hard disks: RAID 0 and RAID 1.
RAID 0 combines both hard disks into one large hard disk; the performance is increased by the better load distribution on both hard disks. All data may be lost if one of the two hard disks fails.
The main feature of RAID1 (which is probably used more frequently in such NAS) is the redundancy of hard disks. Identical data is written to both hard disks. If one hard disk fails, the NAS continues running with the other. This results in greater data availability and security. However, it also has some disadvantages.
Firstly, it costs more money to buy a second hard disk needed for the RAID and increases electricity costs and noise levels. Secondly, you only have half the storage space available for your data. Thirdly, one slot is occupied by a redundant hard disk. And the most critical disadvantage, in my opinion, is that you need to get the right idea about data security.
**RAID is not a backup copy! RAID does not protect against errors from the user or the software. RAID is also useless in a lightning strike or a controller error on the NAS. RAID does not protect against malware.
My cost-benefit analysis has shown me that I would use a faster SSD as system storage instead. The increase in performance is more important to me than increased data availability. Especially as a backup remains essential in both cases if you want to keep the data.
Connecting the NAS to the network
Once the hard disks are in the NAS, I connect the NAS to the network and check my router to see which IP address it has been assigned and ensure it always has the same IP address.
![]()
If the router does not offer this functionality, a fixed IP address can also be set later in the NAS interface. I then have to briefly disconnect the NAS from the network and reconnect it for the change to take effect. As soon as I enter the IP address of the NAS in the web browser, I reach the configuration page.
Initial setup
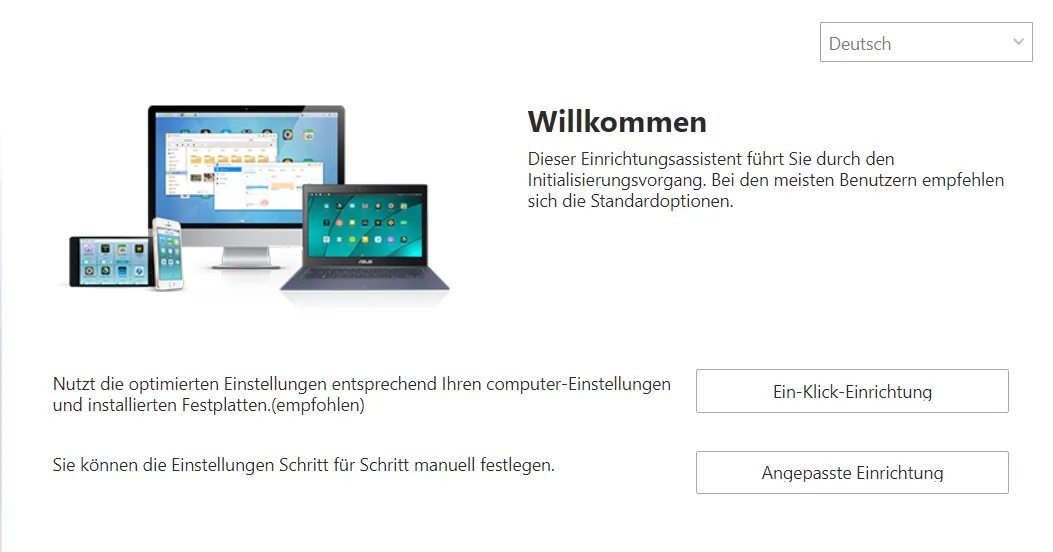
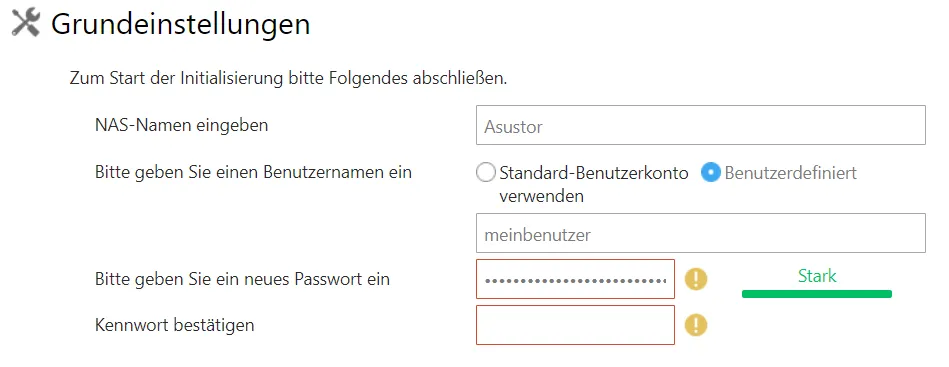
The one-click setup is recommended, but I don’t know what happens there. I choose the customized setup and can create a name for the NAS and my user account.
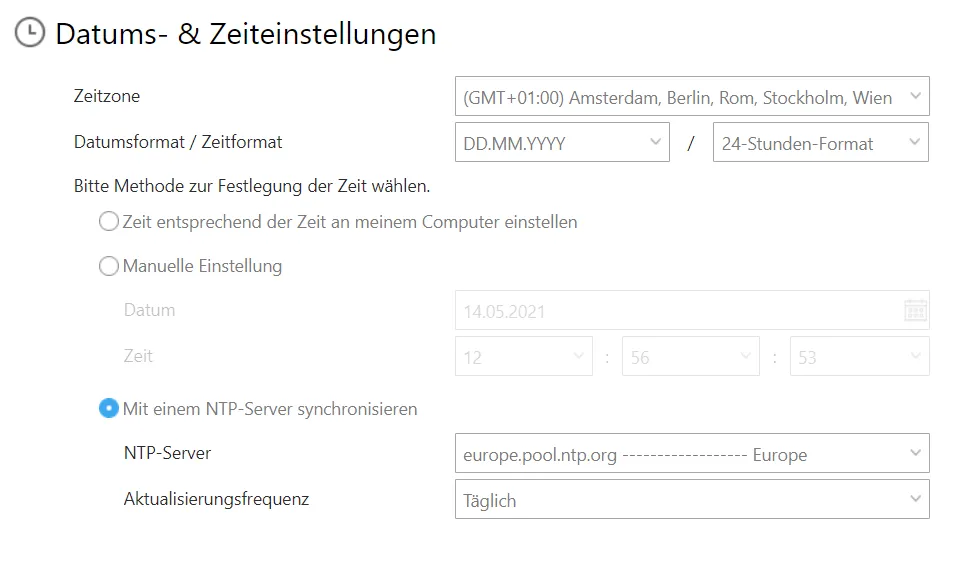
Then, you can change the time settings.
In the network settings, it is possible to either obtain the IP address from the DHCP server (i.e., the router, in my case) or set it manually.
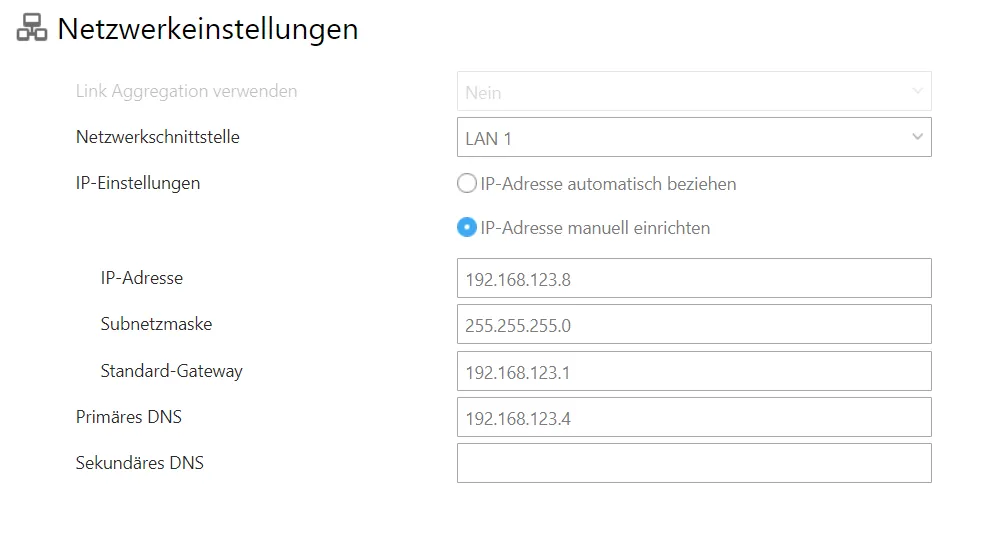
This should mainly be done if there is no possibility of assigning a fixed IP address in the router. Then, it also makes sense to look for an IP address outside the DHCP range..
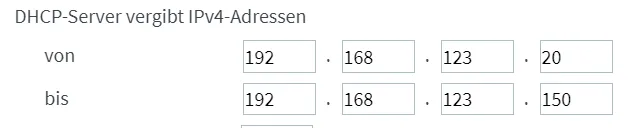
So, if the settings are as in this image, you should use the IP address 192.168.123.x, where x is between 2 and 19 or 151 and 255.
For the DNS, you can enter the DNS address of the DNS server or choose a normal DNS address (more on this in the Fritz!Box setup instructions) or leave the fields empty.
Next are the settings for the drives. As already written, I select RAID level Single. JBoD (Just a Bunch of Disks) would ensure I have one large volume instead of 2 small ones. Yes, it is also possible to use the HDD as a system disk and attach the SSD as a cache. I have already tested this and noticed a higher performance in some cases. Still, I would prefer to move the entire system to the SSD. Opinions differ when it comes to the choice of file system. EXT4 is set by default, but the newer Btrfs file system offers more options. Unfortunately, only EXT4 allows you to set a user quota on a hard disk. If you plan to set up users who are only allowed to store a certain amount of data, you should choose EXT4 and/or buy a larger system hard disk. I still select Btrfs and ask my friends without using software not to flood my NAS excessively with data.
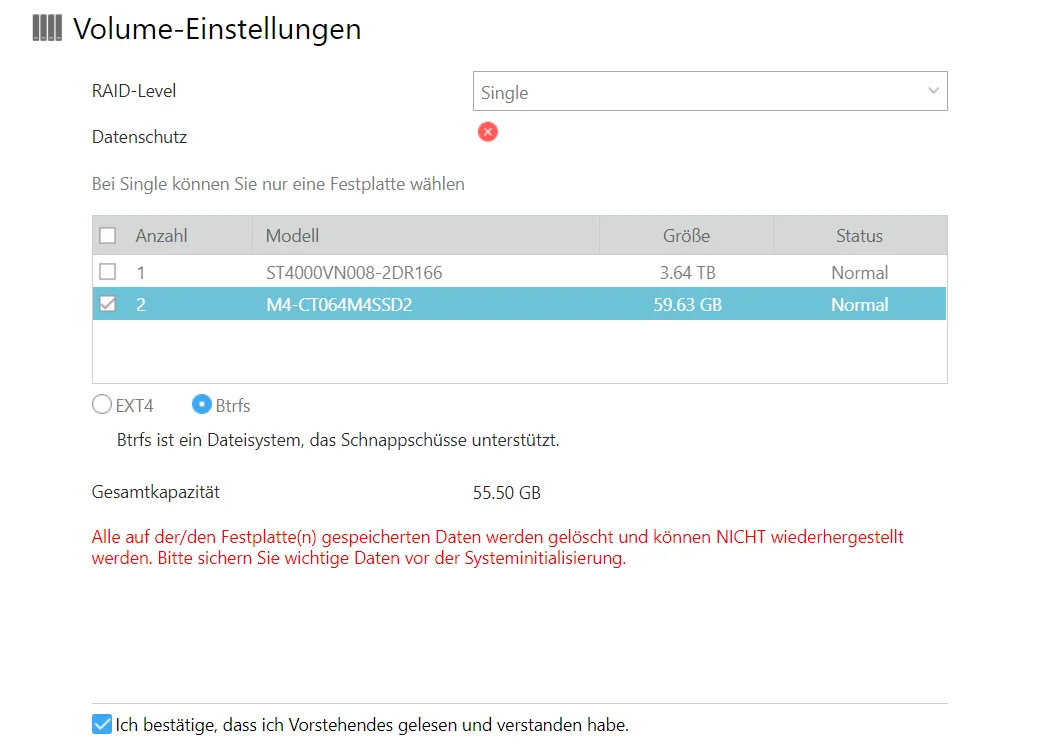
It is also essential to know that the default home folders for the users are created on this hard disk. Of course, you can create additional folders on the second hard disk later.
You then have to wait a little until the installation process is complete.
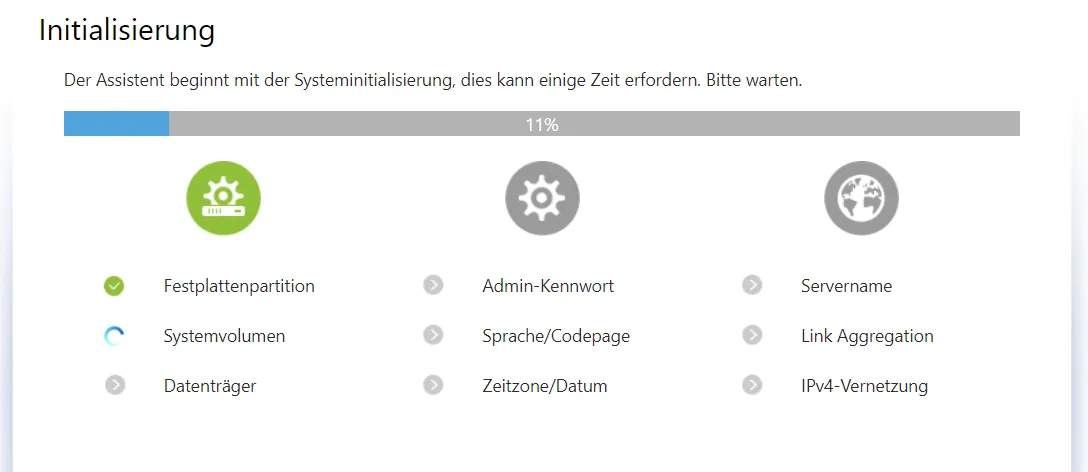
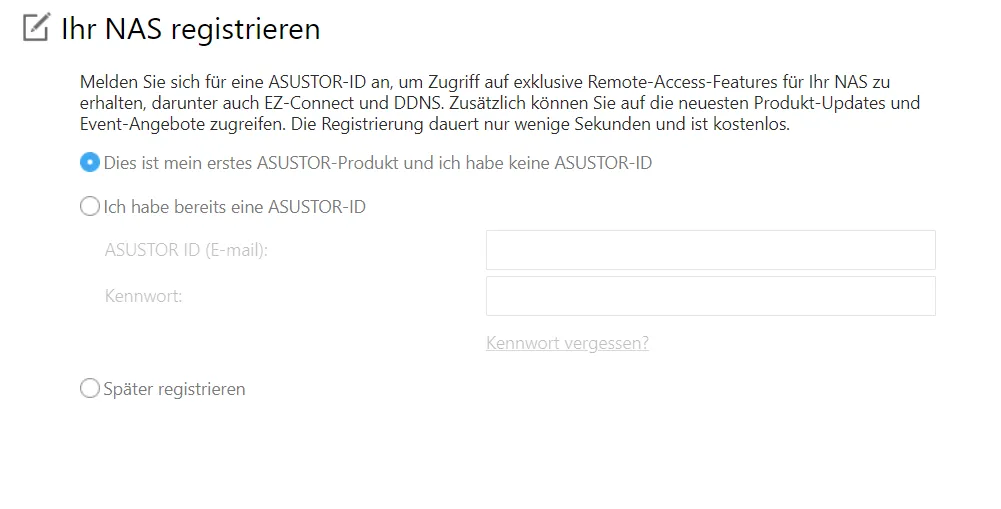
You can then register your NAS, which you should do especially if you want to use EZ-Connect.
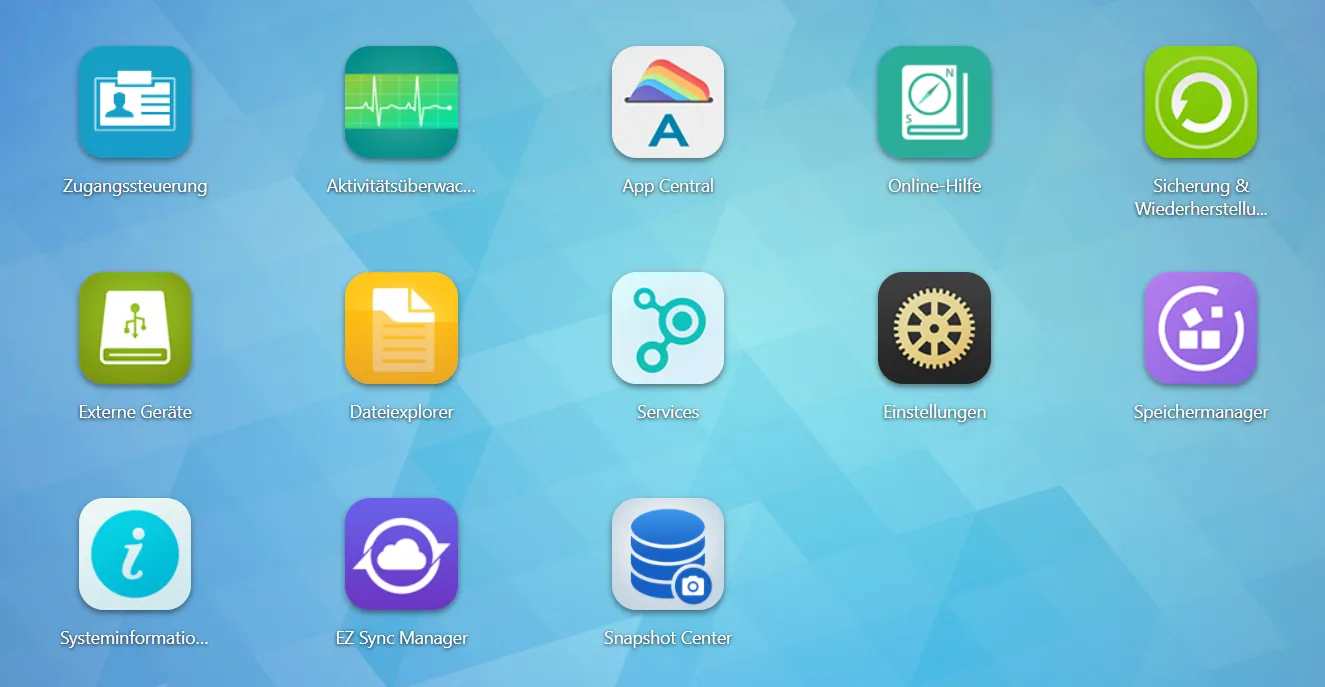
When everything is ready, you should see the “desktop” of the user account.
Initiate hard disk
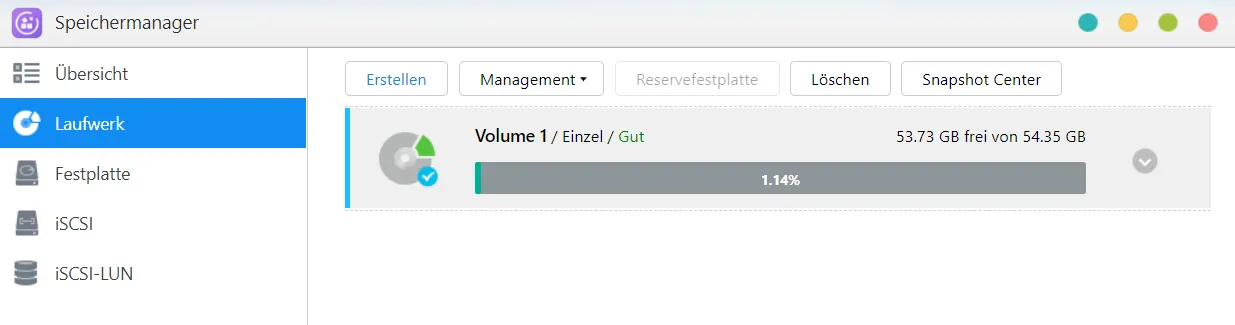
The storage manager shows that the hard disk on which the system was not installed is inactive.
This has to be changed. After all, I want to use it. To do this, I select the menu item Drive and press the “Create” button.
Then advanced setup (because I don’t know what happens with quick setup).
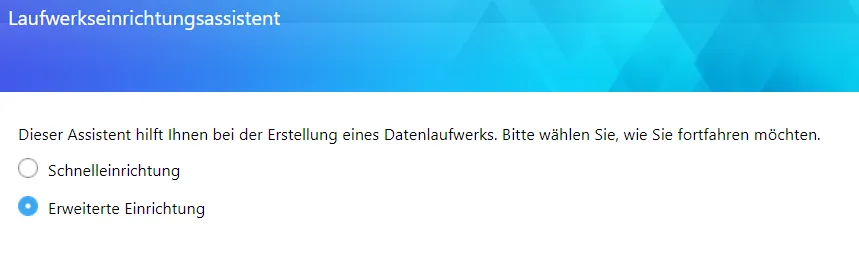
Then single again, although it offers no data protection 😥
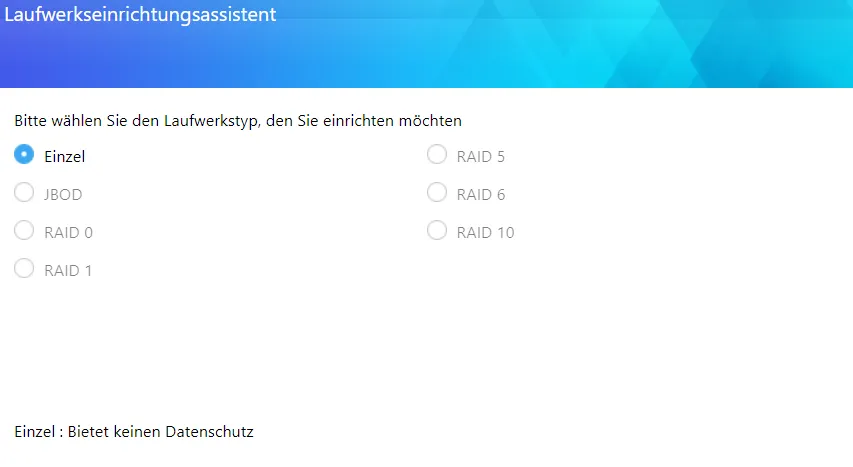
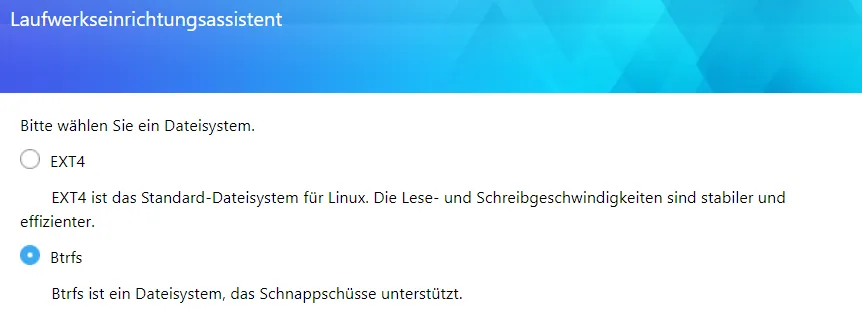
I then select Btrfs as the file system again. If you want to set user hard disk quotas, this is only possible with EXT4. However, snapshots can only be created with Btrfs.
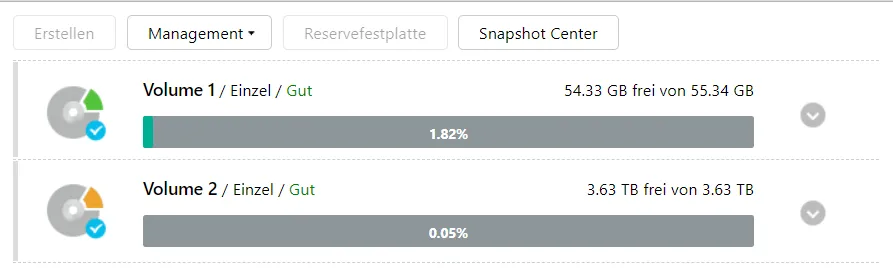
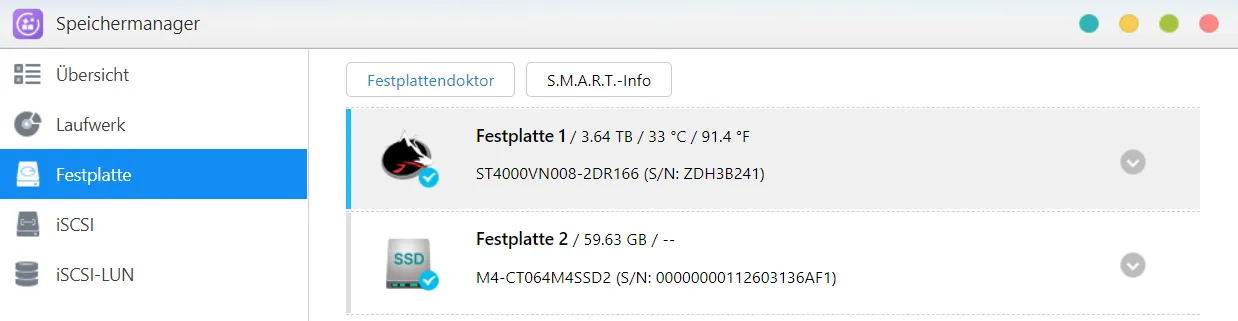
Now both hard disks are visible.
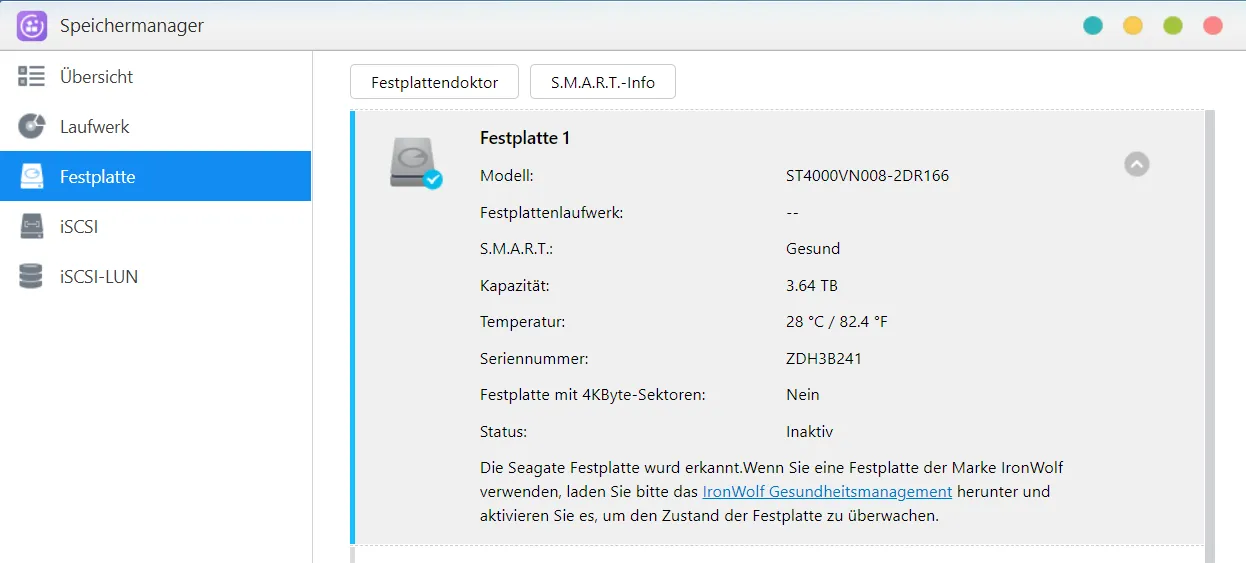
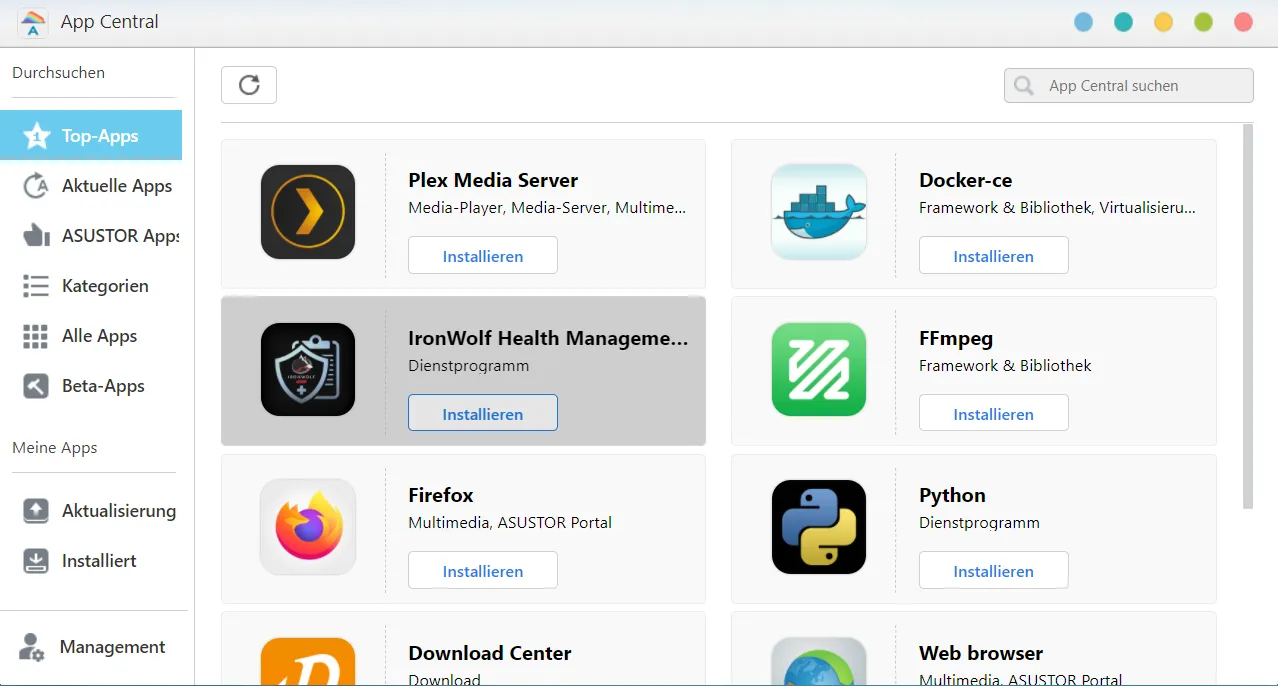
Since I have an IronWolf hard disk, I download the corresponding program from App Central.
Schedule for hard disk doctor
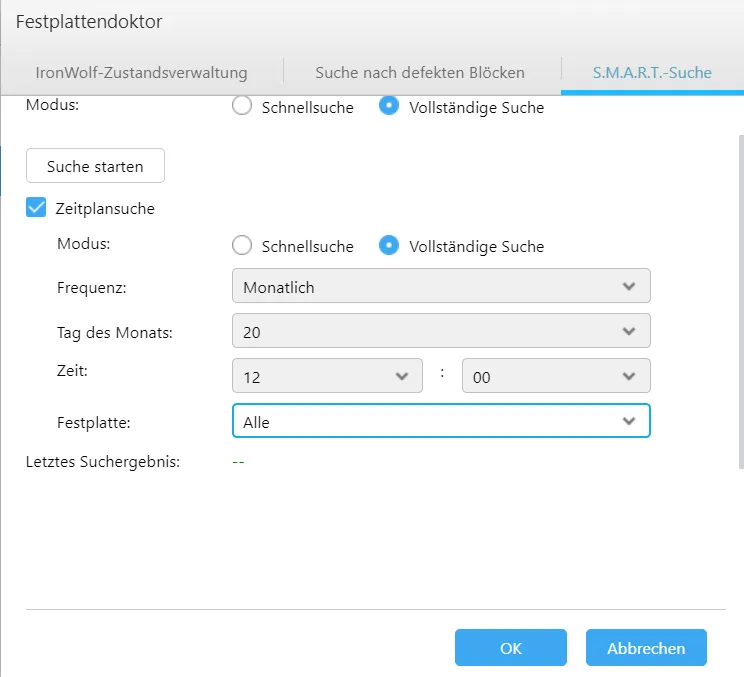
Next, I want both hard disks to be checked at regular intervals. I select the first hard disk in the storage manager and click on hard disk doctor.
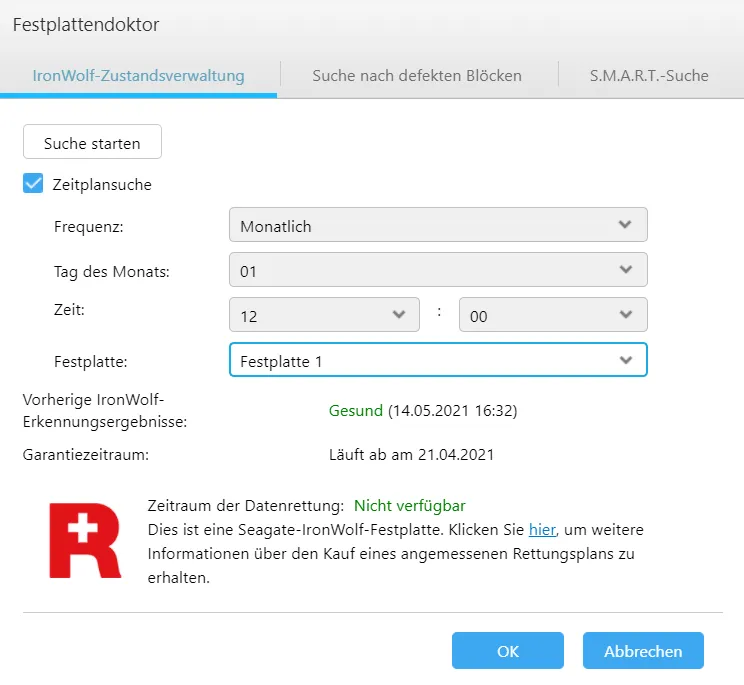
Here I set a monthly check.
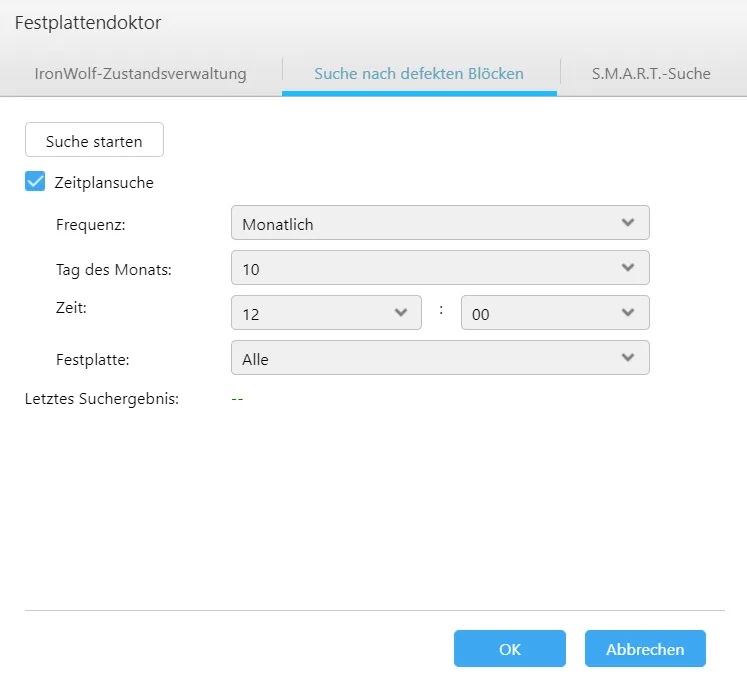
Once a month, defective blocks should also be searched for (here I select “All” for the hard disk).
I would also like a monthly S.M.A.R.T. search.
Set up the recycle bin
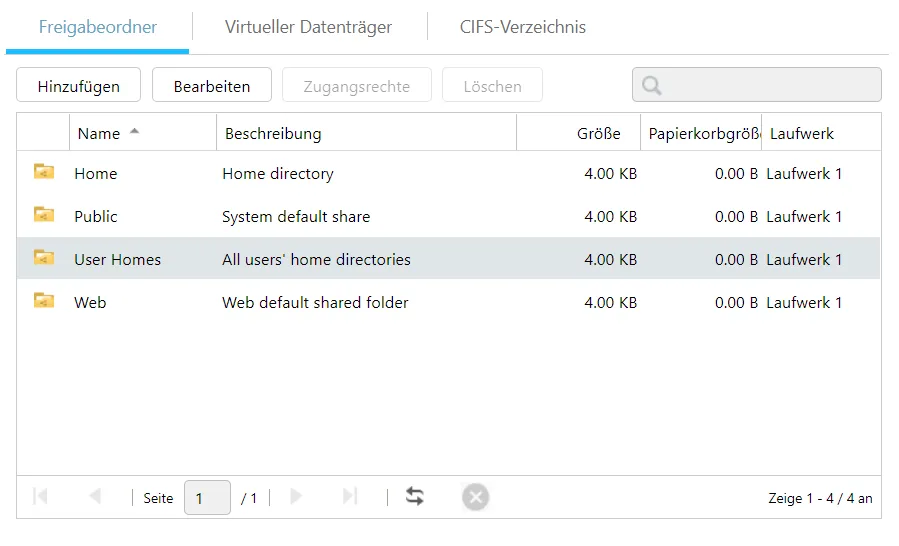
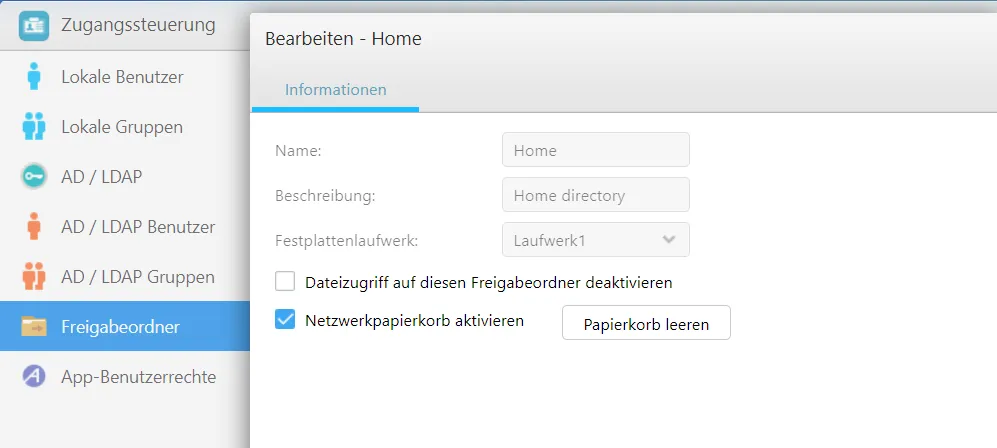
The home folders of the users are currently created on drive 1 (in my SSD), the stupid thing is that this setting cannot be changed easily. But I still want to add a recycle bin to my folder. To do this, I go to Access Control and click Edit under Shared Folders in the Home folder.
Here I check the network recycle bin.
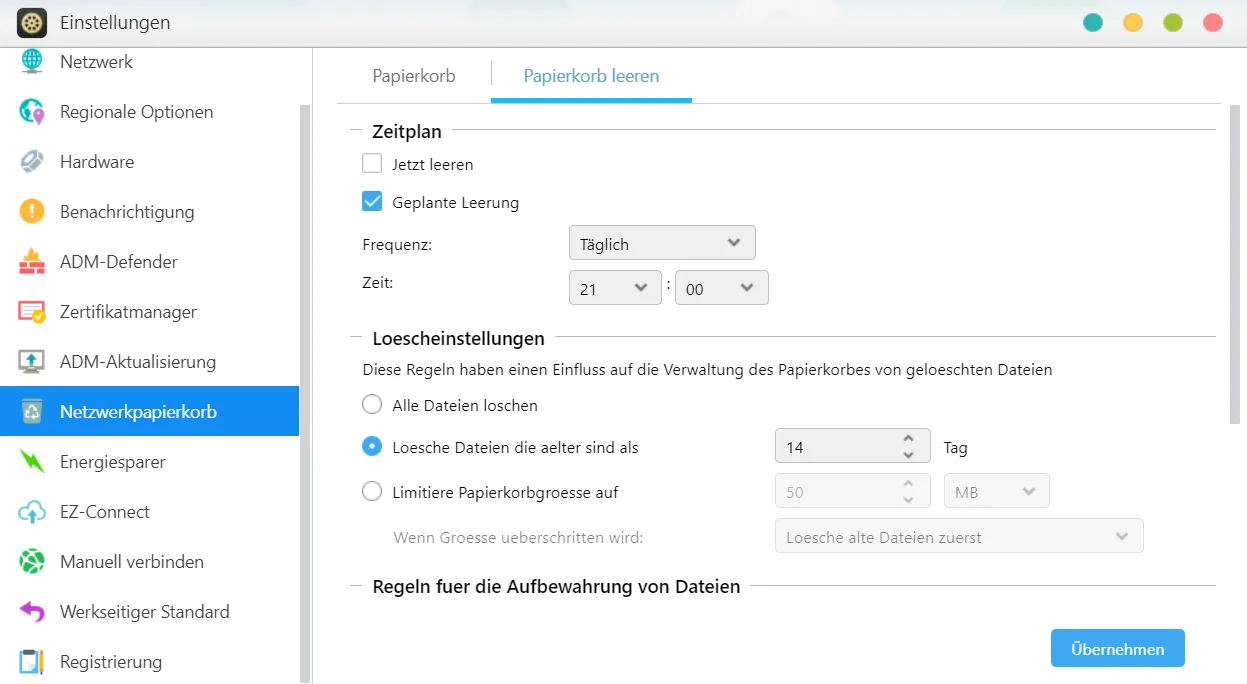
I now change the settings for all the recycle bins. The files in them should be deleted if they are older than 14 days.
Security settings
Next, we make some settings that could affect security.
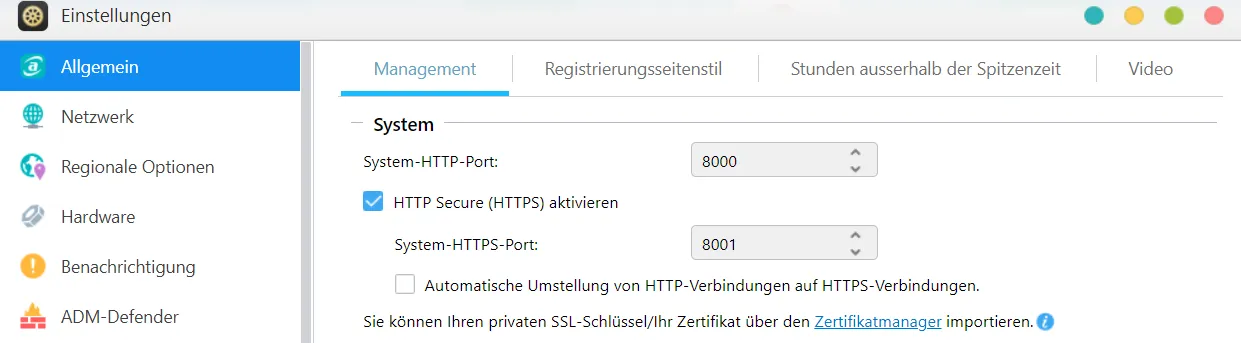
Port
Under Settings/General you can change the HTTP/S ports used to connect to the Asustor NAS.
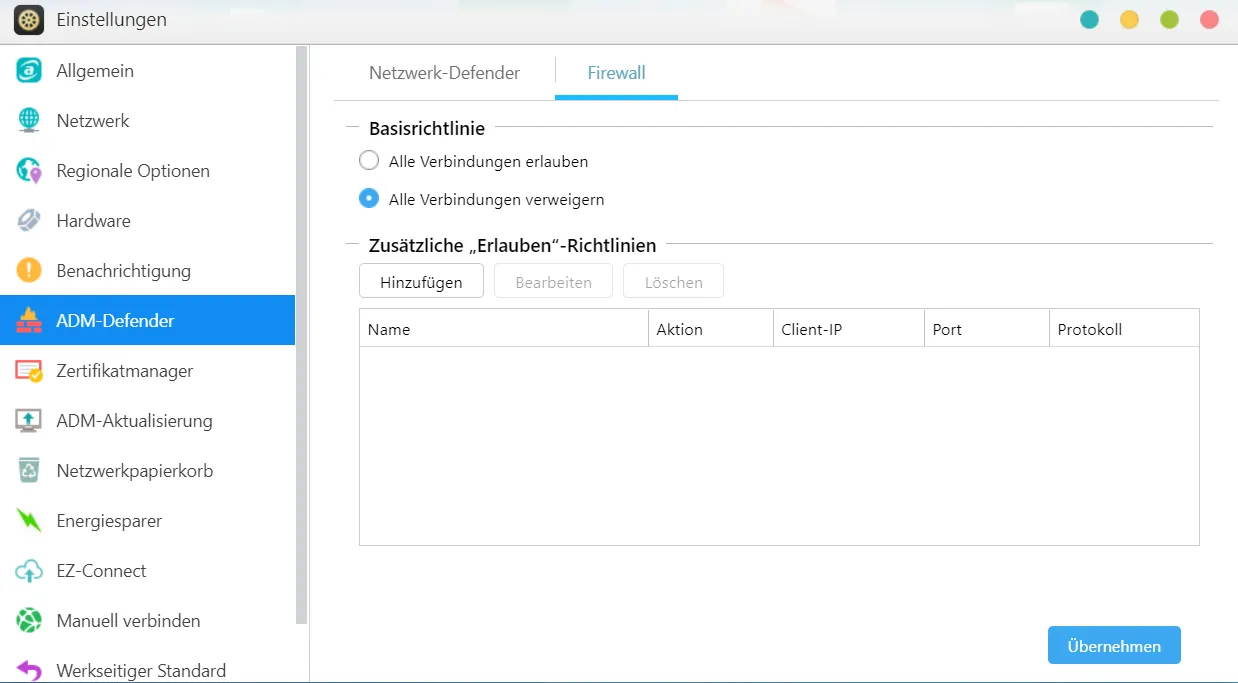
Firewall
Next, I want to activate the firewall. I change the default entry to deny all connections.
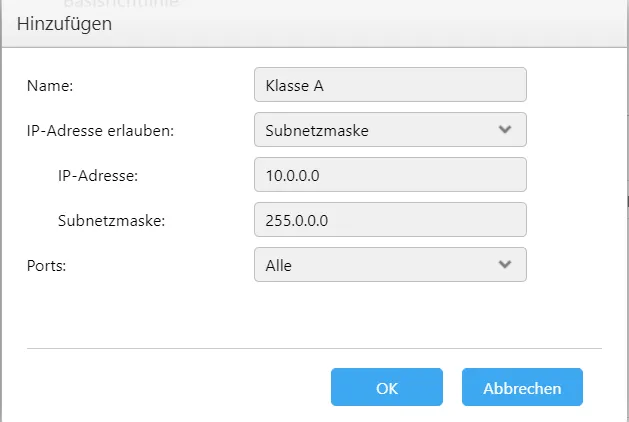
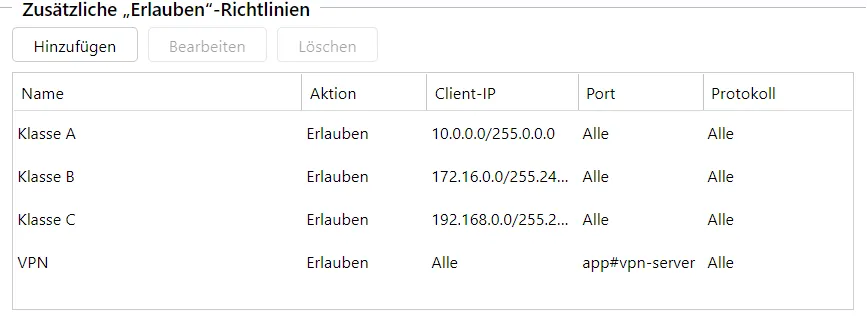
However, I want my private network ranges 10.0.0.0 - 10.255.255.254 and 172.16.0.0 - 172.31.255.254 not to be blocked. The second range is significant for Docker.
I add the first rule.
I add the second rule.
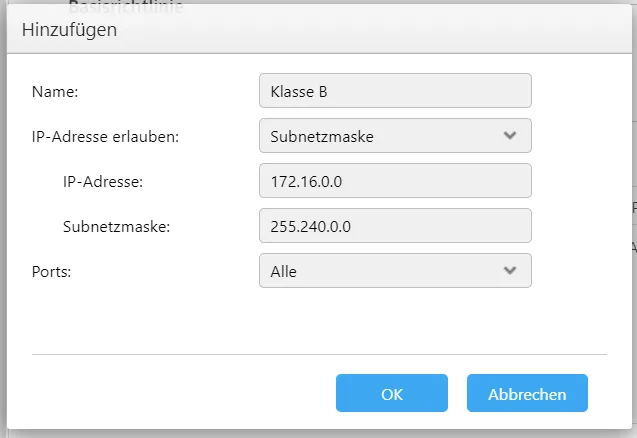
I also want devices on my network to access all ports.
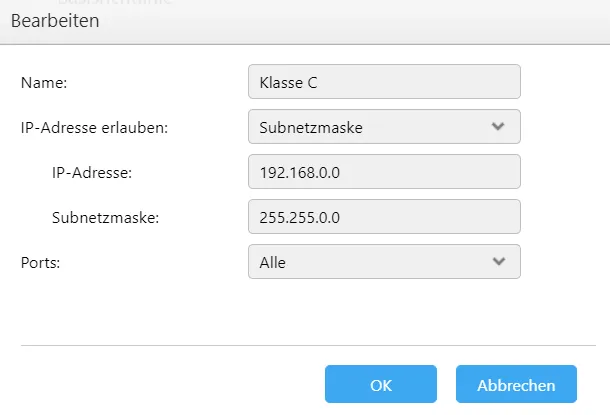
Of course, you could also consider whether you don’t want to release all ports but only select certain services. However, this is too time-consuming, and I will leave it at all.
Antivirus program
I also install the ClamAV antivirus program from the App Central.

I update the database under the update menu item.
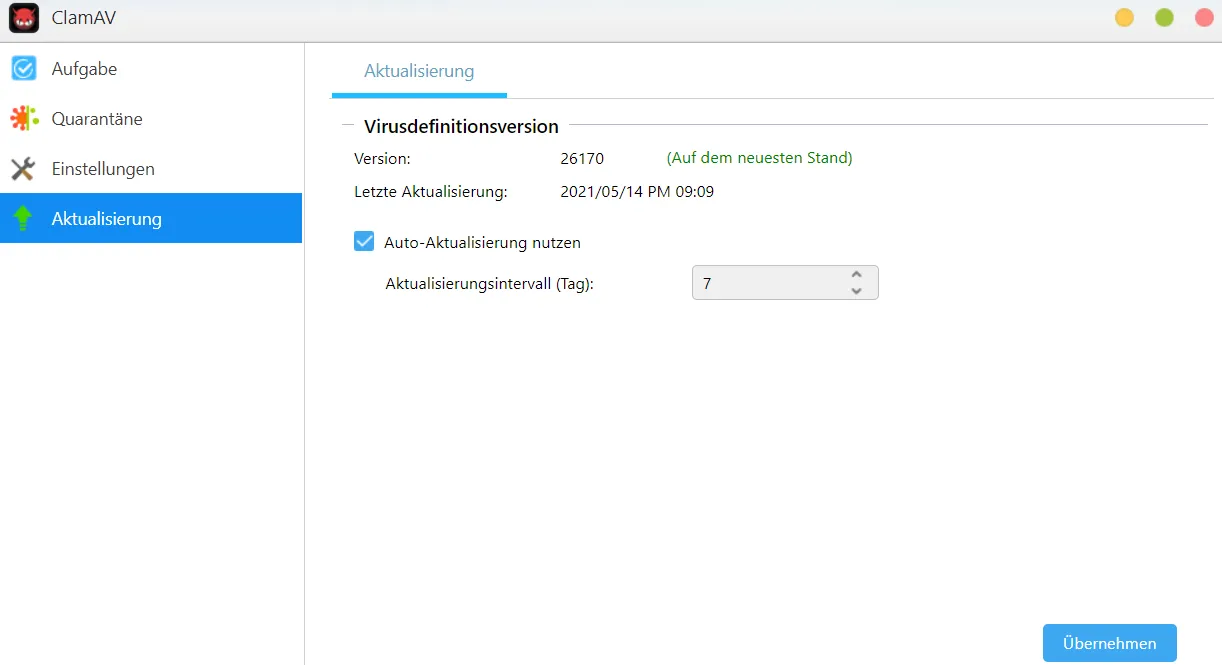
I also activate the auto-update in an interval of 7 days.
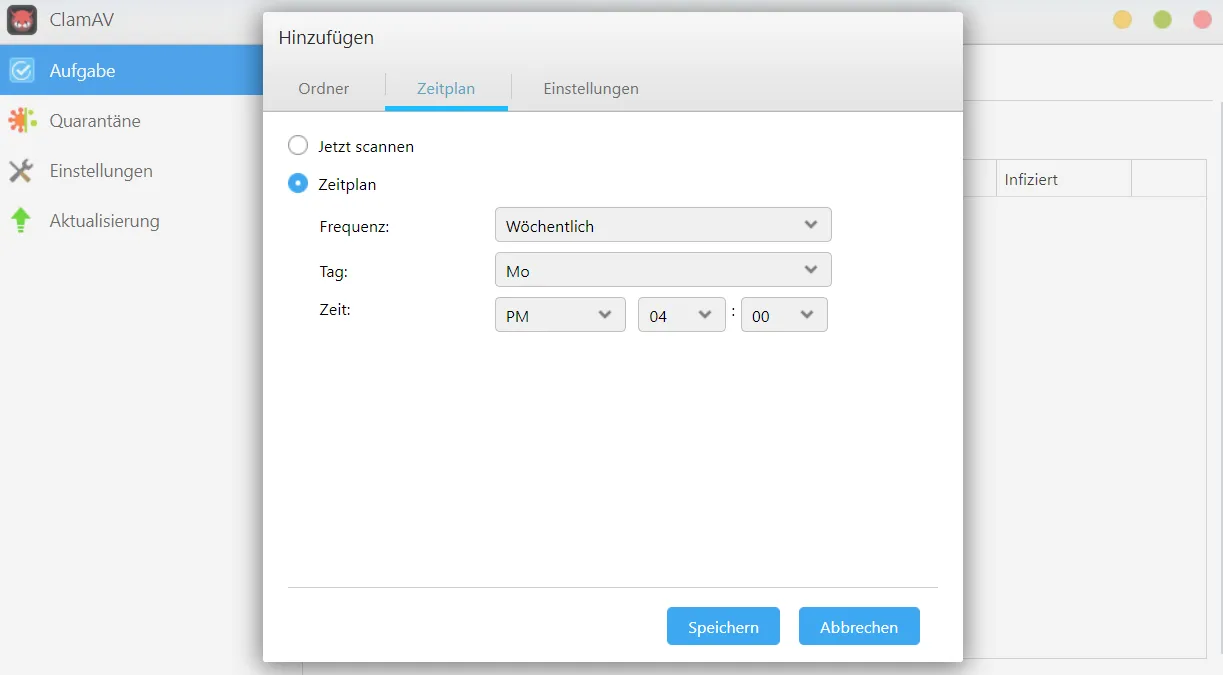
Under the tasks, I create a schedule for scanning all folders.
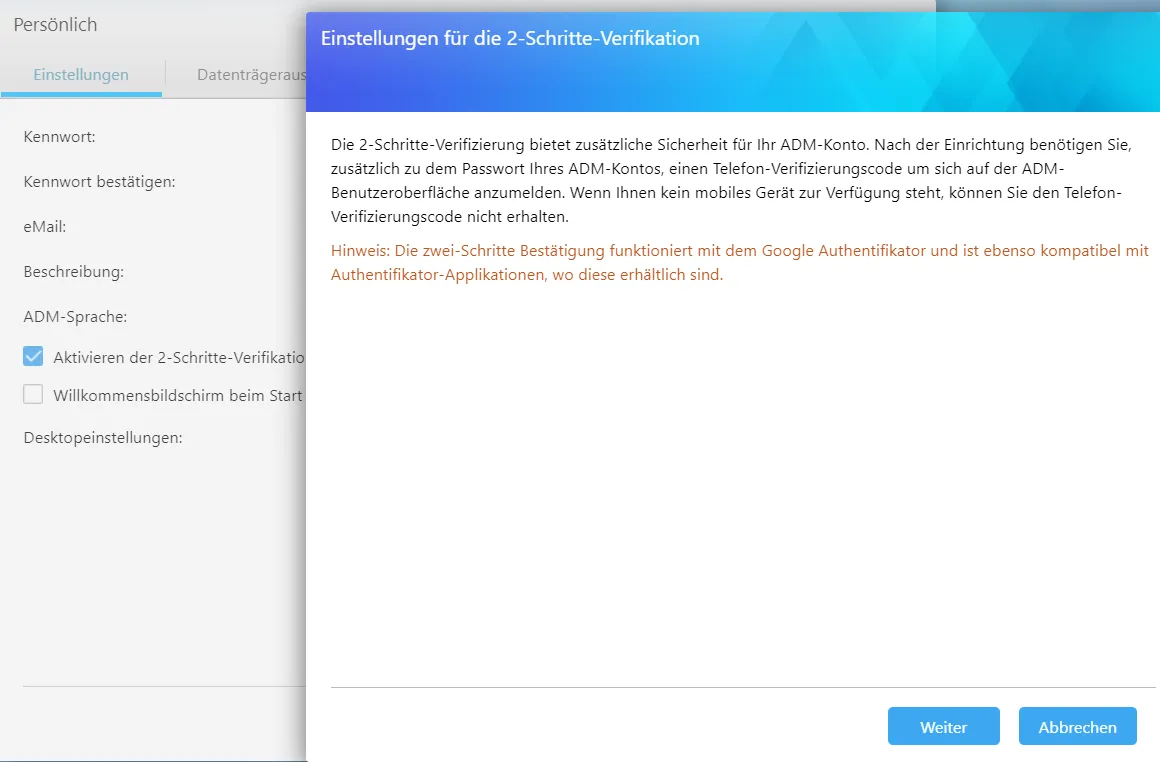
2-factor authentication
Two-factor authentication can be set up under the menu item “personal”.
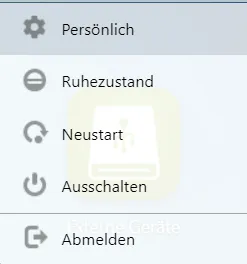
A QR code is displayed which can be scanned with the Google Authenticator app, for example.
Google Authenticator - Apps on Google Play
Enable 2-step verification to protect your account from hijacking.
Windows Authenticator for Google, Blizzard, Guild Wars, Rift
Open-source Windows Authenticator supporting Google Authenticator, Microsoft and games Battle.net for World of Warcraft, Diablo III, Guild Wars 2, Rift.
There is of course more software, this is just an example.
VPN
Now, I want to show you how to set up a VPN, although I do not use the Asustor NAS for this.
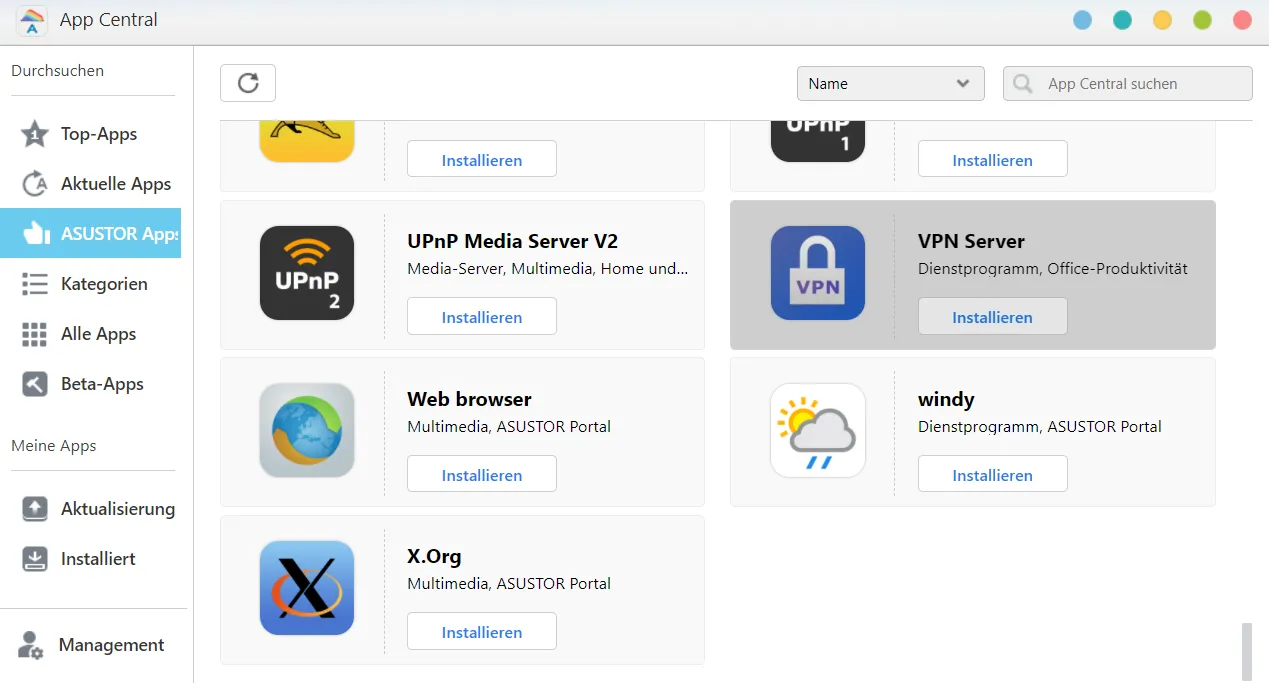
I download the VPN server in the App Center.
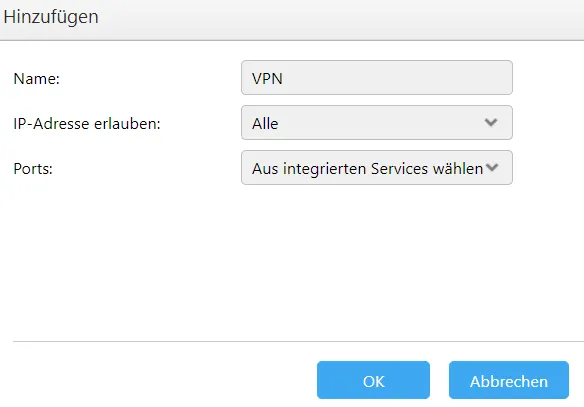
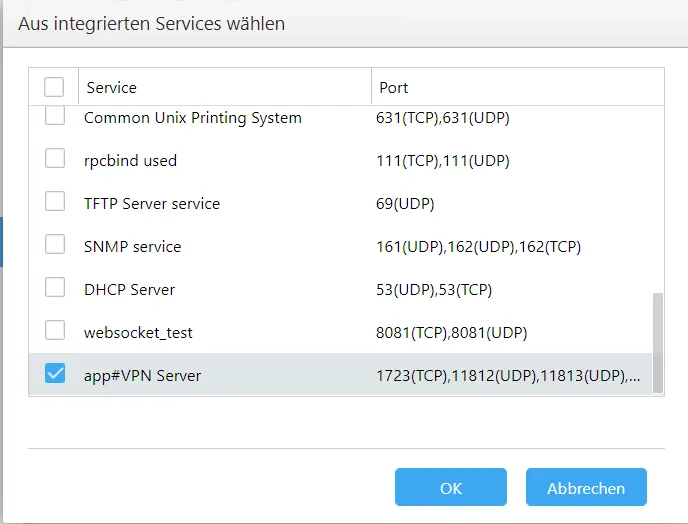
The firewall must then be partially opened. I add the rule for all IP addresses.
I activate the OpenVPN server in the VPN server app.
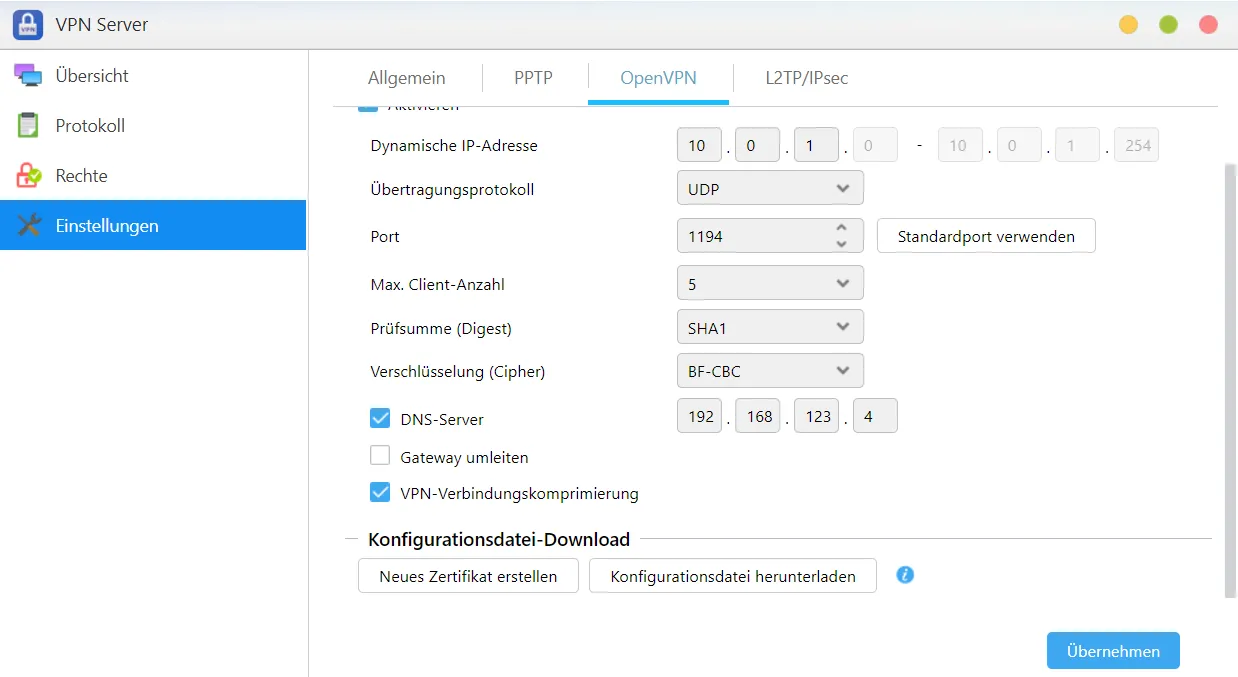
I can enter the IP address of my Raspberry Pi as the DNS server so that the adblocker is also effective via VPN. A new certificate must then be created (if one has already been created, you can also download the existing one). As soon as you have transferred the two files to your smartphone, for example, you can enter them into an OpenVPN client.
OpenVPN Connect - Fast & Safe SSL VPN Client
Official secure client for Access Server and all OpenVPN services
– PlayStore Link
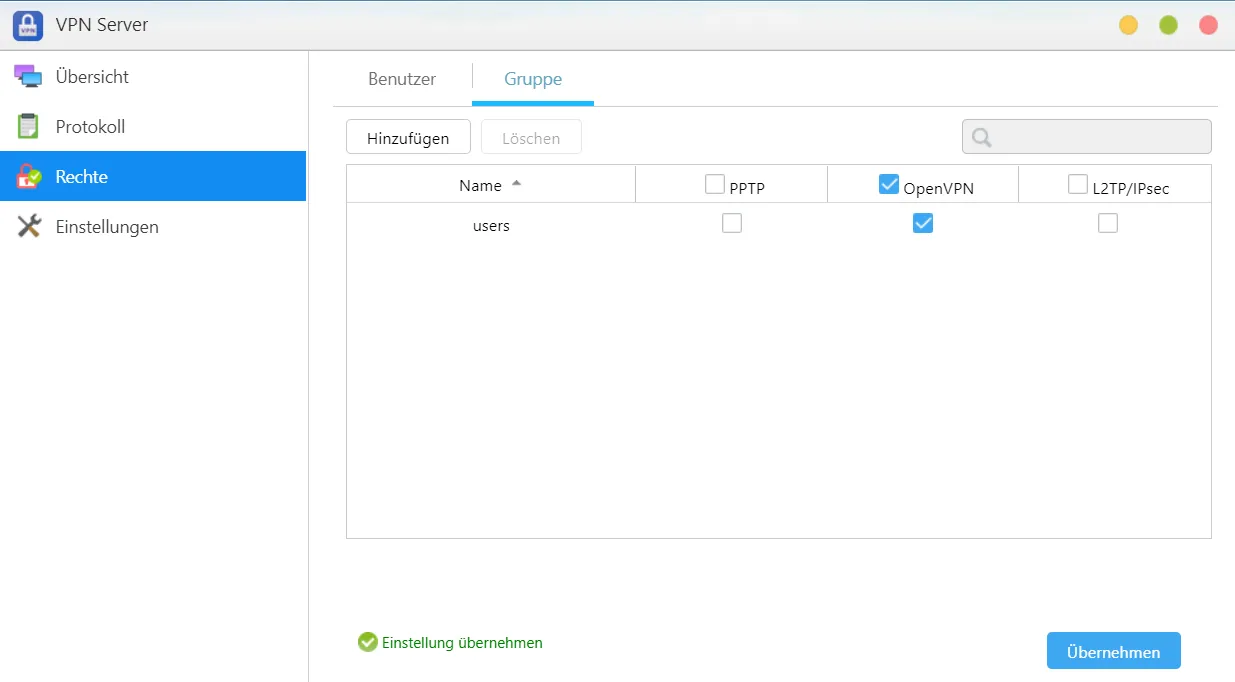
A connection will still need to be fixed. First, a user or group must be allowed to use OpenVPN.
Port 1194/UDP must also be enabled in the router.

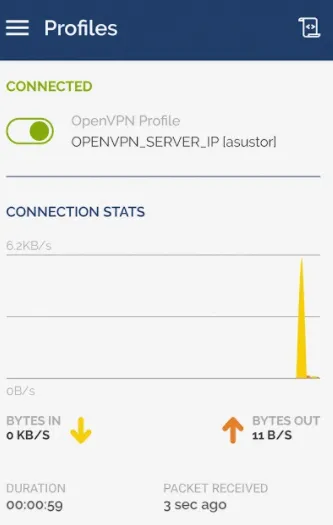
The configuration must be edited in the OpenVPN program.

A connection can then be established.
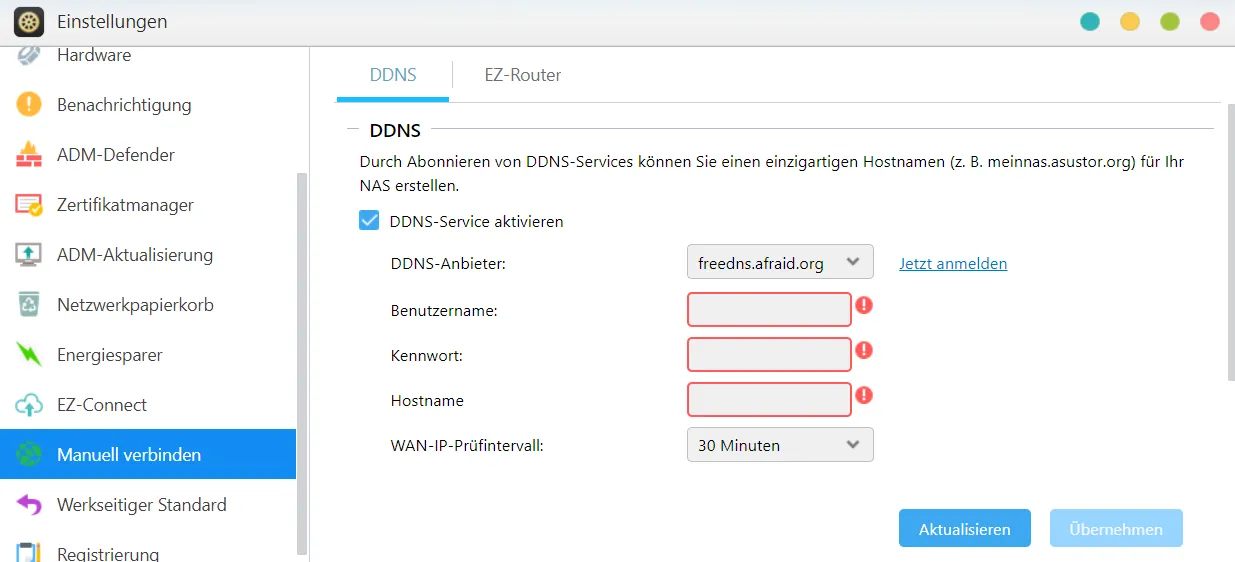
If you have not yet set up a domain for your network, you can do this under Manually connect with a DDNS in the settings or set up the EZ-Router.
Services
I will now look at a few services I would like to install.
DataSync Center
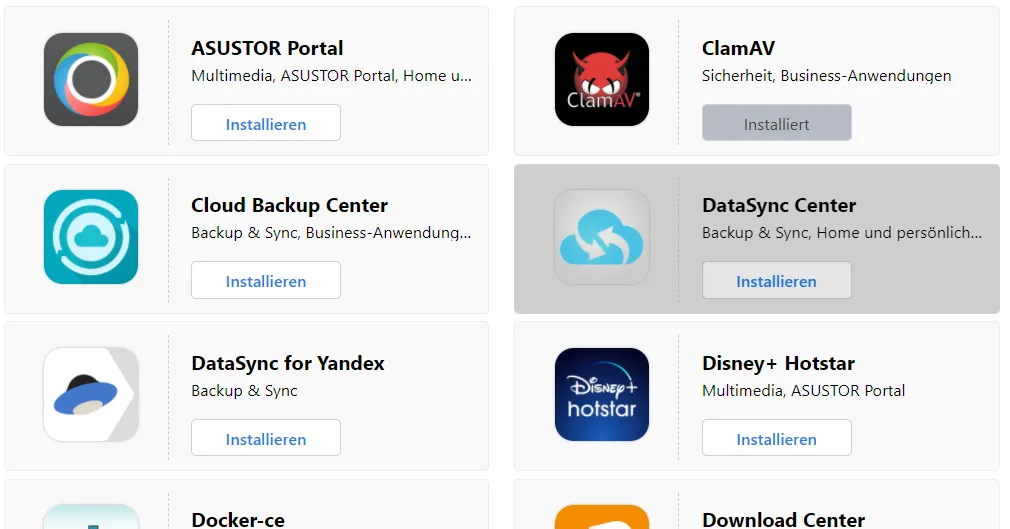
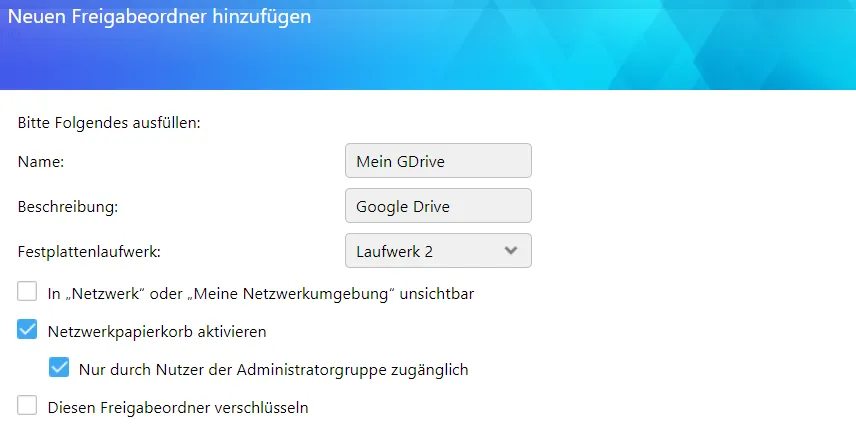
With this program it is possible to synchronize your Google Drive or Dropbox account with the NAS. Before I start the program, I need a new folder on my NAS. I add a new folder in the access control.

Now I can also select the second drive.
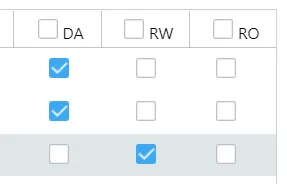
For the permissions, I select by user.
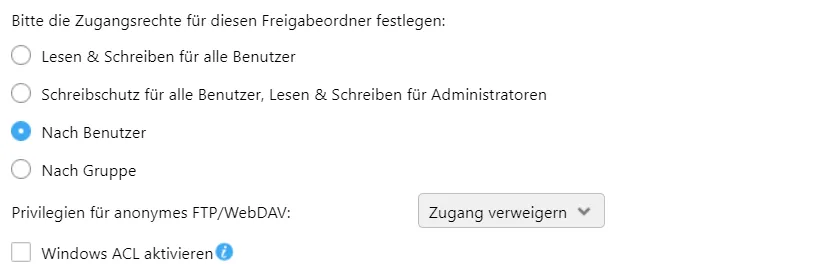
I only give my user read and write permissions.
In the DataSync app, create a two-way synchronization to Drive. This means that if I delete files on my NAS, they disappear from my Google Drive account.
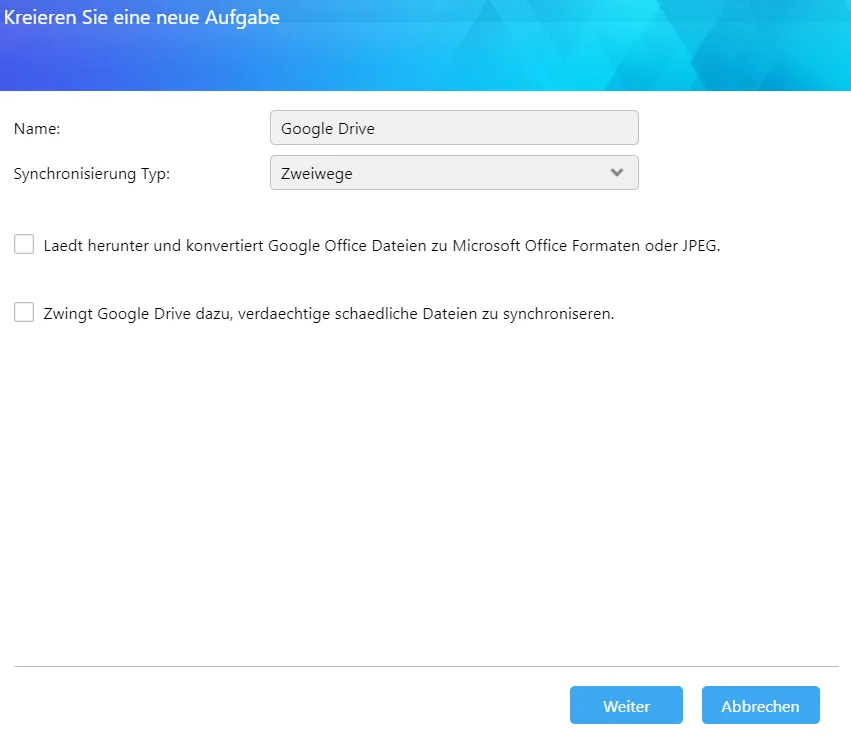
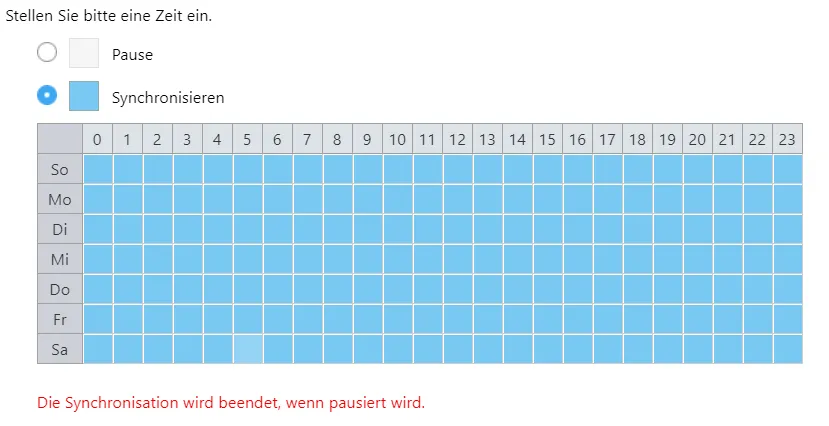
For the local path, I select the newly created folder. For the external path “My folder”. It is possible to set that the synchronization should not occur at all times.
What is practical is that this method now gives me a faster way to use files that I have stored in Google Drive. I can also move files to this folder that I would like to back up in the Google Cloud (storage space quota should be taken into account), and my NAS then takes care of the upload.
The synchronization type can also be set for individual folders. The synchronization time can also be changed afterwards. It is also practical that several Google accounts can be synchronized (but you should then create separate folders or shared folders).
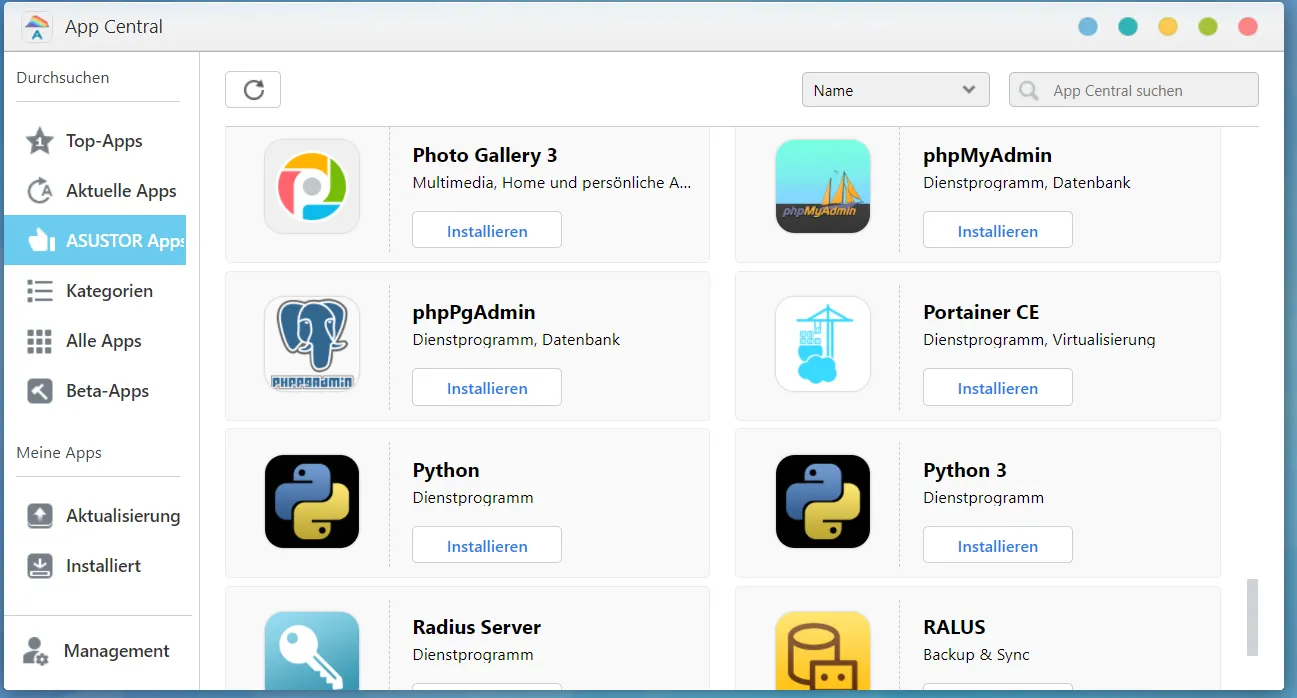
Photo Gallery 3
The NAS offers a promising option for automatically backing up images from your smartphone. Since Google Photos will no longer provide unlimited storage space for photo uploads in standard quality starting July 2021, such solutions are beneficial. Unfortunately, it is not possible to change the automated upload folder. Still, my Volume 1 does not have enough storage space for my pictures. This is where Asustor could really improve the software. If anyone knows how I can change the default upload folder in the application (not just add a second one to display images), I would appreciate a comment or message.
Calibre
I would like a management software for my e-books. In the app center you can find Calibre-Web.
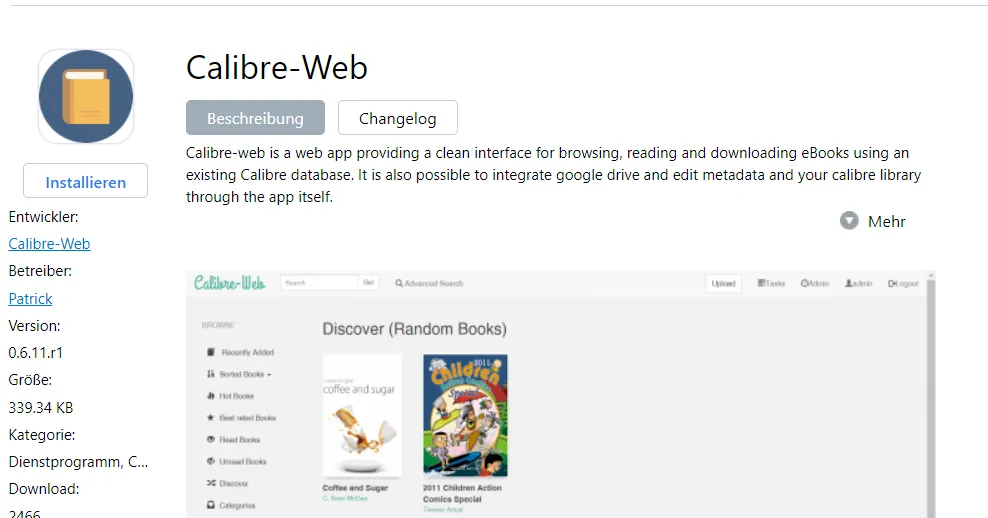
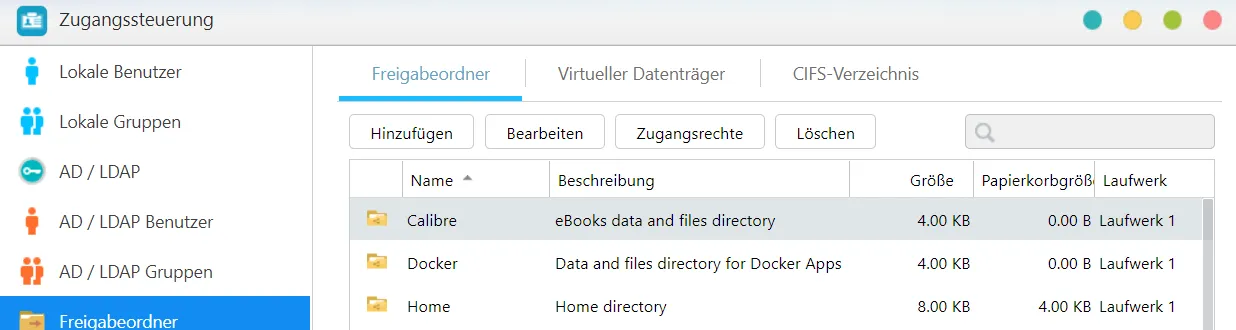
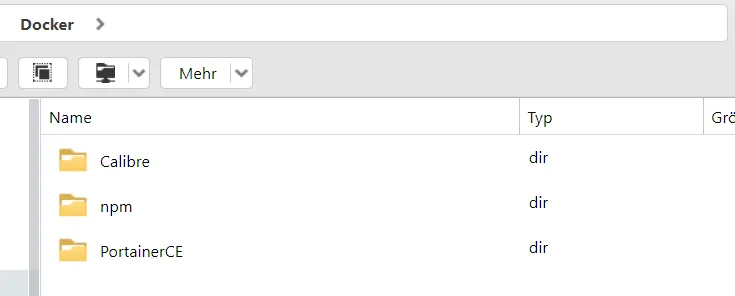
However, before you install third-party software from App Central, you should check how old the package offered is. On the release page of Calibre-Web, you can see that 0.6.11 is the latest version from February 2, 2021. So I install the program directly. This is actually a Docker package. Docker-ce must also be installed. I see two new shared folders in the access control.
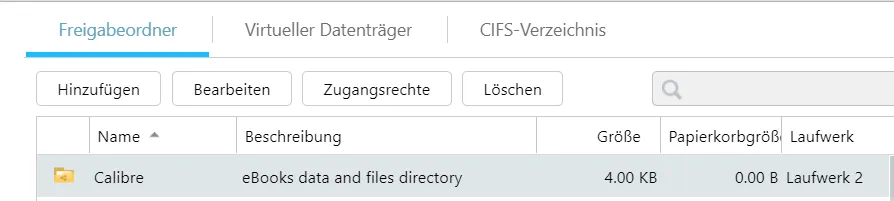
Docker can stay on drive 1 as far as I’m concerned. However, I would like to have Calibre on drive 2. To do this, I first uninstall Calibre in the Central app. Only then can I change the drive of the folder.
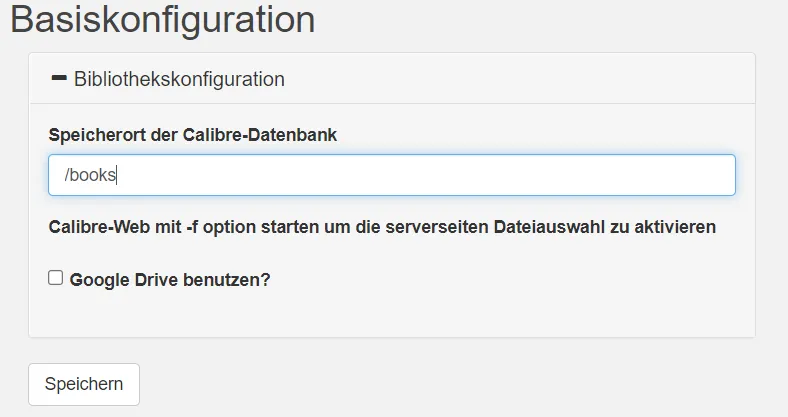
I then install the app again and start it. I enter “/books” on the start screen as my database.
The login data is admin, and admin123 is the password.
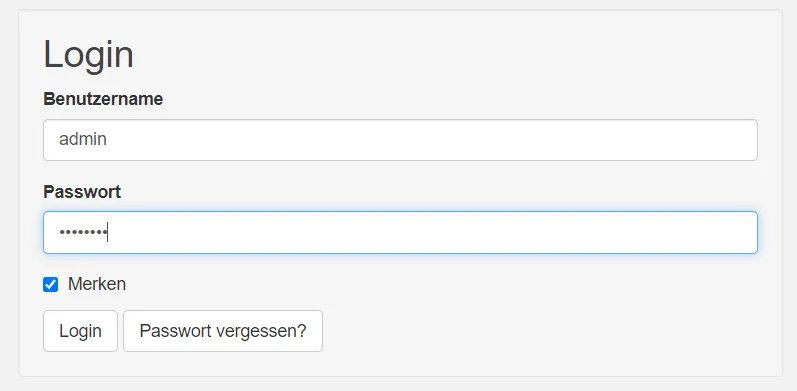
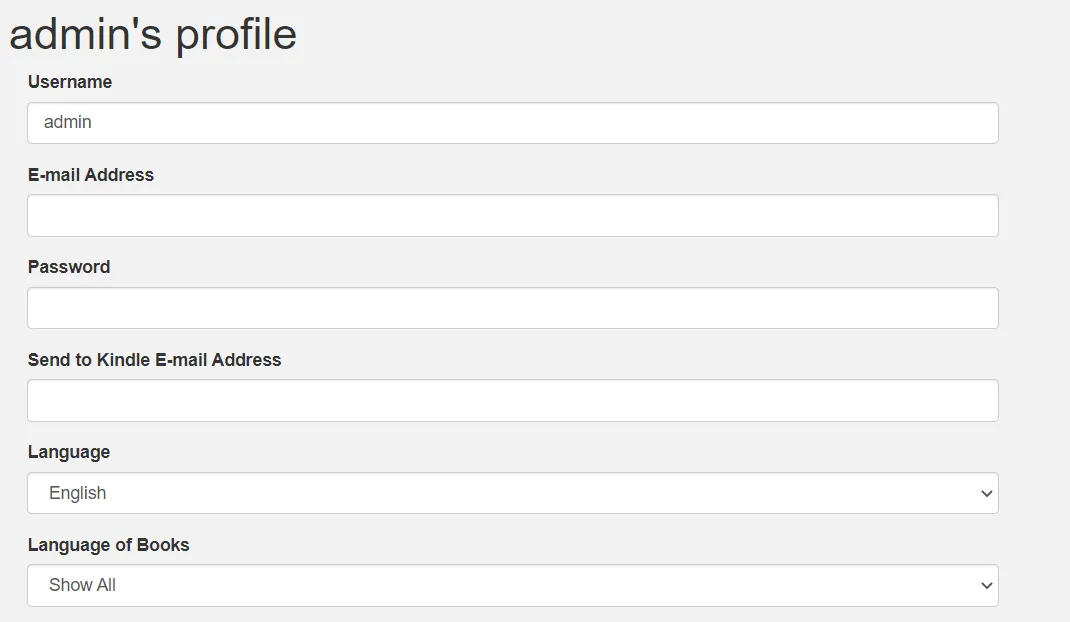
You should also change this in your profile.
Then the basic configuration must be edited.
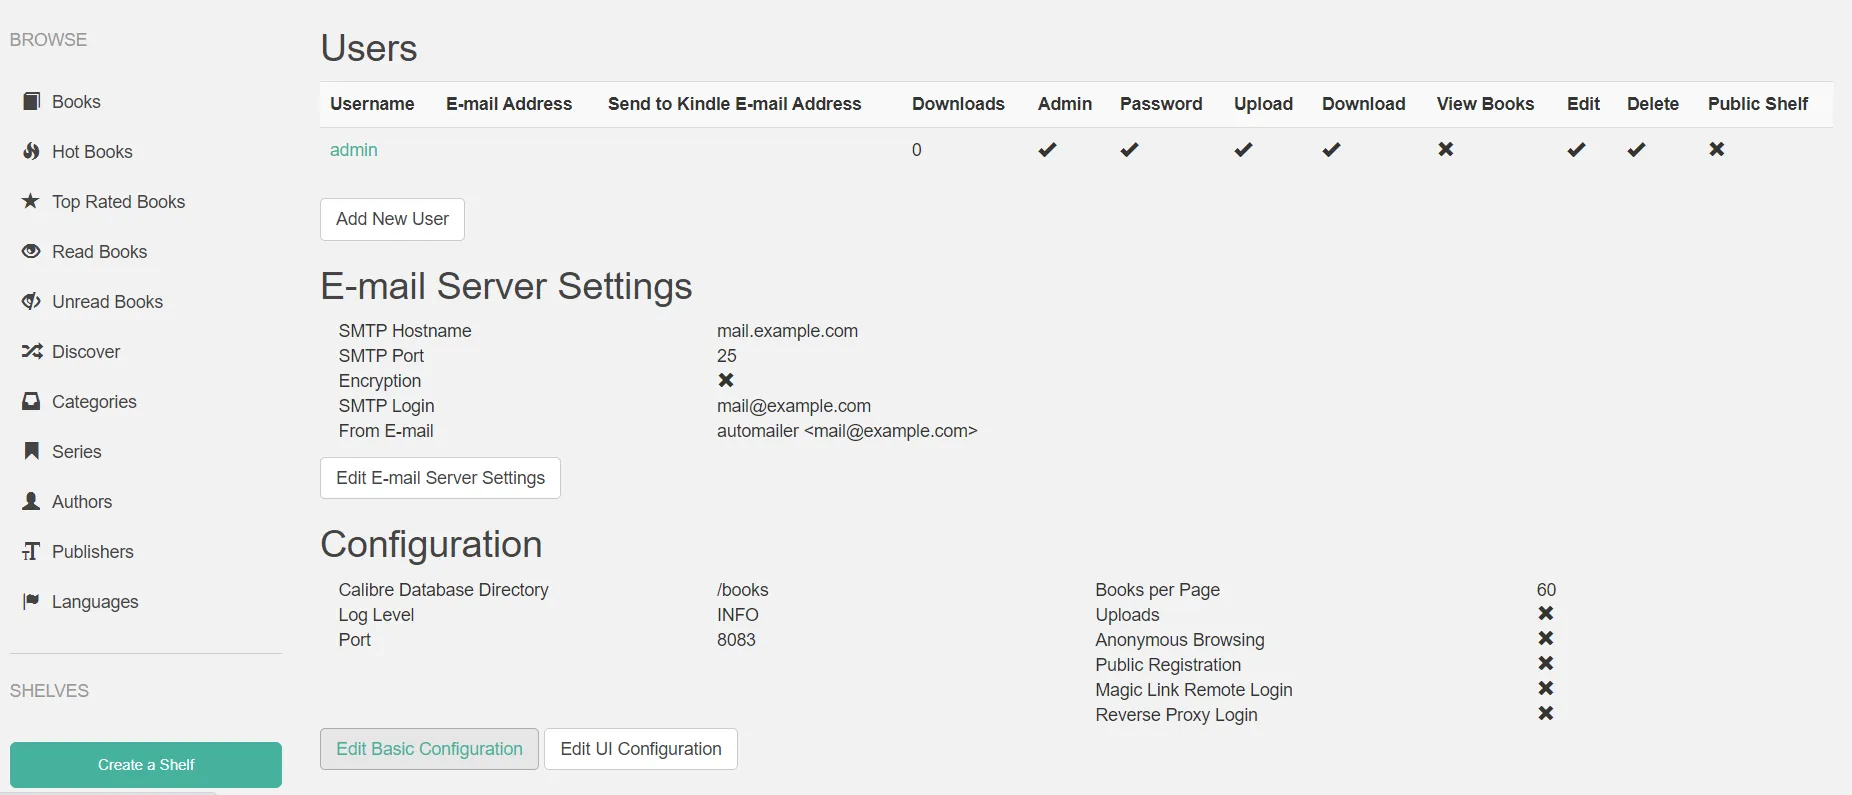
Firstly, it is helpful to activate the uploads; otherwise, there is no possibility of adding books via the WebUI.

This gives you an upload button in the navigation bar.

When I upload a book, I see it in the Calibre folder on my NAS. I have three options if I want access to my library when I’m not at home. Access via a VPN as if you were in your home network or open the ports in the firewall and assign a domain to the IP address, including port 38083 in the Reverse Proxy Manager (more on this in the next paragraph) or open the ports in the firewall and then release them in the router. The last option is not recommended.

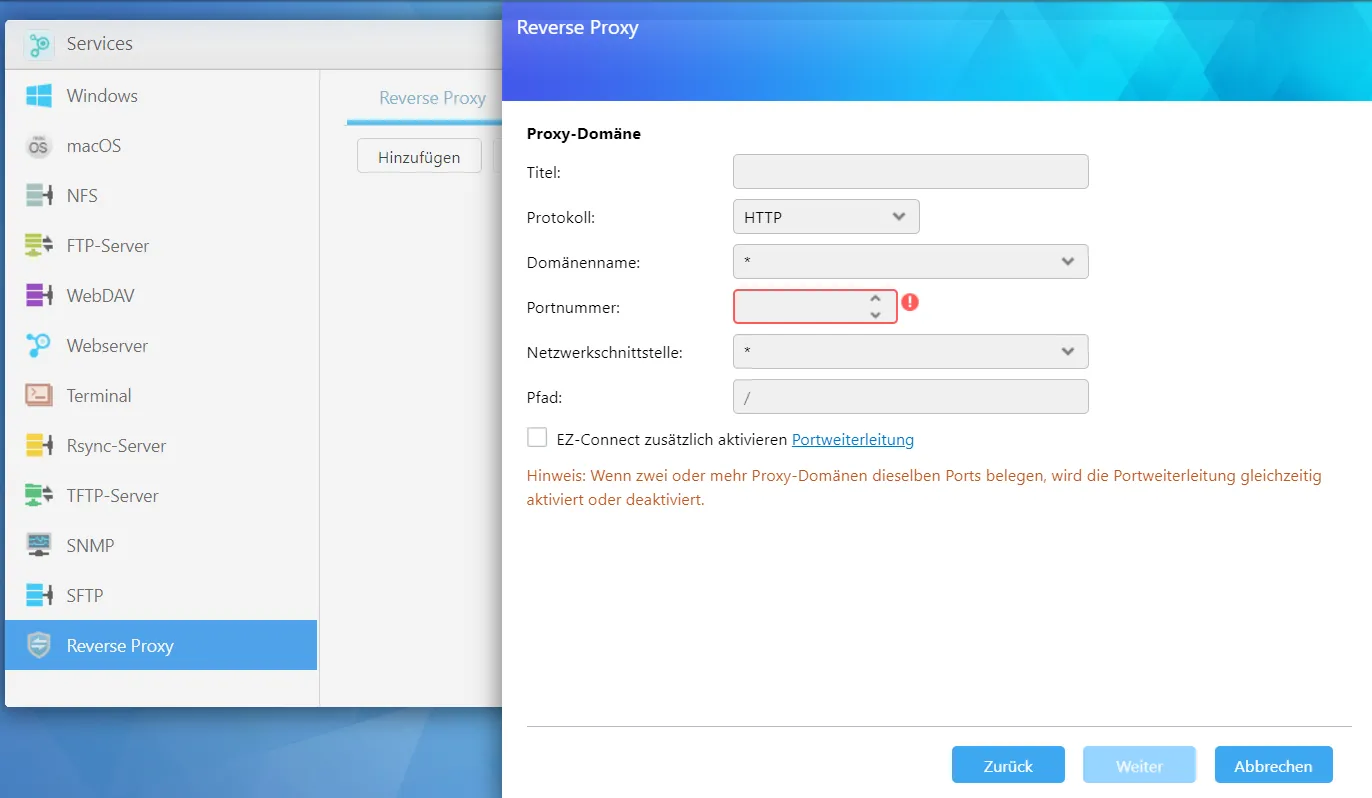
Reverse Proxy
Suppose you do not already have a proxy manager on another device (e.g. Raspberry Pi). In that case, you can also set one up on the NAS.
If you want to use the Asustor NAS as a reverse proxy manager, ports 80 and 443 must be released to the NAS in the router.
I find the integrated proxy manager too restrictive.
 To set up a new one with Docker, we get containers from the center. (Yes, it would certainly also work via CLI, but Portainer is easier)
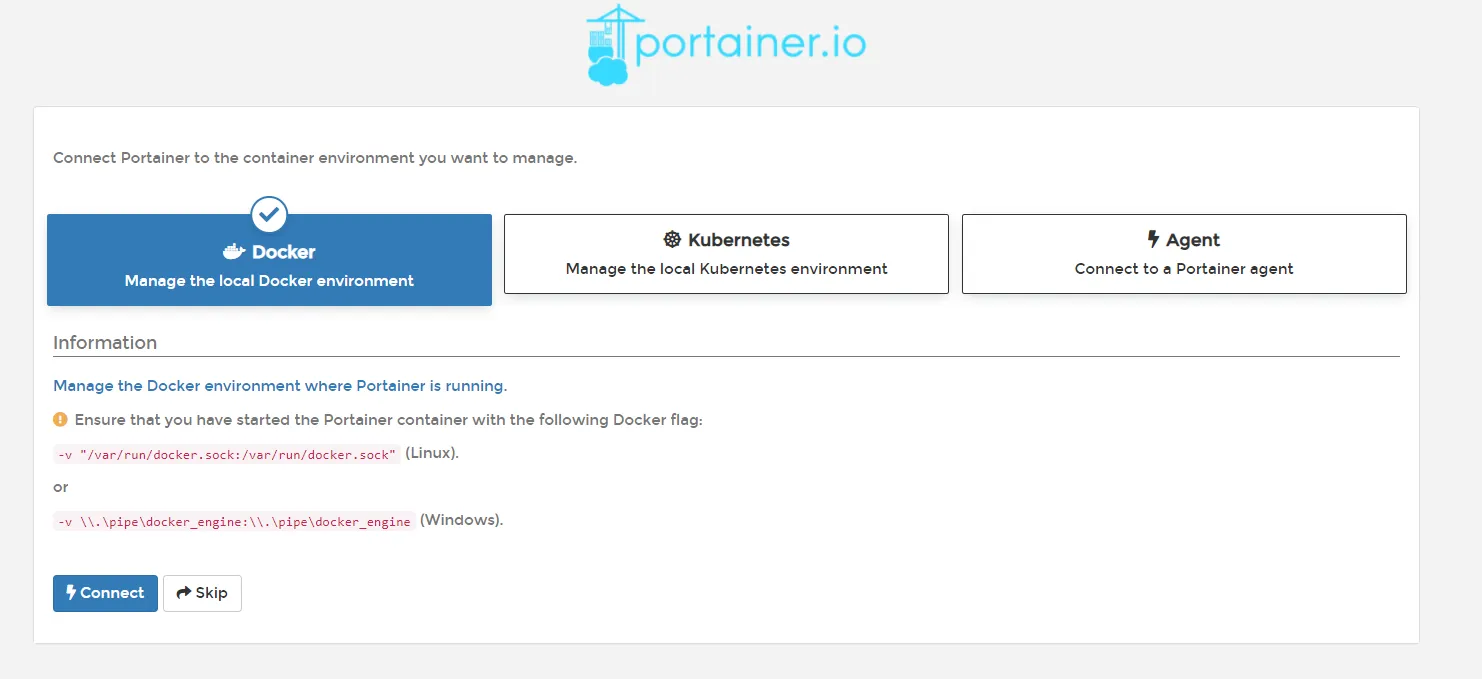
After I start the app, I choose a username and password. Then I select the option that I want to manage my Docker environment.
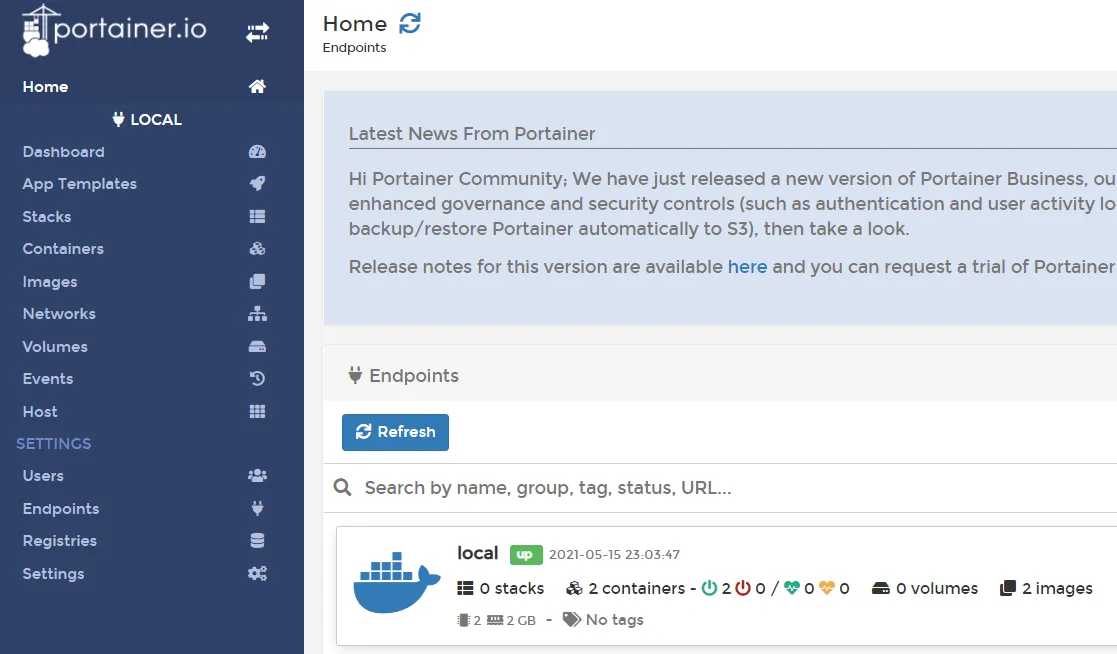
On the home screen, I see that two containers are running. These are Portainer itself and Calibre.
Nginx Proxy Manager needs ports 80 and 443 to work, but the NAS blocks port 443 for its own needs. You could now use the built-in proxy manager to send requests to a new one. But I would rather show the path of an additional network. I add a new network to the list of networks.

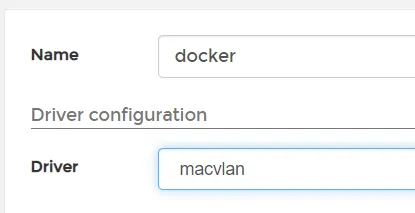
I choose a name and use macvlan as the driver.
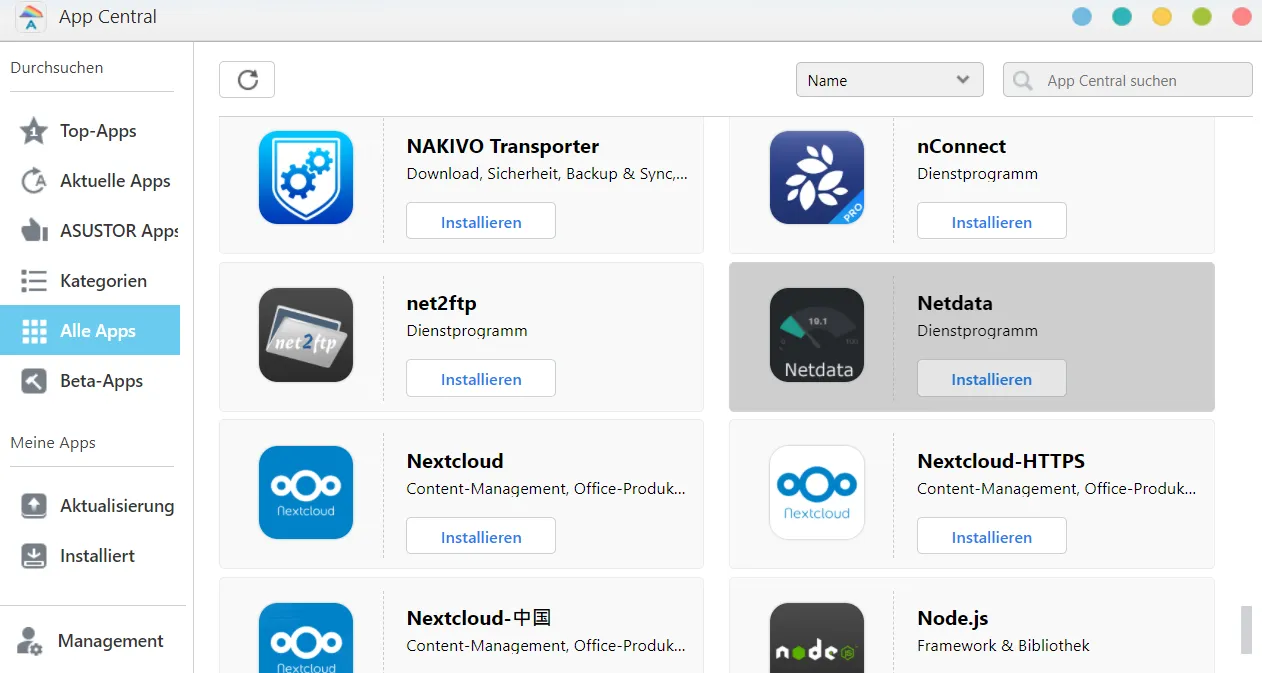
Then I have to specify the network, it should be eth0. But I’m not sure. So I install the monitoring program Netdata.
I see my network under “Network interfaces” is called eth0. docker0 is the default bridge network in Docker.
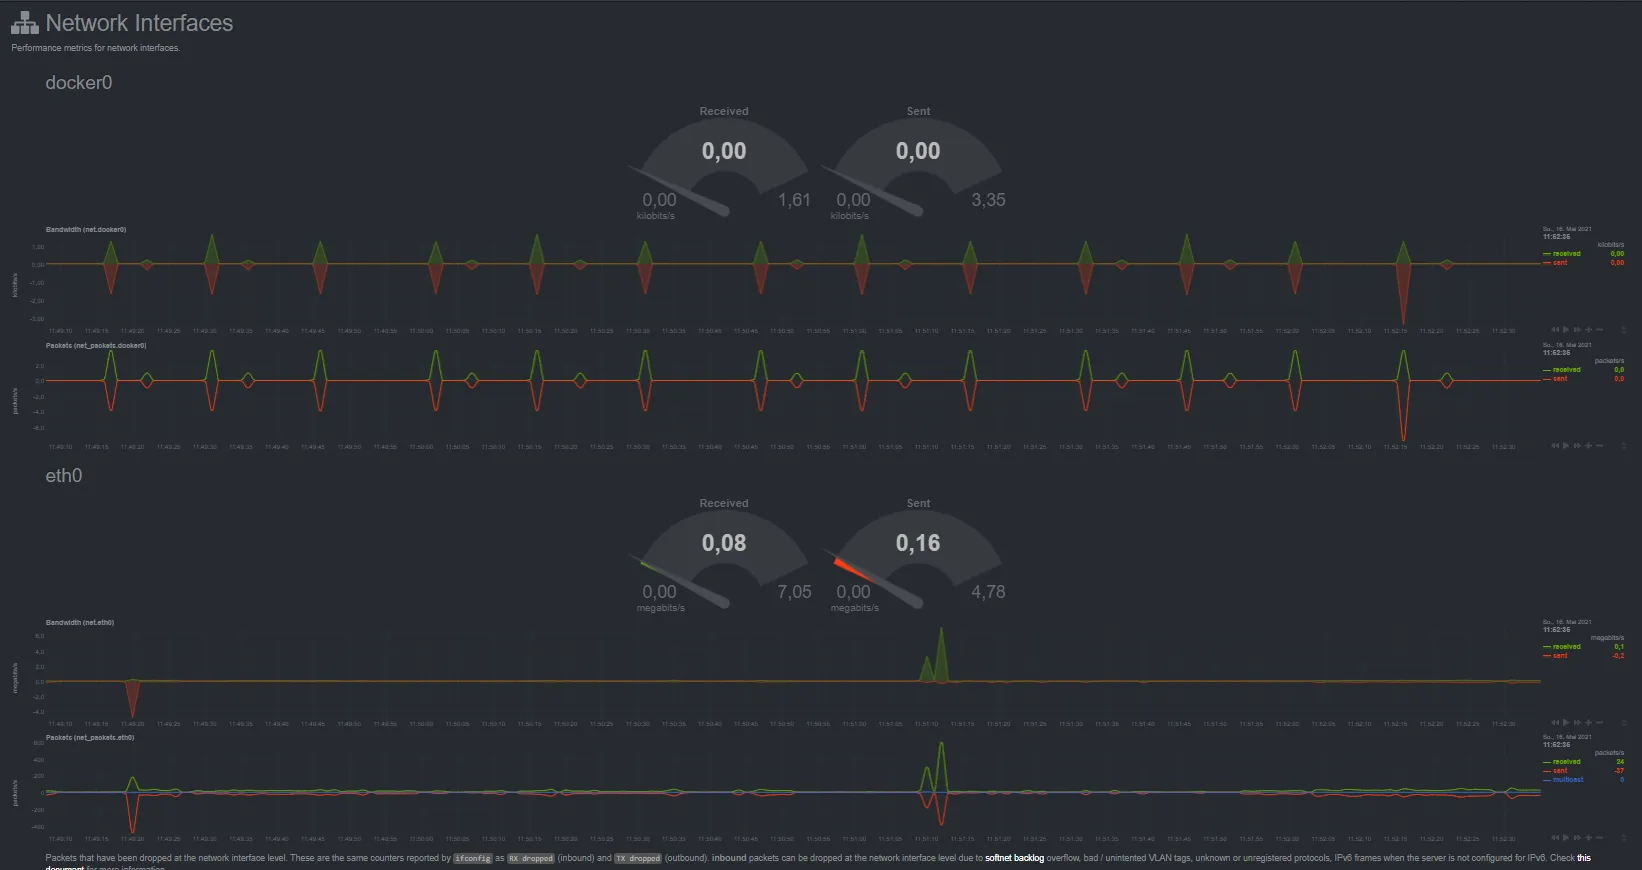
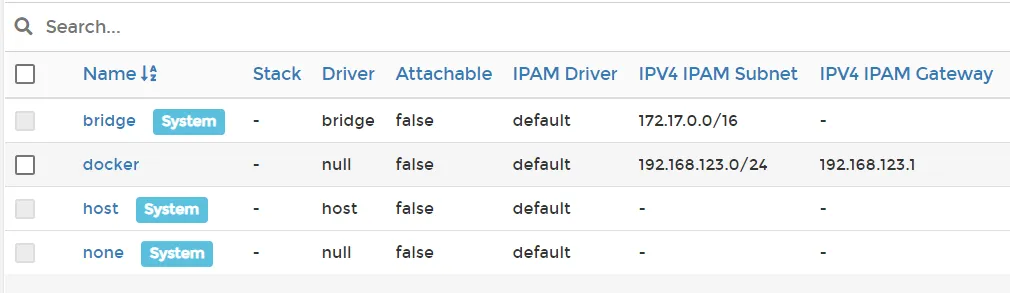
So I enter this in the configuration for my new network.

I enter the IP range of my network as the subnet. Gateway is the IP address of my router. In this case, I select the IP range from 152 to 159, which is outside the DHCP range of my router, i.e. it does not get in the way of this network.

I leave IPv6 unfilled and create the network.
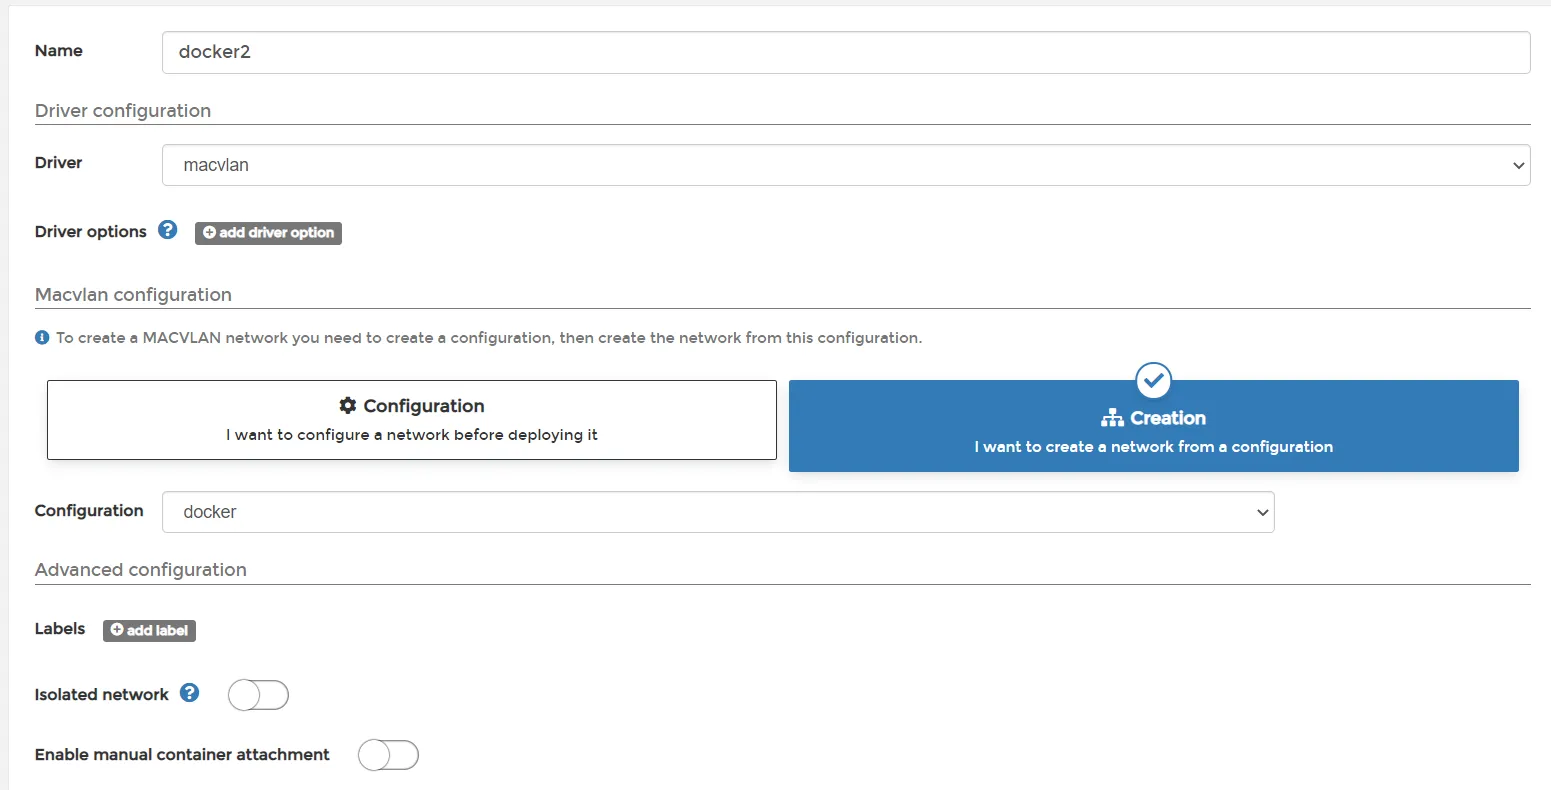
Now I add another network. This time I use Creation instead of Configuration.
Under “Stacks” I create a new stack.
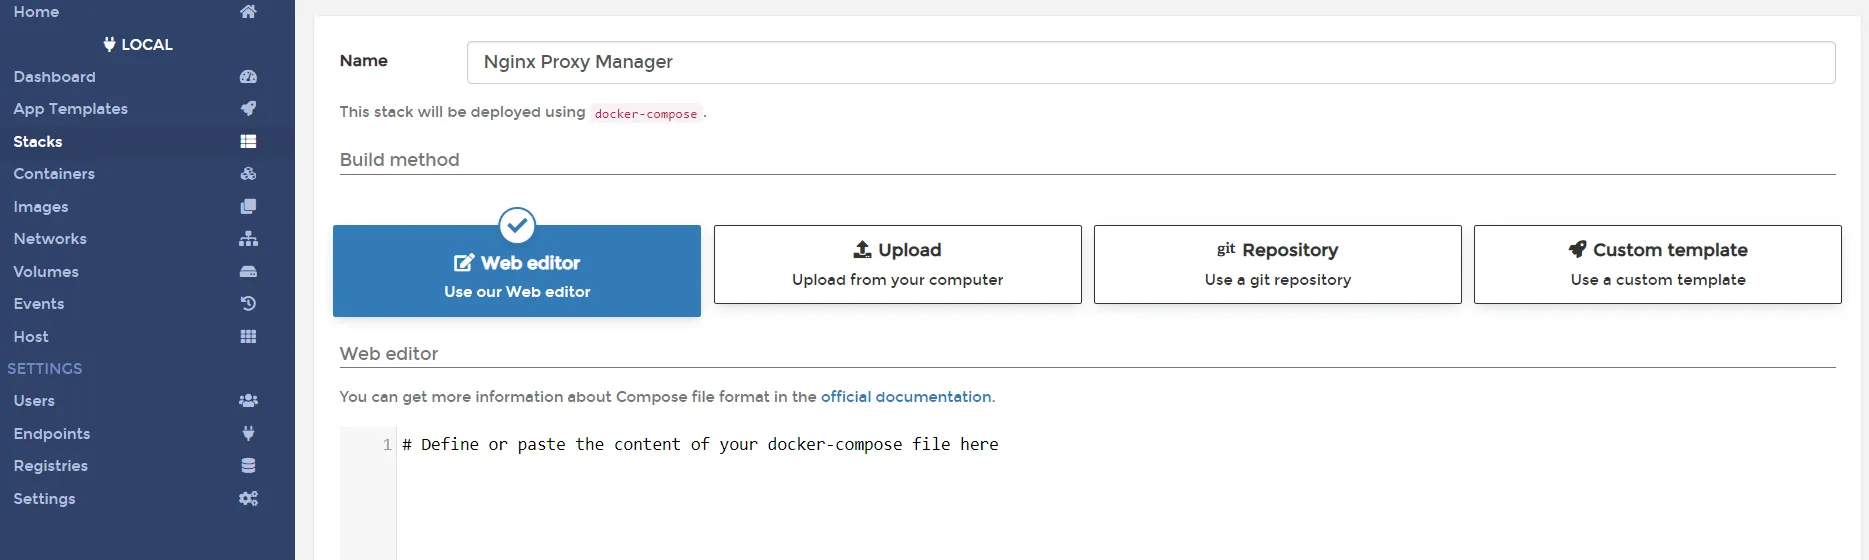
The great thing is that Portainer finally supports Docker-Compose. So we enter the Docker-Compose instruction.
version: "3.9"

### Networks ###
networks:
    docker2:
        external:
            name: docker2
    internal:
        external: false

### Services ###
services:
    nginx-proxy-manager:
        container_name: nginx-proxy-manager
        image: jc21/nginx-proxy-manager
        restart: always
        networks:
            - docker2
            - internal
        ports:
            - "80:80"
            - "443:443"
            - "81:81"
        environment:
            DB_MYSQL_HOST: npm_db
            DB_MYSQL_PORT: 3306
            DB_MYSQL_USER: npm
            DB_MYSQL_PASSWORD: npm
            DB_MYSQL_NAME: npm
            DISABLE_IPV6: "true"
        volumes:
            - /volume1/Docker/npm/data:/data
            - /volume1/Docker/npm/letsencrypt:/etc/letsencrypt
        depends_on:
            - npm_db

    npm_db:
        container_name: npm_db
        image: mariadb
        restart: always
        networks:
            - internal
        environment:
            MYSQL_ROOT_PASSWORD: npm
            MYSQL_DATABASE: npm
            MYSQL_USER: npm
            MYSQL_PASSWORD: npm
        volumes:
            - /volume1/Docker/npm/db:/var/lib/mysql
The network name must be adjusted if a different one was used. The password can be changed. The volume can also be adjusted to avoid mounting the files in the Docker folder or if the volume has a different name. Now you have to wait a little.

I click on nginx-proxy-manager to see which IP address it has. This is at the bottom.
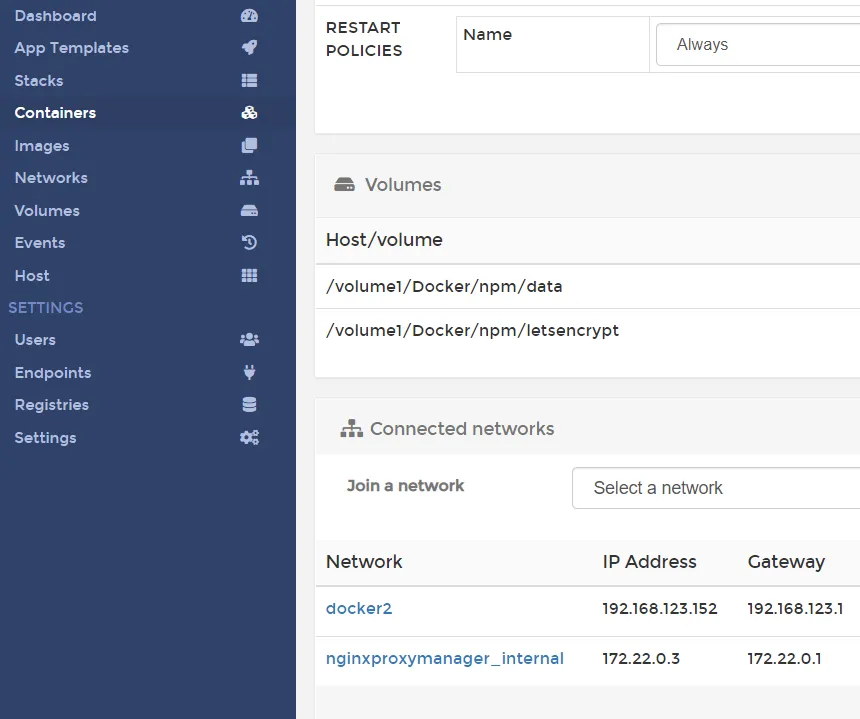
I visit this IP address, including port 81, with my browser and get to this page (i.e. 192.168.123.152:81 for me).
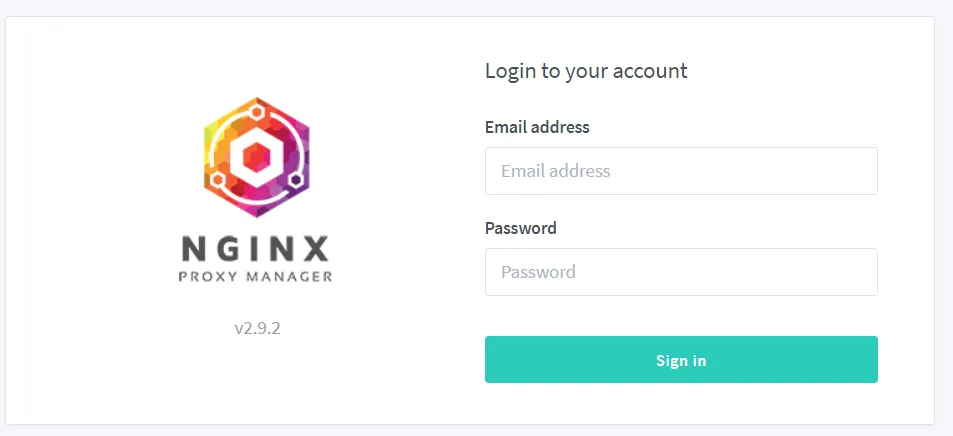
Here, I can log in with admin@example.com and changeme as password. This should also be changed immediately. If you have set it up, you must allow access to ports 80 and 443 in the Asustor firewall. Now you can release ports 80 and 443 (preferably not 81!) for this IP address in the router and have thus set up your nginx proxy manager.
Incidentally, I can also see the new npm folder in the Docker folder.
Git server
The App Central offers Gitea as a Git server. The version is currently about 1 month old, which I think is acceptable.
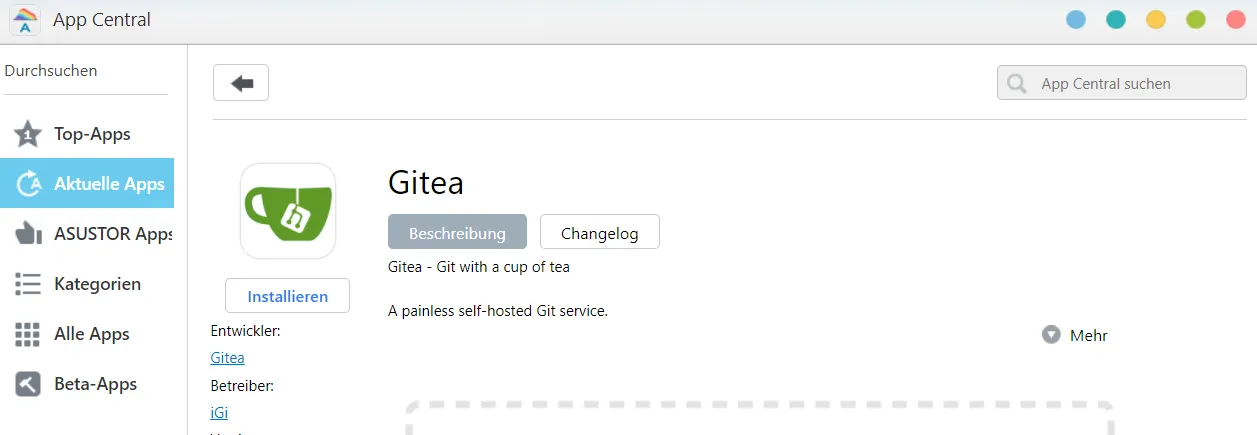
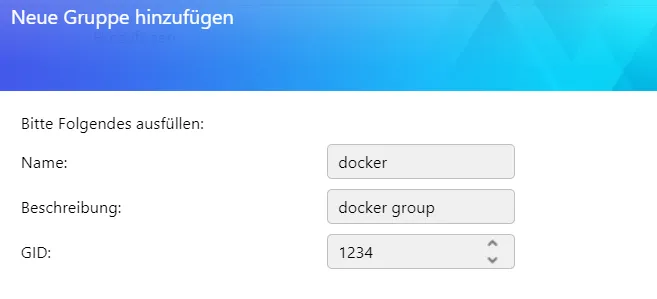
However, I don’t want to set up a central MySQL server, so I prefer to install it via Docker. You should know your user ID and the Docker group ID for the installation. The user ID can be read in the access control when you edit your user. I add a group called docker to the local groups.
I only give the group access rights for the Docker and Calibre folders (although it doesn’t matter for Calibre at the moment).

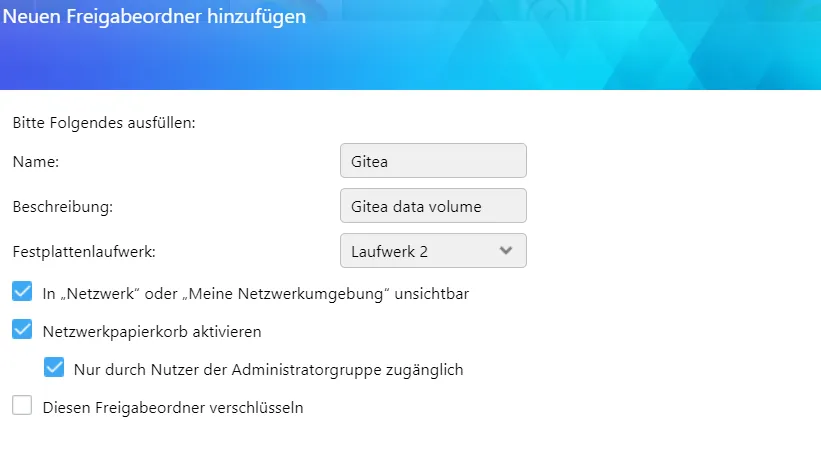
I create a new share folder.
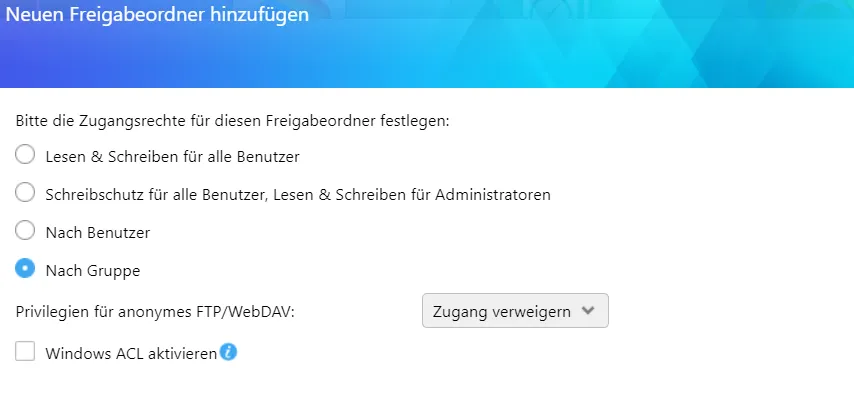
I define the access rights by group and allow the Docker group access.
Now I open Portainer and create a new stack.
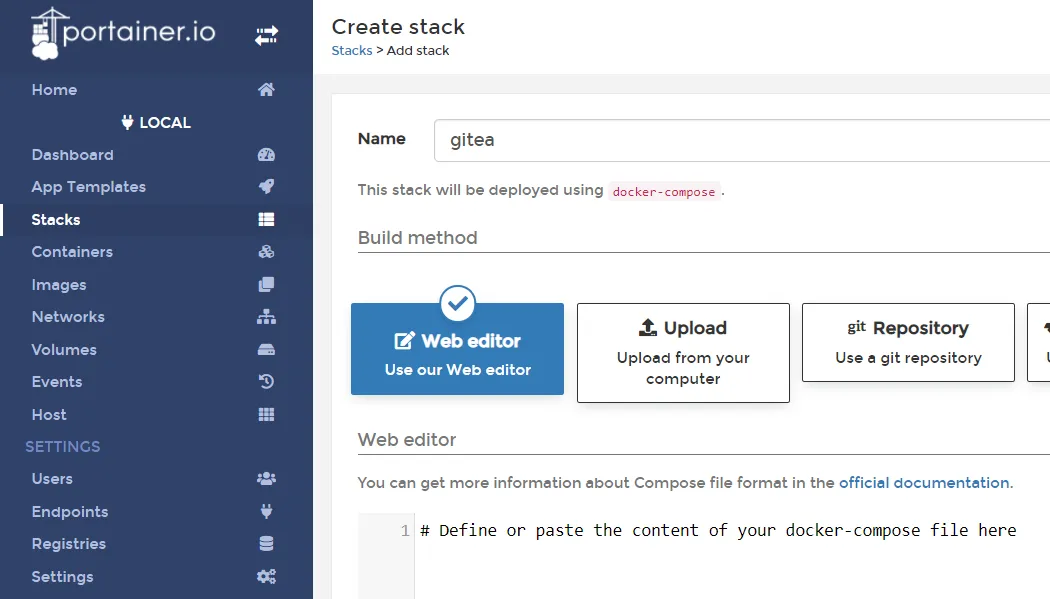
version: "3"

networks:
    gitea:
        external: false

services:
    server:
        image: gitea/gitea
        container_name: gitea
        environment:
            - USER_UID=1000
            - USER_GID=1234
            - GITEA__database__DB_TYPE=mysql
            - GITEA__database__HOST=db:3306
            - GITEA__database__NAME=gitea
            - GITEA__database__USER=gitea
            - GITEA__database__PASSWD=gitea
        restart: unless-stopped
        networks:
            - gitea
        volumes:
            - /volume2/Gitea/data:/data
            - /etc/timezone:/etc/timezone:ro
            - /etc/localtime:/etc/localtime:ro
        ports:
            - "13000:3000"
            - "10022:22"
        depends_on:
            - db

    db:
        image: mariadb
        container_name: gitea_db
        restart: unless-stopped
        environment:
            - MYSQL_ROOT_PASSWORD=gitea
            - MYSQL_USER=gitea
            - MYSQL_PASSWORD=gitea
            - MYSQL_DATABASE=gitea
        networks:
            - gitea
        volumes:
            - /volume2/Gitea/db:/var/lib/mysql
The storage locations, passwords and IDs can be customized. Deploying takes time. I see a white screen when I call the NAS’s IP address, including port 13000. This time it’s not the firewall, but the network. I select the container gitea and add bridge as network.
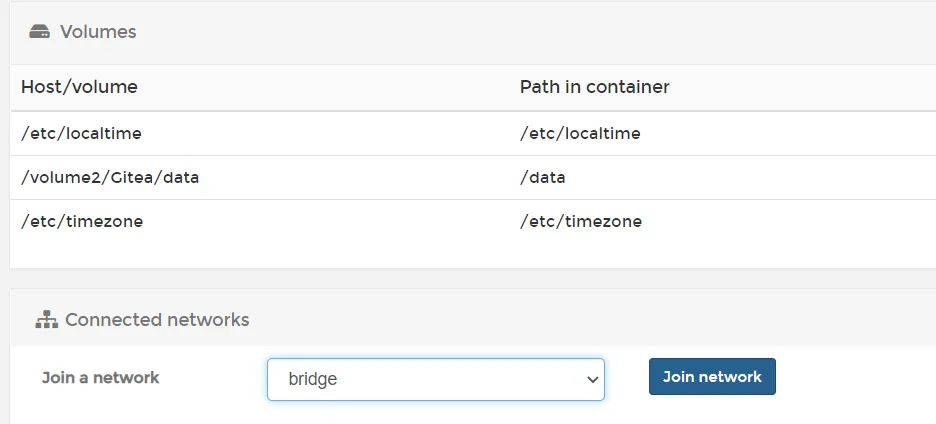
I then see the page with the initial configuration on port 13000.
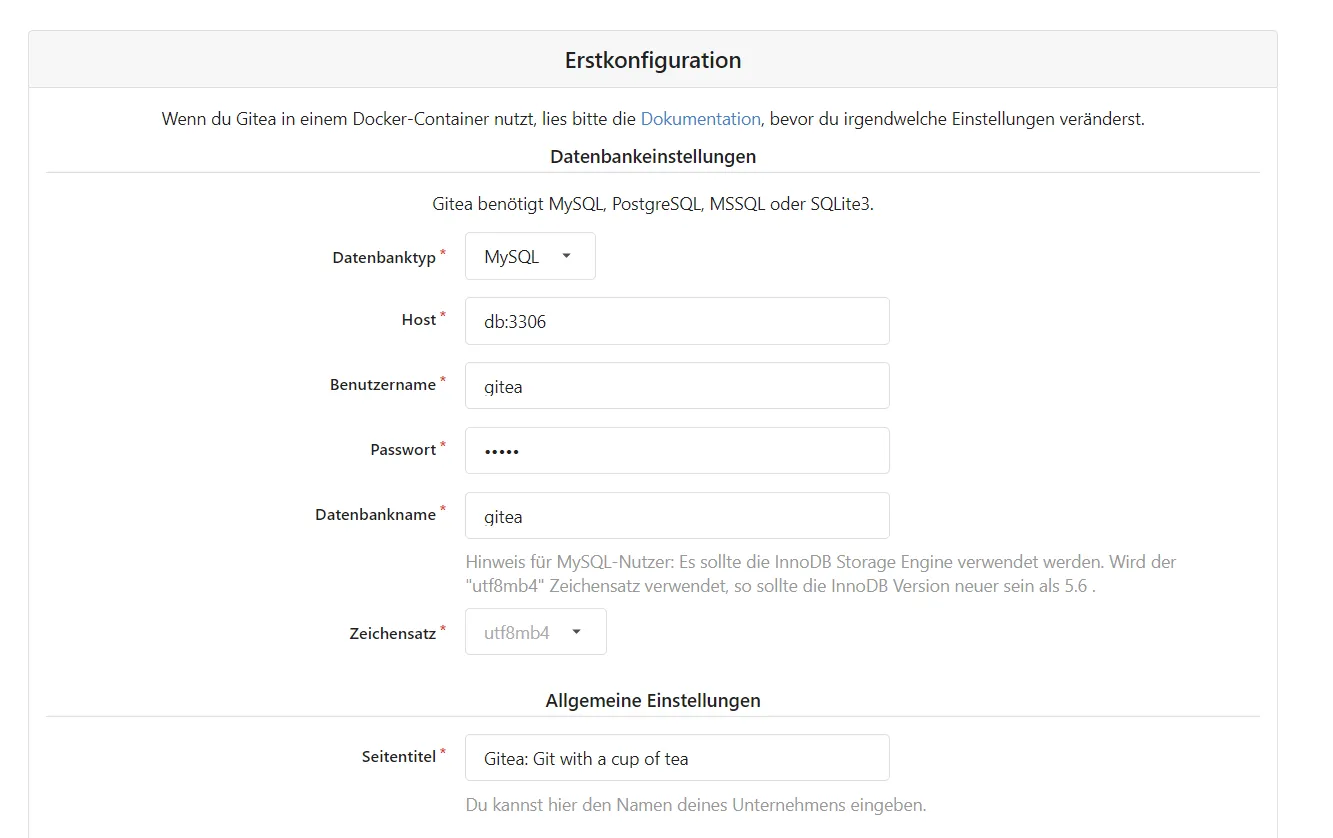
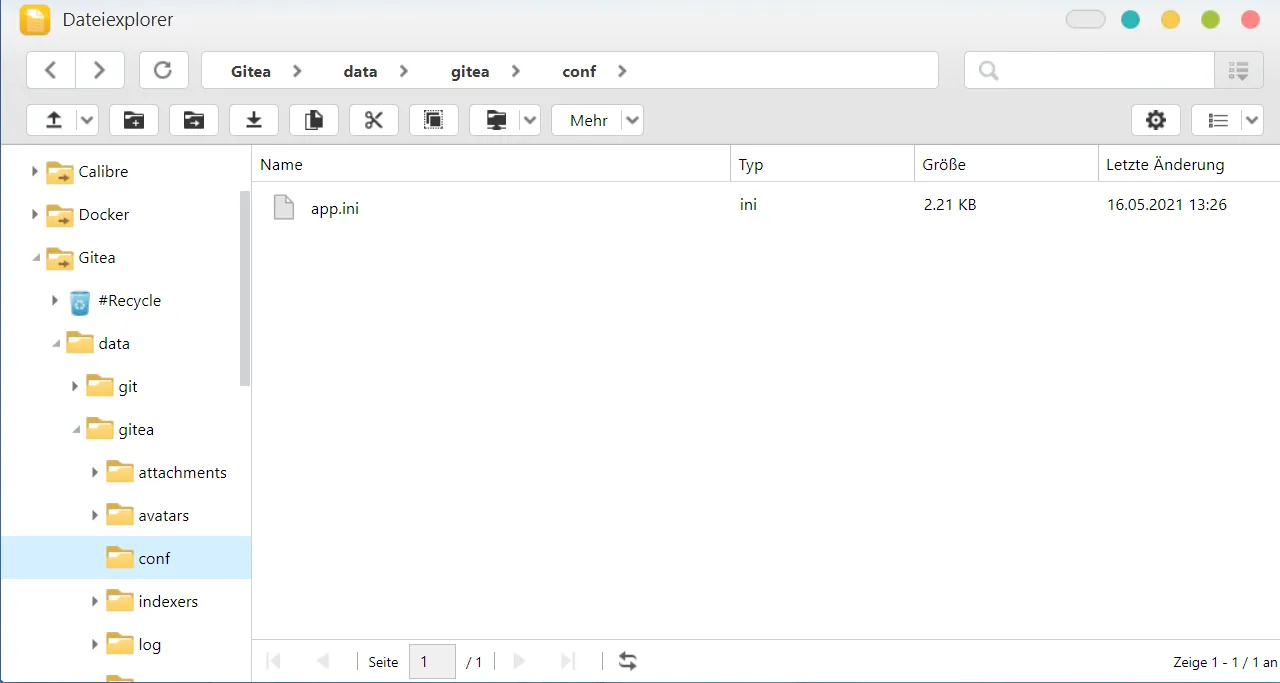
I leave everything as it is and click on install. I can then register on the site. The configuration file is located in the folder Gitea/data/gitea/conf. You can stop the container, edit the file (locally) and start the container again.
Gitea is now also running on the NAS.
Backup and snapshots
Finally, I would like to briefly discuss snapshots and backups.
Snapshot
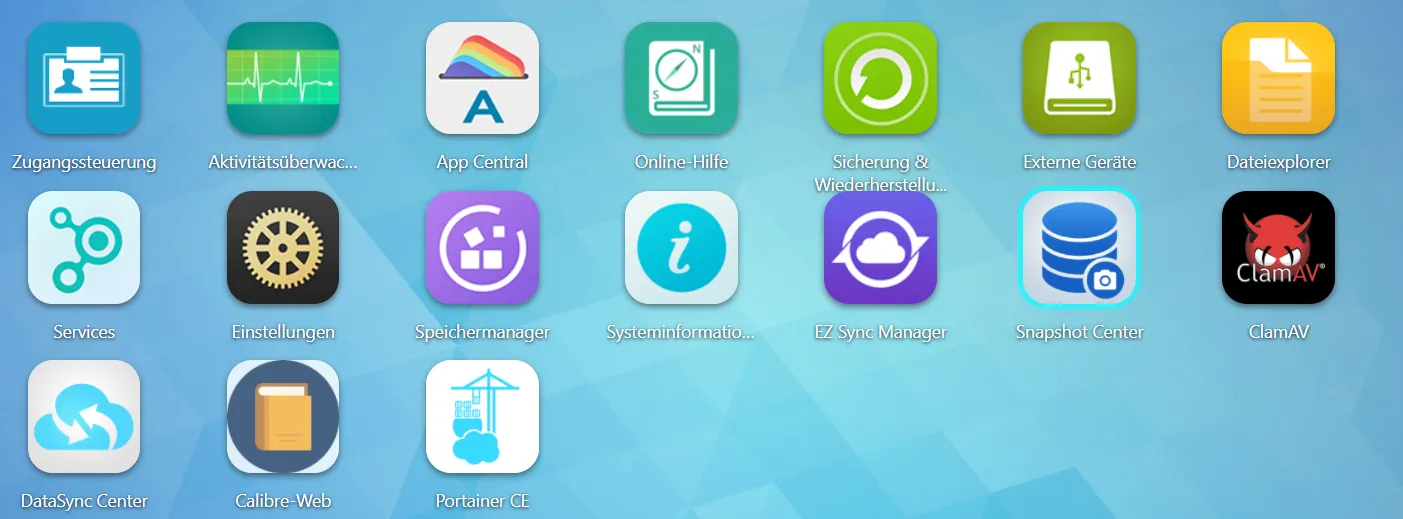
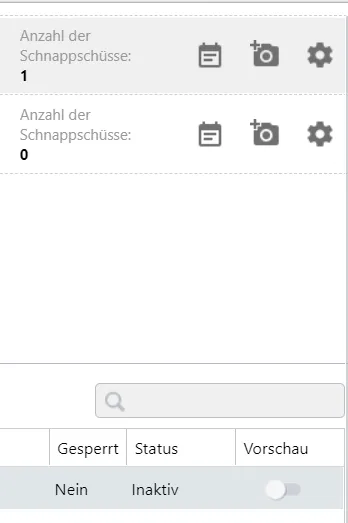
(Automated) snapshots can be set up in the Snapshot Center.
For automatic snapshots, click on the schedule icon and make the desired settings.

A created snapshot can be restored completely, but individual elements can also be found again by pressing the preview trigger.
However, it is essential to note that a snapshot is not a backup. It only protects against accidental deletions or the test installation of programs, etc. Unfortunately, I don’t see a way to export these snapshots. I cannot find them via SSH.


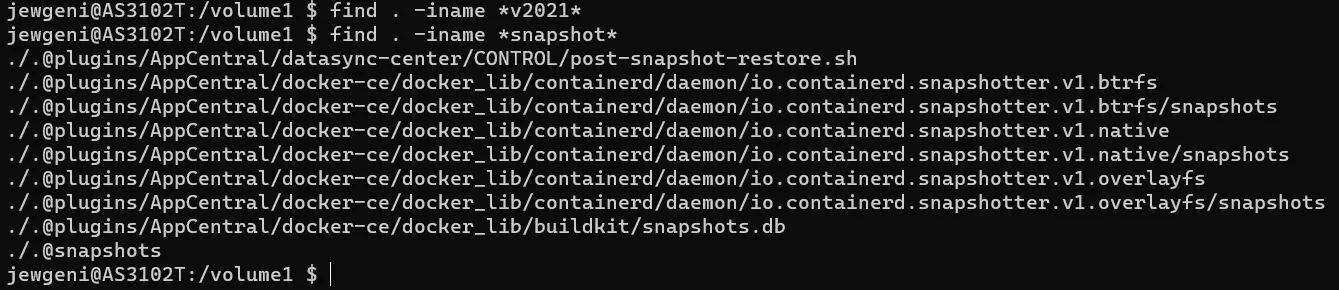
So if anyone knows where they are, I’d appreciate a comment.
Backup
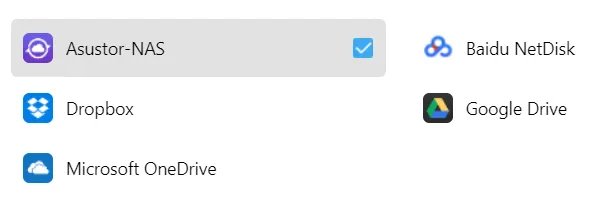
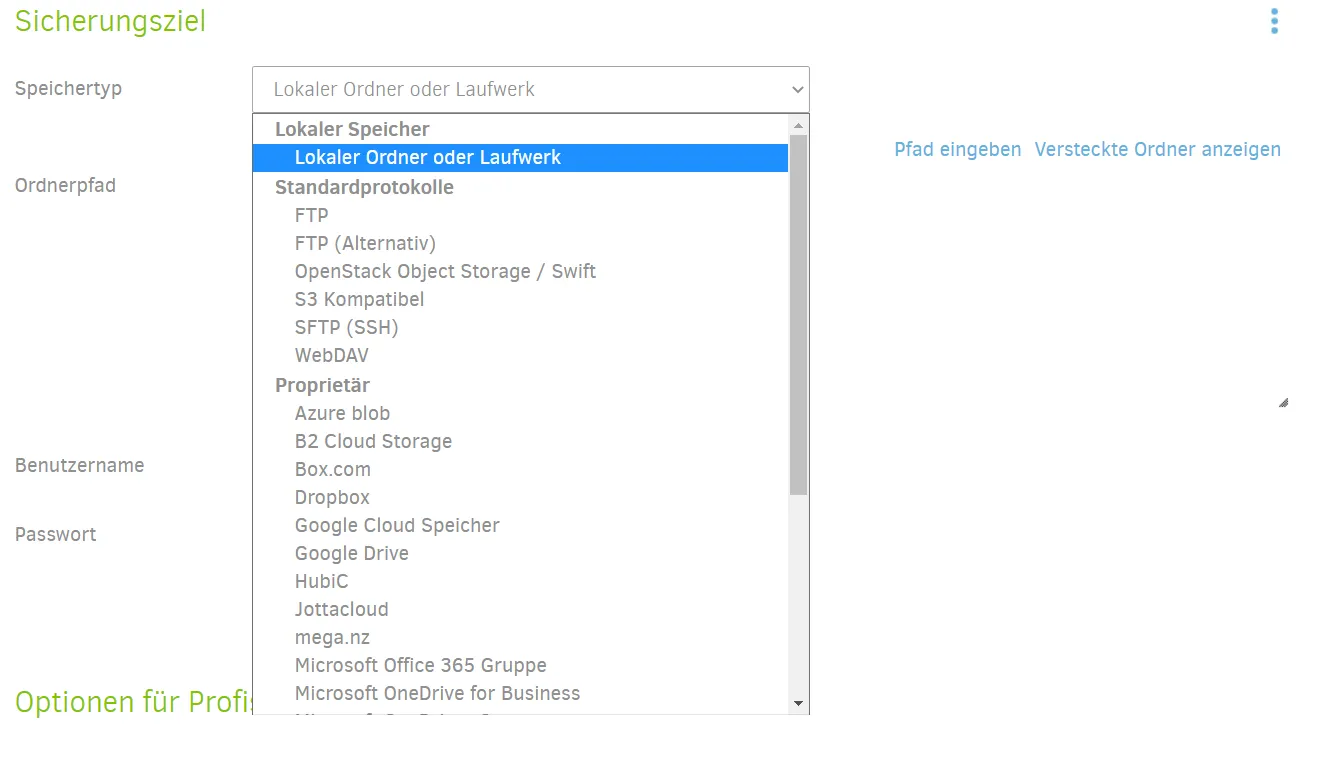
For a quasi-backup copy in the cloud, you can use Google Drive, Dropbox or OneDrive, as already described with the help of the Datasync Center.
The Dublicati program from the App Central offers better backup options.
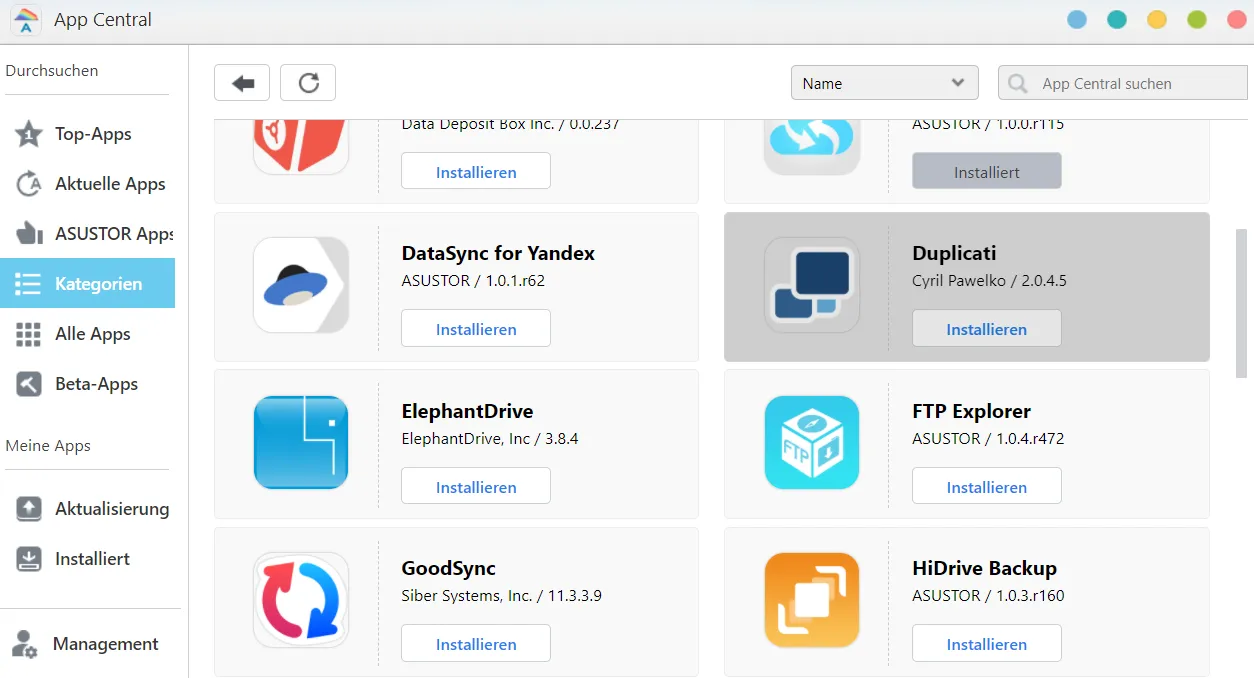
This allows backups to be encrypted if required and there are many backup destinations.
Perhaps I will go into this in more detail at another time.
Another option without further installation is to manually move the folders to be backed up to an external storage location. Please note that databases cannot always be copied easily, especially not during operation. I would now like to back up my Gitea folder.
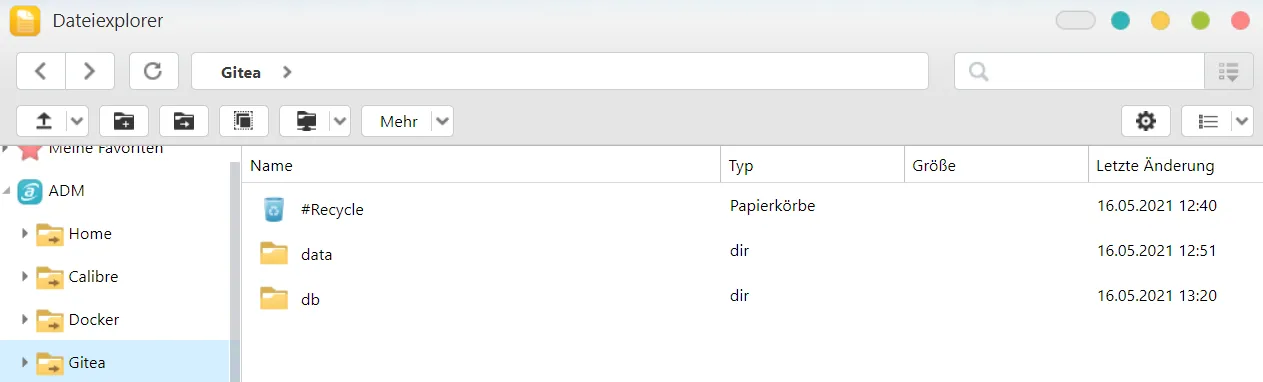
I can simply download the data subdirectory. I could also download the db folder, but restoring it could have complications. I would, therefore, prefer to have MariaDB create a backup for me. I call up Portainer.
I navigate to the container console of gitea_db and connect.
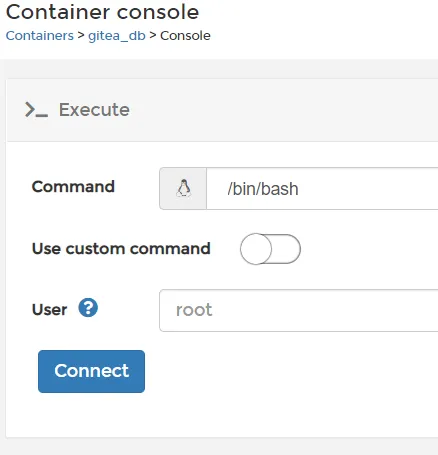
Then I execute a MySQL dump.

The command is as follows.
/usr/bin/mysqldump --default-character-set=utf8mb4 -u username --password=password database > var/lib/mysql/backupdateiname.sqlIn my case, username, password and database are “gitea”:
/usr/bin/mysqldump --default-character-set=utf8mb4 -u gitea --password=gitea gitea > var/lib/mysql/backupdateiname.sqlI then have a backup in the db folder.
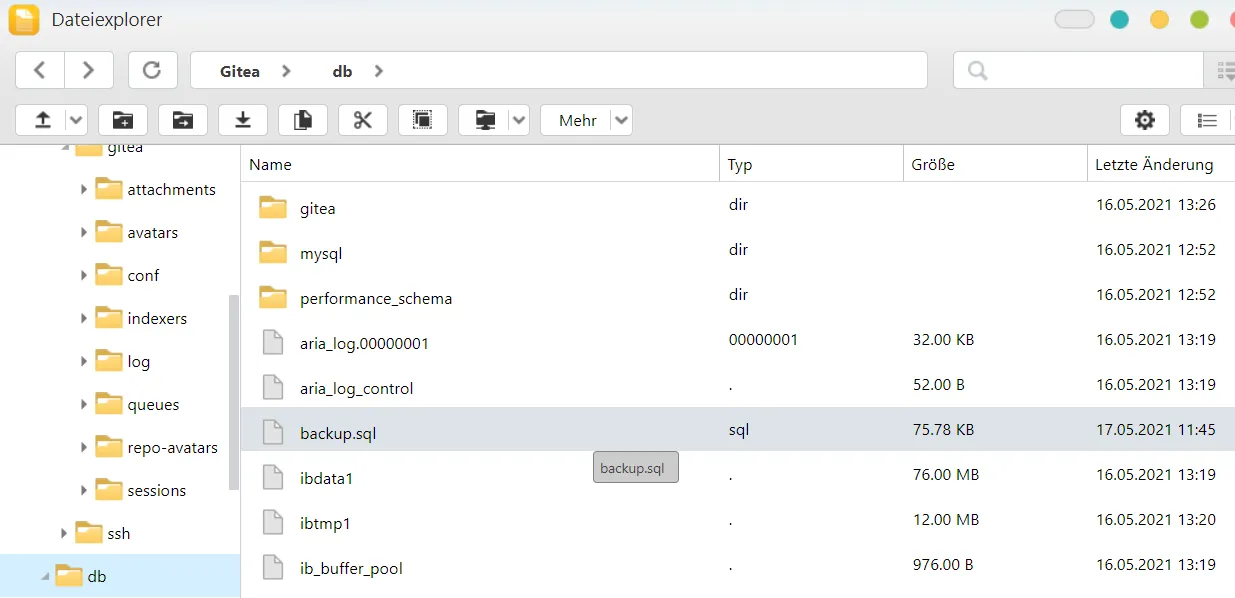
I can download this backup. When restoring the database, I put the backup.sql into the db folder and execute the following.
cat /var/lib/mysql/backup.sql | /usr/bin/mysql --default-character-set=utf8mb4 -u username --password=password database
At this point, I end my setup instructions for the Asustor NAS. If anything remains unclear, I look forward to comments 🙂
Related Articles
Synology NAS Setup: Your First Homeserver Step-by-Step
Set up your Synology DiskStation from scratch: VPN, DDNS, Firewall, Docker, and Nginx Proxy Manager. The complete NAS homeserver setup guide for beginners.
Setting up Ubuntu Homeserver with Docker (Intel-Nuc)
Set up your Ubuntu homeserver step-by-step: from base configuration to your first Docker containers. The complete guide for beginners. Start building today.
Install Linkwarden: Self-Hosted Bookmark Manager on Synology
Install Linkwarden on your Synology NAS and take control of your bookmarks. A self-hosted bookmark manager with easy Docker setup – manage links efficiently!
How to Install Paperless-ngx on a Synology NAS with Docker
Learn how to install Paperless-NGX on your Synology NAS — a powerful open-source document management system — using Docker and Portainer. Step-by-step guide.