Guide for Setting Up Your Own Dedicated OpenTTD Server
Set up your own dedicated OpenTTD server with Docker for multiplayer Transport Tycoon. This step-by-step guide covers everything — free and self-hosted.

Table of Contents
CAUTION
Please note that this blog post was originally written in German and has been translated for your convenience. Although every effort has been made to ensure accuracy, there may be translation errors. I apologize for any discrepancies or misunderstandings that may result from the translation and I am grateful for any corrections in the comments or via mail.
Introduction to OpenTTD
A few years ago, I was looking for games that I could play together with friends without being in the same location. One of the games I came across was OpenTTD.
OpenTTD is an open-source simulation game based on Transport Tycoon Deluxe
This free game is also available on Steam or the Play Store and has highly positive ratings (96%) or 4.3/5 stars. In this strategic Transport Tycoon game, the goal is to run a transport company by building and managing transport routes and vehicles. You can use trains, buses, aircraft, and ships to transport goods and expand your industry.
Why Run a Dedicated Server?
A dedicated OpenTTD server makes it possible for multiple players to log into a shared game at different times without requiring the host to be online. In this guide, I’ll show you how to rent and operate your own dedicated OpenTTD server that’s available 24/7.
Renting a Server
If you have already set up a server according to these instructions, you can skip this part, as the setup is repeated here in abbreviated form.
The first step is to rent a suitable server. I recommend the VPS and especially Root Server (dedicated CPU) from Netcup or servers from Hetzner. For a pure OpenTTD server, you don’t need high requirements, especially if you’re not planning to create huge maps and/or expect a large number of players. A smaller VPS should be completely sufficient.
New customers receive with these affiliate vouchers a discount on the first order (and I receive a commission for referred customers). The percentage discounts remain permanently active if the VPS is not canceled.
I choose Ubuntu 24.04 as the operating system for the new installation. Another would also be possible as long as Docker can be installed on it. Still, I have some experience with Ubuntu and see no reason to change. Furthermore, the end of standard support is in April 2029, so it will probably not be necessary to upgrade the operating system to the next version for the time being.
Setting Up the Ubuntu Server
The connection to the server must be established as soon as the server has been reinstalled. This can be done under Windows with the Windows Terminal, PuTTY or a similar program. VSCode also has a built-in terminal and offers the advantage of easier editing, as described here. I use the Windows Terminal.
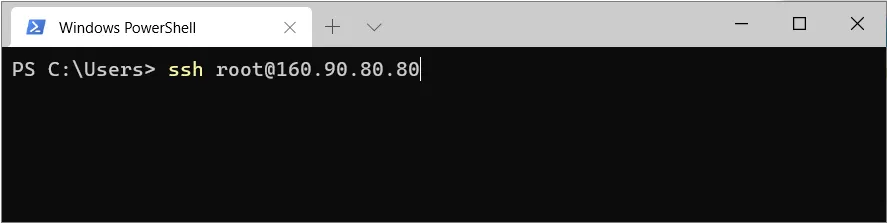
ssh root@{ip-address}You should naturally enter your server’s own IP address.
Then answer the question with “yes” if necessary and enter the password. The password is not displayed while it is being entered. First, we check whether there are any updates and install them if necessary:
apt update
apt upgrade
Confirm whether you want to update with Y.
The text editor Nano should already be installed by default, but you can install it like this to be on the safe side:
apt install nanoNext, we rename the server:
nano /etc/hostname
In Nano, exit the file with Ctrl + X. Nano will ask you if you want to save the changes (confirm with Y) and what you want to name the file. As we want to overwrite it, we do not change the name and simply confirm with Enter.
The new hostname is visible when you restart the server reboot and then reconnect to it ssh admin@{ip-address}.
![]()
Now, it makes sense to create a user who is not root.
useradd -m -G sudo newusername
passwd newusername
Useradd is the command to create a new user. The -m ensures that this user is assigned a home folder. The -G puts the user into a group, and then the group is named. The sudo group can execute commands with sudo. Finally, the name of the new user follows. A password for the user is created with passwd.
If the sudo group does not exist, you must create a group.
groupadd namenewgroupThis group should have the right to execute sudo commands:
EDITOR=nano visudoThe new group must then be mentioned in the file.

Now, we set the correct time if required.
dateIf the correct time is not displayed:
tzselectThe time zone can be selected using the numbers.
timedatectl set-timezone 'Europe/Berlin'It is time to restart the server and log in as a newly created user.
rebootNext, I install Htop (a monitoring program).
apt install htopNow, the server should refuse to run the program and ask if you are root.

So again, with Superuser do.
sudo apt install htopBy entering htop, you can now view the load on the server.
This makes it easy to see how much the server’s CPU and RAM are used. Press F10 or CTRL + C to exit the view.
I would like to have another shell.
sudo apt install git curl
sudo apt install zsh
Now I install zim and change the default shell to zsh.
curl -fsSL https://raw.githubusercontent.com/zimfw/install/master/install.zsh | zsh
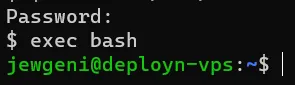
chsh -s /bin/zsh
exec bashNow the shell should (subjectively) look better.
The most important parts of the installation are Docker and Docker-Compose. Also optional is Lazydocker, a straightforward way to view your Docker containers and their current logs via SSH.
# Add Docker's official GPG key:
sudo apt-get update
sudo apt-get install ca-certificates curl
sudo install -m 0755 -d /etc/apt/keyrings
sudo curl -fsSL https://download.docker.com/linux/ubuntu/gpg -o /etc/apt/keyrings/docker.asc
sudo chmod a+r /etc/apt/keyrings/docker.asc

# Add the repository to Apt sources:
echo \
  "deb [arch=$(dpkg --print-architecture) signed-by=/etc/apt/keyrings/docker.asc] https://download.docker.com/linux/ubuntu \
  $(. /etc/os-release && echo "${UBUNTU_CODENAME:-$VERSION_CODENAME}") stable" | \
  sudo tee /etc/apt/sources.list.d/docker.list > /dev/null
sudo apt-get update

# Install Docker:
sudo apt-get install docker-ce docker-ce-cli containerd.io docker-buildx-plugin docker-compose-plugin
Finally, we create a folder in the new user’s home directory.
cd ~
mkdir docker
With mkdir (make directory), we created the folder docker in the home directory (~).
If Lazydocker can be opened, the setup is complete.
sudo lazydockerWith Q, ESC or CTRL + C Lazydocker can be closed again.
Docker-Compose with OpenTTD
The next step is to create a Docker-Compose file to start the container with OpenTTD. First, we need a folder in which the configuration file and the savegames can be saved as well as the Docker-Compose file.
mkdir ~/docker/appdata/openttd -p
touch ~/docker/docker-compose-openttd.yml
We check whether port 3979 is already in use.
sudo lsof -i -P -n | grep LISTENWe now fill the Docker-Compose file.
nano ~/docker/docker-compose-openttd.ymlservices:
openttd:
container_name: openttd
image: ghcr.io/ropenttd/openttd:14
ports:
- 3979:3979/tcp
- 3979:3979/udp
restart: unless-stopped
volumes:
- ./appdata/openttd:/config
environment:
- loadgame=falseIf port 3979 is already in use, we select another port under which the Docker can be reached. For example 3969:3979/tcp and 3969:3979/udp. This is also necessary if several servers are to run simultaneously.
After we have saved the file, we start the container.
cd ~/docker
sudo docker compose -f docker-compose-openttd.yml up -d
And we look to see if there is anything unusual in the log.
lazydocker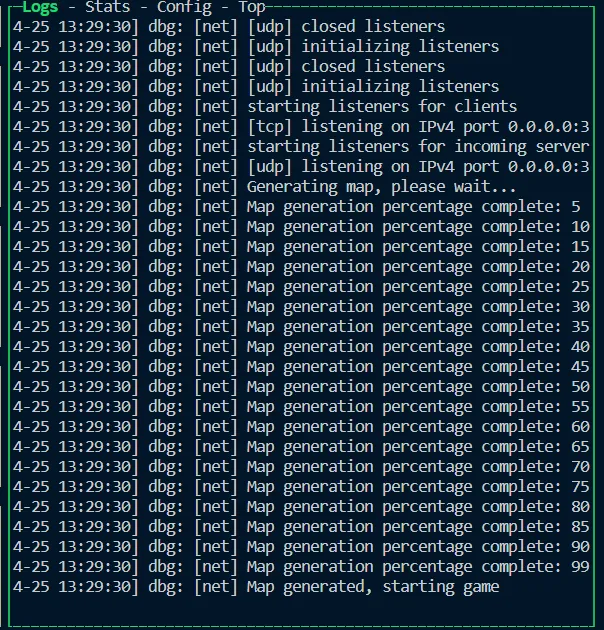
First we stop our container again.
sudo docker compose -f docker-compose-openttd downThe container can also be stopped via Lazydocker.
Editing the configuration
Now the configuration should be customized to your liking. The configuration files should have been downloaded automatically when the container was started for the first time.
sudo nano ~/docker/appdata/openttd/private.cfgHere I can change the server name.
sudo nano ~/docker/appdata/openttd/secrets.cfgHere I can change the password for the server, which requires new players to enter the password to join.
server_password = abcsudo nano ~/docker/appdata/openttd/openttd.cfgThere are many possibilities here, I change a few values of the default settings:
autosave_on_exit = true
autosave_on_network_disconnect = true
This way the game is automatically saved when the server is shut down.
min_active_clients = 1The game is paused if no player is connected to the server.
The game is paused when there is not at least one player connected to the server.
map_x = 9 # 6 to 12
map_y = 9 # 6 to 12
The size of the map can be changed. The larger the map, the more work the server has to do.
infrastructure_maintenance = trueThis causes an amount to be paid at regular intervals, calculated from the number of areas with rails, canals or locks.
max_aircraft = 100
max_ships = 200
This setting reduces the number of airplanes and ships a company may have.
town_name = germanThis ensures German town names.
terrain_type = 2This provides a slightly less flat landscape.
snow_line_height = 7Snow starts lower.
town_layout = 4More varied towns
industry_density = 4Lower industrial density
station_noise_level = trueWith this setting, the number of airports that can be placed near a city is no longer fixed. Instead, it depends on the airports’ noise level, distance from the city center and the city’s attitude.
I leave the rest as it is for now. Now I’ll delete the previous automatically created scores.
sudo rm -rf ~/docker/appdata/openttd/saveStarting the game
We adjust the configuration so that game saves are loaded.
cd ~/docker
nano docker-compose-openttd.ymlservices:
openttd:
container_name: openttd
image: ghcr.io/ropenttd/openttd:14
restart: unless-stopped
ports:
- 3979:3979/tcp
- 3979:3979/udp
volumes:
- ./appdata/openttd:/config
environment:
- loadgame=exitAnd a new game can be started.
cd ~/docker
sudo docker-compose -f docker-compose-openttd.yml up -d
This time, the logs show that the game has been paused due to the changed settings.

Now, it is also possible to connect to the game. To do this, install the game and start it. You can add a server in the “Multiplayer” menu.

The IP address, including port, must be entered in the input field. For example 191.80.90.90:3979. You can then join the server.

Server Update
Of course, you should update the server occasionally; with Docker this is done with just a few lines of code.
cd ~/docker
sudo docker compose -f docker-compose-openttd.yml down
sudo docker pull redditopenttd/openttd
sudo docker compose -f docker-compose-openttd.yml up -d

# Don't forget to update the host server occasionally
sudo apt update && sudo apt upgrade
With htop you can see if the server has enough resources. At this point, I wish you lots of fun building 🚈
Related Articles
Build a Blog with Gatsby.js and Ghost CMS on Your VPS
Step-by-step guide: Build a blog with Gatsby.js and Ghost as a headless CMS. Set up everything on your VPS, configure Docker, and publish your website.
Guide for mail server Mailcow behind Traefik with Docker
Set up your own mail server with Mailcow and Docker. Run it behind Traefik as a reverse proxy with SSL, spam filtering, and webmail – complete step-by-step guide!
How to Install Plausible Analytics with Docker & Traefik
Install the privacy-friendly Google Analytics alternative Plausible with Docker and Traefik. Set up self-hosted web analytics on your own server step by step.
Set Up Privacy-Friendly Shynet Analytics with Traefik
Host your own privacy-friendly web analytics with Shynet. Learn how to deploy Shynet as a Docker container behind a Traefik reverse proxy. Step-by-step setup guide.