How to Install and Optimize Windows 11 (2024 Guide)
Debloat your system using Sophia Script, and install essential programs quickly with WingetUI. Get started for a smooth and optimized Windows 11 setup.

Table of Contents
Getting started with a fresh installation of Windows 11 and setting it up can be quite a task. In this guide, we’ll navigate through the process of installing Windows 11, debloating it for enhanced performance, and setting it up with essential tools.
Key Takeaways
| Aspect | Details |
|---|---|
| Install Windows | Use Rufus to create a bootable USB drive for Windows 11 installation. |
| Debloat Windows | Run Sophia Script post-installation to remove unnecessary features and services. |
| Setup Windows | Install essential utilities such as PowerToys. |
| Rufus | A free, open-source software to create bootable USB drives. |
| Sophia Script | A PowerShell script for Windows debloating and optimization. |
| PowerToys | A set of utilities for power users to tune and streamline their Windows experience. |
| WingetUI | A graphical user interface for the Windows Package Manager (winget), making software installation easier and faster. |
Now that you have a snapshot of what we’ll cover, let’s dive into the details.
Prerequisites
- A PC with at least 4GB of RAM and 64GB of storage*
- TPM 2.0, 8GB of RAM and 128GB of storage is recommended
- A Windows 11 (Pro) license*
- A USB drive* with at least 8GB of storage
- A stable internet connection
Installing Windows 11 with Rufus
When it comes to installing Windows, Rufus is your best friend. This nifty little tool allows you to create a bootable USB drive with ease. Here’s how:
- Download the latest version of Rufus from its official website.
- Obtain the Windows 11 ISO from Microsoft’s website.
- Plug in your USB drive (at least 8 GB is recommended).
- Open Rufus and select the USB drive from the Device list.
- Click on ‘Select’ and choose your Windows 11 ISO.
- Ensure the partition scheme is set to GPT if you’re using UEFI firmware.
- Press ‘Start’ and wait for Rufus to create your bootable drive.
- A new window will appear, here you can select to remove the TPM 2.0 requirement or the online microsoft account requirement.

Once completed, you can use this drive to install Windows 11 on your computer.
First Steps After Installing Windows 11

After installing Windows 11, you’ll need to set up your system. Here are some things you should do:
-
Connect to the Internet: Go to Settings > Network & Internet and connect to your Wi-Fi network. If you’re using an Ethernet cable, you’re already connected.
-
Windows Activate: Go to Settings > Activation and activate Windows.
-
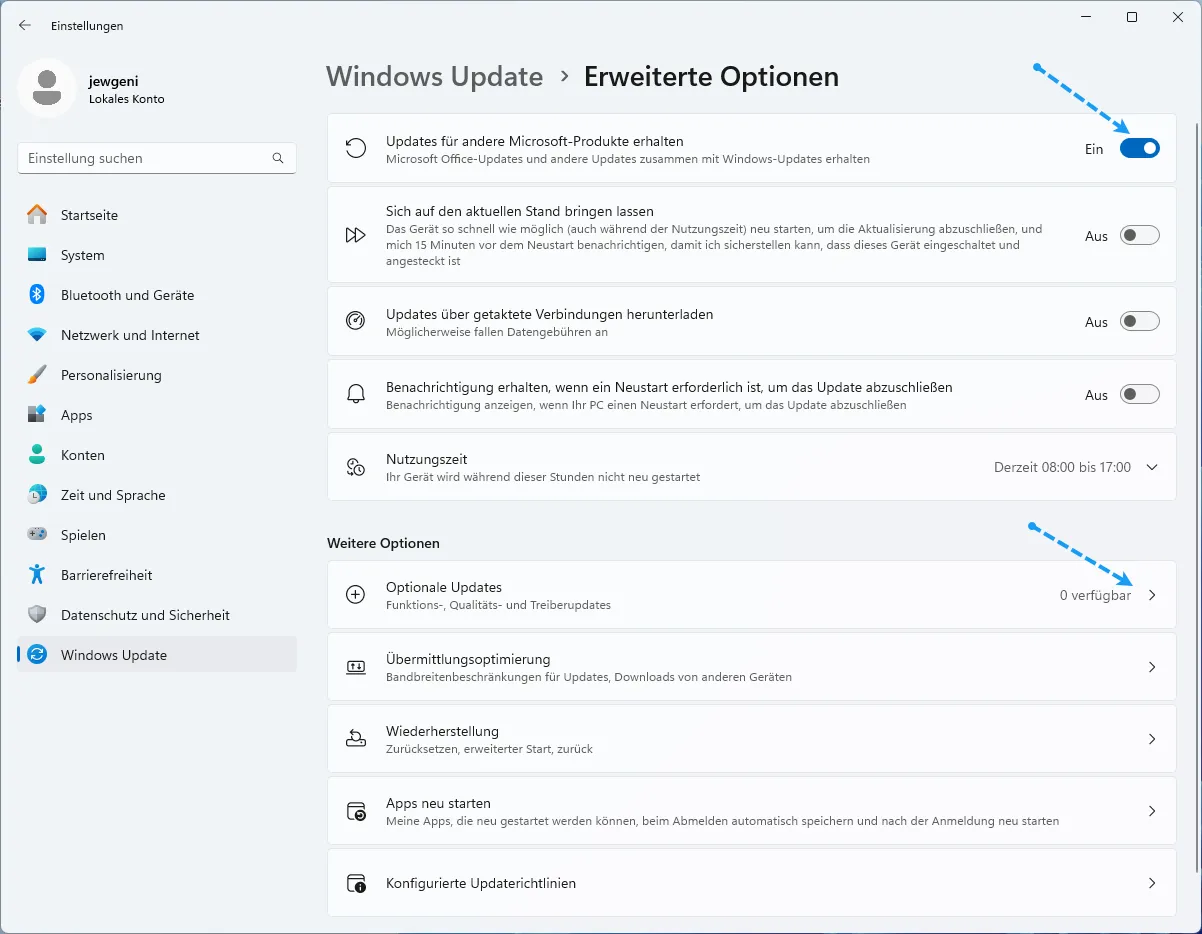
Windows Update: Go to Settings > Windows Update and check for updates. Install any pending updates. Activate the option to install updates for other Microsoft products. Install any pending and optional updates.
-
Microsoft Account: If you want to use a Microsoft account, go to Settings > Accounts > Email & accounts and add your account.
-
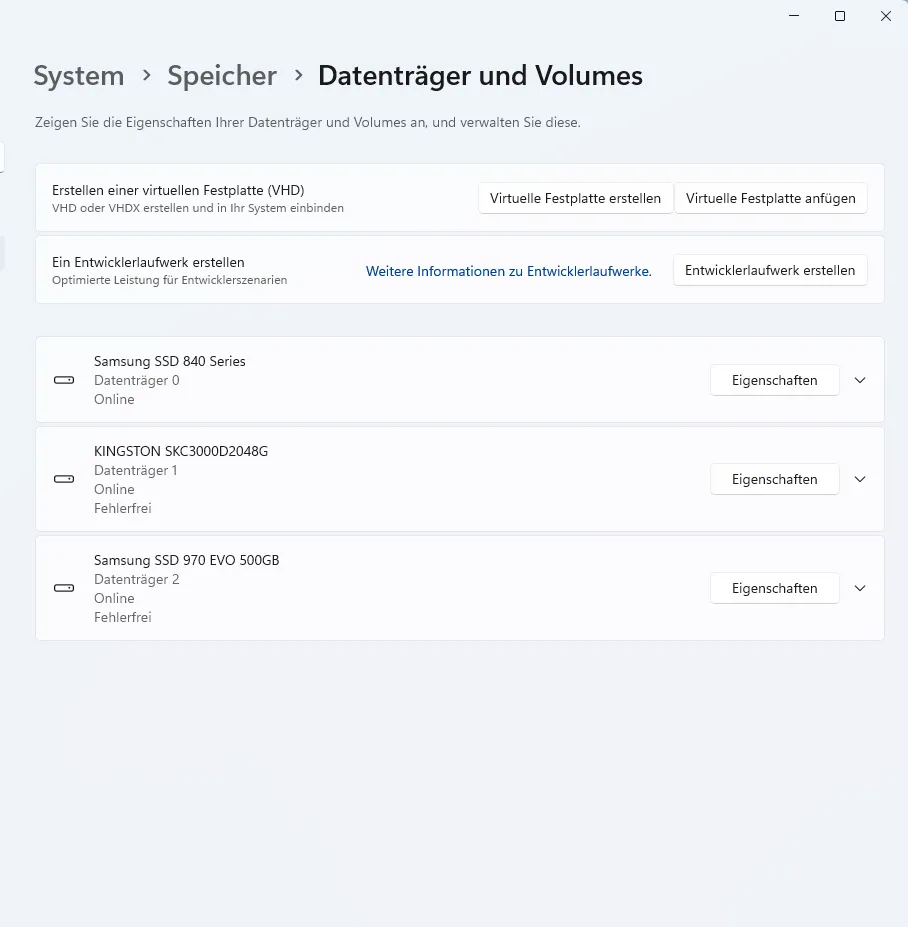
Storage and Volumes: Go to Settings > System > Storage and check if your drives are recognized correctly. If you have more than one drive you have to add the other drives as volumes.
-
Chipset Drivers: If you have an AMD or Intel CPU, you should install the chipset drivers from the mainboard manufacturer’s website.
-
Microsoft 365: If you have a Microsoft 365 subscription, you can install the Microsoft 365 apps as this doesn’t work so well with WingetUI. You can download the installer from here.

Now that you’ve set up your system, it’s time to debloat it.
Debloating Windows with Sophia Script
After installing Windows 11, you might notice some pre-installed apps and features that you don’t need. Sophia Script can help you debloat your system effectively.
What is Sophia Script?
Sophia Script is a powerful PowerShell script that automates the process of fine-tuning your Windows installation. It’s a community-driven, open-source tool that helps users disable, remove, or tweak various features and apps that come with Windows.
Why Use Sophia Script?
Sophia Script lets you:
- Boost Performance: By removing bloatware, you free up resources, allowing your PC to run smoother and faster.
- Improve Privacy: Disable telemetry and data collection to protect your privacy.
- Gain Control: Customize your user experience by disabling unwanted features or services.
- Enhance Security: Eliminate potential security risks associated with certain pre-installed apps and services.
- Save Time: Instead of manually tweaking settings, Sophia Script does it all in a batch, saving you hours.
Getting Started with Sophia Script
Before you dive in, remember: modifying system settings can be risky. Always back up your system before making changes especially if it’s not a fresh installation.
Step 1: Download Sophia Script
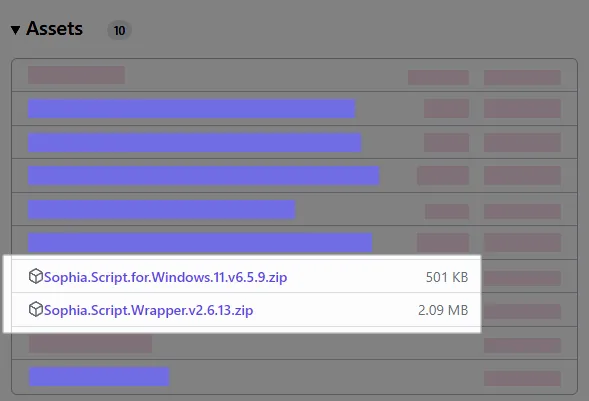
You can download the latest version of Sophia Script from its GitHub repository in the releases section. Please download the script for Windows 11 and the script wrapper from the assets.
Step 2: Customize Your Script
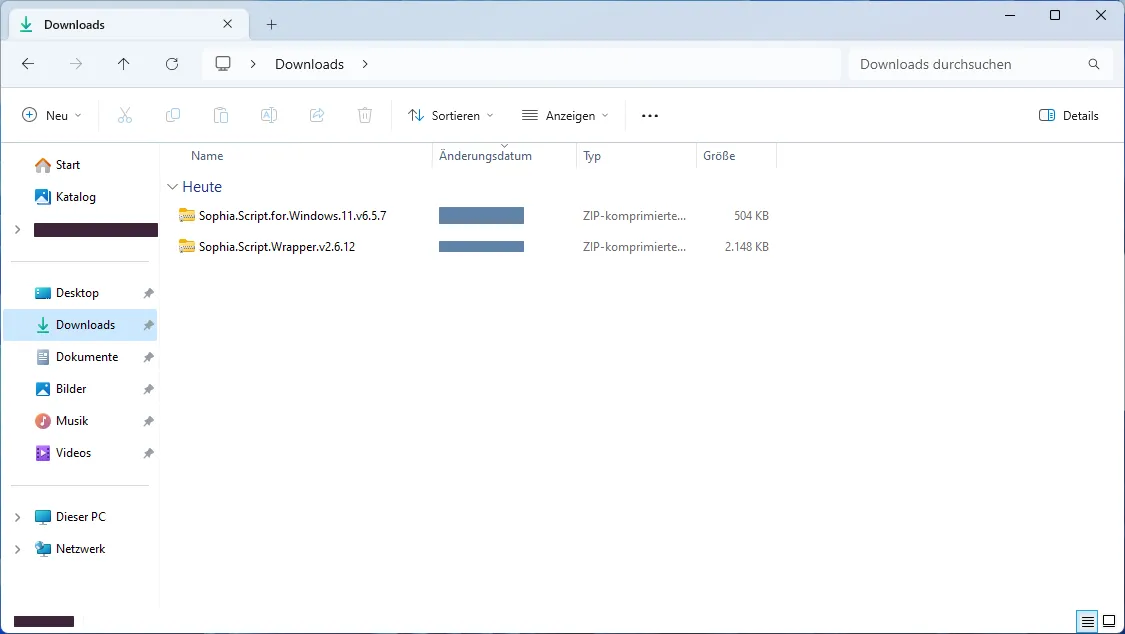
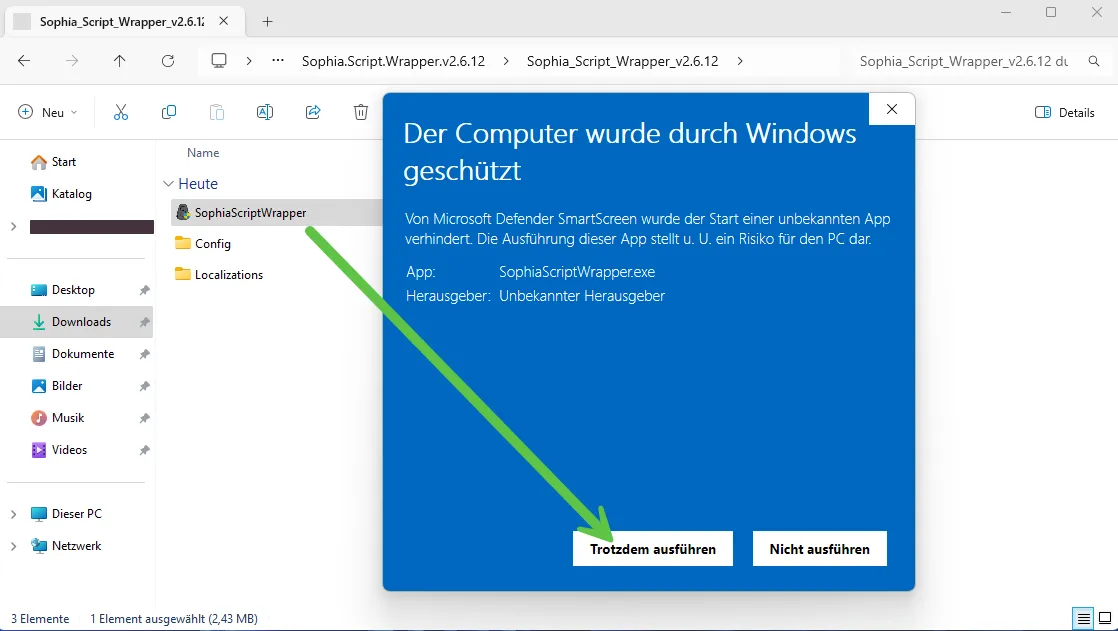
Once you’ve downloaded the script and Unzip both archives and open the Sophia Wrapper despite the Windows Defender warning.
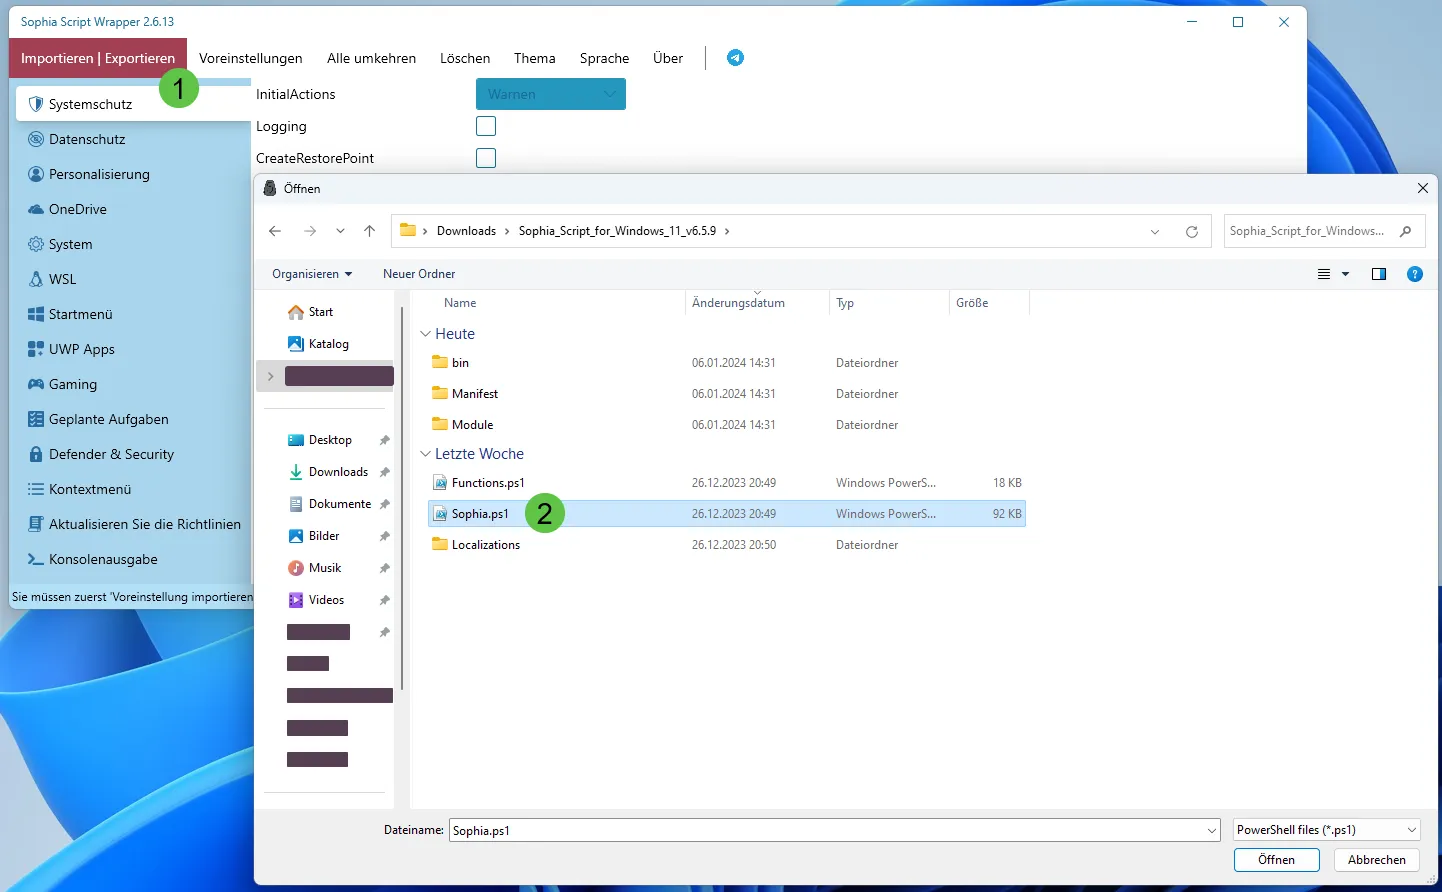
Now you have to import the Sophia.ps1 file from the other downloaded file.
After that you can customize the script to your needs. You can start with the Windows or Sophia defaults. I will start the wrapper with the Windows defaults and customize it. You can hover over the settings to get a description of the setting.
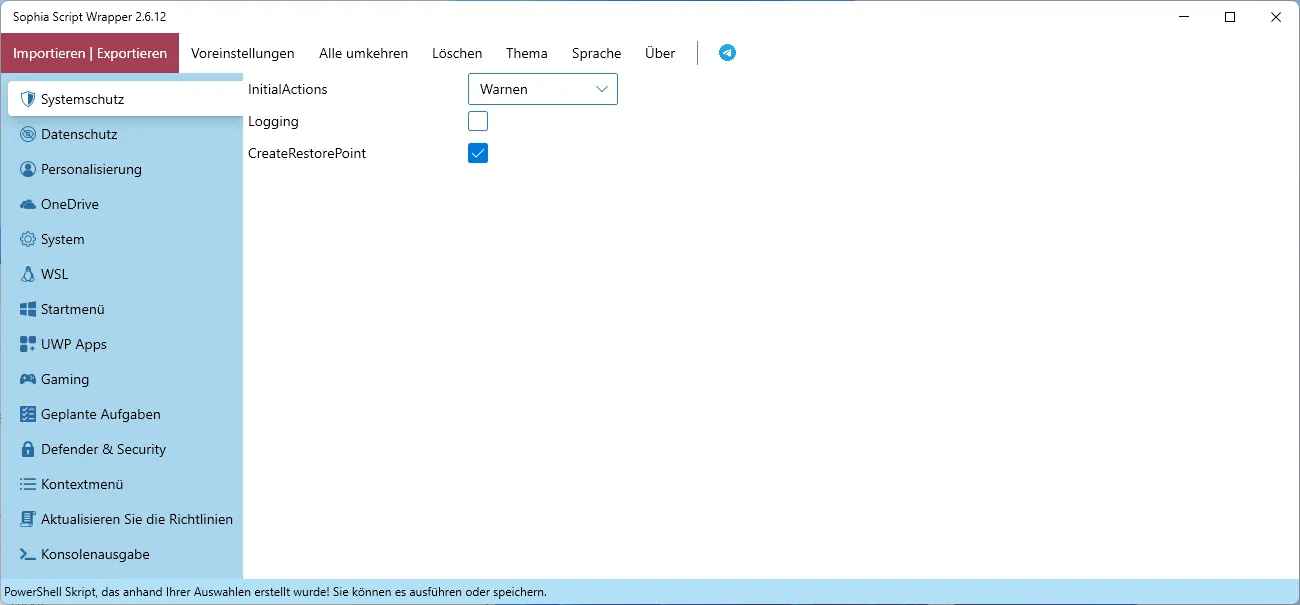
System Protection
I will leave the system protection on the default settings.
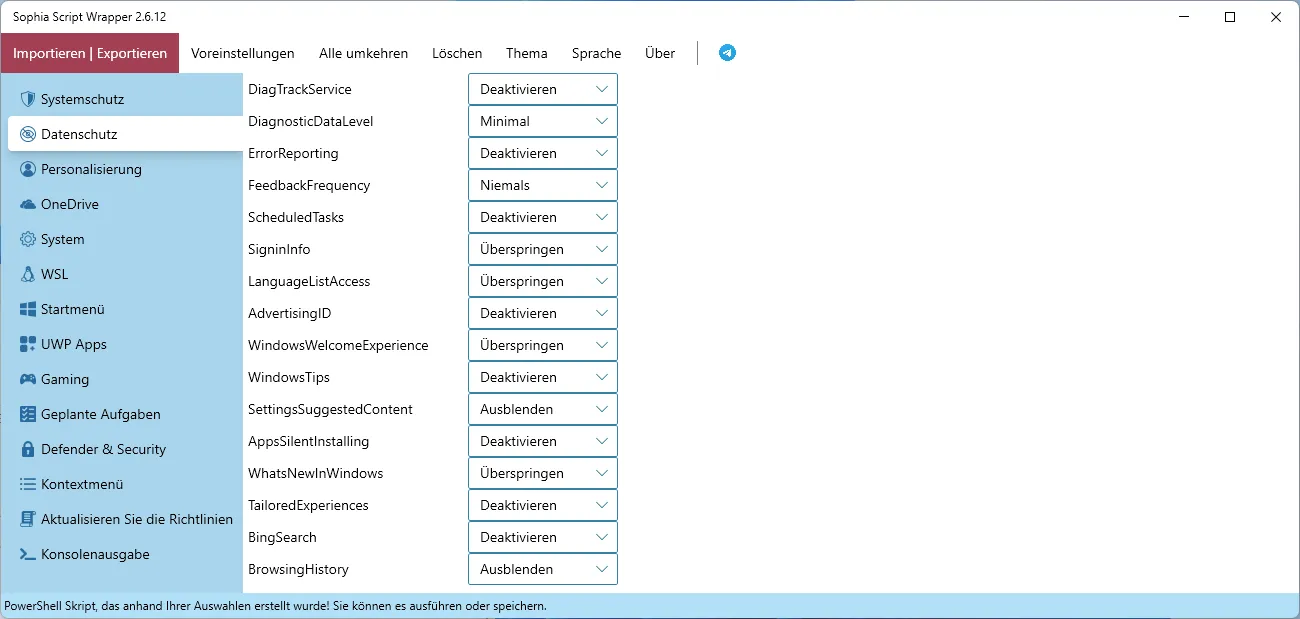
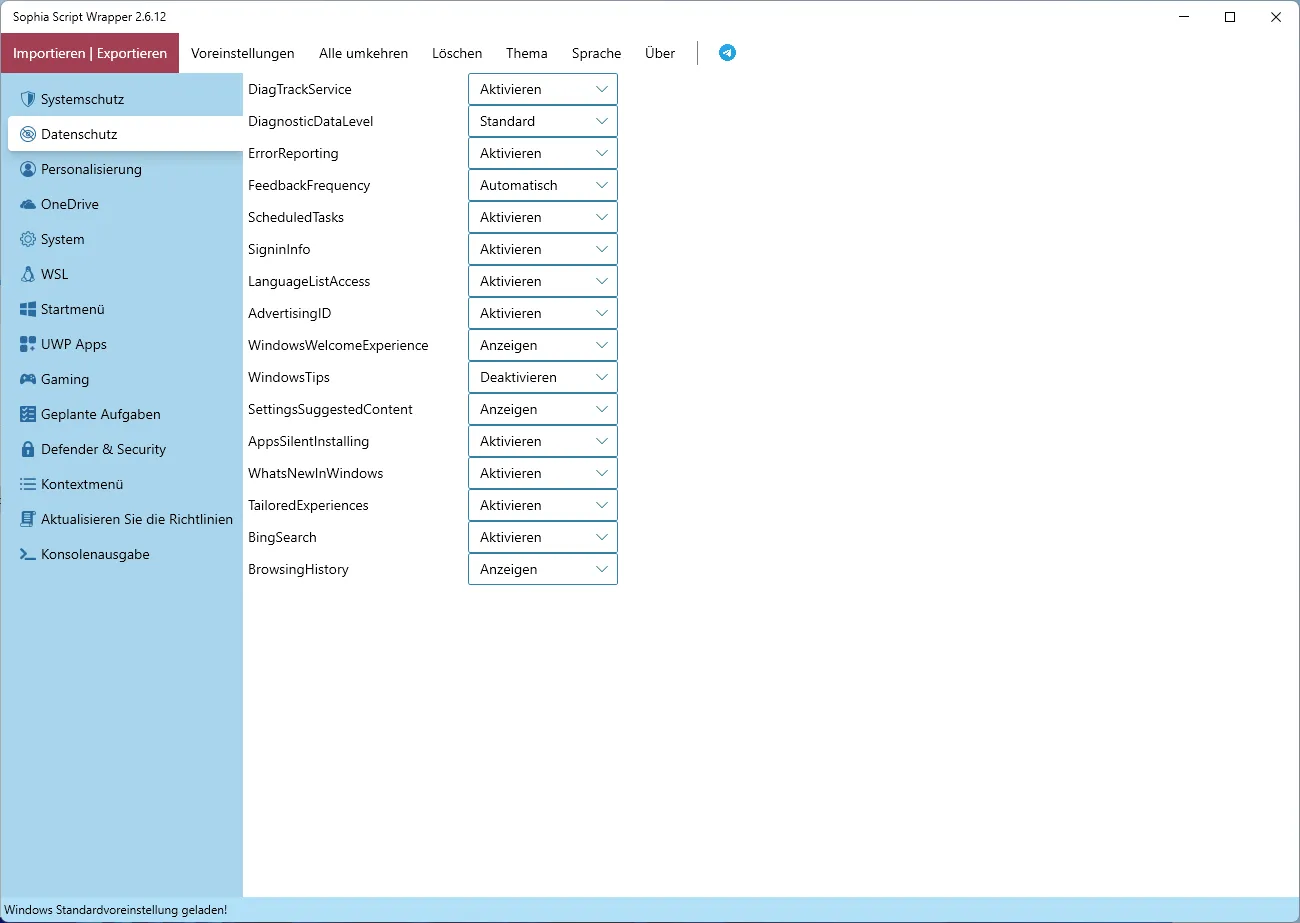
Privacy
Sophia’s Privacy Settings are a set of tweaks designed for users who want to limit the amount of data they share with Microsoft and other services integrated into the Windows operating system. These are the settings I will change:
| Setting | Description | Status |
|---|---|---|
| DiagTrackService | Amount of diagnostic data sent to Microsoft. | Disable |
| DiagnosticDataLevel | Sets data collection to the minimal amount required. | Minimal |
| ErrorReporting | Reporting system errors to Microsoft. | Disable |
| FeedbackFrequency | How often Microsoft asks for feedback. | Never |
| ScheduledTasks | Automatic tasks for data collection. | Disable |
| AdvertisingID | Use of advertising ID for personalized ads. | Disable |
| SettingsSuggestedContent | Content suggestions in Settings app. | Hide |
| AppsSilentInstalling | Installation of recommended apps by Windows. | Disable |
| TailoredExperiences | Personalized tips and ads based on data. | Disable |
| BingSearch | Integration of Bing search results in Start Menu. | Disable |
| BrowsingHistory | Display of browsing history in Start Menu suggestions. | Hide |
I set the other settings to “Skip”.
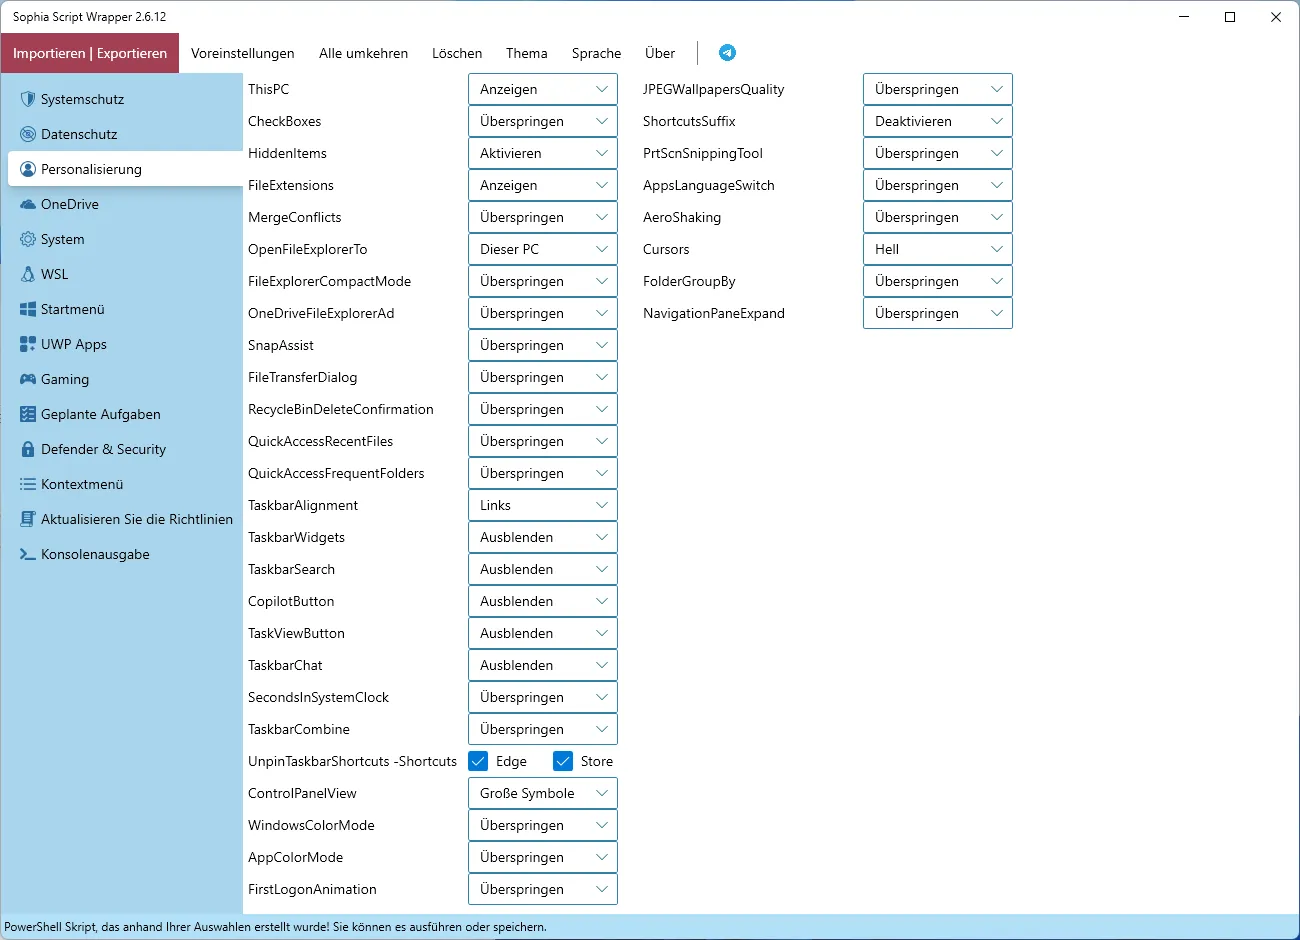
Personalization
Here I will change the following settings:
- ThisPC: Show
- HiddenItems: Enable
- FileExtensions: Show
- OpenFileExplorerTo: This PC
- TaskbarAlignment: Left
- TaskbarWidgets: Hide
- TaskbarSearch: Hide
- CopilotButton: Hide
- TaskViewButton: Hide
- UnpinTaskbarShortcuts: Edge and Store
- ControlPanelView: LargeIcons
- ShortcutsSuffix: Disable
- Cursors: Light (if you set WindowsColorMode to Dark, you should set this to Dark)
I set the other settings to “Skip”.
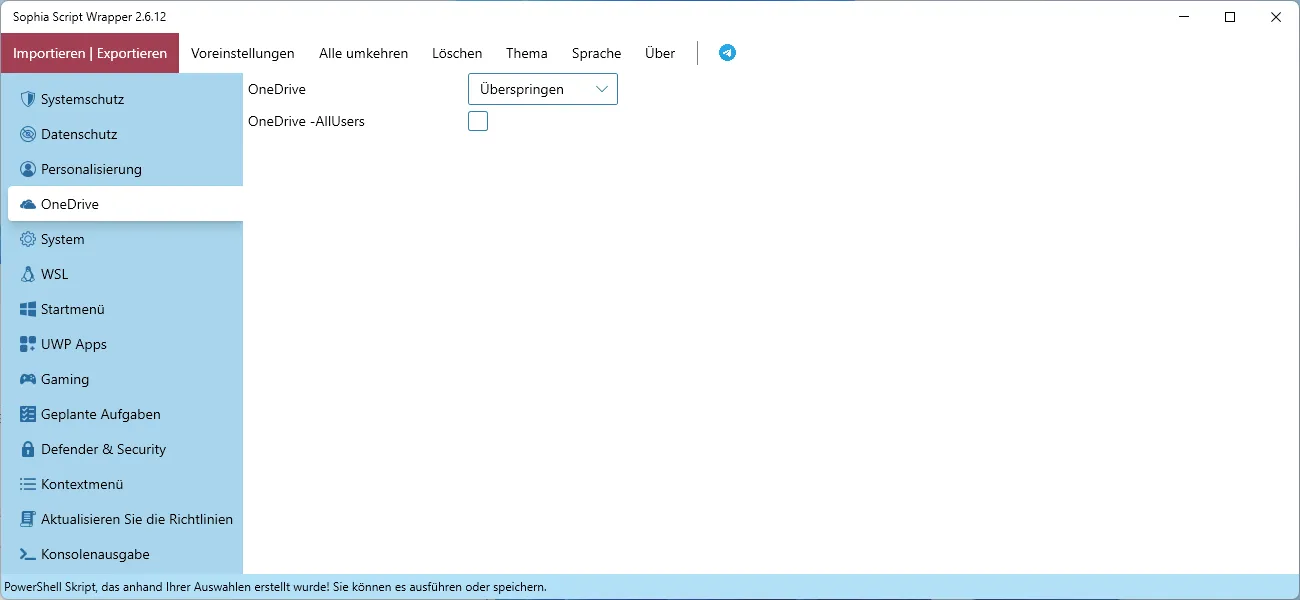
OneDrive
As I use OneDrive, I will set this to “Skip”. If you don’t want to use OneDrive, you can select “Uninstall”.
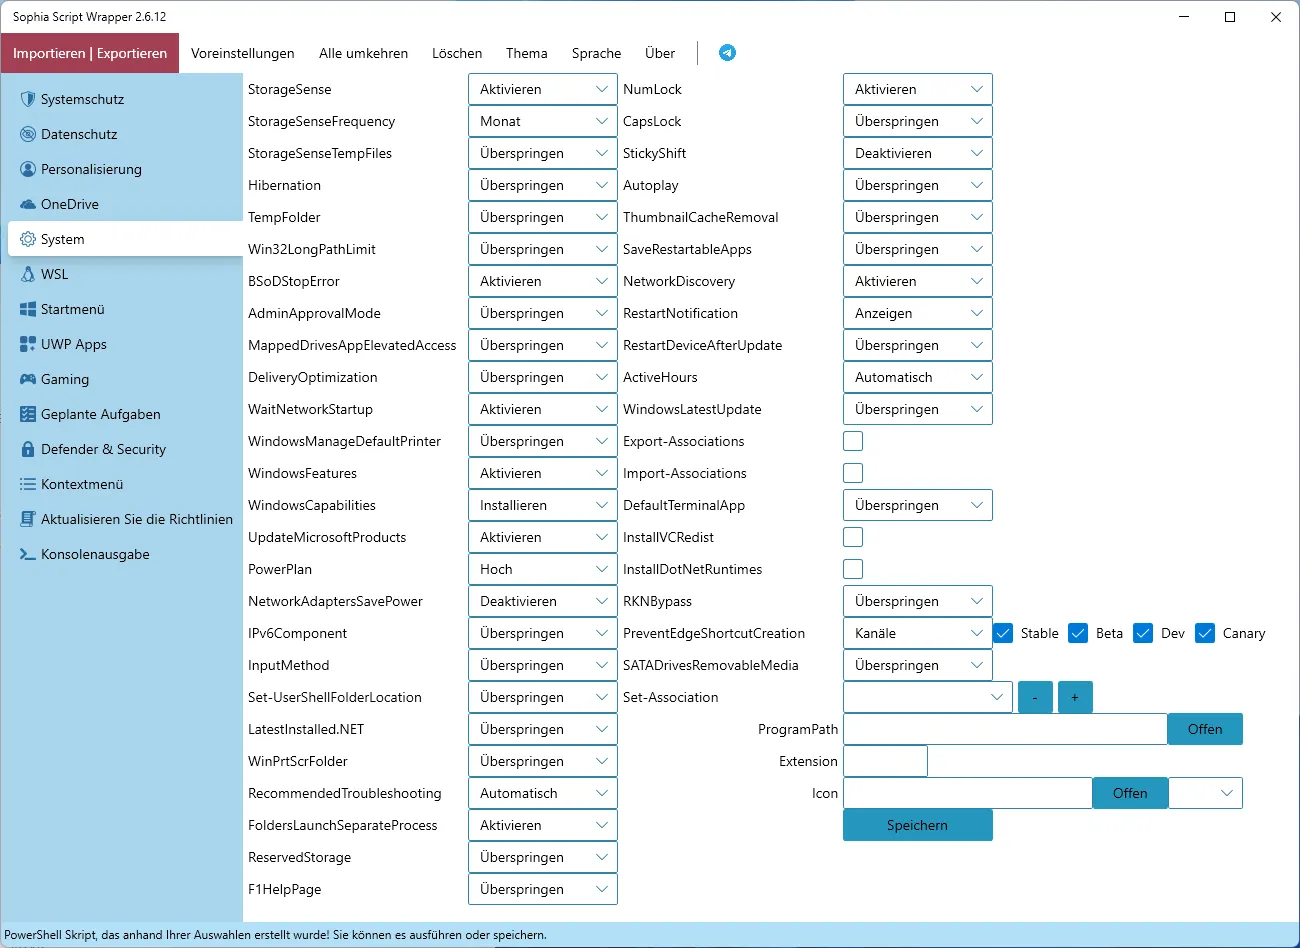
System
Here I will change the following settings:
- StorageSense: Enable
- StorageSenseFrequency: Month
- BSoDStopError: Enable
- UpdateMicrosoftProducts: Enable
- PowerPlan: High
- NetworkAdaptersSavePower: Disable
- RecommendedTroubleshooting: Automatically
- FoldersLaunchSeparateProcess: Enable
- NumLock: Enable
- StickyShift: Disable
- NetworkDiscovery: Enable
- RestartNotification: Show
- ActiveHours: Automatically
- PreventEdgeShortcutCreation: Channels (all)
I set the other settings to “Skip”.
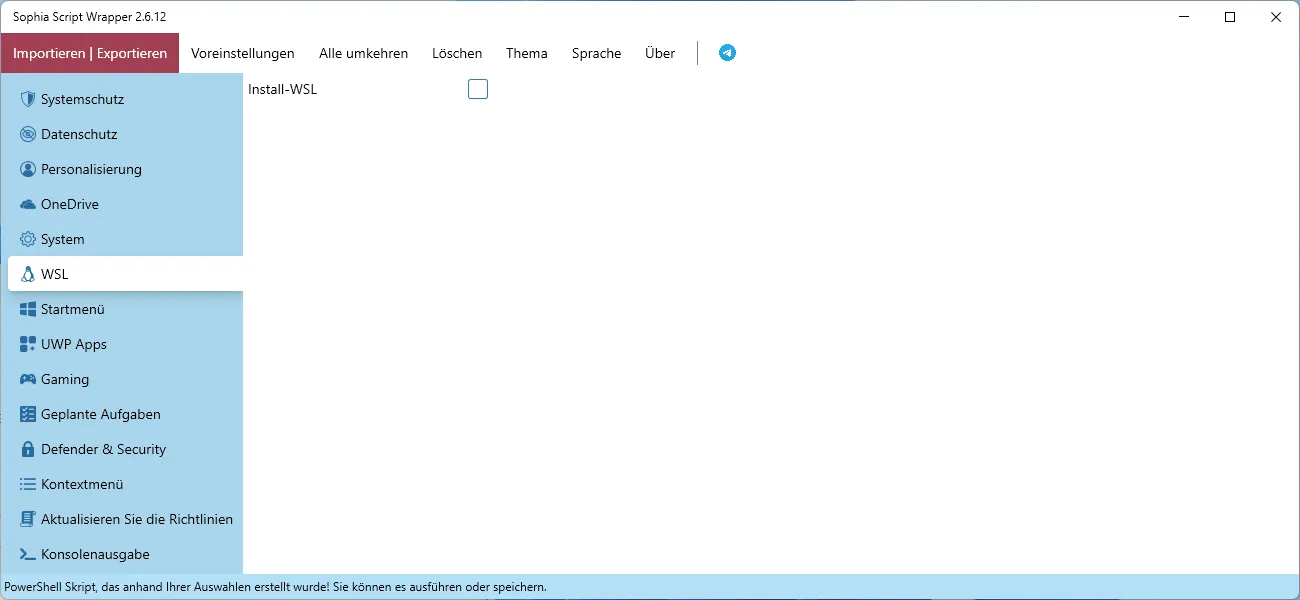
WSL
As I don’t use WSL, I will not select the “Install-WSL” option. If you want to use WSL, you can select this option.
Start Menu
Here I will change the following settings:
- UnpinAllStartApps: Select
- StartLayout: ShowMorePins

UWP Apps
Here I will change the following settings:
- UninstallUWPApps: Select
- CortanaAutostart: Disable
- TeamsAutostart: Disable
I don’t select the other options.

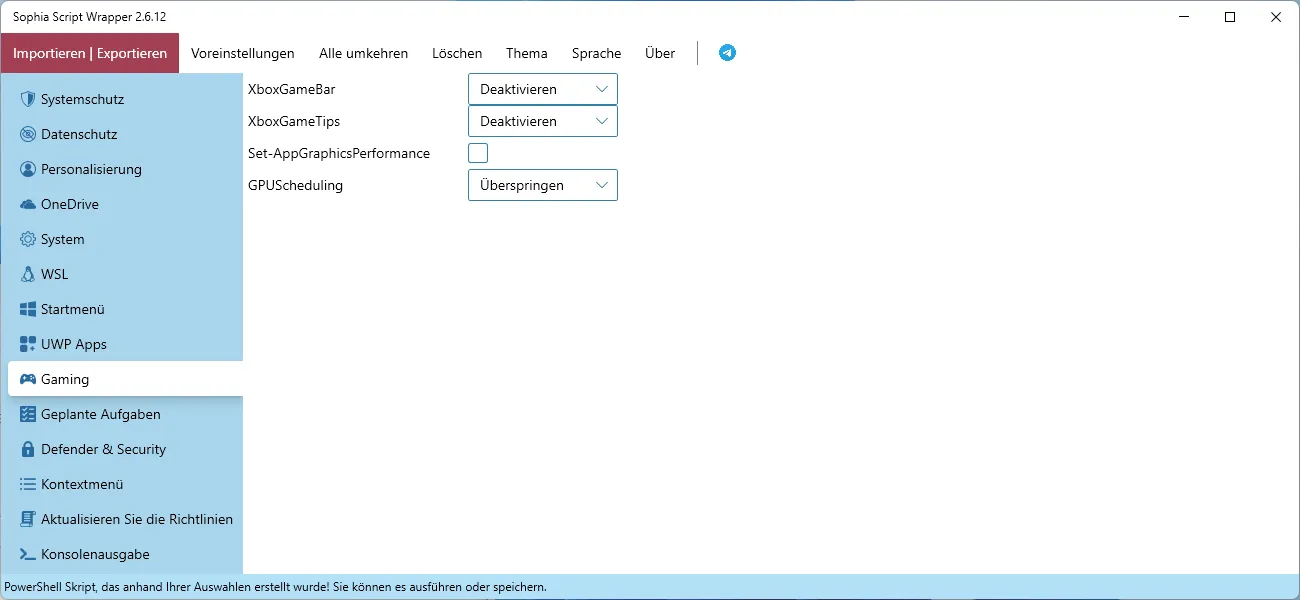
Gaming
Here I will change the following settings:
- XboxGameBar: Disable
- XboxGameTips: Disable
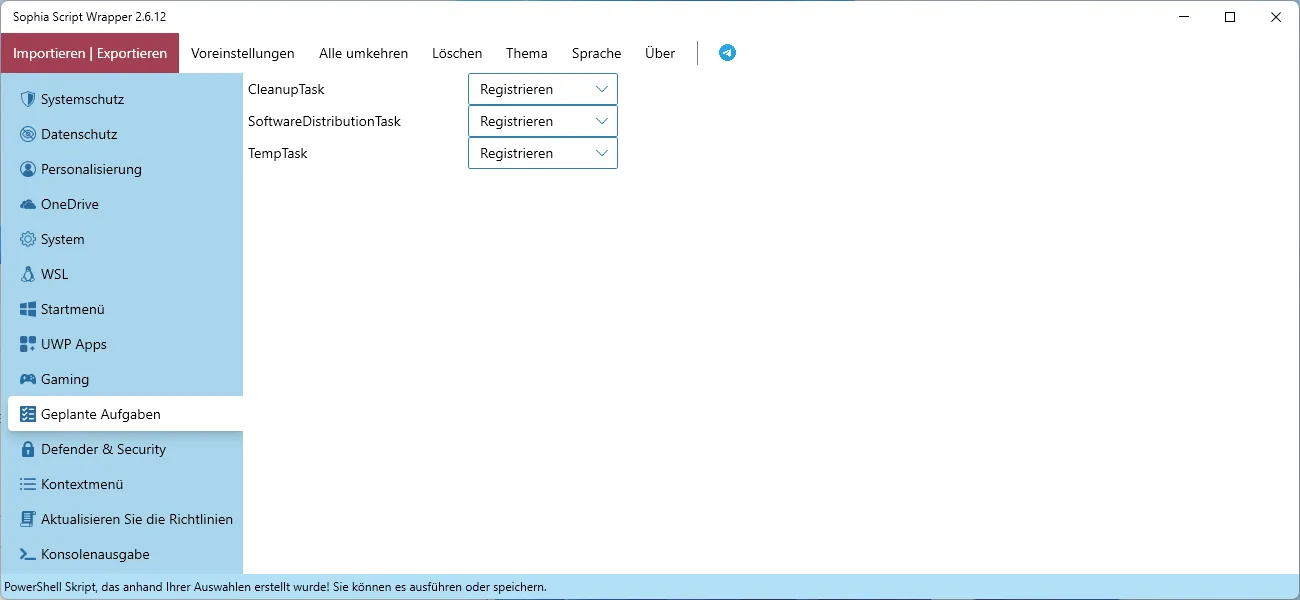
Scheduled Tasks
I register all (CleanupTask, SoftwareDistributionTask, TempTask) the tasks.
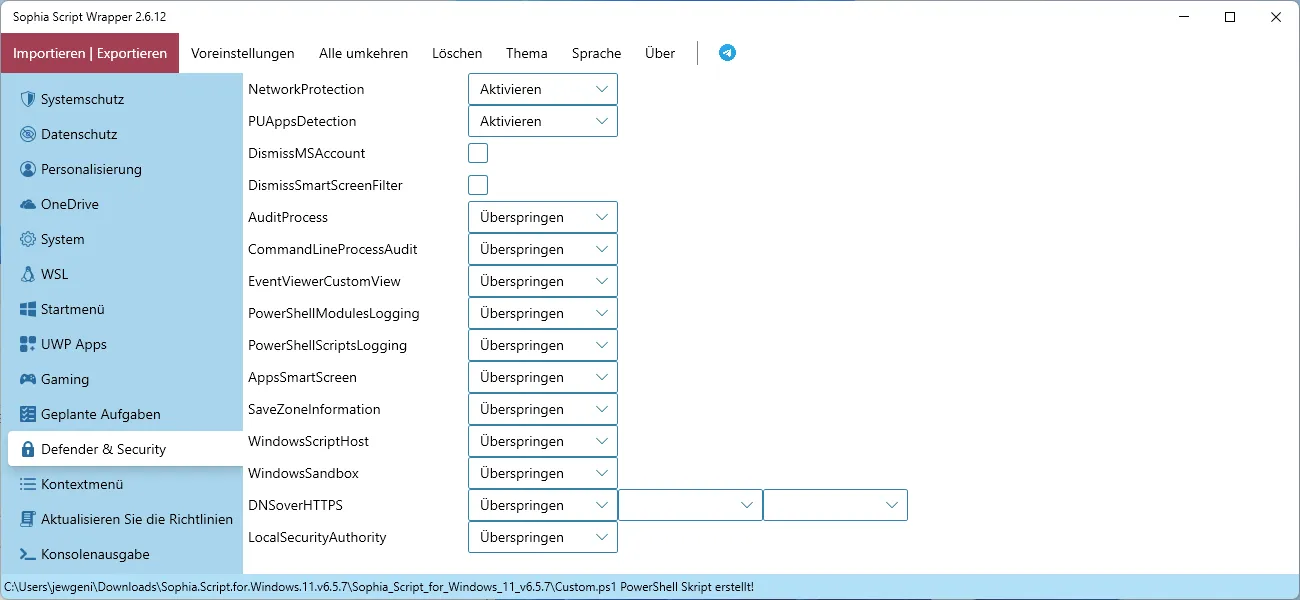
Defender & Security
Here I will change the following settings:
- NetworkProtection: Enable
- PUAppsDetection: Enable
The other settings I set to “Skip” or leave unchecked.
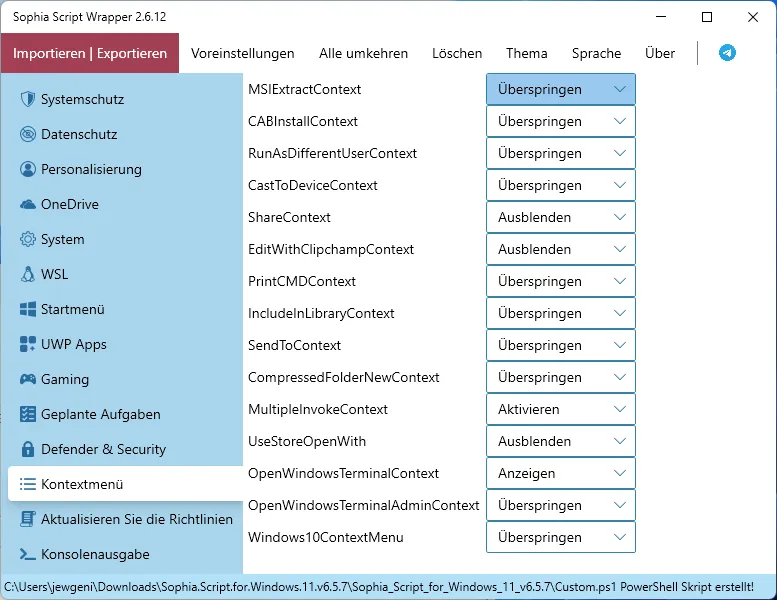
Context Menu
Here I will change the following settings:
- ShareContext: Hide
- EditWithClipchanpContext: Hide
- MultipleInvokeContext: Activate
- UseStoreOpenWith: Hide
- OpenWindowsTerminalContext: Show
I set the other settings to “Skip”.
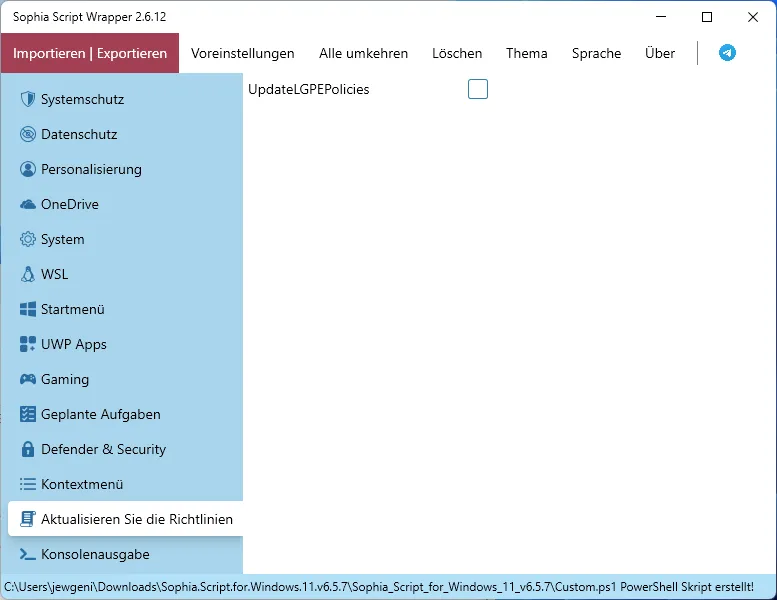
Update Policies
I don’t select the “UpdateLGPEPolicies” option as I don’t need it.
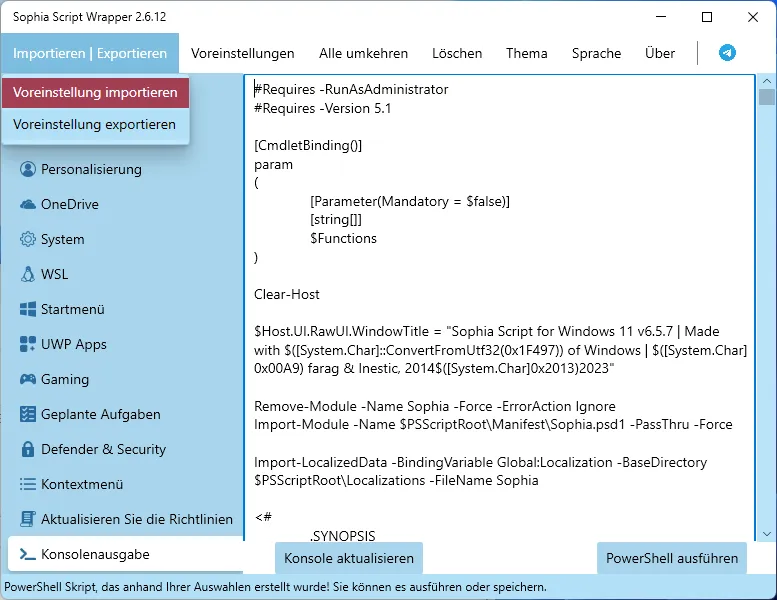
Export Settings
\Export the preset to a file in the same folder as the Sophia.ps1 file.
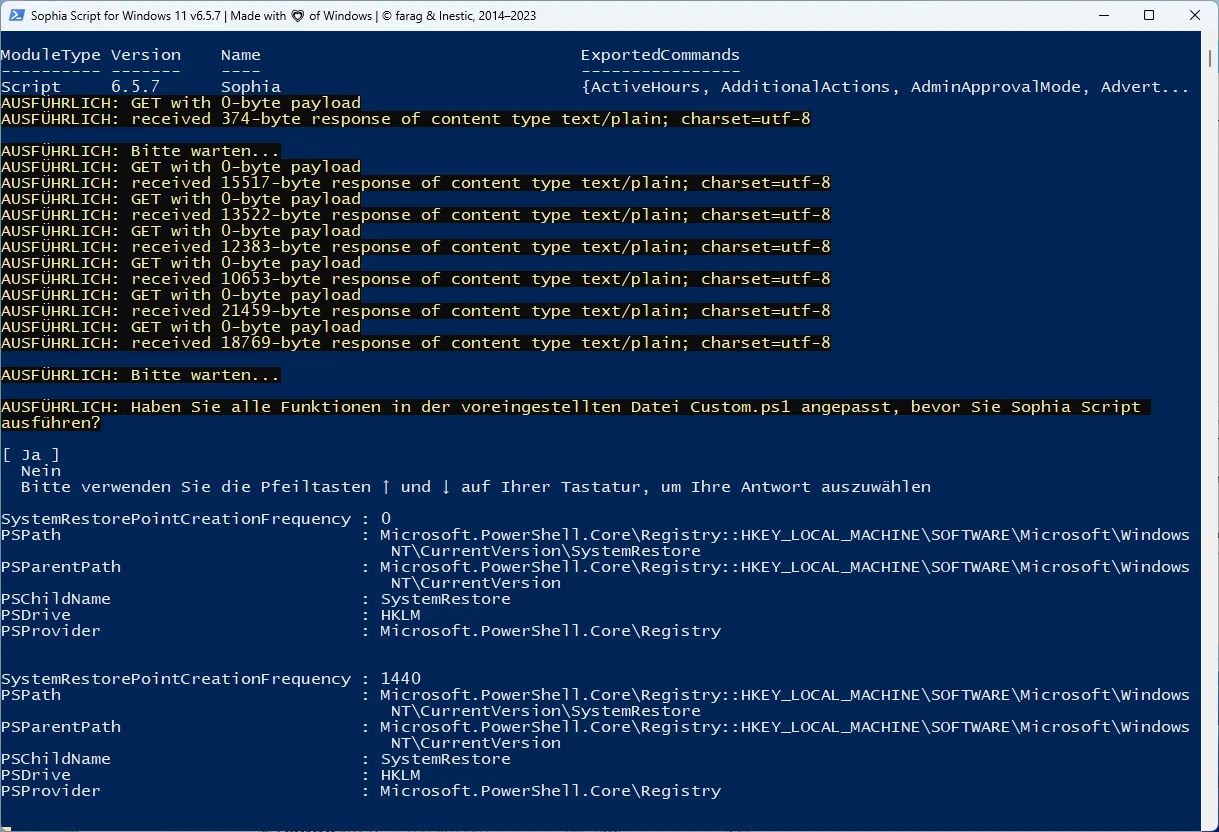
Step 3: Run Sophia Script as an Administrator
Once you’ve exported your file, you have have to run PowerShell as an Administrator. To do this, press the Windows key, type ‘PowerShell’, right-click on the app, and select ‘Run as Administrator’. You will see something like this:
PS C:\WINDOWS\system32>Now you have to navigate to the folder where you have the Sophia.ps1 file and the exported settings file. In my case it is the Downloads folder.
PS C:\WINDOWS\system32> cd ~This will bring you to the user folder. Now you have to navigate to the Downloads folder.
cd Downloads
cd Sophia_Script_for_Windows_11 #press tab to autocomplete
Now you can run the script with the following command:
.\Custom.ps1 #in case you named the file Custom.ps1If you get an error about the execution policy, you have to change it. To do this, run the following command:
Set-ExecutionPolicy -ExecutionPolicy Bypass -Scope Process -ForceNow you can run the script again.
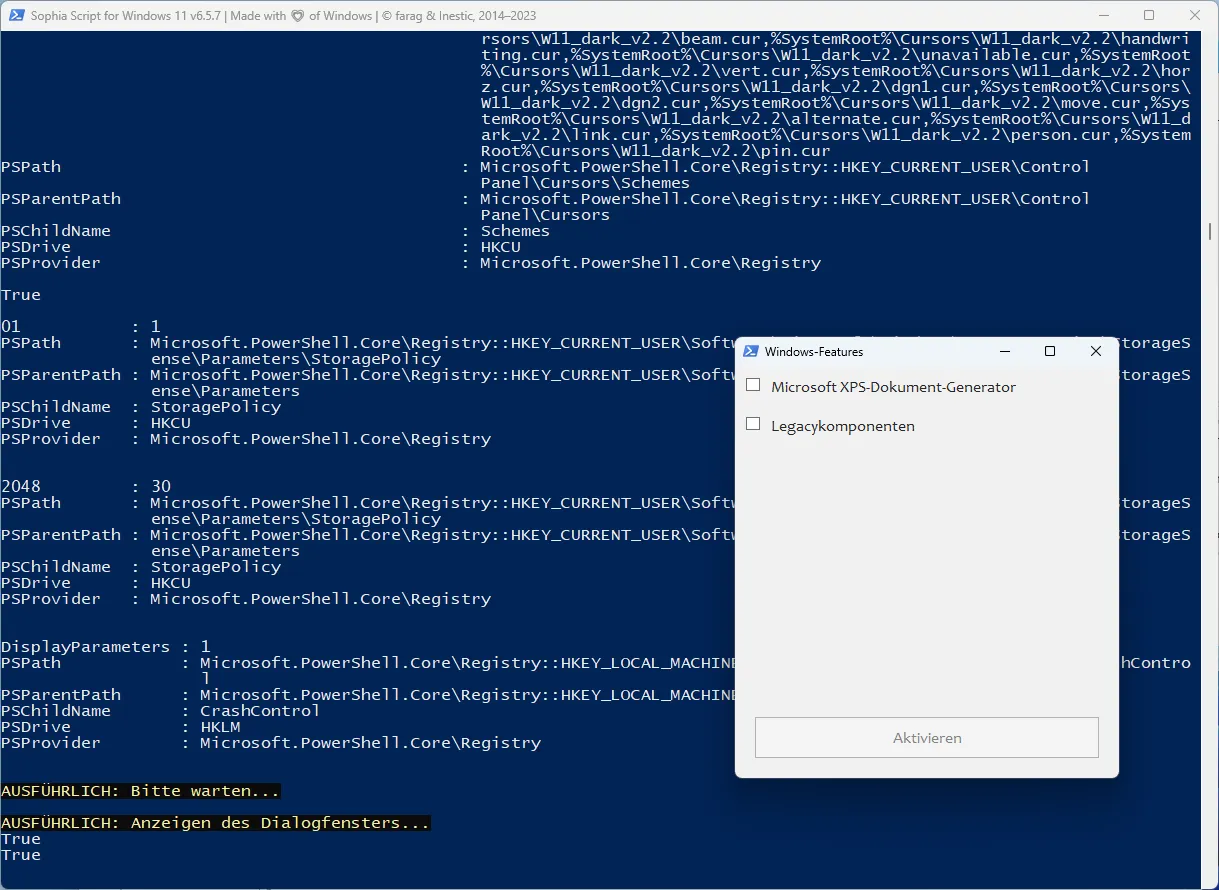
Step 4: Follow the Interactive Menu
You can now follow the interactive menu to select which components you want to remove or tweak.
I leave the scheduled tasks:
I leave the Windows Features as they are:
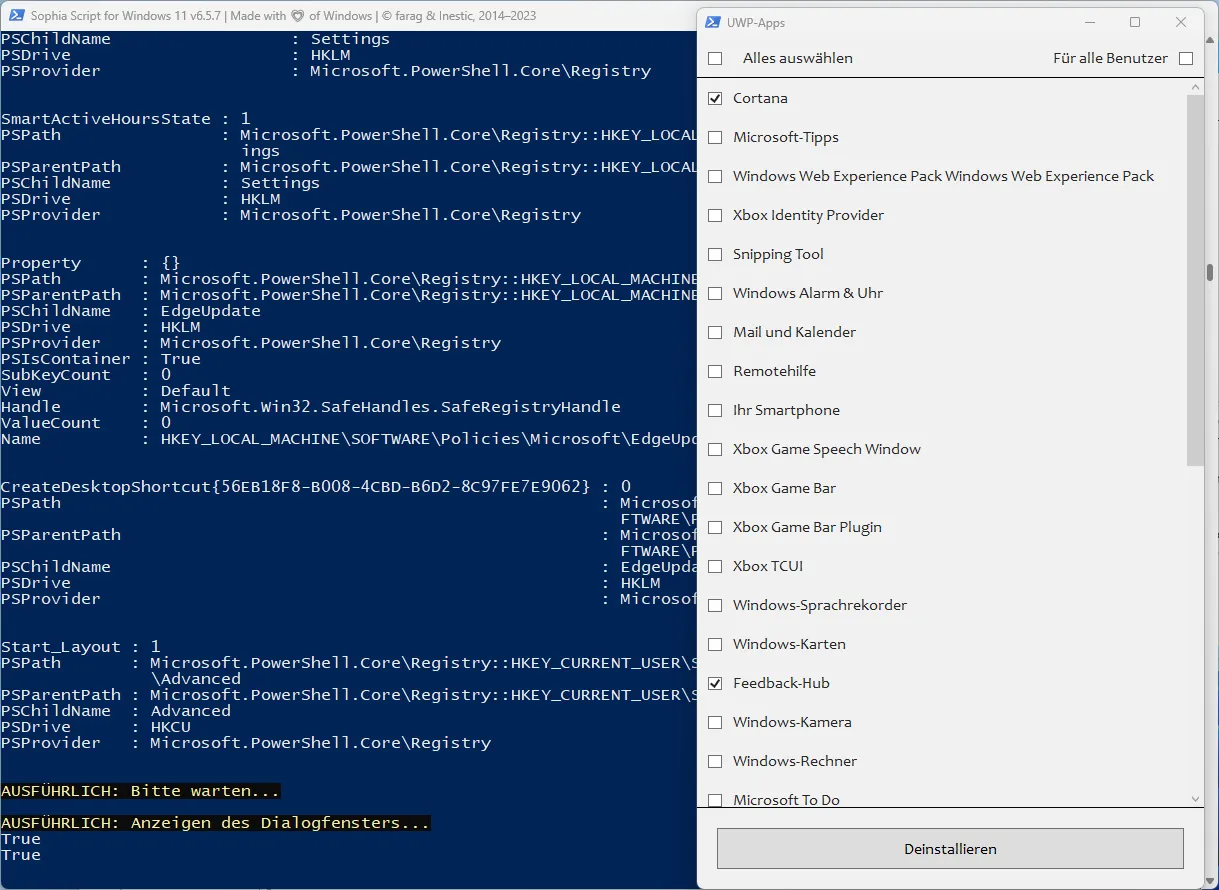
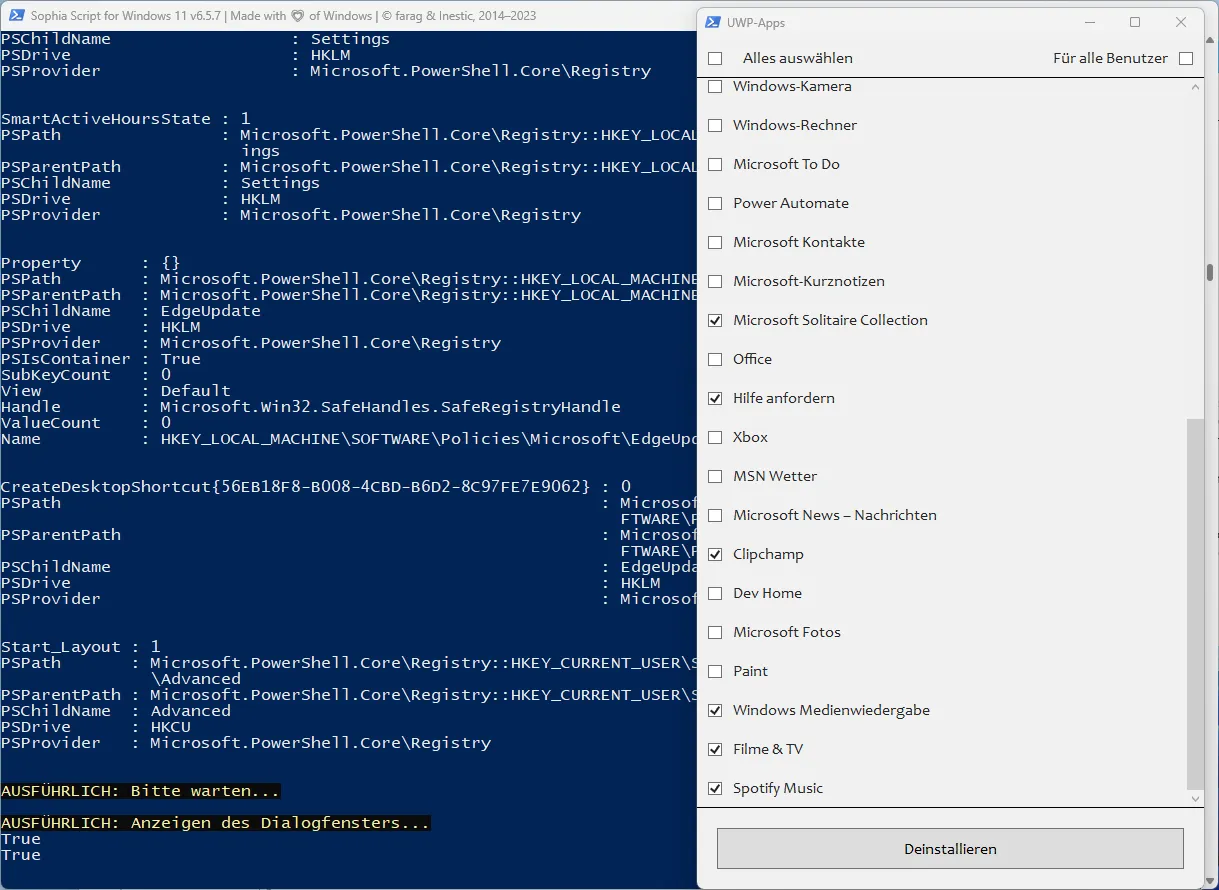
I select the following UWP Apps to uninstall:
- Cortana
- Feedback-Hub
- Microsoft Solitaire Collection
- Request Help
- Clipchamp
- Windows Media Player
- Movies & TV
- Spotify Music
Sophia Conclusion
Done. Now you can reboot your system and enjoy your debloated Windows 11.
If some update reinstalled some of the apps you uninstalled or made some settings changes, you can run the script again.
Software Management for Windows 11 with WingetUI
The user-friendly interface for Windows Package Manager (winget) is transforming how users can install and manage software on their PCs. Here’s what you need to know about WingetUI and why it’s a game-changer for Windows 11.
Discovering WingetUI
WingetUI is built with simplicity in mind. It provides a graphical interface for the command-line tool winget, which allows users to:
- Search for software
- Install applications
- Upgrade existing programs
- Uninstall software
With WingetUI, you no longer need to dive into PowerShell or Command Prompt to use winget. Instead, you get a clean and intuitive interface that integrates seamlessly with Windows 11.
Why Use WingetUI?
- Ease of Use: WingetUI’s graphical user interface makes it approachable for users of all skill levels. Whether you’re a seasoned developer or a casual user, installing and managing your applications is a breeze.
- Time-Saving: No more browsing different websites to download installers. With WingetUI, you can install multiple apps with a few clicks, saving you precious time.
- Centralized Software Management: Keep all your software up to date from one location. WingetUI provides an overview of your installed applications and notifies you when updates are available.
- Safe and Secure: WingetUI taps into the winget repository, where packages are Microsoft-vetted for security and compatibility, giving you peace of mind with each installation.
How to Use WingetUI
Using WingetUI is straightforward. Here’s a quick rundown:
Step 1: Download and Install WingetUI
You can download the latest version of WingetUI from the release section of its GitHub repository.
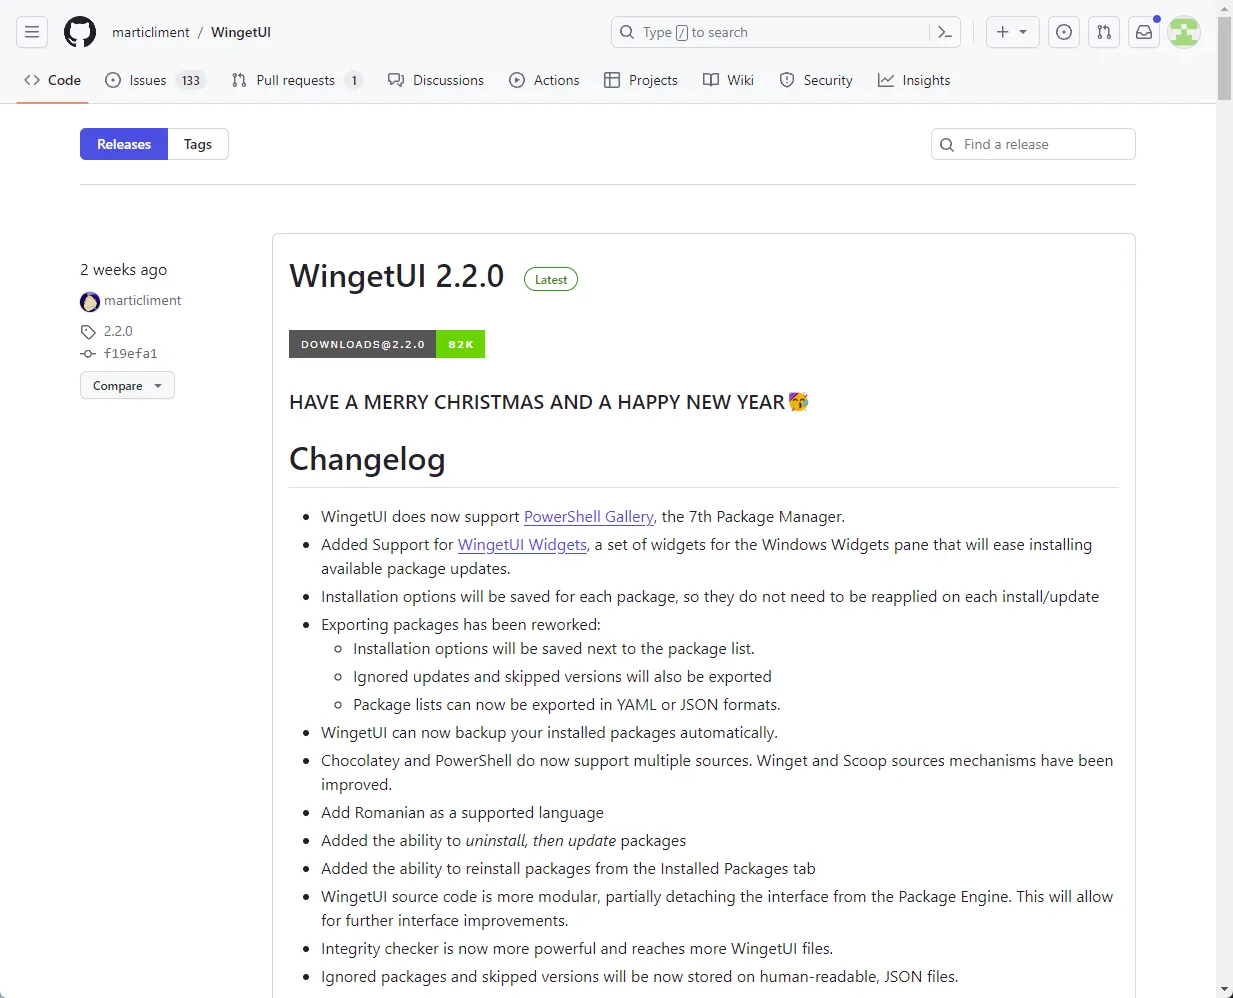
Download the WingetUI.Installer.exe file and run it. You will see a Windows Defender warning. Click on “More info” and then on “Run anyway”.
Step 2: Install Applications
Once you’ve installed WingetUI, you can start installing applications by searching for them in the search bar and selecting them from the results.
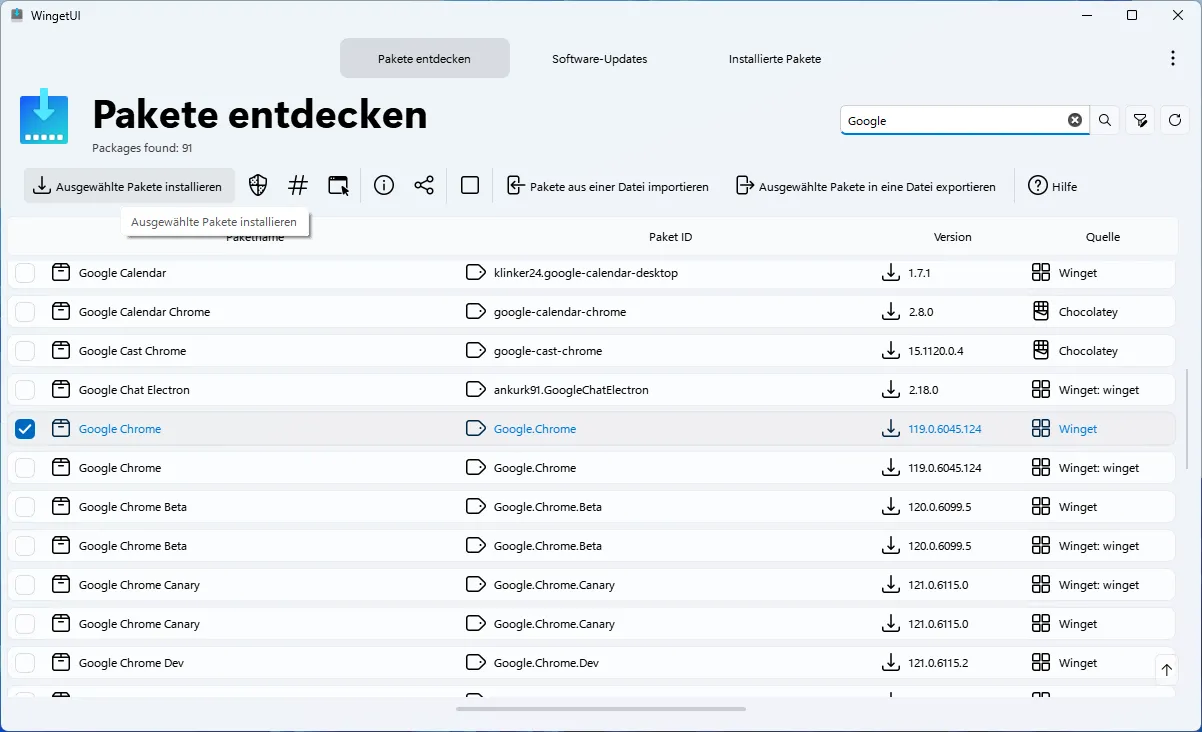
I recommend installing the following applications (alphabetical order):
- EarTrumpet: A volume control app for Windows.
- Firefox Developer Edition: A web browser (not only) for developers.
- Git: A version control system.
- Google Chrome: A web browser.
- Microsoft Visual Studio Code: A code (and text) editor.
- NanaZip: A file archiver.
- NVM for Windows: A version manager for Node.js.
- PowerToys: A set of utilities for power users to tune and streamline their Windows experience.
- ScreenToGif: A screen, webcam and sketchboard recorder with an integrated editor.
- VLC media player: A media player.
- Wireguard: A fast, modern, secure VPN tunnel.
You can also import this json file to install all the applications at once.
{
	"export_version": 2.0,
	"packages": [
		{
			"Id": "WireGuard.WireGuard",
			"Name": "WireGuard",
			"Version": "0.5.3",
			"Source": "Winget: winget",
			"ManagerName": "Winget",
			"InstallationOptions": {
				"SkipHashCheck": false,
				"InteractiveInstallation": false,
				"RunAsAdministrator": false,
				"Architecture": "",
				"InstallationScope": "",
				"CustomParameters": [],
				"PreRelease": false,
				"CustomInstallLocation": ""
			},
			"Updates": {
				"UpdatesIgnored": false,
				"IgnoredVersion": ""
			}
		},
		{
			"Id": "SomePythonThings.WingetUIStore",
			"Name": "WingetUI",
			"Version": "2.2.0",
			"Source": "Winget: winget",
			"ManagerName": "Winget",
			"InstallationOptions": {
				"SkipHashCheck": false,
				"InteractiveInstallation": false,
				"RunAsAdministrator": false,
				"Architecture": "",
				"InstallationScope": "",
				"CustomParameters": [],
				"PreRelease": false,
				"CustomInstallLocation": ""
			},
			"Updates": {
				"UpdatesIgnored": false,
				"IgnoredVersion": ""
			}
		},
		{
			"Id": "VideoLAN.VLC",
			"Name": "VLC media player",
			"Version": "3.0.20",
			"Source": "Winget: winget",
			"ManagerName": "Winget",
			"InstallationOptions": {
				"SkipHashCheck": false,
				"InteractiveInstallation": false,
				"RunAsAdministrator": false,
				"Architecture": "",
				"InstallationScope": "",
				"CustomParameters": [],
				"PreRelease": false,
				"CustomInstallLocation": ""
			},
			"Updates": {
				"UpdatesIgnored": false,
				"IgnoredVersion": ""
			}
		},
		{
			"Id": "NickeManarin.ScreenToGif",
			"Name": "ScreenToGif",
			"Version": "2.40.1",
			"Source": "Winget: winget",
			"ManagerName": "Winget",
			"InstallationOptions": {
				"SkipHashCheck": false,
				"InteractiveInstallation": false,
				"RunAsAdministrator": false,
				"Architecture": "",
				"InstallationScope": "",
				"CustomParameters": [],
				"PreRelease": false,
				"CustomInstallLocation": ""
			},
			"Updates": {
				"UpdatesIgnored": false,
				"IgnoredVersion": ""
			}
		},
		{
			"Id": "Microsoft.PowerToys",
			"Name": "PowerToys (Preview) x64",
			"Version": "0.76.2",
			"Source": "Winget: winget",
			"ManagerName": "Winget",
			"InstallationOptions": {
				"SkipHashCheck": false,
				"InteractiveInstallation": false,
				"RunAsAdministrator": false,
				"Architecture": "",
				"InstallationScope": "",
				"CustomParameters": [],
				"PreRelease": false,
				"CustomInstallLocation": ""
			},
			"Updates": {
				"UpdatesIgnored": false,
				"IgnoredVersion": ""
			}
		},
		{
			"Id": "CoreyButler.NVMforWindows",
			"Name": "NVM for Windows 1.1.11",
			"Version": "1.1.11",
			"Source": "Winget: winget",
			"ManagerName": "Winget",
			"InstallationOptions": {
				"SkipHashCheck": false,
				"InteractiveInstallation": false,
				"RunAsAdministrator": false,
				"Architecture": "",
				"InstallationScope": "",
				"CustomParameters": [],
				"PreRelease": false,
				"CustomInstallLocation": ""
			},
			"Updates": {
				"UpdatesIgnored": false,
				"IgnoredVersion": ""
			}
		},
		{
			"Id": "M2Team.NanaZip",
			"Name": "NanaZip",
			"Version": "2.0.450.0",
			"Source": "Winget: winget",
			"ManagerName": "Winget",
			"InstallationOptions": {
				"SkipHashCheck": false,
				"InteractiveInstallation": false,
				"RunAsAdministrator": false,
				"Architecture": "",
				"InstallationScope": "",
				"CustomParameters": [],
				"PreRelease": false,
				"CustomInstallLocation": ""
			},
			"Updates": {
				"UpdatesIgnored": false,
				"IgnoredVersion": ""
			}
		},
		{
			"Id": "Microsoft.VisualStudioCode",
			"Name": "Microsoft Visual Studio Code (User)",
			"Version": "1.85.1",
			"Source": "Winget: winget",
			"ManagerName": "Winget",
			"InstallationOptions": {
				"SkipHashCheck": false,
				"InteractiveInstallation": false,
				"RunAsAdministrator": false,
				"Architecture": "",
				"InstallationScope": "",
				"CustomParameters": [],
				"PreRelease": false,
				"CustomInstallLocation": ""
			},
			"Updates": {
				"UpdatesIgnored": false,
				"IgnoredVersion": ""
			}
		},
		{
			"Id": "Google.Chrome",
			"Name": "Google Chrome",
			"Version": "120.0.6099.200",
			"Source": "Winget: winget",
			"ManagerName": "Winget",
			"InstallationOptions": {
				"SkipHashCheck": false,
				"InteractiveInstallation": false,
				"RunAsAdministrator": false,
				"Architecture": "",
				"InstallationScope": "",
				"CustomParameters": [],
				"PreRelease": false,
				"CustomInstallLocation": ""
			},
			"Updates": {
				"UpdatesIgnored": false,
				"IgnoredVersion": ""
			}
		},
		{
			"Id": "Git.Git",
			"Name": "Git",
			"Version": "2.43.0",
			"Source": "Winget: winget",
			"ManagerName": "Winget",
			"InstallationOptions": {
				"SkipHashCheck": false,
				"InteractiveInstallation": false,
				"RunAsAdministrator": false,
				"Architecture": "",
				"InstallationScope": "",
				"CustomParameters": [],
				"PreRelease": false,
				"CustomInstallLocation": ""
			},
			"Updates": {
				"UpdatesIgnored": false,
				"IgnoredVersion": ""
			}
		},
		{
			"Id": "Mozilla.Firefox.DeveloperEdition",
			"Name": "Firefox Developer Edition (x64 en-US)",
			"Version": "120.0",
			"Source": "Winget: winget",
			"ManagerName": "Winget",
			"InstallationOptions": {
				"SkipHashCheck": false,
				"InteractiveInstallation": false,
				"RunAsAdministrator": false,
				"Architecture": "",
				"InstallationScope": "",
				"CustomParameters": [],
				"PreRelease": false,
				"CustomInstallLocation": ""
			},
			"Updates": {
				"UpdatesIgnored": false,
				"IgnoredVersion": ""
			}
		},
		{
			"Id": "File-New-Project.EarTrumpet",
			"Name": "EarTrumpet",
			"Version": "2.3.0.0",
			"Source": "Winget: winget",
			"ManagerName": "Winget",
			"InstallationOptions": {
				"SkipHashCheck": false,
				"InteractiveInstallation": false,
				"RunAsAdministrator": false,
				"Architecture": "",
				"InstallationScope": "",
				"CustomParameters": [],
				"PreRelease": false,
				"CustomInstallLocation": ""
			},
			"Updates": {
				"UpdatesIgnored": false,
				"IgnoredVersion": ""
			}
		}
	],
	"incompatible_packages_info": "Incompatible packages cannot be installed from WingetUI, but they have been listed here for logging purposes.",
	"incompatible_packages": []
}
Other applications you might want to install with WingetUI:
- Communication Tools: Microsoft Teams, Signal, Slack, Zoom or similar.
- GPU Software: AMD Radeon Software, NVIDIA GeForce Experience, NVIDIA Geforce Now, Intel Graphics Command Center or similar.
- Office Suite: Something for document creation and management.
- Other Web Browsers: Brave, Opera or similar.
- Password Manager: Bitwarden, Enpass, KeePassXC, LastPass or similar.
Step 3: Update Installed Applications
You can update your installed applications by clicking on the ‘Software Updates’ tab, selecting the apps you want to update, and clicking on ‘Update Selected’. Sometimes there are problems with the update because of some irregularities in the verion number.
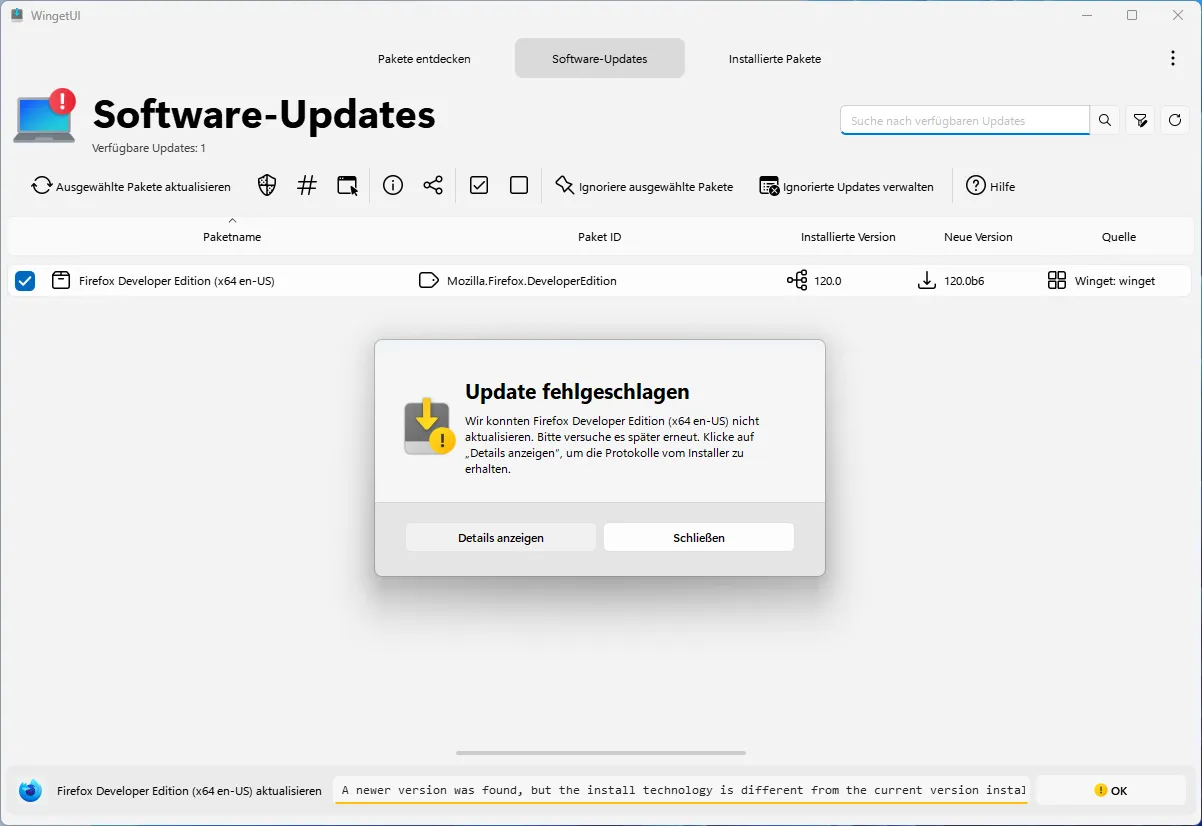
In this case you can right click on the application and select “Ignore this version”.
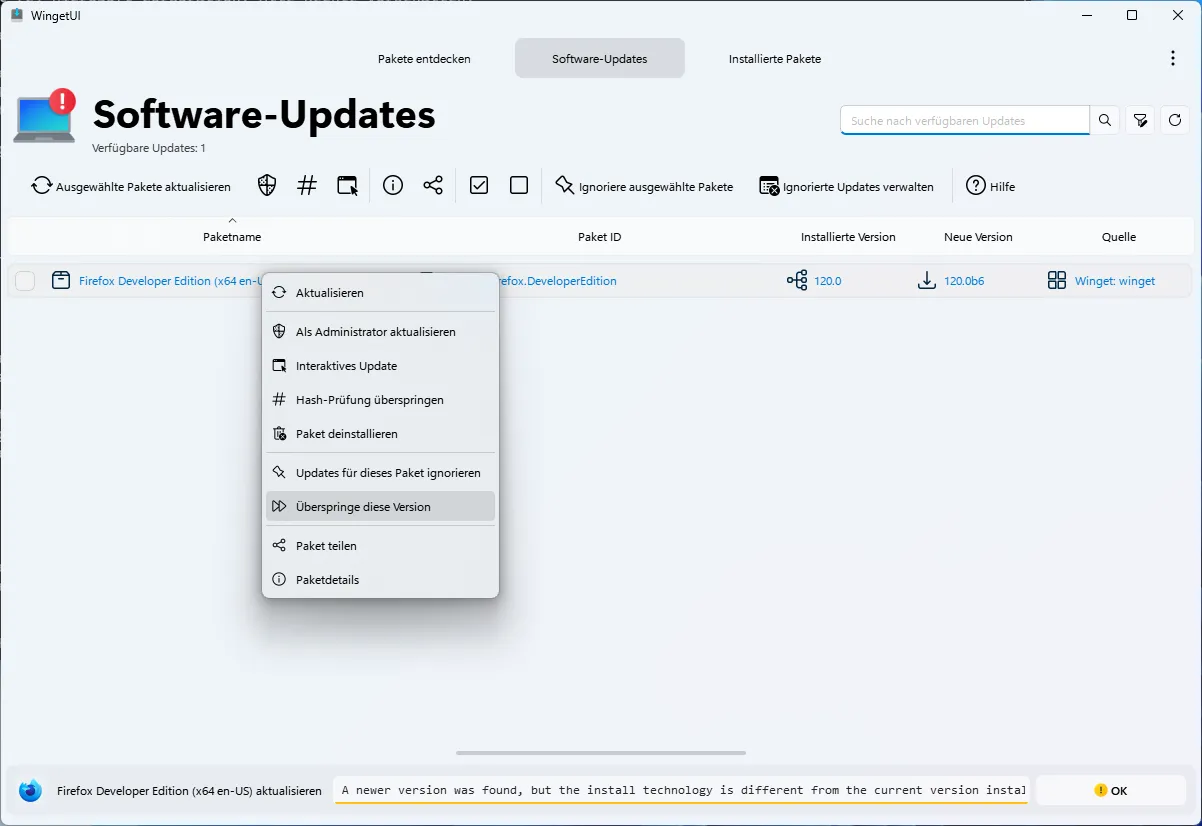
In case it is really a new version and the update is not working, you can uninstall the application and install it again.
Conclusion of WingetUI
WingetUI is revolutionizing the way we manage applications on Windows 11 by combining the power of winget with the convenience of a GUI. It’s designed to streamline the process of software management, making it more accessible than ever before. Whether you’re setting up a new PC or maintaining your current one, WingetUI is an invaluable tool that ensures your software management is efficient, secure, and effortless.
PowerToys
PowerToys is a set of utilities for power users to tune and streamline their Windows experience for greater productivity. I don’t understand why Microsoft doesn’t integrate these tools into Windows 11 by default. Here you can find a list of the tools. The source code is available on GitHub.
Utilities I use often used in the past:
- Always on Top: A tool to keep a window always on top. Whenever I press Windows+Ctrl+T, the active window is always on top.
- Awake: A tool to prevent the computer from going to sleep.
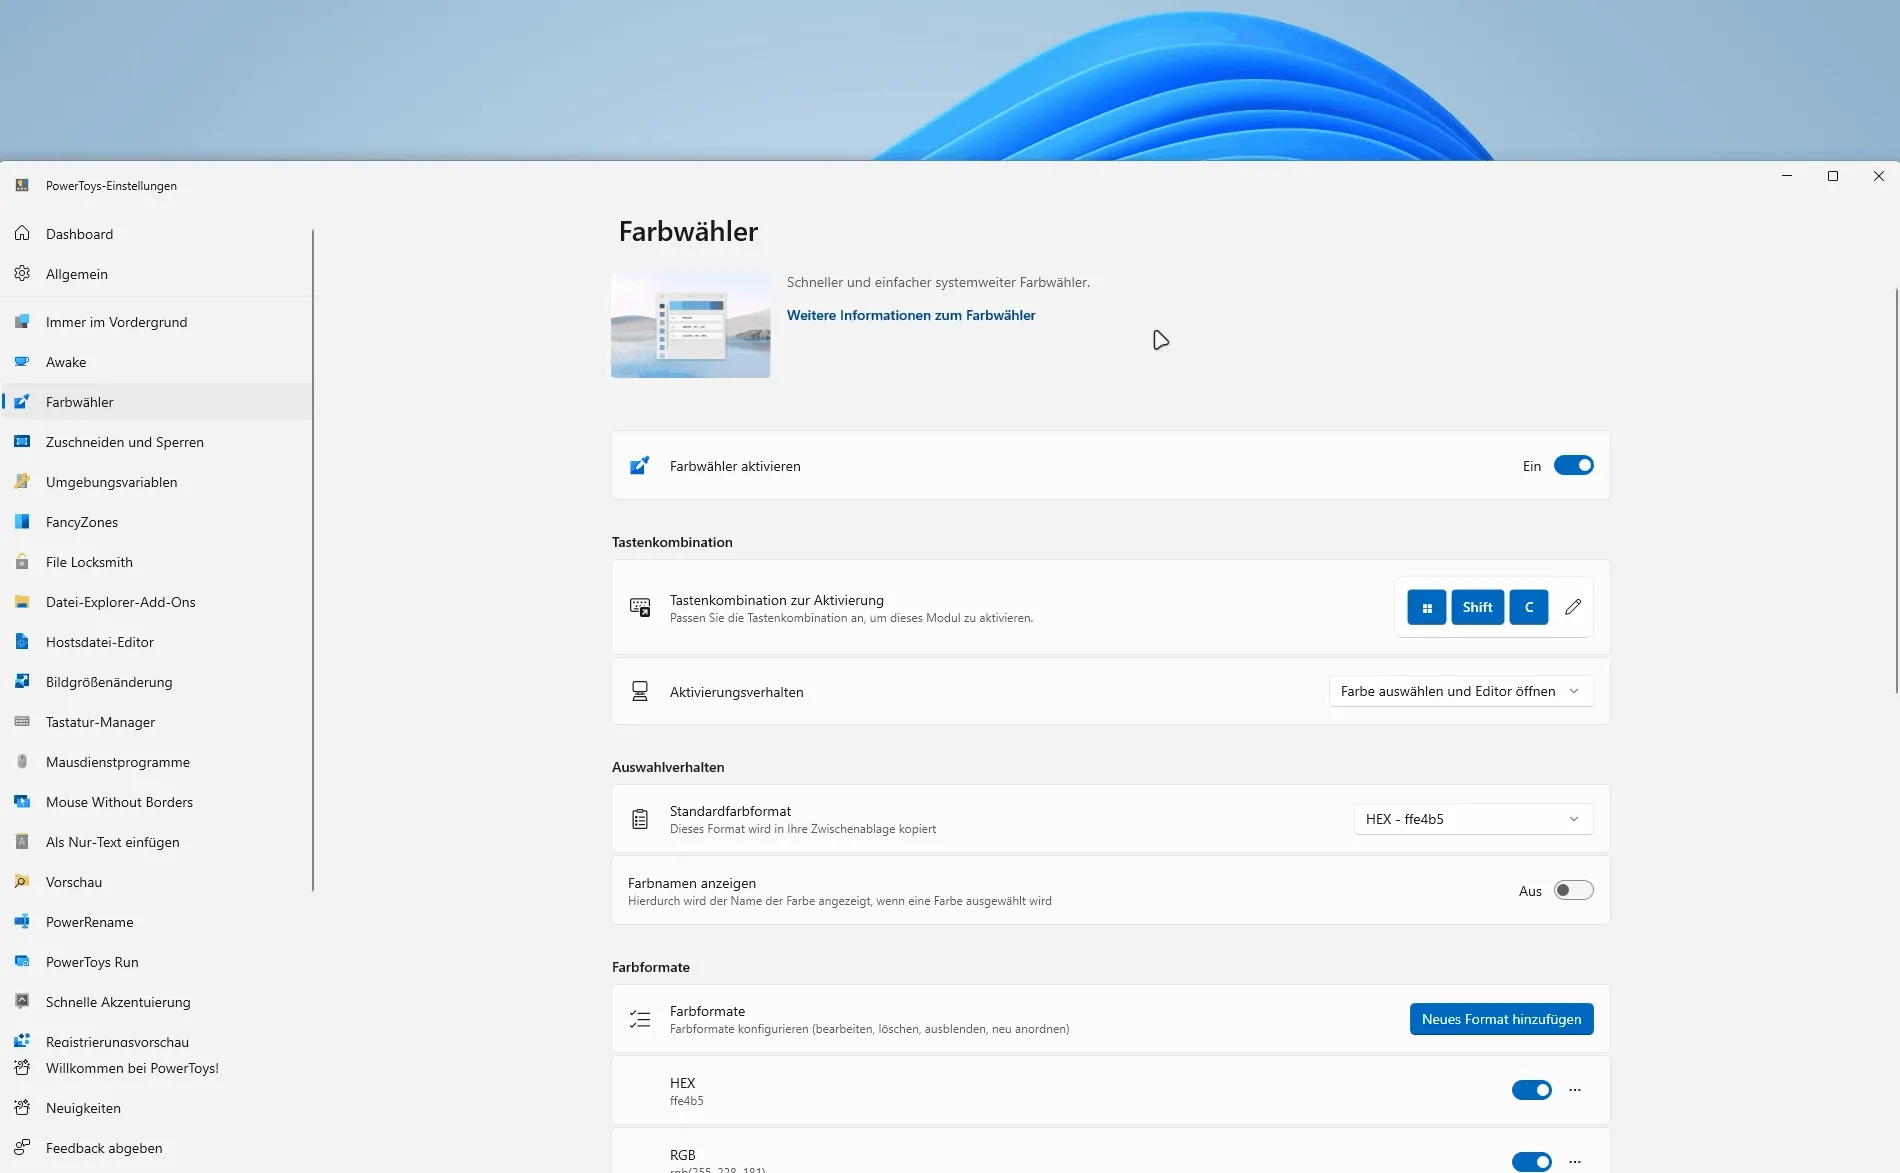
- Color Picker: A tool to get the color of any pixel on the screen. Whenever I press Win+Shift+C, I get the color picker and can select a color.
- PowerToys Run: A tool to quickly find and launch files, folders, and apps. Whenever I press Alt+Space, I get the PowerToys Run window and can search for an application.
- PowerRename: A tool to bulk rename files.
- Shortcut Guide: A tool to show a list of shortcuts when the Windows key is pressed for more than 1 second.
Visual Studio Code
Visual Studio Code is a code editor developed by Microsoft. It is free and open source. You can edit different types of files with it like code files, regular text files, markdown files, csv files, json files, xml files, yaml files, etc.
It has a lot of features which are also useful for non-developers:
- Clean UI: The UI is clean and easy to use.
- Git Integration: You can use Git directly in Visual Studio Code without the need to use the command line.
- Terminal Integration: You can use the terminal directly in Visual Studio Code.
- SSH Integration: You can use SSH directly in Visual Studio Code.
- Extensions: You can install extensions to add more features to Visual Studio Code.
NVM for Windows
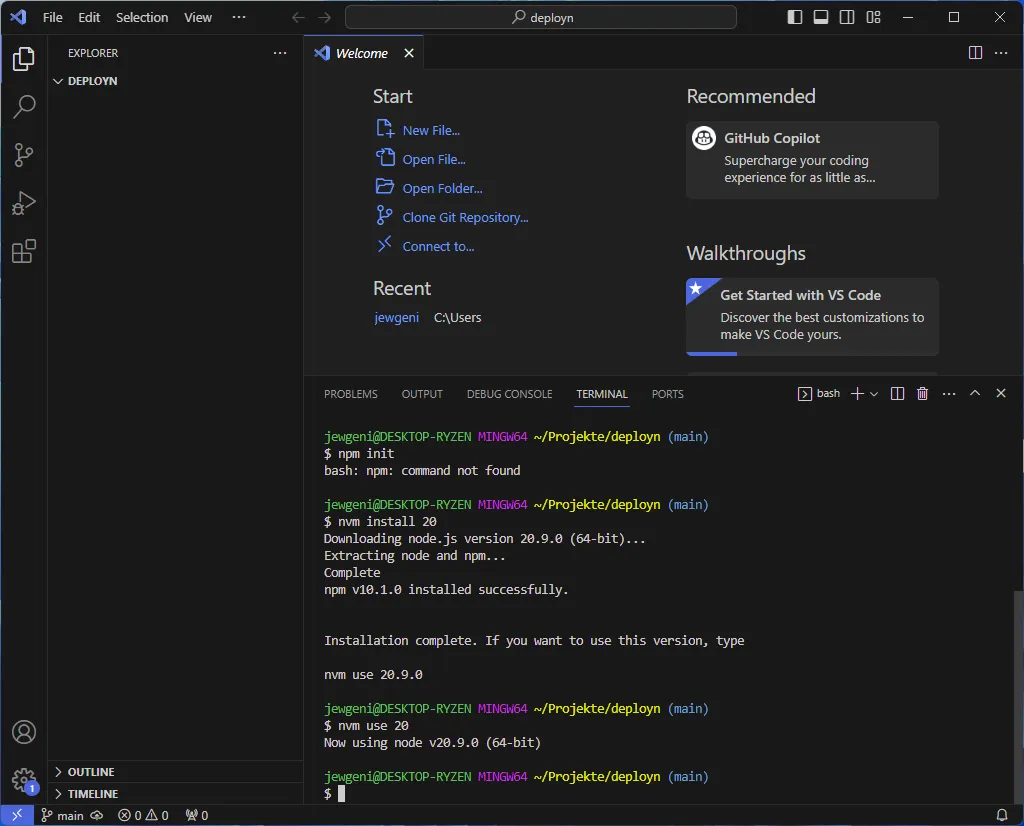
NVM for Windows is a version manager for Node.js. It allows you to install multiple versions of Node.js and switch between them. For this you can use the terminal integrated in Visual Studio Code. Run nvm install 20 to install Node.js 20. Run nvm use 20 to switch to Node.js 20. With nvm list you can see all installed versions of Node.js. If you want to know which version of Node.js you are currently using, you can run nvm current.
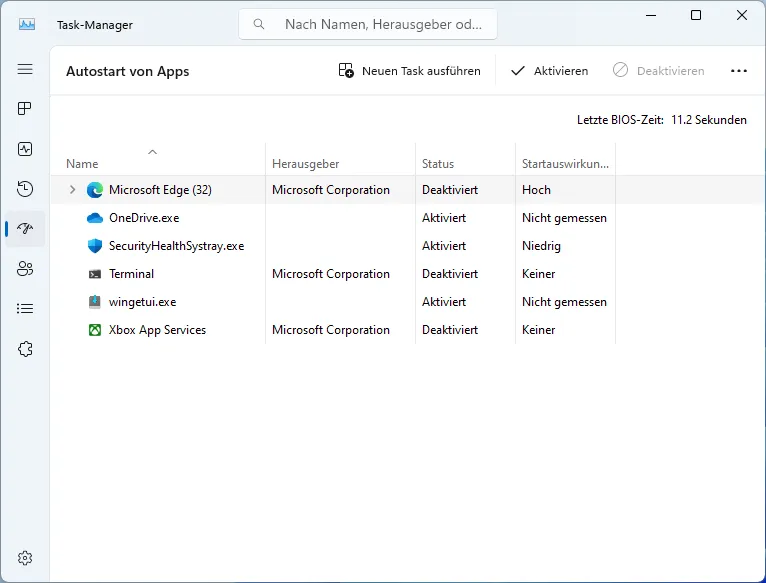
Autostart
The last thing I want to do is to add some applications to the autostart. To do this, rightclick on the start button and select Task Manager. In the Task Manager, select the Startup tab. Now you can enable or disable applications to start automatically.
Conclusion
You’re now equipped with all the knowledge to perform a clean installation of Windows 11 in 2024, debloat it for maximum efficiency, and set up your system with powerful tools to enhance your computing experience. Whether you’re a seasoned professional or new to Windows, following these steps will ensure you get the most out of your operating system.
Related Articles
5 Ways to Rename Multiple Files at Once on Windows 11/10
Rename multiple files at once on Windows 11 and 10. Five easy methods: File Explorer, CMD, PowerShell, Excel, and PowerRename – with step-by-step examples!
Build a Blog with Gatsby.js and Ghost CMS on Your VPS
Step-by-step guide: Build a blog with Gatsby.js and Ghost as a headless CMS. Set up everything on your VPS, configure Docker, and publish your website.
Git for Beginners: The Ultimate Tutorial to Learn Git (2025)
Learn Git from scratch! A beginner-friendly tutorial covering installation, repositories, commits, and GitHub – your gateway to version control. Start now!
Combine and Pivot Text Data in Excel Using PowerQuery
Combine text columns and pivot datasets in Excel using PowerQuery. Learn how to merge and transform data efficiently with practical examples. Step-by-step tutorial.