Proxmox VE Installation: Step-by-Step Guide with LXC Containers
Install Proxmox VE on a VPS: requirements, ISO upload via SFTP, installation steps, and creating your first LXC container. Explained with screenshots.

Table of Contents
CAUTION
Please note that this blog post was originally written in German and has been translated for your convenience. Although every effort has been made to ensure accuracy, there may be translation errors. I apologize for any discrepancies or misunderstandings that may result from the translation and I am grateful for any corrections in the comments or via mail.
It’s been some time (and a major release) since I last used Proxmox. To be honest, I didn’t like it back then. However, I keep reading that users are genuinely satisfied with it. By now, over 1.5 million Proxmox VE hosts are deployed worldwide (webhosting.today, 2026), and the community has grown to over 200,000 active members. So I’m giving Proxmox another chance to replace my usual Ubuntu setup.
Proxmox VE is an open-source virtualization platform that combines KVM virtualization and LXC containers under a single web interface. That means virtual machines and lightweight containers side by side on one host. In this guide, I’ll show you step by step how to install Proxmox on a VPS and create your first container.
Key Takeaways
- Proxmox VE is free, open-source, and combines KVM VMs and LXC containers in one interface
- Minimum requirements: 64-bit CPU and 2 GB RAM; for LXC containers, a basic VPS is enough
- Installation is done via ISO image uploaded to the server through SFTP
- After installation, everything is managed through the web interface at
https://IP:8006
Requirements
Naturally, you need a server to run Proxmox. It can be any server that allows you to install a custom image. It must have a 64-bit CPU, and at least 2 GB of RAM is recommended. If you’re wondering what to look for when choosing a server, my VPS guide for beginners has a comprehensive overview.
I’m using a server from Netcup (affiliate link). New customers can also use these vouchers. But of course, other providers like Hetzner, Contabo, or RackNerd work just as well.
With a Netcup server, you can’t run a KVM host in the default configuration. You need to rent an additional flag for that, which costs 2 EUR per month per core. I haven’t done that, so I’ll only be able to create LXC containers. For my purposes, that’s perfectly fine, since LXC containers have lower overhead than full VMs and share the kernel with the host.
You also need a computer from which you can access the server via SSH. I’ve described how to do this with VSCode in another post.
Proxmox Installation
Download and upload the ISO image
First, I download the latest image file from Proxmox VE. At the time of writing this article, it’s version 7.1. It’s just under 1 GB in size.
Next, I upload it to my server. In the case of Netcup, you need to log in to the Server Control Panel, where you’ll find the FTP server credentials under the “Media” menu item.
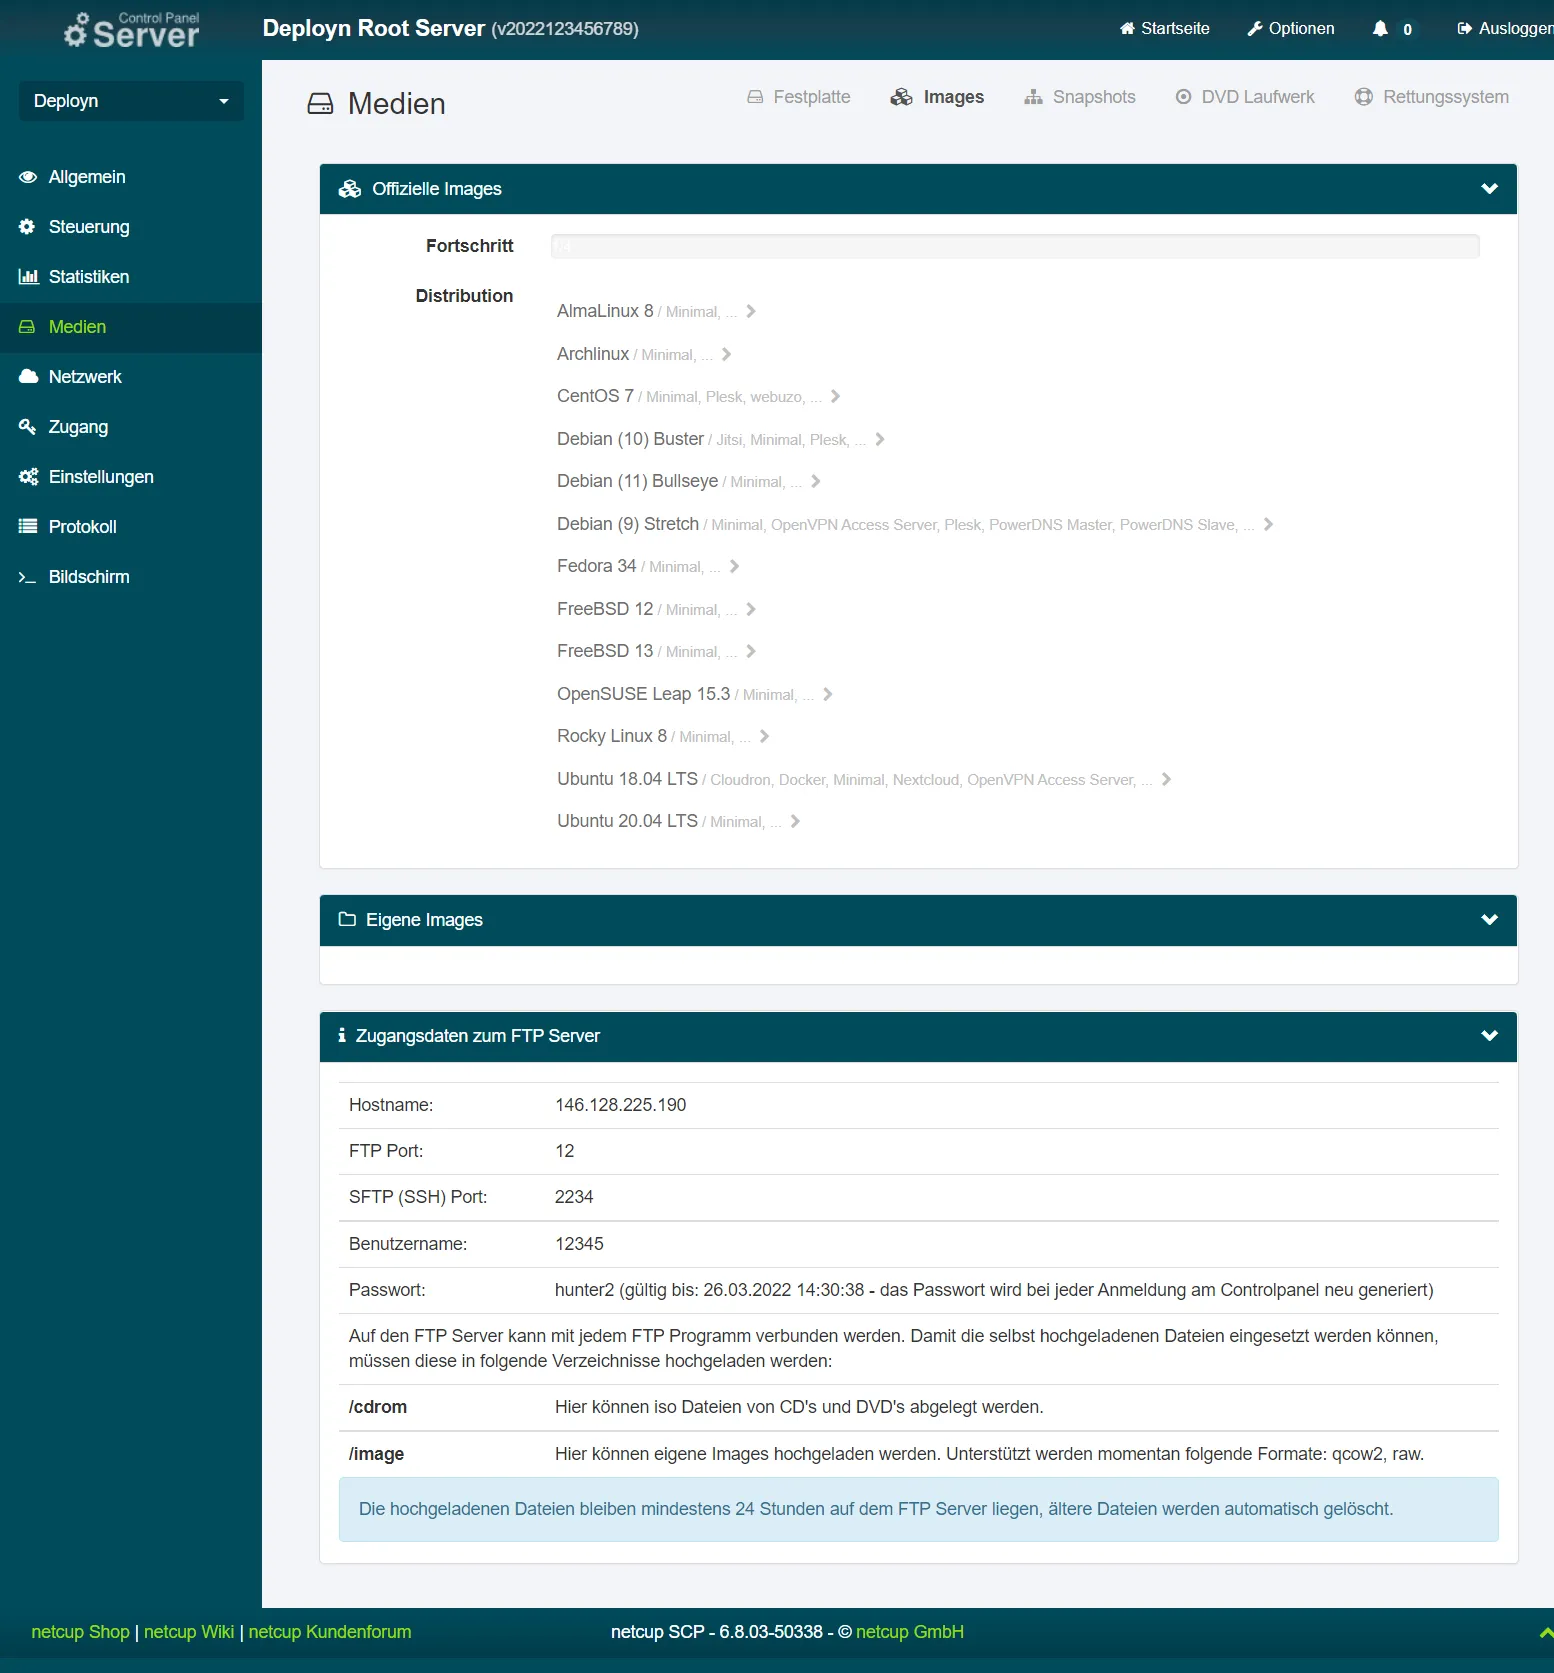
Now I use any FTP client to connect to the FTP server. An example of such a program is Filezilla. If you use SFTP, don’t forget to add sftp:// before the IP address in the “Server” field, otherwise it won’t work.
I place the Proxmox image in the folder named “cdrom”.
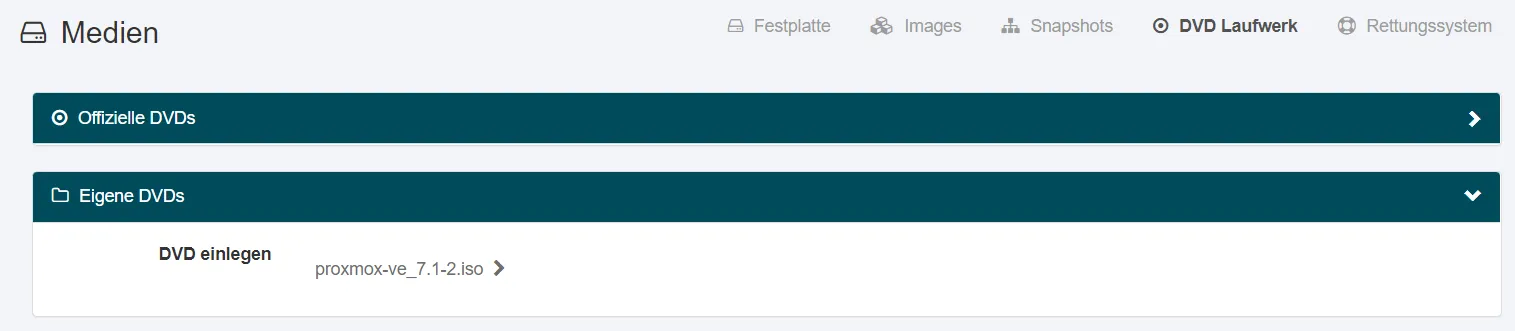
Once the process is complete, you can see the image under “your own DVDs”.
Running the installation
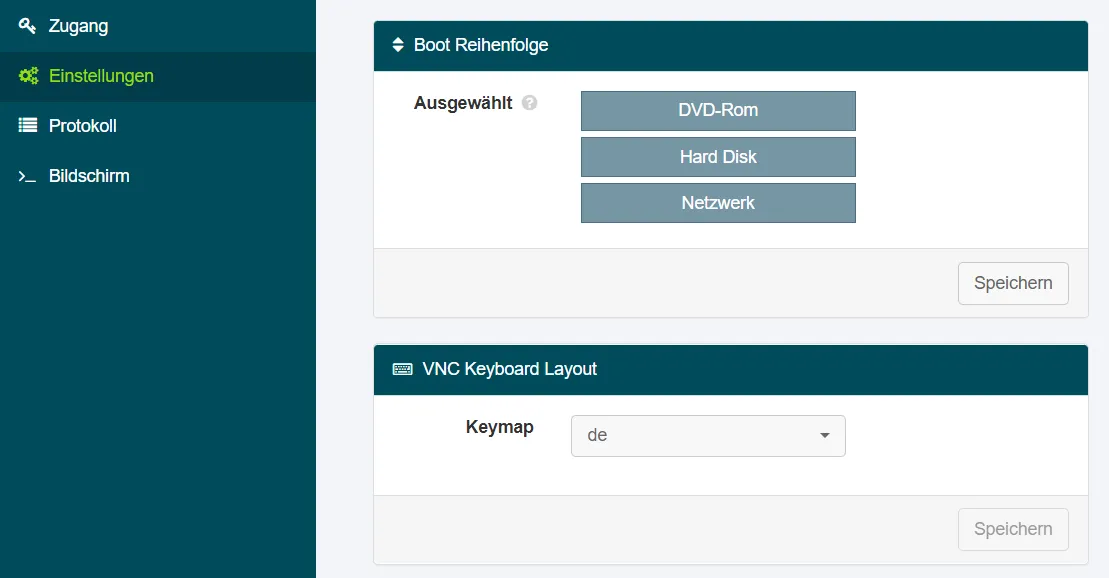
Before I restart the server, I change the virtual keyboard settings to simulate a German layout.
Then I restart the server.
If you now select the “Screen” menu item, you can continue the installation on the server.
I leave all settings as they are. What I change are the password, email, and a hostname of my choice.
After the installation, you’ll see the installation screen again. At this point, you can close the VNC console, remove the virtual CD, and restart the server.
First login
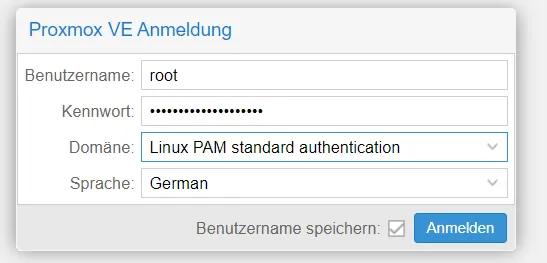
Once the server has restarted, you can access it in your web browser using your server’s IP address and port 8006: https://{ip-address}:8006. You’ll likely see a warning that the connection is insecure. This is due to the self-signed certificate and can be ignored.
Important: The username for login is root and not the email address you entered during installation.
The installation is complete. From now on, everything runs through the web interface.
Creating your first LXC container
If you try to create a container right now, it won’t work yet. You first need a template. To do this, select the local storage in the left sidebar, then click “Container Templates”.
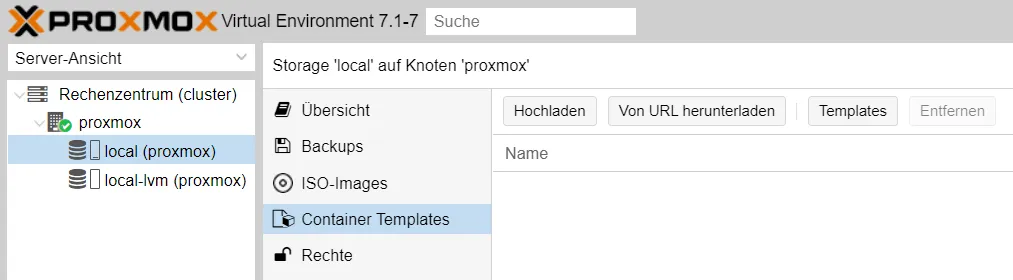
Here I click “Templates” and select the templates I’d like to use as a base. I choose Debian 11.
Then I can create a container via “Create CT”. If I leave everything as is (except for password and hostname), I get a new container.
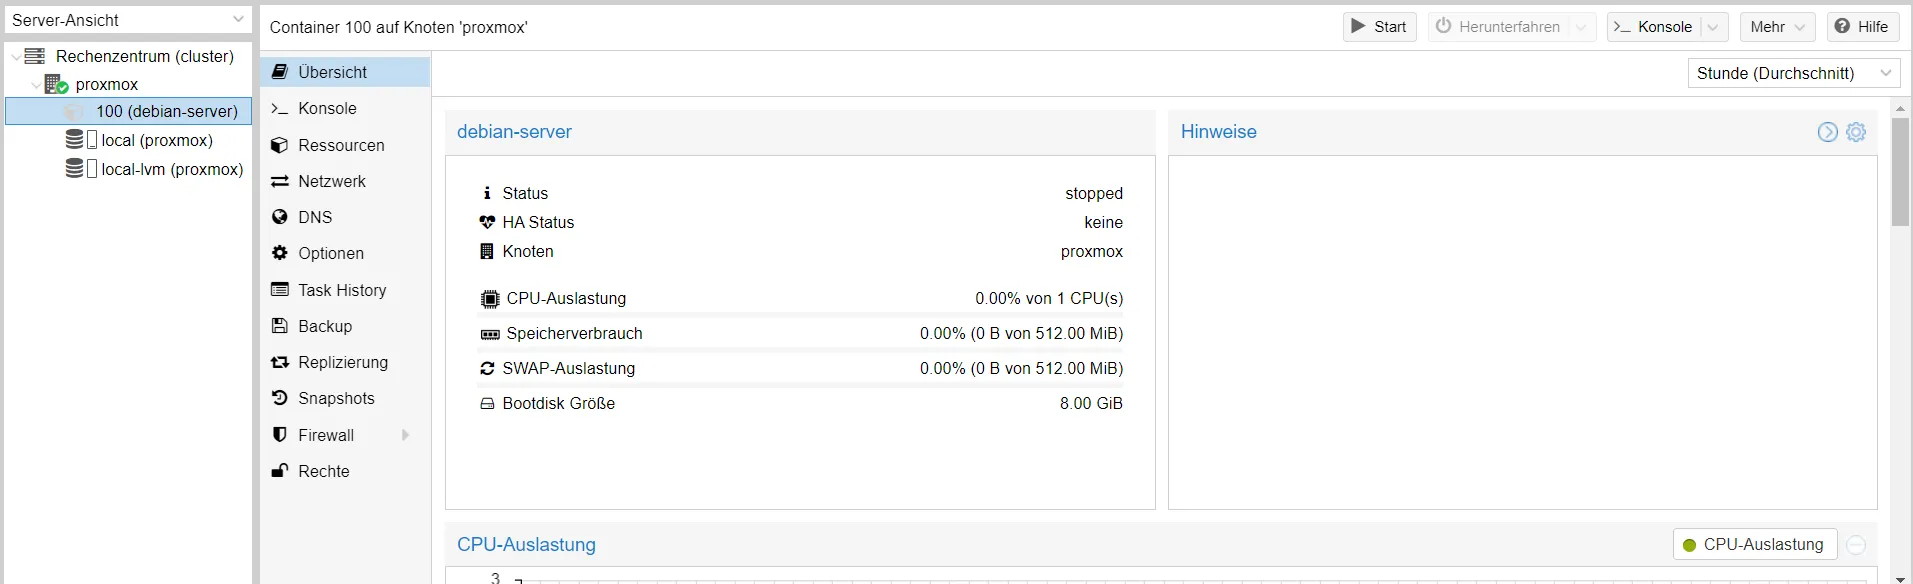
Now I can click “Start” in the top right and connect to the container via the integrated console. The username is root, and the password is the one you chose.
What can you do with Proxmox?
Proxmox offers significantly more than just basic containers. Some of the most important features:
- KVM virtualization: Full virtual machines with their own kernel, ideal for Windows or other operating systems
- LXC containers: Lightweight Linux containers with low overhead that share the kernel with the host
- Clustering and High Availability: Multiple Proxmox hosts can be combined into a cluster where VMs are automatically migrated if a node fails
- Storage backends: Proxmox supports ZFS, Ceph, LVM, and NFS among others as storage backends
- Backup and snapshots: Built-in backup functionality as well as live snapshots of VMs and containers
- Proxmox Backup Server: A dedicated product for centralized, deduplicated backups
If you’re running a single server and want to host various services on it, LXC containers are often sufficient. They start in seconds and only consume the resources that are actually needed. This is a major advantage over a setup with multiple Docker containers on Ubuntu, where you have to manage services manually with Docker Compose.
Next steps
After the installation, many options are available. The next logical step is usually setting up a reverse proxy to make services accessible under your own domain. Traefik as a reverse proxy is a good choice, which I’ve covered in a separate article.
Other services that integrate well with Proxmox containers include Paperless-ngx for document management, Uptime Kuma for monitoring, or Vaultwarden as a password manager.
Whether I’ll stick with Proxmox or return to a classic Ubuntu setup remains to be seen. Both approaches have their pros and cons. Proxmox offers a clean web interface and simplifies container management, while a pure Ubuntu setup provides more flexibility for Docker management.
Feel free to share in the comments which system you prefer and why.
Do I need an expensive dedicated server for Proxmox?
What is the difference between LXC containers and KVM VMs?
How secure is Proxmox VE?
Can I use Proxmox for free?
How do I update Proxmox?
Related Articles
Ubuntu 24.04 vs. Debian 13: Docker Performance Benchmark
Is Debian really leaner and faster than Ubuntu? I benchmarked both operating systems as Docker hosts using a comprehensive script to find the real answer.
Linux Terminal for Beginners: Essential Commands for Servers
Master essential Linux terminal commands for your server. A beginner-friendly guide with practical examples for navigation, file management, and SSH admin!
Set up server with Traefik as reverse proxy for Docker
Set up your server with Docker and configure Traefik as a reverse proxy using Docker Compose. Get automatic SSL certificates and secure container management.
VPS for Beginners: Your Guide to Choosing and Securing
Choose and secure your first VPS step-by-step: system updates, new user, SSH keys, and firewall setup. The ideal starting point for self-hosting with Docker.