Automating release process with Commitizen and Semantic-release
Save time and improve code quality with automated releases using Semantic Release and Commitizen. Learn how to version your projects efficiently and reliably.

Table of Contents
CAUTION
Please note that this blog post was originally written in German and has been translated for your convenience. Although every effort has been made to ensure accuracy, there may be translation errors. I apologize for any discrepancies or misunderstandings that may result from the translation and I am grateful for any corrections in the comments or via mail.
Introduction
In software development, there is a principle that everything that can be done should be automated. Even if you work alone on a project and develop different features, you not only have to test the function each time, but you should also create a changelog and define a version system. Manually, this process can take a lot of time. But with automatic releases, it all happens automatically.
Automatic releases play an essential role in software development and offer numerous advantages. Firstly, automating the release process enables faster and more efficient delivery of software updates and enhancements. In addition, automated releases improve collaboration and communication within a development team.
In this article, I’ll demonstrate how to streamline the release workflow within a Node.js repository. We’ll achieve this by integrating Commitizen and Semantic-release into a Next.js project hosted on GitHub.
Both tools work hand in hand to streamline the software release process and save developers time and effort.
What is Semantic Release?
Semantic Release automates the release process. It analyzes Git commits to determine the new version number based on the commit messages and automatically generates a release. It is based on Semantic Versioning (SemVer). This industry-wide standard ensures that version numbers and changes are displayed meaningfully. Semantic Release is an open-source tool written in Node.js that works with any Git repository. It can generate releases for various types of software, including libraries, frameworks, plugins, apps and more. It is also compatible with CI/CD tools such as Github Actions, Travis CI, CircleCI, Jenkins and GitLab CI.
Semantic Versioning
Over ten years ago, Tom Preston-Werner, co-founder of Github, introduced the concept of semantic versioning.
The version number of a piece of software consists of three parts: Major, Minor and Patch. These parts are separated by dots. Here is an example:
{
	"name": "my-project",
	"version": "1.0.0"
}
The minor version (1.1.0) is increased if a new feature is added. The patch version is increased if a bug is fixed (1.0.1). A major version increase (2.0.0) indicates the software is no longer downward compatible.
Example:
- 1.0.0: First version
- 1.0.1: Bug fix
- 1.1.0: New feature
- 2.0.0: Change that affects existing functionality
In his blog post in 2022, Tom Preston-Werner argued that developers are often reluctant to increase the major version number even when there are significant changes. He emphasized that the major version number should be used for any change that breaks backward compatibility and should not be abused for marketing purposes.
What is Commitizen?
Commitizen is an open-source tool designed to create standardized Git commit messages. It provides developers with a standardized structure and syntax for commit messages by guiding them through the process. Using the “Conventional Commits” specification allows for easier management and navigation of the commit history, ensuring consistency and clarity.
Syntax of the commit messages
The syntax of the commit messages is structured as follows:
<type>[optional scope]: <description>

[optional body]

[optional footer(s)]
The individual parts are:
- type: Category of the commit
- scope: Scope of the commit (optional)
- description: Short description of the commit
- body: More detailed description of the commit (optional)
- footer: Footer of the commit (optional)
Examples
Example of a commit to fix an error:
fix: resolve parsing error when uploading filesExample of a commit to introduce a new function:
feat: add darkmodeExample of a commit with a breaking change:
feat: replace obsolote API with new implementation

BREAKING CHANGE: replaced `getUserData` method with `fetchUserData` to allow more efficient data retrieval.
Example of a commit with an optional scope:
feat(api): implement endpoint to retrieve user profilesExample of a commit with a footer:
chore: update dependencies

Update dependencies to fix security vulnerabilities

closes #123
More information about conventional commits and the exact rules can be found here.
Integration in a Next.js project
I am looking to incorporate two specific tools into a Next.js project. First, I’ll create a new Next.js project alongside a fresh GitHub repository. After that, I’ll install the necessary dependencies and configure the tools accordingly. I will also create a GitHub Action to streamline the workflow to automate the deployment process.
Create repository
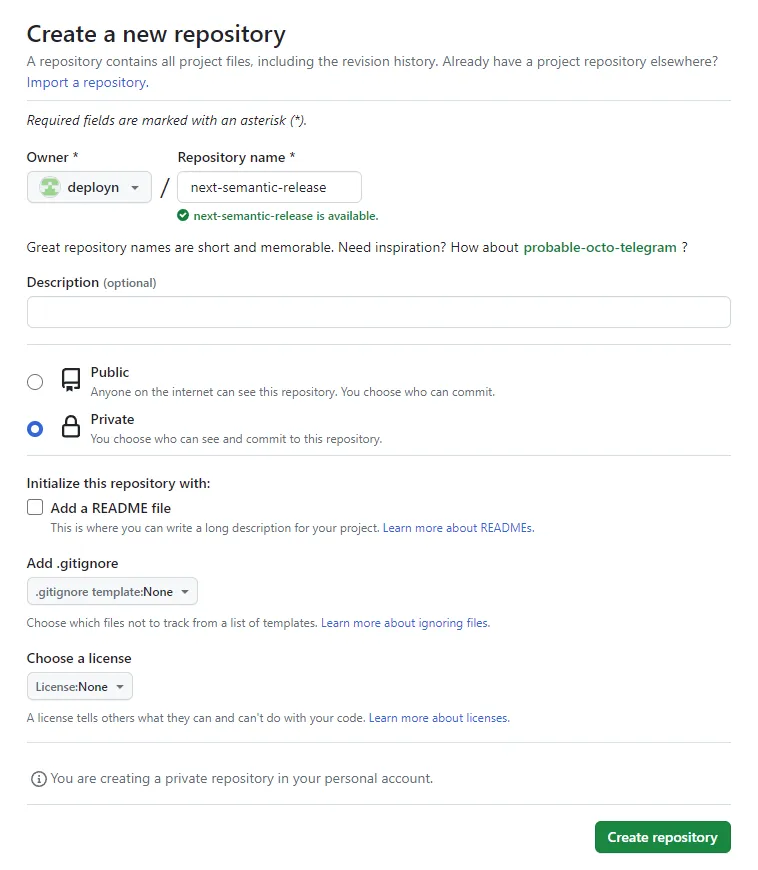
The first step is to create an empty repository in Github. Proceed as follows:
- visit Github and log in.
- click on the “+” button in the top right-hand corner and select “New repository”
- enter a name for the repository and optionally add a description
- select whether the repository should be public or private
- click on “Create repository” to create the empty repository.
After the repository is successfully created, we can set up the Next.js project.
Create a Next.js project
To create a new Next.js project, the following steps can be performed:
- open terminal and change to the directory where you want to create the project
- execute the following command to create a new Next.js project:
npx create-next-app next-semantic-releaseAdd repository as remote
First, I switch to the main branch after navigating to the project directory in a terminal.
git branch -M mainNext, I link the GitHub repository as a remote.
git remote add origin https://github.com/my-username/my-repository.gitUsing VS Code, the status should now reflect:
- “main” as the active branch
- My GitHub repository as the configured remote
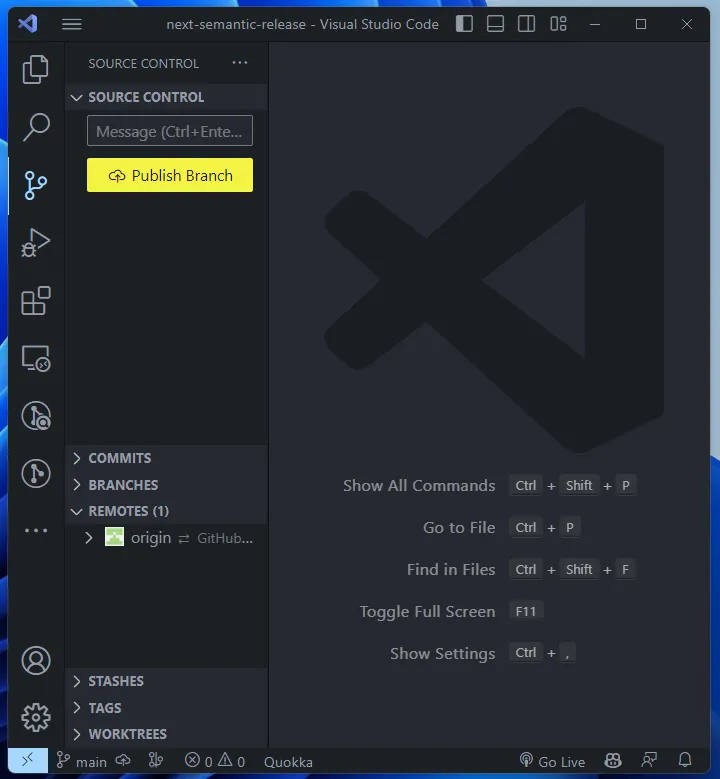
Following this setup, I proceed to push the code to GitHub.
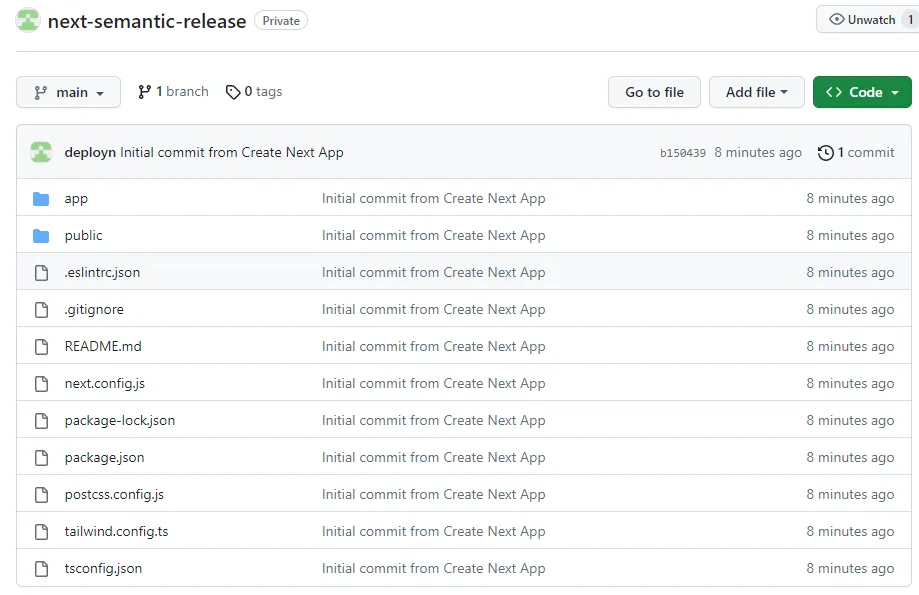
git push -u origin mainOnce pushed, I can view the code on my GitHub repository.
Install dependencies
Next, I install the dependencies for Semantic Release and Commitizen.
npm install --save-dev semantic-release @semantic-release/changelog @semantic-release/git @commitlint/cli @commitlint/config-conventional @commitlint/cz-commitlint commitizen cz-conventional-changelogThis command will download and save the required packages in the package.json file. Here is a brief explanation of the individual packages:
- semantic-release: This package enables automatic releases based on the commit messages.
- @semantic-release/changelog: This package automatically generates a changelog for each release.
- @semantic-release/git: This package enables the automatic addition of changes to the Git repository during the release process.
- @commitlint/cli: This package provides a CLI for validating commit messages according to the commitlint rules.
- @commitlint/config-conventional: This package contains the conventional commitlint rules for validating commit messages.
- @commitlint/cz-commitlint: This package integrates commitlint with commitizen to enable the validation of commit messages during the commit process.
- commitizen: This package provides an interactive user interface for creating standardized commit messages.
- cz-conventional-changelog: This package provides the conventional commitizen templates that give the commit messages a standardized structure.
Customize package.json
In the package.json I add the following lines and change some values:
- Under “version” I change the value from “0.1.0” to “0.0.0-development”.
- Under “scripts” I add two more scripts: “semantic-release” to execute Semantic Release, and “commit” to execute Commitizen.
- In the “config” section, I enter the path to Commitizen.
- Finally, I add a “release” object in which the plugins for Semantic Release are specified. It is important to specify the branches for which releases are to be performed. In my case, this is the
mainbranch. I also specify that the releases should not be published on npm. I do this because I don’t want to publish the project as an npm package.
Overall, the package.json then looks something like this:
{
	"name": "next-semantic-release",
	"version": "0.0.0-development",
	"private": true,
	"scripts": {
		"dev": "next dev",
		"build": "next build",
		"start": "next start",
		"lint": "next lint",
		"semantic-release": "semantic-release",
		"commit": "cz"
	},
	"dependencies": {
		//[...]
	},
	"devDependencies": {
		"@commitlint/cli": "^17.7.1",
		"@commitlint/config-conventional": "^17.7.0",
		"@commitlint/cz-commitlint": "^17.7.1",
		"@semantic-release/changelog": "^6.0.3",
		"@semantic-release/git": "^10.0.1",
		"commitizen": "^4.3.0",
		"cz-conventional-changelog": "^3.3.0",
		"semantic-release": "^21.1.1"
	},
	"repository": {
		"type": "git",
		"url": "https://meine-repository-url.git"
	},
	"publishConfig": {
		"access": "restricted"
	},
	"config": {
		"commitizen": {
			"path": "./node_modules/cz-conventional-changelog"
		}
	},
	"release": {
		"branches": ["main"],
		"plugins": [
			"@semantic-release/commit-analyzer",
			"@semantic-release/release-notes-generator",
			"@semantic-release/changelog",
			[
				"@semantic-release/npm",
				{
					"npmPublish": false
				}
			],
			"@semantic-release/git",
			"@semantic-release/github"
		]
	}
}
Configuring Commitizen
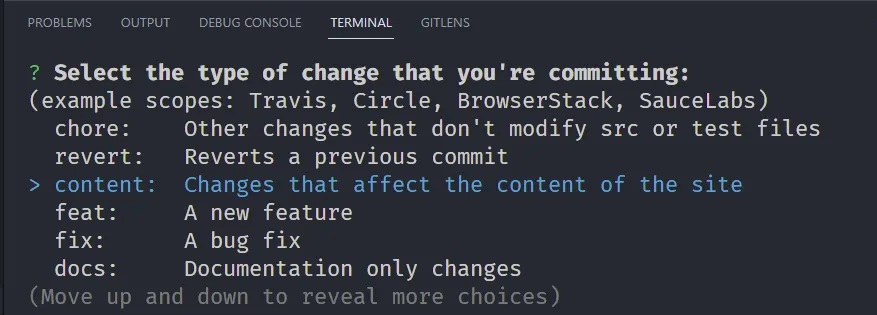
There are various options and extensions for configuring commits. A common convention for committing is the so-called “conventional commits”. The commit is divided into different categories. Here are some of the common categories:
- fix: Bugfix
- feat: New function
- BREAKING CHANGE: Change that breaks the existing functionality
- docs: Changes in the documentation
- style: Changes that have no effect on the code (e.g. spaces, formatting, semicolons)
- refactor: Code changes that neither fix a bug nor add a function
- perf: Code changes that improve performance
- test: Adding or changing tests
- build: Changes that affect the build system or external dependencies
- ci: Changes to the CI configuration or scripts
- chore: Other changes that do not fit into the other categories
Sometimes, it makes sense to expand the categories. For example, the type deps could be used for updates to node_modules if you don’t want to sort them into build or chore. When I create websites and the content is partially or entirely in the repository, I would like to have a separate category for content. The revert category is intended for reverting commits.
Currently (version 3.3.0), there is no built-in way in Commitizen to add new categories without overwriting the existing ones. If you set Types, the original classes are overwritten. An open pull request on this topic has yet to be accepted.
There are two options in this situation. You can stay with the existing categories and use the scope parameter to categorize changes more precisely (e.g. chore(content): update the content), or you can list the categories you do not want to lose again:
package.json:
{
  //[...]
  "config": {
    "commitizen": {
      "path": "./node_modules/cz-conventional-changelog",
      "types": {
        "feat": {
          "description": "A new feature",
          "title": "Features"
        },
        "fix": {
          "description": "A bug fix",
          "title": "Bug Fixes"
        },
        "docs": {
          "description": "Documentation only changes",
          "title": "Documentation"
        },
        "style": {
          "description": "Changes that do not affect the meaning of the code (white-space, formatting, missing semi-colons, etc)",
          "title": "Styles"
        },
        "refactor": {
          "description": "A code change that neither fixes a bug nor adds a feature",
          "title": "Code Refactoring"
        },
        }, "perf": {
          "description": "A code change that improves performance",
          "title": "Performance Improvements"
        },
        "test": {
          "description": "Adding missing tests or correcting existing tests",
          "title": "Tests"
        },
        "build": {
          "description": "Changes that affect the build system or external dependencies (example scopes: gulp, broccoli, npm)",
          "title": "Builds"
        },
        "ci": {
          "description": "Changes to our CI configuration files and scripts (example scopes: Travis, Circle, BrowserStack, SauceLabs)",
          "title": "Continuous Integrations"
        },
        "deps": {
          "description": "Updates to dependencies",
          "title": "Dependencies"
        },
        "content": {
          "description": "Changes that affect the content of the site",
          "title": "Content"
        },
        "chore": {
          "description": "Other changes that don't modify src or test files",
          "title": "Chores"
        },
        "revert": {
          "description": "Reverts a previous commit",
          "title": "Reverts"
        }
      }
    }
  }
  //[...]
}
If I now execute npm run commit, the selection of categories is displayed.
Configure Semantic Release
There are also some setting options for Semantic Release. Of particular interest here are the branches and the Commit Analyzer plugin.
Branches
In the package.json, I have already specified the branches to be published. Here, I can also select that only certain branches should be published. In my case, this is the main branch.
{
	//[...]
	"release": {
		"branches": ["main"]
		//[...]
	}
	//[...]
}
Of course, you can also specify several branches for a publication.
{
	//[...]
	"release": {
		"branches": [
			"+([0-9])?(.{+([0-9]),x}).x",
			"main",
			"next",
			"next-major",
			{ "name": "beta", "prerelease": true },
			{ "name": "alpha", "prerelease": true }
		]
		//[...]
	}
	//[...]
}
All branches beginning with a number are published here. For example, 1.0.0, 2.0.0 etc. The branches main, next, next-major, beta and alpha are also published. The beta and alpha branches are published as prereleases.
Commit Analyzer
The “Commit Analyzer” plugin in Semantic Release analyzes the commit messages to determine the next version. The categories of the commits are taken into account. Depending on the type, the version number is increased accordingly:
- If a commit is created with the category “fix”, the patch version increases. This indicates a commit that fixes a bug without introducing new functions or breaking existing functionalities.
- If a commit is created with the category “feat”, the minor version increases. This means that a new function has been added without affecting or breaking existing functionalities.
- The major version is increased if a commit contains the addition “BREAKING CHANGE”. This indicates that a change has been made that breaks existing functionalities and may require adjustments.
This behavior can be adjusted:
{
	//[...]
	"release": {
		"branches": ["main"],
		"plugins": [
			[
				"@semantic-release/commit-analyzer",
				{
					"releaseRules": [
						{ "type": "deps", "release": "patch" },
						{ "scope": "no-release", "release": false }
					]
				}
			]
			//[...]
		]
	}
	//[...]
}
The patch version is also incremented here if the deps category is used. Furthermore, the version is not incremented if no-release is specified for scope (e.g. fix(no-release): ...). However, this behavior can lead to an undesired result. If you publish a “breaking change” with the category “deps”, this is treated as a “patch release”. If you also want a major release here, you must add another line to the configuration:
{
  //[...]
  "release": {
    "branches": ["main"],
    "plugins": [
      [
        "@semantic-release/commit-analyzer",
        {
          "releaseRules": [
            { "breaking": true, "release": "major"}
            { "type": "deps", "release": "patch" },
            { "scope": "no-release", "release": false }
          ]
        }
      ]
      //[...]
    ]
  }
  //[...]
}
Create Github action
The last thing I must do is ensure that Github carries out the publication automatically.
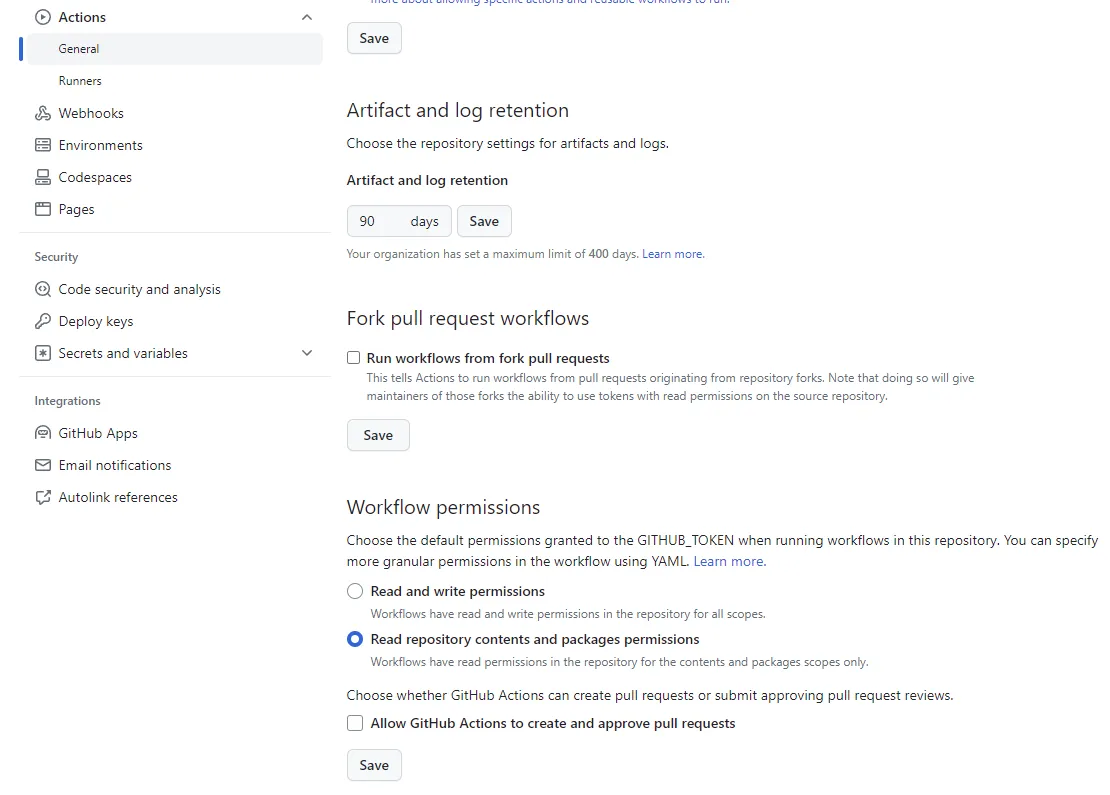
First, I go to the settings of my repository and select “Actions” and then “General”. I change the “Workflow permissions” to “Read and write permissions” here.
Next, I create a new file, .github/workflows/release.yml and add the following content:
name: Release

on:
    push:
        branches:
            - main

permissions:
    contents: read

jobs:
    release:
        name: Release
        runs-on: ubuntu-latest
        permissions:
            contents: write
            issues: write
            pull-requests: write
            id-token: write

        steps:
            - name: Checkout code
              uses: actions/checkout@v3
              with:
                  fetch-depth: 0

            - name: Setup Node.js
              uses: actions/setup-node@v3
              with:
                  node-version: 18

            - name: Install dependencies
              run: npm clean-install

            - name: Build Next app
              run: npm run build

            - name: Semantic Release
              env:
                  GH_TOKEN: ${{ secrets.GITHUB_TOKEN }}
              run: npx semantic-release
Here, the release is only executed for the main branch. In addition, the Github action is only performed when the code is pushed to Github. The Github action is not executed if I create and push a commit locally. Semantic Release is only run if the build process is successful.
Test
Now it’s time for the first commit.
git add .
npm run commit
I select the category “feat” and enter a short description.
git push
# or more precisely
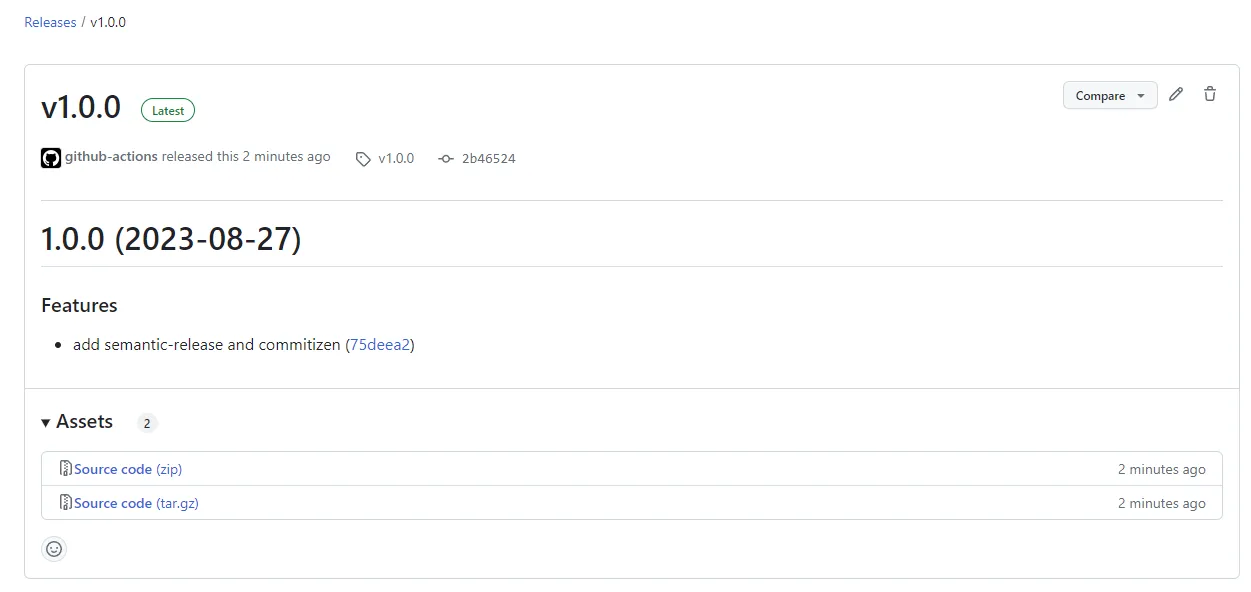
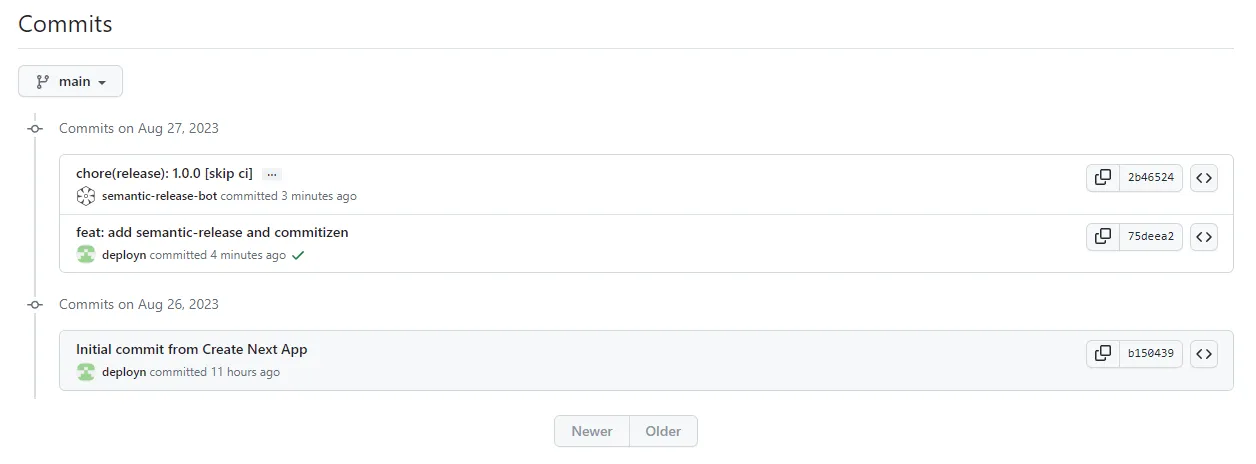
git push -u origin mainNow, I can see in Github that my repository contains three commits. In addition, a release has been created, and a CHANGELOG.md document has been generated.
If you want to use semantic-release locally, you can do this with the command npm run semantic-release. A GITHUB_TOKEN must be created and saved in the .env file. This token must then also be stored as a secret in Github.
Safeguarding the confidentiality of tokens is crucial. To achieve this, I have placed my token within a .env file and included this file in my project’s .gitignore. Consequently, the .env file is omitted from any commits, ensuring it remains unpublished on GitHub.
Summary of the advantages of automatic releases
The automatic generation of releases using tools such as Commitizen and Semantic-release offers several advantages.
-
automated process: By using Commitizen and Semantic-release, the entire release creation process is automated. New versions are generated directly from the code repository based on the defined rules.
-
clear and consistent commit messages: Commitizen ensures that commit messages are clear, consistent and structured according to the Conventional Commits specifications. This simplifies the management of software versions and makes it easier to track changes.
-
automatic version incrementation: Semantic-release analyzes the commit messages and automatically increments the version numbers according to the type of changes. This ensures that the version numbers are correct and consistent.
-
generation of change logs: Semantic-release automatically generates change logs based on the commit messages. This makes it easier for developers and users to track the changes made.
-
improved software quality: Automating the release process speeds up new feature deployment while ensuring operations run smoothly. This helps enhance software quality and minimises errors that could occur with manual processes.
Commits and semantic releases provide a structured, reliable and efficient approach to managing software releases. They enable more precise version management, accelerate the development process and contribute to increasing software quality.
If you have any comments, please feel free to leave a comment. I look forward to your feedback.
Related Articles
Git for Beginners: The Ultimate Tutorial to Learn Git (2025)
Learn Git from scratch! A beginner-friendly tutorial covering installation, repositories, commits, and GitHub – your gateway to version control. Start now!
Git Reset Hard Explained: Irreversibly Deleting Commits (Caution!)
Correcting risky Git history? A guide to `git reset --hard`. Understand the dangers of data loss & `--force push`, plus when `git revert` is a better choice.
Build a Blog with Gatsby.js and Ghost CMS on Your VPS
Step-by-step guide: Build a blog with Gatsby.js and Ghost as a headless CMS. Set up everything on your VPS, configure Docker, and publish your website.
Install Gitea with Docker: Your Own Lightweight Git Server
Install Gitea with Docker and Caddy as a reverse proxy. A beginner-friendly, step-by-step guide to setting up your own lightweight, self-hosted Git server.